Mhucasey's SPS obsession

I glued the Bulkheads to the back of the tank today, lots of careful measuring again before proceeding. This process went very smooth:

IMG_5848_zps5rytu5vu.jpg


And the overflow box fits really nicely and takes up 4.75" behind the tank!

IMG_5851_zpscvoqewcp.jpg


IMG_5850_zps9ooiwb28.jpg


The internal overflow wall really came out nice:

IMG_5849_zpskbzhvpov.jpg


I need to get the Piece of HDPE that goes under the tank(should arrive soon), get the tank up on it on the stand, and do a wet test to see if this whole scheme is solid.
 
Wet test successful! I filled the tank with water and temporarily plumbed the return pump to one of the Weir outlets then returned the water to the tank. The overflow is very very quiet and I was able to run a 1300gph pump flat out through the box without a hiccup:
IMG_5886_zpsb5t8pjqt.jpg


IMG_5884_zpsepuowp2p.jpg


IMG_5883_zpsrscydxl9.jpg


I cut the Starboard for the bottom and siliconed it in, hoping to get this tank filled for real this weekend!
 
Big Update!
I've had a very long five days, starting last Thursday afternoon. I'm Wiped out but phase one of the new build is complete!
Thursday: Drilled and attached HDPE Sheets to top and bottom of new stand, all holes countersunk and all hardware Stainless steel:
IMG_5893_zpsukeu22ag.jpg

IMG_5894_zpsqfhmpmre.jpg


Then I took the stand apart and reassembled it in my dining area adjacent to the current tank and its future location. It was pretty crowded in there:
IMG_5892_zpstf30rper.jpg

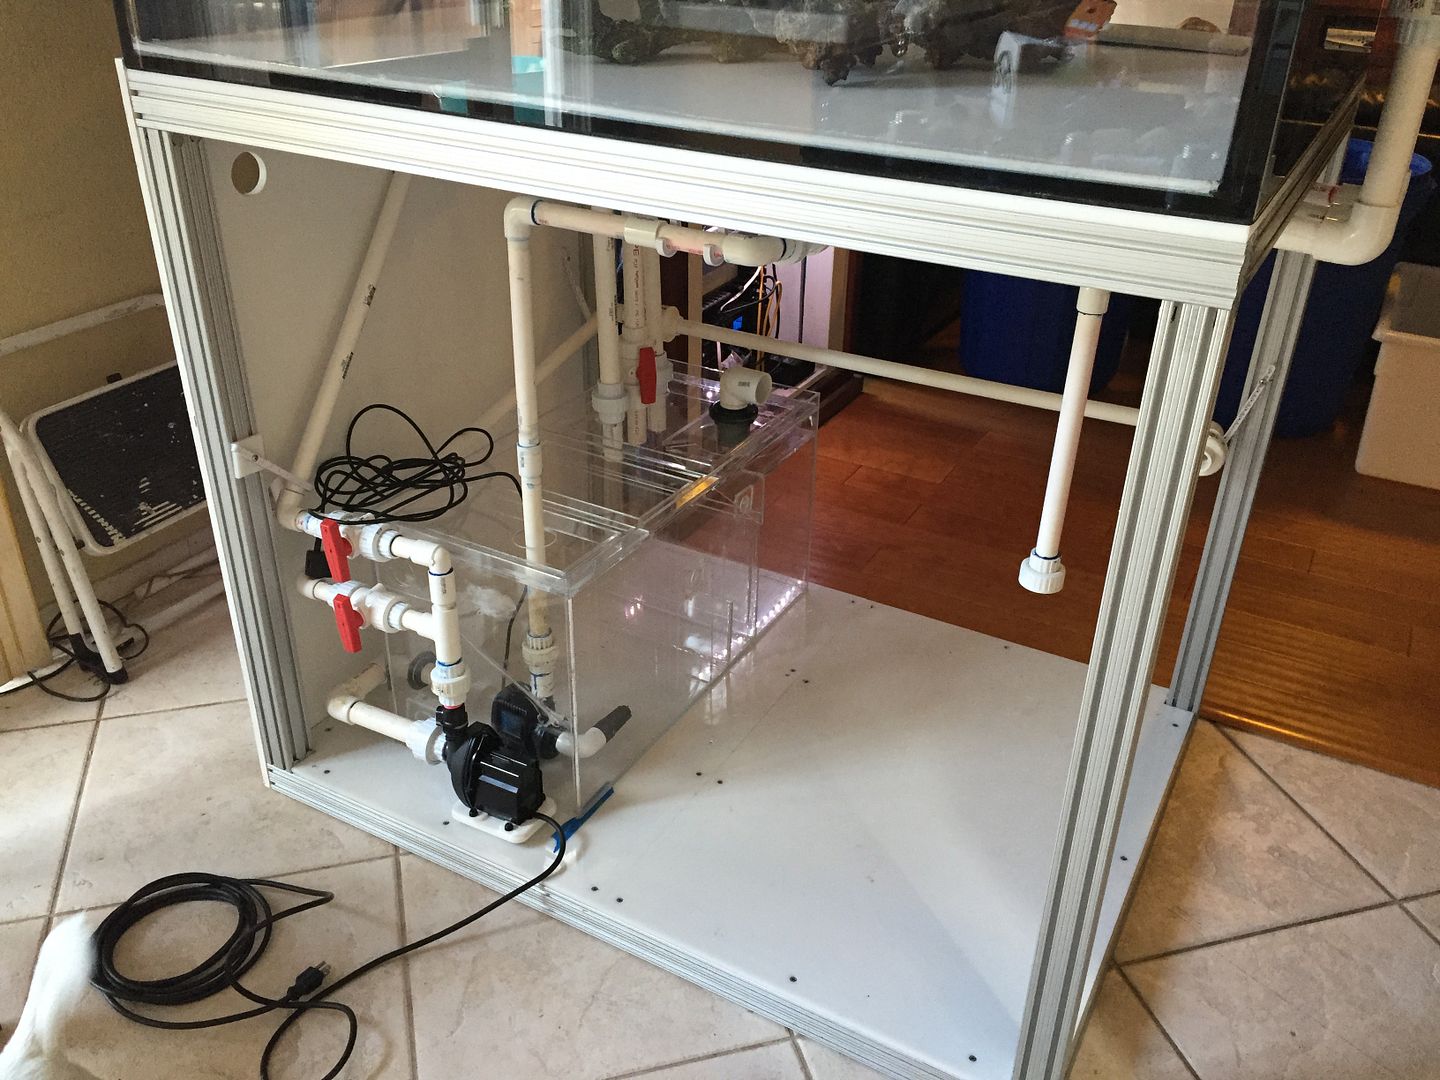
Friday: Moved the tank inside and began plumbing process beneath the tank. I am re-using what was my old secondary sump, patched up a bit. I am able to use a Laguna return pump with a base kit that makes it look really nice. I think this pump typically uses about 65 watts to move up to 1350gph:
IMG_5921_zpsjg7ipde5.jpg


Overflow box drains:
IMG_5912_zpsegyiv5g2.jpg


And I couldn't help it, Put the fake live rock in the tank. I love it so far!:
IMG_5915_zpse5aw6lzl.jpg

Saturday:
Continued plumbing, affixed end panel, cut and test fit side panel, built covers for Sump, got prepared for tank move.
IMG_5920_zpscmyli0bo.jpg
 
Sunday, the big day!:
Drained the current tank into containers and grabbed as many fish and critters as I could get. I left the SPS where they were as there are just too many of them to pull them out and then get them all back in in a reasonable timeframe. I had isolated the thank from the sump and pump in the garage but left it going for the small 12 gallon tank for now.

Once drained, i was able to cut free of the supply and return piping and disconnect any electrical wiring. The old stand is on felt pads so I was hoping it wouldn't damage the floor to move it, and it was pretty good. I was able to move it a few inches at a time to its new position by sitting on the floor and pushing with my legs. It took about 2.5 hours between beginning of drain and starting to re-fill. The fish were freaked out and the corals were in air for a long time:(

Once the tank was moved, I plumbed it in to the new sump and pump system while the re-filling occurred. Of course I was about 10 gallons short so I had to make up some ESV saltwater quickly and add it in to get the flow loop going with a heater. Luckily the temperature only dropped two degrees in that time.

I prioritized getting flow and temperature and basic control set up first, then moved on to setting up the skimmer. This was one of the easiest parts, as I had all the plumbing sitting in place ready to go, so it was mostly connecting a few unions. Content that the tank had basic Life support, I went to bed very late Sunday.

Monday:
Everything was working well, skimmer had removed a lot of gunk. I got a second side panel cut and repaired the Pellet reactor and temporarily plumbed it in place. I will need to move the skimmer a bit to get a better arrangement of the equipment as there is a lot of wasted space in the cabinet right now:
IMG_5949_zpsk0cadfq5.jpg


I had to remove the 8-Bulb Sunpower from the old location and move it to cover the new tank. Before I did that I realized I wanted the tanks moved over another 6 inches, so I moved the empty new tank and stand, but of course the old tank isn't going to budge full. Its staying put as it will be removed during stage three of the setup process:) I hung the light wherein will be when the tank is in the correct position and then tied it back to hang over the current one:
IMG_5945_zpssg72spc7.jpg


A few corals were damaged, mainly a tip or two here and there in the tank, except a big patch of tips are dead on my big Validia Tricolor. I think it will recover just fine. I have probably lost the small Hokesmi frag. Most everything else looks pretty good. I haven't had the lights on enough to see if the two wrasses pulled through, but I think they should be ok.
 
Phase 2: Get the new tank filled with salt water, join it to the system, and get the stand treatment complete. Build the new stand for the smaller tank.
Phase 3: Transfer everything but the sand to the new tank temporarily. Drain the old tank, remove the overflow box, build in the Basso overflow and pipe routing, and place on new stand. Connect the two stands together.
Phase 4: Move live rock and selected corals and fish back to the renovated tank and aquascape new tank using artificial live rock.
Phase 5: Complete stand panels, hardware, etc, and clean up all wiring.
 
The only decision I'm having trouble with is on the lights. I didn't think that one 8 X 39Watt Sunpower would adequately cover a 4' X 3' tank. I decided on going with two 6 X 39 watt Sunpowers to get the coverage I need. My issue is that they are bigger than I expected! Each one is 13.5" wide, which means tag they take up 27" of the 36" width. I drew it out to see where to place them and this is how they would sit:
Light%20layout_zpsili93bsw.jpg


I probably will go with them still, however I am considering moving one six bulb to cover the old tank and using the 8 bulb fixture on the new. I probably won't, but in general the amount of light will be ridiculous....
 
Looking good, Matt!
What's wrong with them take my up 27 of the 36 inches? Don't understand the problem.

It was just a wisp of my sanity trying to rear its ugly head. Don't worry, the beautiful supernova of 12 brand new tubes killed it real quick:p

IMG_5959_zpsjbrekndj.jpg


IMG_5962_zpsdbx8daxj.jpg


Yep, between both tanks that will be 20 tubes at peak wattage of only 780 watts...
 
Looks great! Where did you source your stand materials (aluminum)?

I found the best price through Amazon.com. Search for 80/20 aluminum channel. For example, a 72" length of the 2020 extrusion (2" X 2") is 43 dollars on Amazon. You spend more on the connectors than the extrusion, but in my opinion its worth it.
 
Back
Top