MikeInToronto
New member
I was out of the hobby for a while then in 2010 I thought I would start a 60g cube tank with an anemone as the centrepiece. After pricing tanks I thought it was too expensive and bought a 75g standard instead. Well that didn't make me very happy so I've decided to dismantle that tank and start up a cube. I did the 75 all wrong anyway.
Equipment:
Marineland 60 gallon Cube (2x2x2') w/ built-in overflow
Custom stand
2x Vortech MP10w ES
Tunze Silence Water Pump - 1073.020
250W 20K XM
Galaxy Ballast
Lumenbright Pendant
6" Sugar Sand bed
24" Sump (not sure if I want 15 or 20g H
SWC Xtreme 150 BMK Protein Skimmer
BRS GFO Reactor
Livestock:
1x Blackfoot Clown
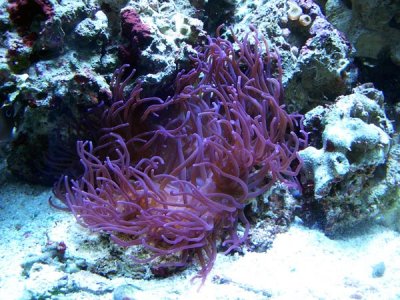
1x LTA
Polyps and mushrooms
I'm sure I missed something.
Anyway, I got started on the stand. I didn't realise how cheap it would be to make this thing. If you exclude the price of screws, the only cost is four 2x4's, so about $8 total. I did mess up so I needed 1 extra 2x4. Of course, my cordless drill broke a while back so I needed a new one, but I won't include that as a cost. The screws cost me about $20 but that's because I got boxes of them. Oh, and I needed a long bit to drill through the 2x4's so another $10.
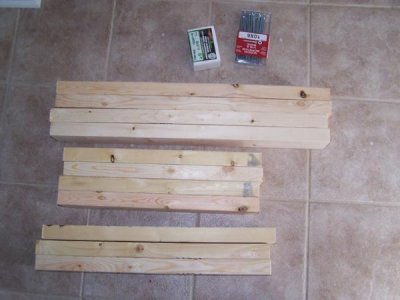
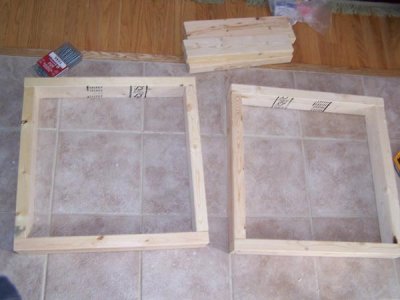
Here is all the stuff. One of the pieces is missing in the pic. Here I have:
4x 24" pieces
4x 21" pieces
4x 30" pieces (which I later replaced with 23" pieces)
Some screws

The result will be a frame that is 24x24x30". The tank is just under 24" but the frame of the tank is exactly 24". I intend to skin the frame and I want it to "hug" the tank so I can hide the 6" sand bed.
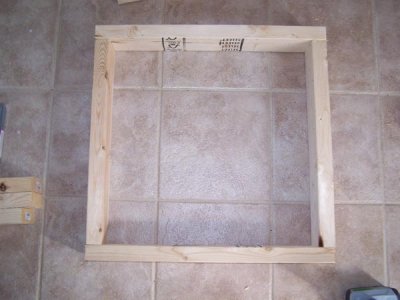
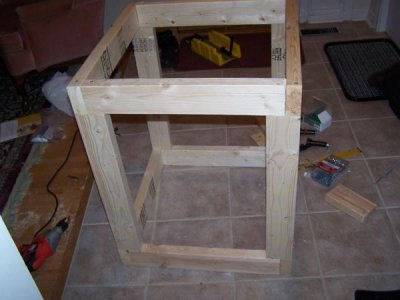
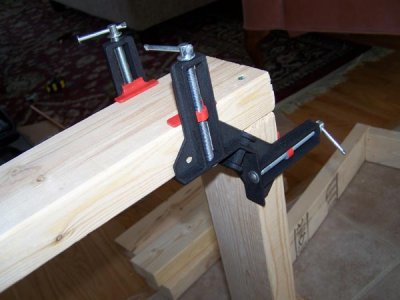
I had these brace things sitting around so I used them to make the frame square.

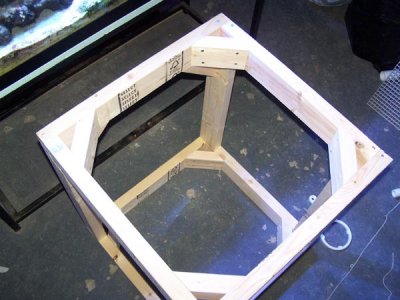
This is the first frame done.

And this is both done.

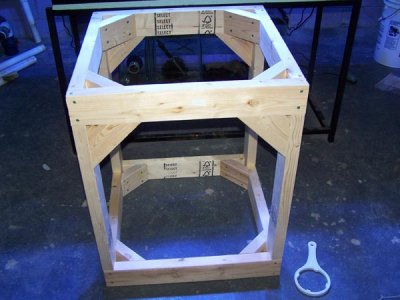
And this is the "finished" frame.

So obviously it needs more to keep it from collapsing. I haven't decided if I want to cross brace the bottom and top or if I will depend on the skin to keep things from torquing. I'm going to add a floor to this stand that rests on the frame (not under it) but I think I will add a sheet 2x2' to the top of the stand, maybe just 1/4" thick.
If anyone tells me I need to drill more holes through the top (or bottom) of the frame into the "legs" of the stand, forget about it. The ones I put already will give me nightmares for weeks!
Thanks for looking. I hope I can keep this updated for anyone who follows it.
Equipment:
Marineland 60 gallon Cube (2x2x2') w/ built-in overflow
Custom stand
2x Vortech MP10w ES
Tunze Silence Water Pump - 1073.020
250W 20K XM
Galaxy Ballast
Lumenbright Pendant
6" Sugar Sand bed
24" Sump (not sure if I want 15 or 20g H
SWC Xtreme 150 BMK Protein Skimmer
BRS GFO Reactor
Livestock:
1x Blackfoot Clown
1x LTA
Polyps and mushrooms
I'm sure I missed something.
Anyway, I got started on the stand. I didn't realise how cheap it would be to make this thing. If you exclude the price of screws, the only cost is four 2x4's, so about $8 total. I did mess up so I needed 1 extra 2x4. Of course, my cordless drill broke a while back so I needed a new one, but I won't include that as a cost. The screws cost me about $20 but that's because I got boxes of them. Oh, and I needed a long bit to drill through the 2x4's so another $10.
Here is all the stuff. One of the pieces is missing in the pic. Here I have:
4x 24" pieces
4x 21" pieces
4x 30" pieces (which I later replaced with 23" pieces)
Some screws
The result will be a frame that is 24x24x30". The tank is just under 24" but the frame of the tank is exactly 24". I intend to skin the frame and I want it to "hug" the tank so I can hide the 6" sand bed.
I had these brace things sitting around so I used them to make the frame square.
This is the first frame done.
And this is both done.
And this is the "finished" frame.
So obviously it needs more to keep it from collapsing. I haven't decided if I want to cross brace the bottom and top or if I will depend on the skin to keep things from torquing. I'm going to add a floor to this stand that rests on the frame (not under it) but I think I will add a sheet 2x2' to the top of the stand, maybe just 1/4" thick.
If anyone tells me I need to drill more holes through the top (or bottom) of the frame into the "legs" of the stand, forget about it. The ones I put already will give me nightmares for weeks!
Thanks for looking. I hope I can keep this updated for anyone who follows it.
")