mntbiker's 55 gallon reef build

mntbiker2008

New member
Hello everyone. Just want to share my build as I go along. I am big into DIY so a lot of stuff I have built myself. I may not have a ton of posts but I have been lurking on this site for about 6 months or so. Definitely feel free to give my tips and suggestions. This is my first saltwater build so I know I won't do everything correctly!

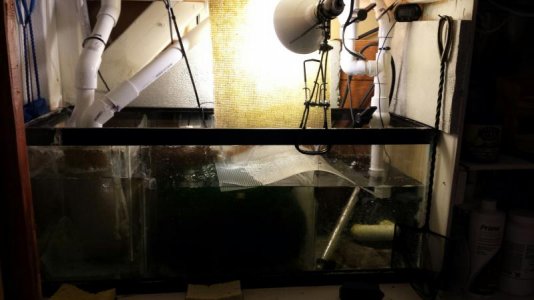
I started by grabbing my tank off craigslist for $50. It was formerly a sump tank for the guys 90 gallon and had a TON of coralline on it. After leak testing the tank and getting all the coralline scraped off, I started to make the stand for it.


I decided instead of the traditional stained, finished wood that you see with almost every stand, I would do something somewhat unique. I kind of went for a "pirate/ rustic" feel so I used old pallet wood for the face of the stand and canopy.


I wanted the tank to sit back a little bit so I would have a little bit of a ledge to set things on. I later changed this due to plumbing for the sump.


I started building the canopy at this time as well


I made the side pieces the same width as the stand so I could fill the space between the stand and canopy to block out the plumbing and everything
 
I built everything so that I could put the stand basically right up against the wall. It drove me nuts with my other tanks having to keep the stands about 4" off the wall because of the HOB filters.


Got the top part of the door put on


Canopy is mostly finished!


I was searching all over for a good background but wasn't too big on anything. I have always just used blue wrapping paper on all my tanks and it looked halfway decent but most of those tanks were easy to pull out and change it if I needed to. I decided to plasti dip the back of my tank and then throw in some black random lines and curves to give it a little depth.

 
After most of the stand and tank was done, I started on the sump. I found a guy on craigslist giving away a bunch of plexiglass for free so I scooped that up.


One of the mistakes I made when I drilled the tank was not thinking about the clearances for my drain pipe and the return line. This made it a real pain when I did the plumbing inside the overflow boxes. I ended up using 1" for the drains and 3/4" for the return.


I will probably end up re-doing the plumbing at some point to decrease some of the elbows and such to get max flow. I got my bulkheads and the glass cutters off of Gl*******s.com. Great site for plumbing needs!


Here are my overflow boxes. I just used 1/4" plexi and the krylon fusion paint most people are using in their tanks.
 
Sand is in. I used the CaribSea Aragonite crushed shell.


I had a 30 gallon tank going already with some damsels and a spotted hawkfish in there. I removed 2 of the 3 HOB filters for that tank and used them to cycle the 55 over the next month. after all my levels went to 0 or close to it, I transferred everyone over to the big tank.


During all of this I felt like the unused space to the right of the sump needed a shelf so I put one in and it made everything so much more organized
 
Here are some crappy shots of how the plumbing is inside the tank.
Drain:


Return/Drain: You can see how little space I had due to where I drilled the holes.


Here is my sump. I scored a Mag18 pump off craigslist for $50. It is definitely overpowered but I figure I would get some more out of it once I redo the plumbing.


Over the next month I added a couple pounds of lace rock and 2 clownfish. It is hard to come by live rock around here and I am kind of picky about what shapes I want so ordering online and getting a bunch of random shapes just isn't an option for me.

I also added 2 powerheads, both rated for 800gph. The return pipe has also been shortened to just below the waterline.


I couldn't quite justify spending a TON of money on lights right now since it will still be a bit before I get to keeping corals so I went with a high output t5 light setup and bought some 10,000k lights. I also went ahead and did most of the inside of the canopy with aluminum tape. Until I am able to drop the coin on some nice reflectors, this will just have to do.

Here it is as it sits today. I found a guy getting rid of about 20 lbs of live rock from his saltwater tank so I grabbed that up. I had a huge algae bloom not too long ago so I put in about 10 mexican turbo snails and they made short work of the algae.


Very cool and interesting build so far. I was thinking of doing something similar to you in extending my stand towards the wall so that there isn't a gap and allow the plumbing to actually run through it. However, I plan on doing a rimless tank so I am not sure if aesthetically it would be pleasing, but it is nice to see it done here. TFS
 
You are doing a good job on everything, I like the DIY cabinet making, gives it a different look from the regular everyday stands. Sounds like you got some good deals on materials and supplies. Keep up the good work...
 
Very cool and interesting build so far. I was thinking of doing something similar to you in extending my stand towards the wall so that there isn't a gap and allow the plumbing to actually run through it. However, I plan on doing a rimless tank so I am not sure if aesthetically it would be pleasing, but it is nice to see it done here. TFS
I originally had the plumbing running behind the stand and I hated how far from the wall it had to sit. If I wasn't worried about the bottom being tempered, I would have drilled the bottom of the tank and ran my plumbing that way then just build my reef around the pipes. This would eliminate all the bends in the drain/return plumbing.

Rimless would be awesome but you are right... not sure how it would look aesthetically. If it is a custom tank, try getting one without a tempered bottom and drill the bottom?

You are doing a good job on everything, I like the DIY cabinet making, gives it a different look from the regular everyday stands. Sounds like you got some good deals on materials and supplies. Keep up the good work...

Thank you guys! I made a stand for my 46 gallon bowfront that I did in oak and stained it cherry and everything...It looks nice but because this was going to be the focal piece in the room, I figured something different would be great. I think I have done everything so far (not including fish) for about $300. I also just found a guy getting rid of 50# of well established live rock for $25.

I think my next purchase is going to be a protein skimmer. Would something around the 150gph area work?
 
picked up about 50 lbs of cured rock last night for $25. I have a ton of cool pieces. Now I just need to figure out a good layout for this 55... I knew it would be tough scaping a 55 but not this tough! I kinda wish I went with a 75 now.
 
I don't think the rim looks bad! And I like the organized wiring! Having your wires organized will make life so much easier!! You should consider looking into adding switches if you can
 
I don't think the rim looks bad! And I like the organized wiring! Having your wires organized will make life so much easier!! You should consider looking into adding switches if you can

Thanks! What do you mean by adding switches? Like making a switch for each plug so I can turn individual items off?
 
One of the mistakes I made when I drilled the tank was not thinking about the clearances for my drain pipe and the return line. This made it a real pain when I did the plumbing inside the overflow boxes. I ended up using 1" for the drains and 3/4" for the return.

I thought all 55 gallon tanks had tempered glass and could not be drilled.
 
So I have added a few more creatures to my tank over the last month. I got a little cleanup crew going with some more mexican turbos, red clawed hermits, and a few emerald crabs. I also added a candycane frag and a frag of Galaxia. The Galaxia is amazing to watch! Any tip on how to pull them off the frag plugs they are on? they are such an eye sore and would like them to be on my live rock instead.
 
Keep an eye on your crabs. If they do not have ample food, they can turn on your fish and corals.

The only crab I know of that does not eventually eat your tank inhabitants, is the true scarlet hermit.
 
Keep an eye on your crabs. If they do not have ample food, they can turn on your fish and corals.

The only crab I know of that does not eventually eat your tank inhabitants, is the true scarlet hermit.

thank you for the heads up! I will keep an eye on them. So far I haven't had any issues. They are mostly around the bottom and in the little crevices and holes in the rocks.
 
So I got tired of the old stand so I pulled all the pallet wood off and replaced it with and oak/walnut skin.

Before:


After:


I have also added an algae turf scrubber. This thing has only been running a few weeks but so far has made a huge difference.
 

Attachments

  • 20160326_195648.jpg
    20160326_195648.jpg
    43.5 KB · Views: 8
  • 20160326_200000.jpg
    20160326_200000.jpg
    44.2 KB · Views: 6
  • 20160326_200010.jpg
    20160326_200010.jpg
    60.7 KB · Views: 8
Some updates on the fish and coral
 

Attachments

  • 20160326_200020.jpg
    20160326_200020.jpg
    67.5 KB · Views: 7
  • 20160326_200026.jpg
    20160326_200026.jpg
    66 KB · Views: 7
  • 20160326_200031.jpg
    20160326_200031.jpg
    60.9 KB · Views: 5
  • 20160326_200041.jpg
    20160326_200041.jpg
    73 KB · Views: 7
  • 20160326_200108.jpg
    20160326_200108.jpg
    56.4 KB · Views: 5
Great looking tank!

I too am running a 55, and so far so good.

Btw the tang police might show up.. a 55 is a brutal place for a blue tang. Only 13 inches of depth to swim in? That's not very nice.

However it is still small, so if you trade it to a LFS for a few frags when it gets medium sized, you might be well-off
 
Back
Top