My 500 + gallon system. Last 13 years to now. Build, Aquascaping & more. Lots of pics

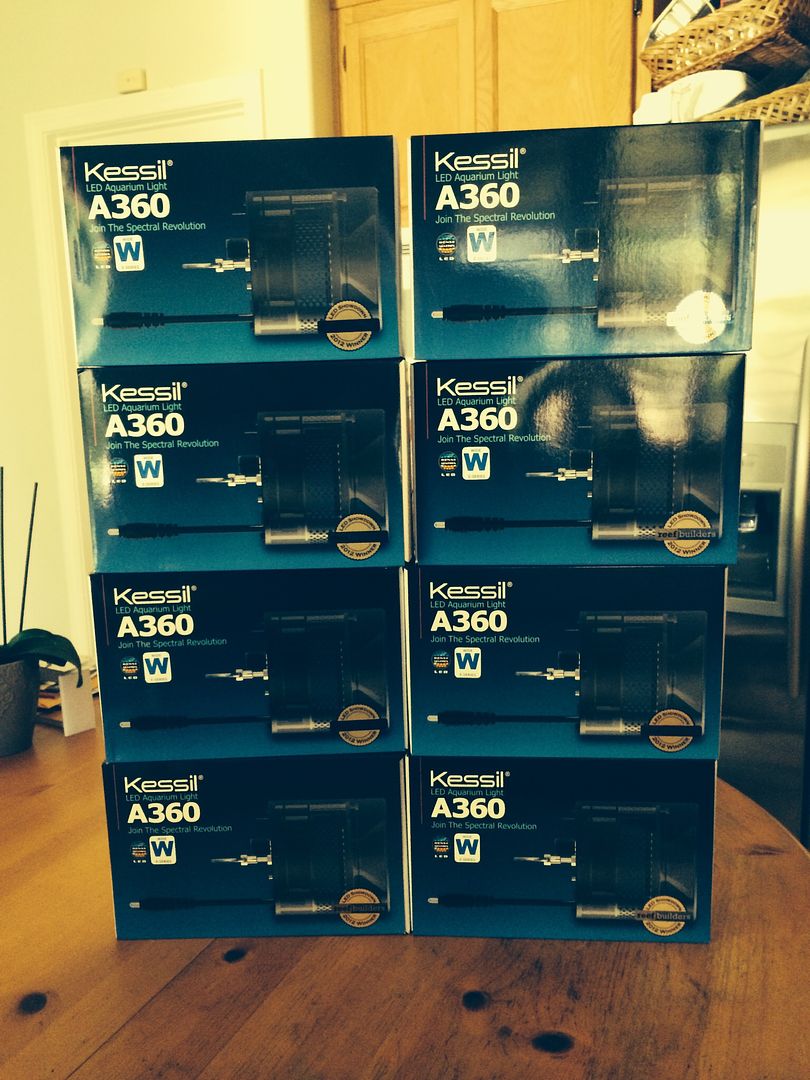
LOL.. All but one light should be here today if not tomorrow. I've got 8 of the 360WE's coming.. Neptune VDM module and Kessil control cable will arrive today. Mounting hardware is in transit as well and should be here by weeks end. It's looking like I will have a big project Saturday.. :hmm4:

And you love it!!!:dance:
 
so you daisychain all the kessils together and use the 0-10v input on the 360 masterlight to connect to one varspeed port of the vdm? this would mean if you change spectrum or intensity all the lights change on the same level and not individually or? if you want individually controllable lights you would need 4 vdm modules as you can control 2 kessils with 2 varspeed ports, right?

nice project, greets
chris

Correct. The Kessils are daisy chained together and the first in the chain is connected to the VDM modules variable speed port. You setup an intensity profile and a color profile. Each VDM module has 4 outputs on two separate variable speed ports. Each Kessil chain requires two ports which would be one RJ45 connector for the two ports.. As such, you could control 2 separate Kessils individually from one VDM module. Also, the Apex has 4 variable speed ports on two RJ45 connectors. So you could control Kessils directly off the Apex's built in variable speed ports. In my case, those ports are used by my Tunze pumps. The only down side to using those ports is that some advance functions such as weather modes (clouds and lightning) aren't available through the lighting wizard but you could program in some profiles that generate those functions and program them to occur randomly. For me, I have no interest in lightning but clouds could be useful for acclimation of new corals and such.

So in short, you can control 2 separate Kessils per VDM module or Per Apex. For me, daisy chain should work fine unless I need to increase the output on the center most lights that are shooting through my acrylic top. If that proves to be the case, I will get another Apex Kessil control cable and set those lights up on a separate channel with slightly different intensity profiles.
 
And you love it!!!:dance:

Yea, but it's an expense that I really didn't need right now. I'm trying to buy property in Montana as I would really love to move there and my spending habits certainly don't help the cause. Still, this has been something I have been thinking about for a year or more and there comes a point with me where too much thinking results in spontaneous & impulsive decisions. This skimmer was easy to justify as the Alpha sold almost immediately. My existing lights won't be as lucrative or as easy to sell despite the fact that they work well. This is and was a tough nut to swallow but once they are setup, I'm sure I will be happy.
 
Yea, but it's an expense that I really didn't need right now. I'm trying to buy property in Montana as I would really love to move there and my spending habits certainly don't help the cause. Still, this has been something I have been thinking about for a year or more and there comes a point with me where too much thinking results in spontaneous & impulsive decisions. This skimmer was easy to justify as the Alpha sold almost immediately. My existing lights won't be as lucrative or as easy to sell despite the fact that they work well. This is and was a tough nut to swallow but once they are setup, I'm sure I will be happy.

Montana is nice. Property is super affordable - compared to Cali ;)
 
I'm sure you'll be happy with the lights.
I love the look and shimmer.
And so compact too.

Montana?
It's freeeeeeezing there.
 
Last edited:
Lights arrived. Mounting hardware should arrive tomorrow. I've got my metal fabricator making me up some threaded aluminum plates that will allow me to clamp the new light mounts to my light rack which will give me the ability to slide them forward and back on my rack for easy adjustment. This will also eliminate the need for me to drill the rack to mount them. I should have those parts by Friday. More pictures to follow once I've got the mounts and new clamp plates.

Some light porn in the mean time.. Time to go play with some new lighting profiles..
image_zps5ae398da.jpg
 
Mind if I ask when you unbox them to see a image or two of the side, top, and bottom (led/light area)? I'm just wondering what they look like since I've never seen one up front and personal. I couldn't use them on my current tank but maybe a future one.
 
Mind if I ask when you unbox them to see a image or two of the side, top, and bottom (led/light area)? I'm just wondering what they look like since I've never seen one up front and personal. I couldn't use them on my current tank but maybe a future one.

Here are a few pictures. If you google Kessil A360WE and select images, you will find many better photos. The first one is one of those google results. The second two are ones I just took.
imagejpg1_zps01fc026d.jpg


image_zpse7335050.jpg


image_zps2d45da9a.jpg
 
Thank you. I appreciate it.

So a puck or array of LED's more or less with a nice lens that gives spread rather than spot light. That is what I was thinking more or less it would look like. Did you or do you have to adjust your canopy?

And I'm sure they are adjustable in regards to intensity. Is it the whole array or colors?

Very well built. I like the way they look. And thanks. Sorry about the odd ball question.

Adjustable both manually from the fixture as well as from the 0-10v controller input. You can adjust both the intensity and the spectrum. Each light will cover roughly 24"x 24" but I will have mine a bit closer together to insure very good coverage over my 48" x 96" footprint. I will arrange and aim them over my peninsula based aquascape which is roughly 36" x 72" to maximize them.
 
wow cant wait to see what it looks like with the new lights.

You and I both.. From the outside, it should look the same. As it turns out, LA Fish Guy Jim is going to come over Saturday at 1PM to film the conversion for a future LA Fish Guy episode. We will cover the PAR reading first before the old lights start getting removed. Then the light install as well as color and par matching will also be covered. I will be using Apex Fusion to do the color and intensity so there will be a brief explanation of that process as well. Fusion makes the whole process so simple.. I was really impressed when I did my initial setup yesterday. Much easier than creating and adjusting a bunch of profiles. Just set the graph up and then fine tune the numbers one point at a time. One graph for color and one graph for intensity. It couldn't get any easier. Hats off to the Apex team for creating such a great interface.

I've got the whole process detailed in my head and I expect it will go very smooth. Especially since I already set up the VDM module and tested the new programming. It will just be a matter of some minor adjustments to the color and intensity. I plan on removing one light at a time and installing a pair of kessils in place of each light fixture. The tank will never go dark that way and I will be able to match the kessil color to the existing lighting when I remove the first light and replace it with the first pair of Kessils.. Once the first pair of Kessils are in and the color is adjusted, things will move very quickly as my existing light are really easy to remove and my mounting setup for the Kessils is stupid simple and very flexible. Truth is without this being filmed, it would only take me an hour or two to swap the lights but with Jim there filming and me explaining everything as well as "re-takes", I'm sure this relatively simple migration will turn into something more akin to monkey's trying to screw a football. :crazy1:

Either way, I am looking forward to it.. I always go into this stuff very well prepared which insures that things usually go as planned if not ever smoother. Expect a big update Saturday afternoon if not early Saturday evening. :bounce1:

I just got the mounting hardware and the only thing left is the aluminum pieces I have being made at my metal shop. Those should be done by tomorrow
 
Last edited:
My 500 + gallon system. Last 13 years to now. Build, Aquascaping & more. Lots...

My 500 + gallon system. Last 13 years to now. Build, Aquascaping & more. Lots...

we expect a big preview video of the tank with the new lights installed. :-) curious how you like the 360's as i want to get some for myself for my new 200g project.

one last thing. how are the 360's cooled? is there some vent inside or is it passive cooling? any noise from the light?
 
we expect a big preview video of the tank with the new lights installed. :-) curious how you like the 360's as i want to get some for myself for my new 200g project.

one last thing. how are the 360's cooled? is there some vent inside or is it passive cooling? any noise from the light?

Since I have yet to place them over my tank, I can't really say how much I like them other than the tests I have run with one fixture outside the tank which leaves me really optimistic. What I really love is the small compact form factor which will lend itself very useful for my install. The fact that I will be able to aim every light where I need it most in order to get the best coverage will be a great thing. I'm pretty sure I will be very happy but ultimately the PAR levels and the response from my corals will be the ultimate proof of success. To be honest, I don't need astronomical PAR levels as I don't even run my current fixtures anywhere near 100%. I do however expect to have more available PAR (than my current fixtures) should I need it simply by increasing the intensity. Given that my corals have been doing really well under LED's consisting of cool white, blue and royal blue LED's for 3 years, I expect the corals to respond very favorably to the new lights as they provide a much better spectrum.

As for cooling, each light has a fan in it that is just shy of the fixtures diameter in size. The body of the light seems to run cool to the touch. If you look closely at this picture, you can see the fan blades inside the light.
image_zpse7335050.jpg


I just got back from my friends metal shop. He decided he was not going to come in tomorrow which could have put a kibosh in my plans to have all the parts. He cut the metal plates for me and set me up on his punch so I could add the holes and then he set me up on his press so I could install the PEM nuts to hold the mounts to my mounting plate and to hold the mounting plates to my light rack. I'm actually glad I got to do some work on the mounting plates.

I was prepared to go home and use my drill press but I've got to say... That hole punch machine sure beats the hell out of a drill press. Step on a peddle and it punches a perfect hole through aluminum in a second. Given that there are 8 plates with 4 hols and 8 plates with 2 holes, the press and it's alignment jig made quick work of that process. The press was pretty nice to as I didn't have to use a vice or a hammer to install the 32 PEM nuts. Just step on a pedal and it pushes the PEM right into the hole in the plate. For those that are wondering, a PEM nut is a threaded piece that gets pressed into the metal to give a solid thread hole to insert a screw into. It's a much easier and better solution than tapping a bunch of holes into aluminum..

I'm going to stop at a hardware store on the way home to get all the screws and washers I need for the project and will add some photos of my "mounting contraption" in a couple hours. I'm sure some of you are already wondering what the hell I am talking about so stay tuned. A picture is worth a thousand words.
 
Last edited:
Back
Top