I've been having issues with the heat in my current light hood causing my bulbs to fail way too soon. I'm running 2 x 250w MHs and 2 x 96w PC actinics. It is the actinics that are not lasting as they should. I have two fans running on the hood, one blowing in, the other pulling out, vented to the outside of the aquarium canopy cabinet. The hood is just a simple box I made of 1/2 plywood to hold the light kits that I got from J&L when I set up my reef tank. There is a 1/8 acrylic lens to protect the bulbs from water splashes
I decided that I needed to get rid of more heat, so I am building a new hood from aluminum. It will use the same two fans in the same configuration, but it will employ some passive cooling methods as well which I hope will reduce the internal temperatures of the hood. Basically, air will be able to circulate up from the lower edges of the hood and out throuugh vent holes in the top. Also, being aluminum, it should dissipate more heat then the wood.
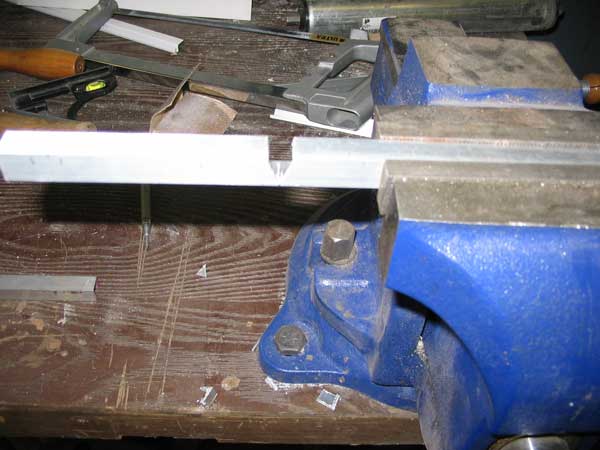
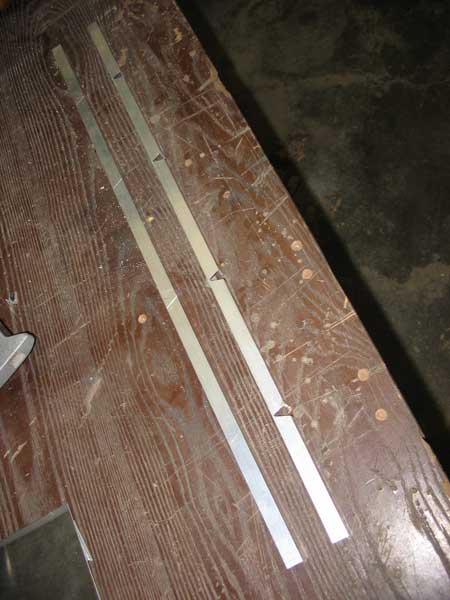
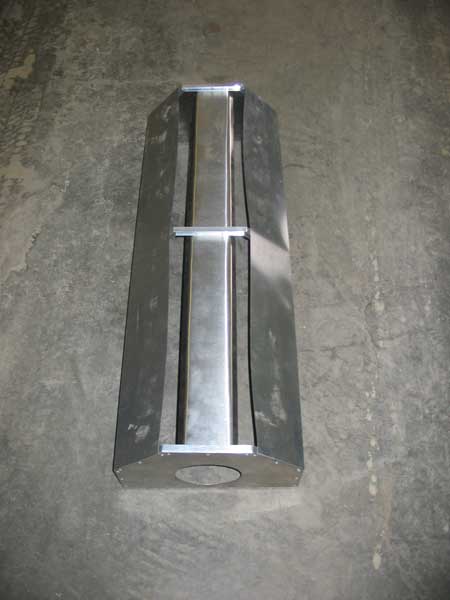
I started with some 1/2" aluminum U channel. I cut V notches in the channels to form them into frames for the hood. There are three frames, one at each end and one in the center.
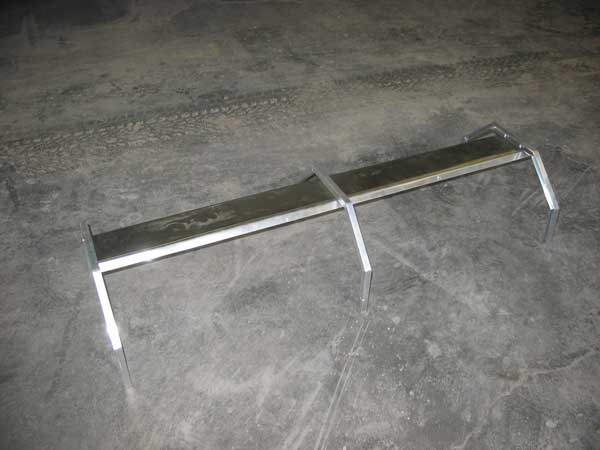
To these, I then riveted on the backing pieces which will support the light sockets and the polished aluminum PFO reflector. There are aluminum channels riveted along the bottom that will accept the acrylic lens.
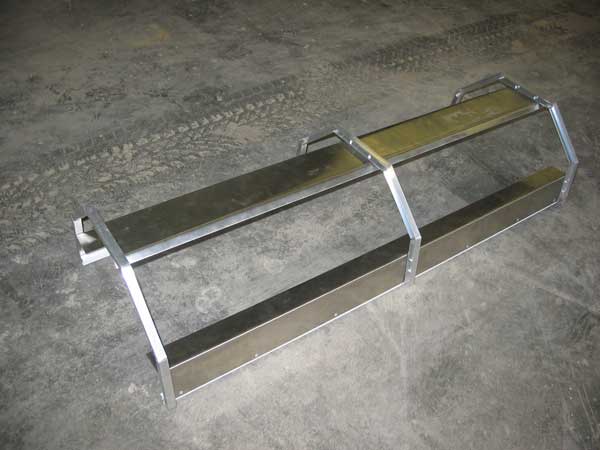
I made the end panels and cut out the holes for the fans (I will drill the mounting holes when I install them) then riveted them onto the end frames.

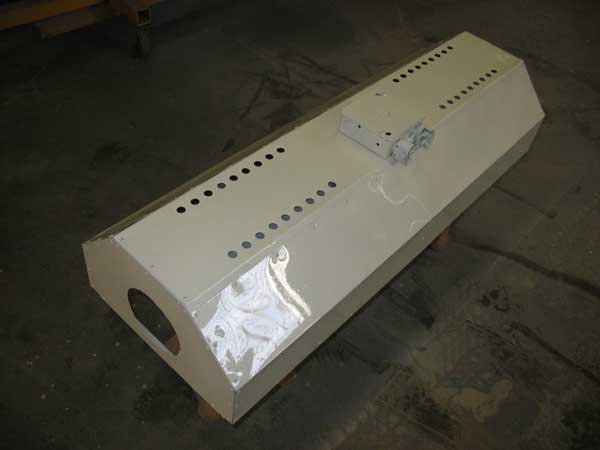
Next the skin is riveted onto the outside of the frames. The top skin has vent holes drilled in it to allow heat to escape. The frames create a space between the reflector and the outer skin for the air to move through.

The electrical box on the top will accommodate all the cords and wire connections for the lights and fans.

Now the hood itself is built, and a coat of paint is applied.
I will be switching to VHOs from the PC, so the next step is to get the sockets, install and wire them. Then I will strip out the old hood and move the MHs and fans into the new one. Total investment so far, $50, or about the price of one PC bulb. I hope it works.
I decided that I needed to get rid of more heat, so I am building a new hood from aluminum. It will use the same two fans in the same configuration, but it will employ some passive cooling methods as well which I hope will reduce the internal temperatures of the hood. Basically, air will be able to circulate up from the lower edges of the hood and out throuugh vent holes in the top. Also, being aluminum, it should dissipate more heat then the wood.
I started with some 1/2" aluminum U channel. I cut V notches in the channels to form them into frames for the hood. There are three frames, one at each end and one in the center.
To these, I then riveted on the backing pieces which will support the light sockets and the polished aluminum PFO reflector. There are aluminum channels riveted along the bottom that will accept the acrylic lens.
I made the end panels and cut out the holes for the fans (I will drill the mounting holes when I install them) then riveted them onto the end frames.
Next the skin is riveted onto the outside of the frames. The top skin has vent holes drilled in it to allow heat to escape. The frames create a space between the reflector and the outer skin for the air to move through.
The electrical box on the top will accommodate all the cords and wire connections for the lights and fans.
Now the hood itself is built, and a coat of paint is applied.
I will be switching to VHOs from the PC, so the next step is to get the sockets, install and wire them. Then I will strip out the old hood and move the MHs and fans into the new one. Total investment so far, $50, or about the price of one PC bulb. I hope it works.


") One of the things that gave me this idea was the recent
One of the things that gave me this idea was the recent