Our 200 DD build

tingleyl

New member
We have finally set our go-live date for 2 mos from now. So I thought it was finally time to get our build thread started.

This will be our first tank ever. We never had any interest in freshwater and no experience keeping fish. My wife and I went to the local zoo last summer. They had sea horses. We thought they were cool and figured surely we could build a tank for seahorses, couldn't be that hard right? My son liked nemo. Maybe sea horses and a couple of Nemos. Yeah, that's what we were going to do. I had visions of a little Biocube, how complicated could it really be?!

So we started doing some research and found this site. Wow talk about an eye opener, I quickly realized I had a TON to learn before I could even consider a tank. And of course sea horses quickly fell off of our future livestock list. So we researched and studied for 6 mos and were getting ready to pull the trigger on a tank when I found a deal that was too good to be true for a used 200 DD. We had been looking at a 300 DD, but this deal was too good to pass up. So in January I bought the tank for my wife's birthday present. Back to the research for another 6 mos. Once I was comfortable with measurements and components we started our build a full year after deciding we were going to do this.

By the time we finally get water in the tank it will be 1 1/2 years since deciding we were going to do this. I have 2 mos to get everything else put together and ready for our go live date of mid-November. Hopefully I can get it all done, still have a lot to get ironed out in 2 most.

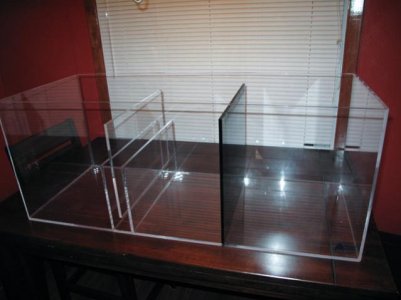
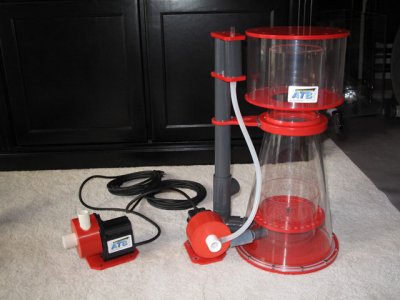
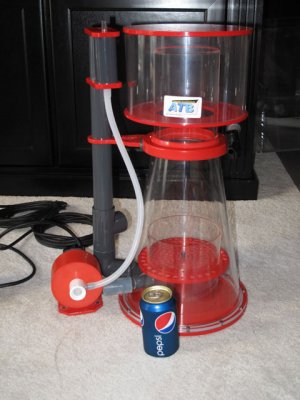
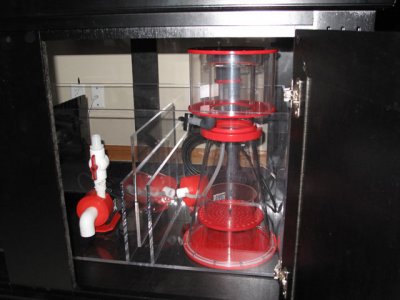
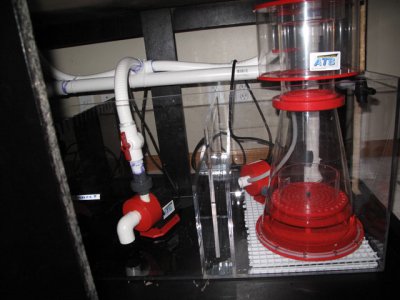
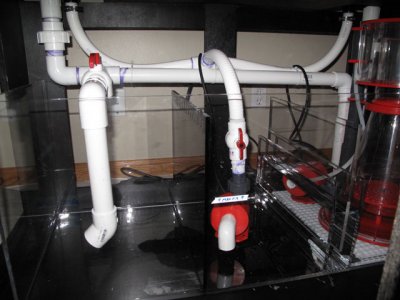
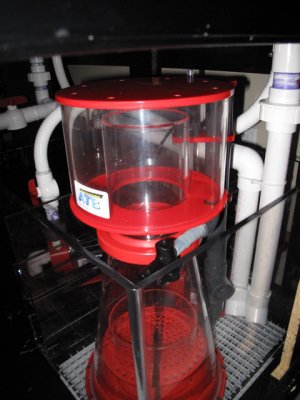
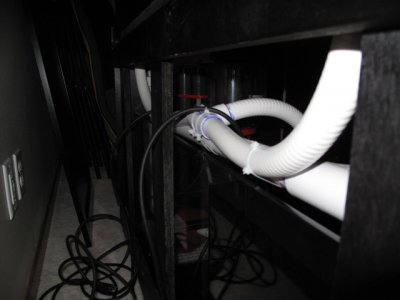
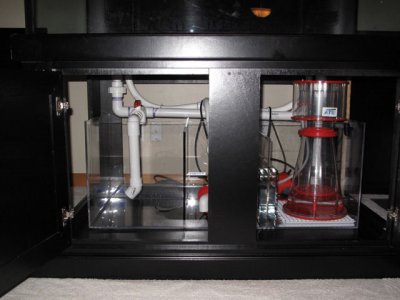
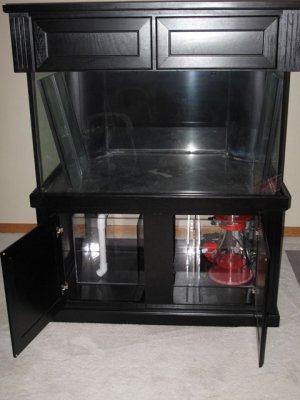
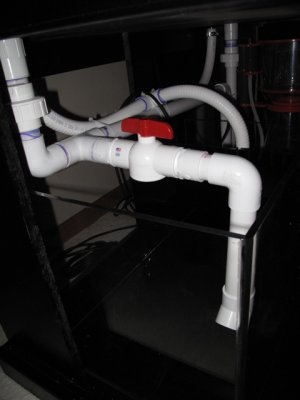
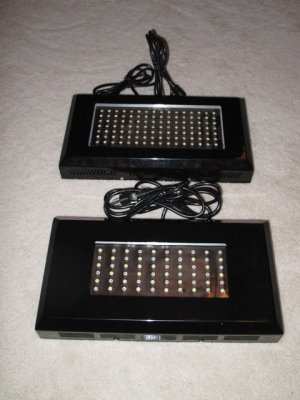
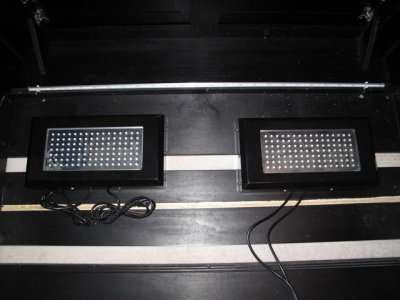
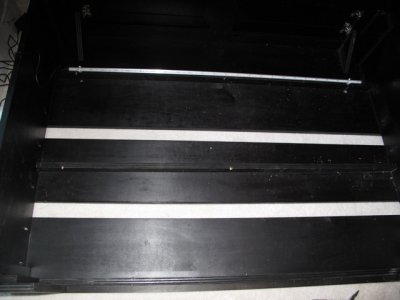
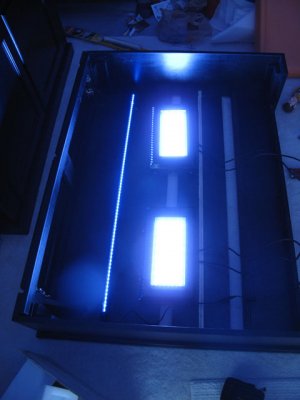
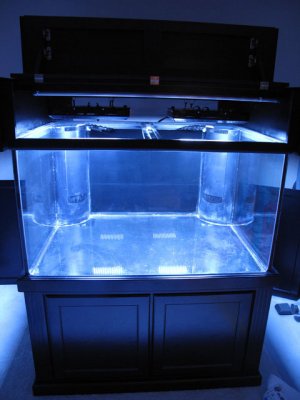
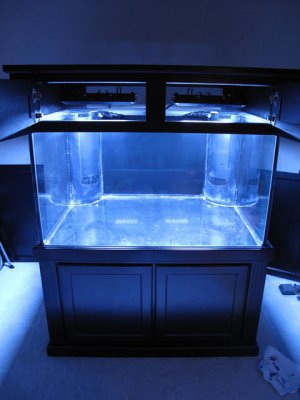
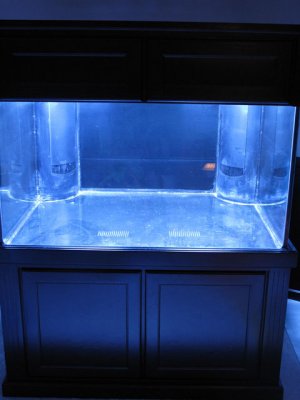
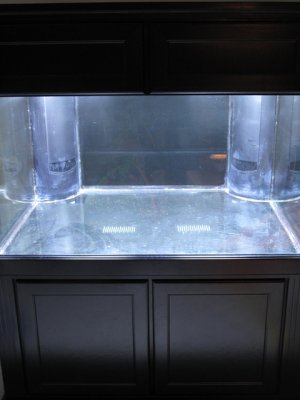
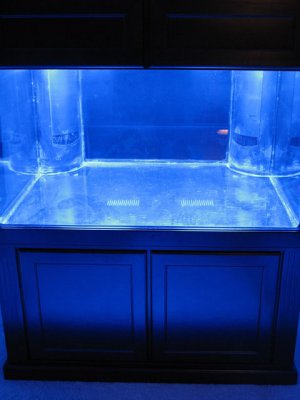
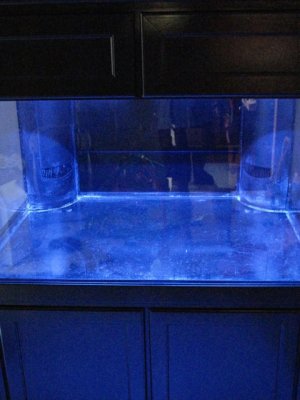
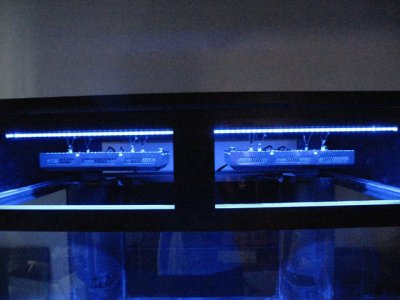
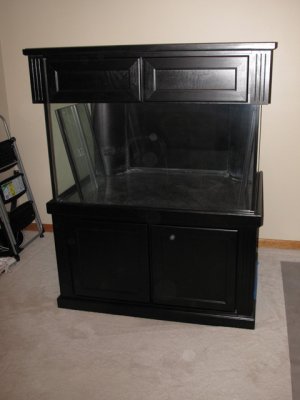
Found this used tank on Craigslist. 200 gallon Marineland Deep Dimension with metal halide light fixture, skimmer, sump, stand, and canopy. Ended up selling the components that came with it that I wasn't going to use and by the time that was finished I got the tank, stand and canopy for virtually nothing.

Aquarium Marineland Deep Dimension w/Starphire Glass 200 Gal (48x36x27)
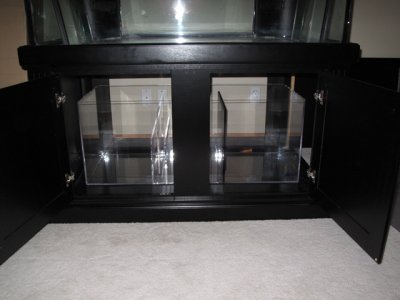
Stand Marineland Deep Dimension Stand (Monterey Black (48x36x27))
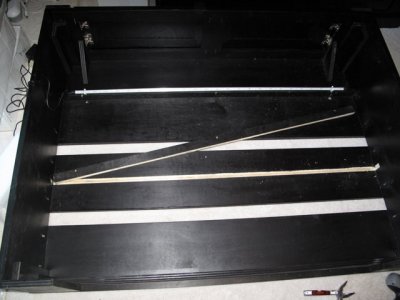
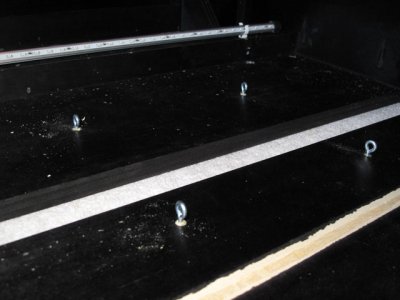
Canopy Marineland Canopy (Montery Black)
 

Attachments

  • 000-200DD.jpg
    000-200DD.jpg
    93.7 KB · Views: 4
Last edited:
Nice tank, I like the dimensions a lot. Wish I had more depth :)
So what's on your new stock list now that the seahorses dropped out?
 
Custom Sump & Refugium Build

Custom Sump & Refugium Build

The sump/fuge caused me a TON of stress trying to figure out how I could meet the recommended volume percentages and still manage to get it into my stand. The Marineland stand is designed perfectly for Marineland products. If you don't use their products, ugh...would have been much easier to build my own. But this one was free and I figured I'd go with it.

I ended up going with a custom sump/fuge from Advanced Acrylics. I read a lot about their hit or miss reputation online, but figured I had time on my side so I could be patient. I sent John my build specs and he built and shipped it to me as promised. No problems at all and the build quality is fantastic. Had to cut a couple of inches off one of the sides of my stand so I could fit the dimensions I wanted. Would have preferred to make it a little larger but wasn't comfortable hacking more off of the stand.
 

Attachments

  • 001-CustomFugeSump-Plan.jpg
    001-CustomFugeSump-Plan.jpg
    34.7 KB · Views: 3
  • 002-AA Custom Sump & Fuge.jpg
    002-AA Custom Sump & Fuge.jpg
    32.8 KB · Views: 3
  • 003-Sump In Stand.jpg
    003-Sump In Stand.jpg
    101 KB · Views: 4
Skimmer & Return Pump

Skimmer & Return Pump

Again, the Marineland stand caused me a lot of headache trying to figure out which skimmer could do what I wanted and still work in my sump & fit under my stand so I could still remove the collection cup. Seems like most vendor websites have vague measurements and since I didn't have any experience with skimmers I had no clue how much space I needed to allow to take off the collection cup.

Running water depth was also a big concern because the skimmers were so tall I wasn't going to have a lot of room to raise it if the water level wasn't correct.

Victor at ATB & Mike at Reef Specialty were huge helps and were able give me great recommendations and accurate measurements and running depths.

Measurements are perfect, I can take the collection cup off and it fits just perfectly to still be able to get it off. A 1/4" higher and it wouldn't have worked.

In case anyone else is looking for it: 1050a running depth is 8.5"


Skimmer ATB 1050a (w/Airstar 1300 pump)
Return Pump ATB Flowstar 1800
 

Attachments

  • 004-Return PumpSkimmer.jpg
    004-Return PumpSkimmer.jpg
    80.8 KB · Views: 3
  • 005-ATB 1050a.jpg
    005-ATB 1050a.jpg
    87.7 KB · Views: 3
  • 006-SumpSkimmer.jpg
    006-SumpSkimmer.jpg
    78.2 KB · Views: 3
Last edited:
Plumbing

Plumbing

I had no clue what I was doing with plumbing. After reading threads a ton of threads and about 20 trips to the home improvement stores I finally got something rigged up I think will work. Took 3 water tests by the time I got everything setup and all of the leaks taken care of.

I eventually found a thread on here that helped me a lot with my plumbing: http://www.reefcentral.com/forums/showthread.php?t=1873079&highlight=pvc+leaking&page=2

For those of you considering using spaflex: use primer and cement and slip fittings. One of the geniuses at the home improvement stores told me I should use barbed threads. Those are RIDICULOUSLY difficult to get wedged into the spaflex.

Other lessons learned:
PVC cement & primer goes on BOTH pieces being joined together.
 

Attachments

  • 007-Plumbing-Right Front.jpg
    007-Plumbing-Right Front.jpg
    84.9 KB · Views: 3
  • 008-Plumbing-Left Front.jpg
    008-Plumbing-Left Front.jpg
    83.6 KB · Views: 4
  • 009-Plumbing-RightSide.jpg
    009-Plumbing-RightSide.jpg
    86.2 KB · Views: 5
  • 010-Plumbing-RightSideTop.jpg
    010-Plumbing-RightSideTop.jpg
    30.7 KB · Views: 3
More Plumbing

More Plumbing

More plumbing:
 

Attachments

  • 012-PlumbingBackLeft.jpg
    012-PlumbingBackLeft.jpg
    83.3 KB · Views: 2
  • 013-PlumbingFront.jpg
    013-PlumbingFront.jpg
    74.5 KB · Views: 3
  • 014-PlumbingTank.jpg
    014-PlumbingTank.jpg
    74.9 KB · Views: 3
  • 011-Plumbingleft.jpg
    011-Plumbingleft.jpg
    82.8 KB · Views: 3
Lighting

Lighting

Next up was lighting. Tough decisions. I had planned on going with 250 watt MH & T5 combo. But was worried about heat and was really not looking forward to re-doing my canopy to fit basically any thing other than a fixture.

While visiting a LFS on vacation I saw Illuminarium LED fixtures. I hadn't even considered LED and never would have had I not seen them in action. In the end they solved a few of my issues:
1. Heat - don't produce nearly as much heat
2. Didn't have to modify my canopy.
3. I could get the equivalent of 400 MH without any of the detractors that go with it.

Lights Illuminarium 120 Reefboxes
Moonlights IceCap 45.2" LED Moonlight Retro 470nm Tube

Moonlights I connected right to one of the braces on the canopy.

To mount the Reefboxes I had to remove one of the braces. Fortunately it unscrewed and I popped it off and repositioned it further back.
 

Attachments

  • 015illuminariumreefbox.jpg
    015illuminariumreefbox.jpg
    81.5 KB · Views: 3
  • 017cnpybraceremoved.jpg
    017cnpybraceremoved.jpg
    69.6 KB · Views: 4
  • 018canopy.jpg
    018canopy.jpg
    65.5 KB · Views: 3
  • 019moonlights.jpg
    019moonlights.jpg
    73.8 KB · Views: 4
  • 016marlndcanopy.jpg
    016marlndcanopy.jpg
    93.2 KB · Views: 4
Last edited:
More Lighting

More Lighting

More light pictures:
 

Attachments

  • 020CanopyLights.jpg
    020CanopyLights.jpg
    68.1 KB · Views: 3
  • 021TankHoodUp.jpg
    021TankHoodUp.jpg
    76.8 KB · Views: 3
  • 022TankHoodDown.jpg
    022TankHoodDown.jpg
    75.1 KB · Views: 3
  • 023Tanklighton.jpg
    023Tanklighton.jpg
    66.8 KB · Views: 3
Last edited:
Lighting Modes

Lighting Modes

The LED's have a Dawn/Dusk setting. So here are the various light settings and a picture of each in the following order: Dawn, Dusk, Moonlights
 

Attachments

  • 024TankDawnMode.jpg
    024TankDawnMode.jpg
    95.9 KB · Views: 3
  • 025TankDuskMode.jpg
    025TankDuskMode.jpg
    69.2 KB · Views: 3
  • 026TankMoonlights.jpg
    026TankMoonlights.jpg
    79.8 KB · Views: 3
  • 027Moonlights.jpg
    027Moonlights.jpg
    81.2 KB · Views: 4
Hopefully this thread helps someone, I know I looked at a TON of build threads when I was trying to figure out what I was going to do.

I painted the back of the tank black with krylon fusion flat black paint.
I had 2 circuits & GFCI's wired behind the tank

This isn't in my basement, so I reinforced the floor using ibeams in the crawl space directly below the tank.

In case anyone can't find it...Egg Crate is located in the lighting areas of the home improvement stores. It's back with the drop ceiling stuff.

Next Up:
RO/DI & Water Storage/Mixing tanks - in progress
Apex Controller
2 Vortec MP40s for my powerheads
ATO - still need to figure this out
Dosing/Reactor - need to research and decide what I'm going to do here
QT Tank
UPS
Generator
 
Last edited:
Nice tank, I like the dimensions a lot. Wish I had more depth :)
So what's on your new stock list now that the seahorses dropped out?

Thanks, the extra depth was really important to us. We plan on having some Tangs, so I hope I don't regret not having the extra length of the 300 to give them more swimming room.

Livestock list is ever evolving depending on what day you talk to my wife, but right now:

Couple of tangs
Mandarin
Copper Banded Butterfly
Mag & clown pair
Frog Spawn
Elegance
Torch
Hammer
Zoas
 
yes ur goin to regret not havin the 6 ft vs 4 ft if ur plannin to keep tangs but nice find mind me askin wat u paid for the tank stand and canopy towards the end?
 
Looking good, I'm curious to hear how you'll like the LEDs in the long run. From the pictures it looks good, the dawn/dusk settings are nice.
Does your plumbing allow for enough flow in the refugium section? Won't the water take the path of least resistance, straight to the skimmer?
I'm looking forward to seeing this up and running, I like your coral selection :)
 
yes ur goin to regret not havin the 6 ft vs 4 ft if ur plannin to keep tangs but nice find mind me askin wat u paid for the tank stand and canopy towards the end?

Less than $400 by the time it was all said and done.

Looking good, I'm curious to hear how you'll like the LEDs in the long run. From the pictures it looks good, the dawn/dusk settings are nice.
Does your plumbing allow for enough flow in the refugium section? Won't the water take the path of least resistance, straight to the skimmer?
I'm looking forward to seeing this up and running, I like your coral selection :)
Me too, I hope I like the LED's. Figured since I didn't know any different they'd be a good way to start.

Not sure on the plumbing. I'm no plumber and had no clue what I was doing. I ended up redoing it 3 times. During the water tests it appeared as though the flow through the fuge was ok. Everything I read said you wanted reduced flow so I put the valve there so I could reduce it, but it's wide open. Now you have me thinking I also should have put a ball valve on the other side as well so I could force more flow to the fuge. Guess we'll have to see how that goes.
 
Great thread tingley! Have you got the tank up and running yet? I am driving to Ohio tomorrow myself to pick up the exact same setup you have. Nabbed it for 750.00 myself. Anyways i cant wait to see pics of your setup running.
 
Tank is up and fully functional. We finally got it up and running about a month ago. I haven't updated this in a long time, so here come the pictures.

We ended up going with 4 MP40s. May even add a 5th one at some point.

Rock consists of 150 lbs of Bali Alor and about 60 lbs of Marshall Island rock.
 
Last edited:
2 - 60 gallon water storage tanks & plumbing
 

Attachments

  • IMG_0225.jpg
    IMG_0225.jpg
    69.2 KB · Views: 3
  • IMG_0226.jpg
    IMG_0226.jpg
    52.1 KB · Views: 3
  • IMG_0227.jpg
    IMG_0227.jpg
    91.2 KB · Views: 6
  • IMG_0228.jpg
    IMG_0228.jpg
    60.4 KB · Views: 4
Spectra Pure Maxcap 180 gpd RO/DI system:
 

Attachments

  • IMG_0229.jpg
    IMG_0229.jpg
    82.6 KB · Views: 3
  • IMG_0230.jpg
    IMG_0230.jpg
    94.9 KB · Views: 4
  • IMG_0231.jpg
    IMG_0231.jpg
    82.5 KB · Views: 3
  • IMG_0232.jpg
    IMG_0232.jpg
    80.1 KB · Views: 4
Shelving system to hold 3 - 40 gallon tanks
 

Attachments

  • IMG_0233.jpg
    IMG_0233.jpg
    93 KB · Views: 3
  • IMG_0234.jpg
    IMG_0234.jpg
    74 KB · Views: 4
  • IMG_0263.jpg
    IMG_0263.jpg
    92.7 KB · Views: 3
Back
Top