Skinning stands...

I too would like this info (how to skin) since
I am building a new stand this weekend.

I am going to try and find some premade doors as well.

Thank you
 
I too would like this info (how to skin) since
I am building a new stand this weekend.

I am going to try and find some premade doors as well.

Thank you
 
I built mine out of 3/4" oak plywood. Joints were done by using a kreg pocket hole jig and glue. I sleep just fine too!

click on my red house to see my build.
 
ok so i think this thread is looking for how to skin a frame... I hope everyones tank stands hold would be a horrible thing to hear of anyones stand failing...

I love will's stand does anyone else have any they would like to share?
 
I have seen alot of cool stands in the links and thank you to all that have posted.

I really want to see techniques and tools used, I am not versed in alot of wood working techniques and tools but I am not afraid to try anything. I have access to a miter saw, router, and circular saw. My concern would be for cutting out openings for the doorsin the paneling that are nice and straight and square...How are people fastening things together on these stands? Looks like trim/molding can really dress up a stand. How do I make doors simply but attractive?

Is there going to be other tools I will need? I think I will document this build focusing on the skinning part to help others...but I hope it turns out well and can help some others like me that dont have much(close to none) woodworking experience but arent afriad to try.

I am going to build rocketengineers stand and probably go with a version of the stand will16 built-maybe without as much molding-a little simpler version.
 
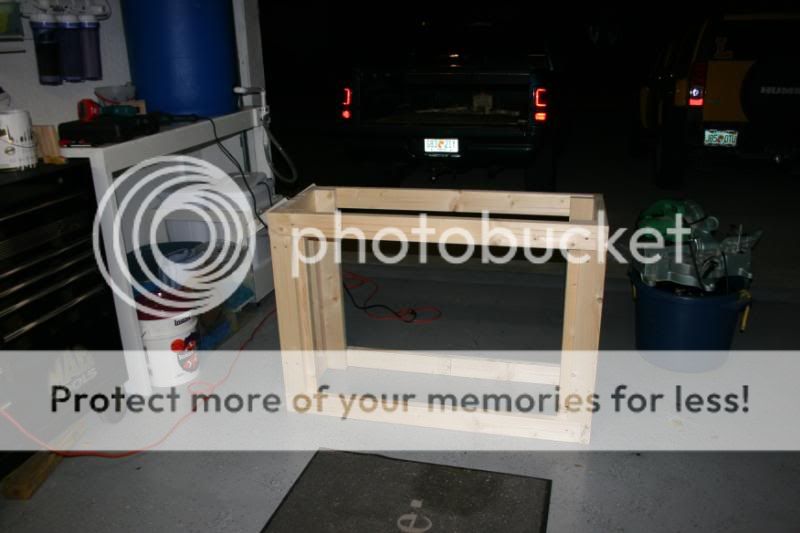
mine is almost finished....lil odds & ends i want to work into it before i skin it.
my list of tools used is as follows:

* Ryobi 10" Miter Saw ...the laser guide is waaaaaaay helpful

* Skil table saw thought i could get by w/out it, but it is helpful to cut pieces i can't cut in the miter saw. i don't have a truck, so buying 4'x8' sheets wasn't a option. so i bought my large pieces cut over-size & then use it to cut them down

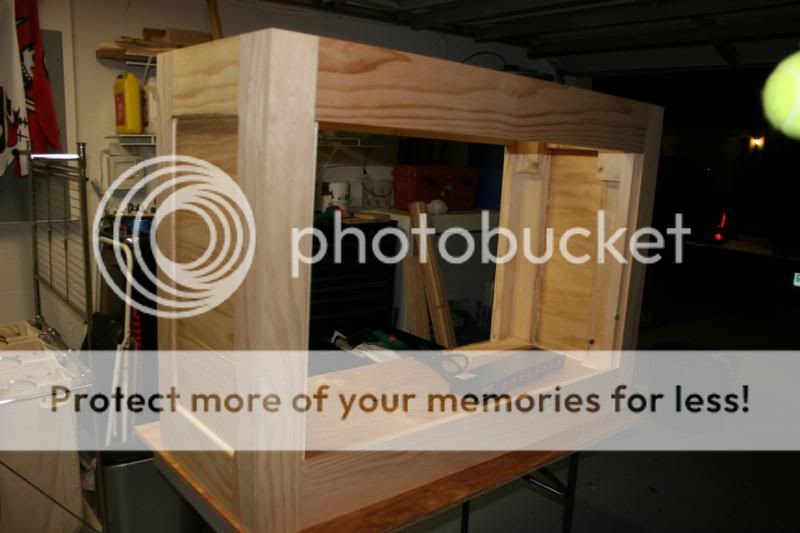
* Craftman router & table combo the ryobi ones at home depot are now cheaper than this one, but i got mine on sale ....using it w/ 45degree bit & fence to make trim pieces for my hand-made doors. also using the router to cut channels for steel braces to sit below edge on sides where exterior skin will be mounted. also using it w/ an edging bit to cut my exterior edges flush w/ each other

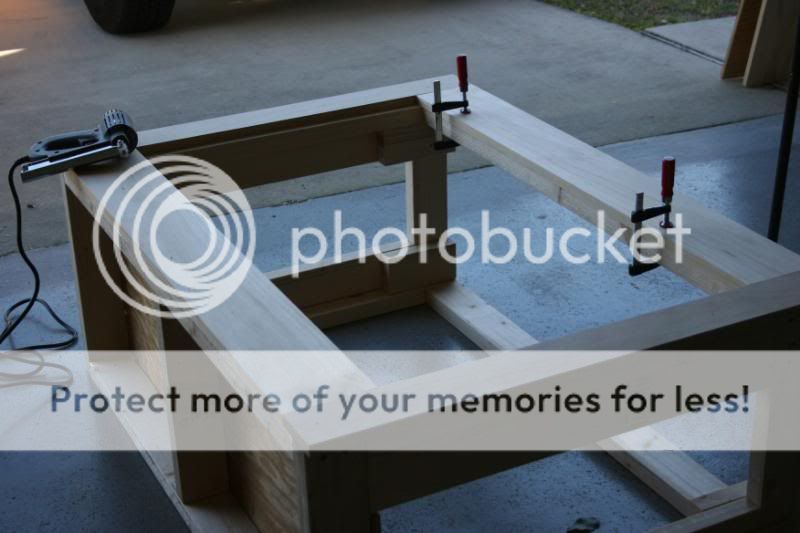
* clamps....what can i say....you can't have enough of them in various sizes

* circular saw.....used it once or twice & said to heck w/ this & bought the table saw LOL....glad i only gave $29 for it on sale

* Countersink bit gets your screws below the edge. useful when "skin" will be going on top of screws.

* if you are using long screws, it is also helpful to use a drill slighly smaller than the screw you are going to put in & pilot-drill the hole as deep as possible first. makes running the screw in ALOT easier & also helps keep the wood from splitting on the thinner stuff

* lastly, i bought (2) sets of these plastic folding sawhorses. along w/ a piece of 2'x4' they make a good inexpensive stand for the miter saw, place to lay bits etc, or as you would normally use a sawhorse LOL
 
Here is what I did, hope it helps. When I bought my tank from spsfreak he had already built the stand out of 2x4s but had not skinned it. I decided to wrap it in 3/4" oak. I could have used thinner plywood but I used 3/4" so I would have a good, solid wall to mount my doors on. I pre-measured all my plywood and went to Lowes and had them cut all my plywood for me since I do not have a table saw. I used wood screws and screwed the plywood to the frame. I then used stain grade trim to make the stand look like like I wanted. I had put the screws where I knew the trim would cover them. I cut the openings out with a small battery operated circular saw and ordered my doors online. It was really easy.

Heres how it turned out. Keep in mind I am not a carpenter and had never built anything like this before.

IMG_2287.jpg
 
That is very nice...definately helps. Very nice.

Good point about mounting the doors...may need to consider thicker wood on front.
 
another option when having to do screws on the exterior is to counter-sink them w/ the bit i mentioned, then fill the holes in w/ wood putty. once the putty dries, sand it smooth...either w/ an inexpensive orbital power sander or by hand w/ a piece of sandpaper & the cheap sanding blocks

for mine, i have battery-operated brad nailer that came in in my craftsman combo. i'm gonna brad nail my exterior pieces on the stand frame & then use a small center punch to sink them in & then use the wood putty method
 
That is exactly what I did to finish mine, James. Easy way to do it and the finished product is very nice.
 
I though I would update this thread and show you what I came up with-thanks for all the suggestions.


2-08-09006.jpg


IMG_3691.jpg


IMG_3700.jpg


IMG_3769.jpg


IMG_3798.jpg


IMG_3799.jpg
 
when skinning a 2x frame, has anyone ever

- sprayed/brushed rubberized-coating onto the inside of the panels, so the sounds inside the cabinet get absorbed instead of modulating the panels to transmit sound into the room?

and, if using magnets to hang rubberized-coating treated panels,

- setup the magnets so they are not touching magnet-to-magnet, such that the pannels do not have direct contact with the frame (isolated by the rubberized-coating) so they can't be modulated by vibrations in the frame?

has either, would either, make a difference in sound levels in the room?
 
<a href=showthread.php?s=&postid=14048630#post14048630 target=_blank>Originally posted</a> by RedEDGE2k1
I've said it before and I'll say it again...I don't understand why so many folks on here choose to build a 2x4 frame then wrap it in thin plywood. Why not save yourself the time, weight, and money and just use thicker plywood to begin with and no "frame"?

StandOptions.jpg

Out of curiosity, does any one have pictures of how these joints are made and what they look like? What needs to be considered while making this type of stand?
 
<a href=showthread.php?s=&postid=14549911#post14549911 target=_blank>Originally posted</a> by Rhodes19
Out of curiosity, does any one have pictures of how these joints are made and what they look like? What needs to be considered while making this type of stand?

if you don't mind the screws showing, you can attach them in the overlapping ends....just remember to drill pilot holes 1st to keep the wood from splitting

a good tool for doing that is THIS. it drills the pilot hole & makes a countersink for the screw at the same time :)

if you plan to paint the stand, you can fill the holes w/ wood putty & sand it smooth before painting & theey'll never be seen. if you plan to stain it, this isn't the best metod as the wood putty filler doesn't stain very well & ends up standing of real bad

the other option is to pocket drill it. to do that you need THIS or THIS. i have the 2nd one & it works GREAT. the biggest difference in the 2 (besides the price) is that the 2nd one has the clamp as part of the jig & the 1st one you have to have your own clamp....but the 2nd one can be used on something already together if you need to add an extra hole. like i said, i like the 2nd one.

if doing pocket drilling, make sure the screws you use have a flat back at the top of the screw....like a T. regular deck screws will have a V back & this can & will split the wood causing the join to fail.

my framed & skinned stand is built in a combination of regular screwed-thru joins & pocket drill attached joints. for instance....the legs are attached together using the screwed-thru method, but i didn't use the screw-strips to attach the legs to the top & frame....i did that w/ pocket drilling

CLICKABLE THUMBNAILS.....pocket drilling 1st pic....screw-thru 2nd pic:

 
Last edited:
Thanks James3370,

I have the tools and actually used the Kreg jig for the first time on my 180 stand. I had a mis calculation for the leg height and am going to make another one the same way but with the corrections. I saw the plywood stand comments and sketches but no real detail on how its joined and assembled. There was mention of dattos and biscuits but no pictures of what it looks like. I am a visual learner and pictures help! LOL. I'm going to use RocketEngineer's design for my 180 but I would not mind tring a plywood stand for my two 45 tanks.
 
<a href=showthread.php?s=&postid=14550547#post14550547 target=_blank>Originally posted</a> by Rhodes19
Thanks James3370,

I have the tools and actually used the Kreg jig for the first time on my 180 stand. I had a mis calculation for the leg height and am going to make another one the same way but with the corrections. I saw the plywood stand comments and sketches but no real detail on how its joined and assembled. There was mention of dattos and biscuits but no pictures of what it looks like. I am a visual learner and pictures help! LOL. I'm going to use RocketEngineer's design for my 180 but I would not mind tring a plywood stand for my two 45 tanks.

If you click on rededges red house his build thread goes into a lot of detail-you may find your answers there-
 
<a href=showthread.php?s=&postid=14550568#post14550568 target=_blank>Originally posted</a> by buccard
If you click on rededges red house his build thread goes into a lot of detail-you may find your answers there-

Hi Roger,
I just re read his build. I didn't get beyond the computer graphics the first time. Now it answers a lot of my questions. I was under the impression the plywood supported the weight of the tank and I didn't understand how biscuits and glue could hold up about 2000 lbs (my 180 full). Thanks.

Chris
 
Back
Top