You are using an out of date browser. It may not display this or other websites correctly.
You should upgrade or use an alternative browser.
You should upgrade or use an alternative browser.
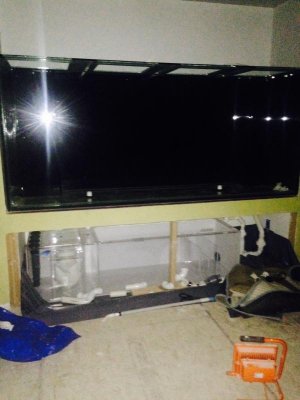
Tall 485 gallon in-wall build
- Thread starter CrazyDiamond
- Start date
CrazyDiamond
New member
Dsailf28r-
Sorry; I did not buy it directly from a manufacturer; So I have no idea who made it. I got it from a buddy of mine. But, whoever built it is my hero. This aquarium is built like a TANK. The front glass is low iron & the glass that was used is super thick all the way around (commercial grade).
If you find someone who will make one out of glass like this (this size) for you, make sure it is commercial grade.
CrazyDiamond
New member
CrazyDiamond
New member
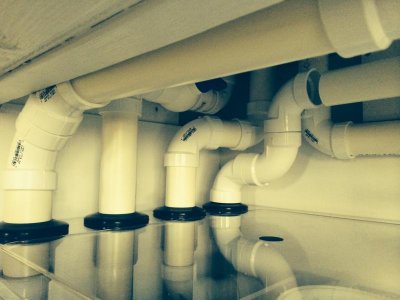
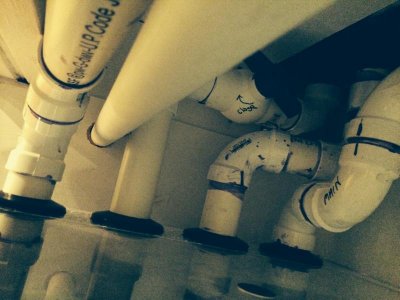
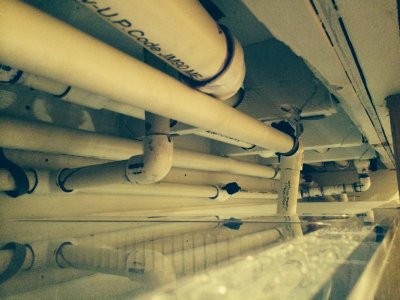
Plumbing aint easy....
Plumbing aint easy....
Geeze Louise - Some tight working space underneath the aquarium, but I got all the major drain line plumbing worked out. Kinda felt like a mechanic working underneath a cadillac eldorado on my back for 4 hours. Nothing like a little pvc cement dripping straight onto the forehead.
Anyway, glad that phase is completed. (Or so I hope) I am filling it up tonight with fresh H20 and I'm gonna let the water sit for a few days ; hoping all my bulkheads and fittings are well sealed. Will probably wake up every 30 minutes thru the night to go check on it.
Fingers (and toes) crossed.
Attachments
CrazyDiamond
New member
CrazyDiamond
New member
Birkholz51
New member
Very interesting! Following!!
sixpackgarage
reef mechanic
really epic build. what is the stand made of?
CrazyDiamond
New member
Thx - yes this build is definately gonna be a project and a half. The stand is made of wood. 2x6's / 2x4's and 2x10's. Everything is doubled up with metal brackets and painted in a white moisture / mildew resistant paint.
So far, no leaks in the bulkheads on the bottom glass (thank god). I am hooking up the closed loop pump and main pump for a test run of the pvc pipe fittings later this afternoon. Then the 6 stage RO/DI water filtration unit and mixing station.
Back to work this week - so, not too sure how much will get done.
CrazyDiamond
New member
Ran the main and closed loop pumps for about an hour or two. I had to adjust the standpipe height (i.e. make it taller) to eliminate the sounds of niagra falls in my overflow boxes. That was easy. Good news is : All pvc fittings & connections are dry. Bad News : one of the darn bulkheads on one of the closed loop returns (bottom glass) is leaking. Tried tightening it up, but it appears the leak is where it connects via cement to the pvc. So, I will need to drain the tank & take out the existing bulkhead ; then replace it with a new one / re-plumb the line.
Other than that, all good. I will get it fixed. Dry Rock is supposed to be getting delivered tomorrow. May need to pull a few all nighters if I want to get her goin by weeks end.
Other than that, all good. I will get it fixed. Dry Rock is supposed to be getting delivered tomorrow. May need to pull a few all nighters if I want to get her goin by weeks end.
CrazyDiamond
New member
CrazyDiamond
New member
No leaks
No leaks
Great progress - tank is water tight ! All pvc fittings are perfect (no leaks) and I ran the system with freshwater through the main pump and closed loop. Good to go ! Framed up the skeleton facade and my contractor will be moving to do all the fancy trim work as a next step.
I received the dry rock delivery and will have to get it aquascaped before the salt water and live sand goes in. Salt water mixing station and ATO will be plumbed once I start getting her filled up.
Hopefully I get some time this weekend to make a dent on the to-do list.
Attachments
CrazyDiamond
New member
Trimwork is coming along....
Trimwork is coming along....
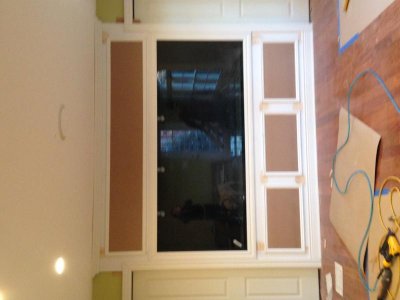
Matt76 - thanks; it is starting to come together. The trim work is assembled and all nailed up around the aquarium. We used trim to match the crown molding and trim throughout the addition. It is a nice thick detailed design - not the wimpy stuff
Three panels of MDF on the bottom with shadowbox trim design around them and one long one across the top. They will be held in place with magnets and be easily removable for when I need to get into the aquarium from the top or into the sump area down low.
Everything will be caulked and nail holes / joints will be filled with wood putty and then primed / painted in a nice Linen White Benjamin Moore Oil Based paint.
Should look sweet when it is done !
Pic is a little blurry/ but you'll get the idea of what I am going for with the design.
Attachments
CrazyDiamond
New member
Aquascaped and looking good
Aquascaped and looking good
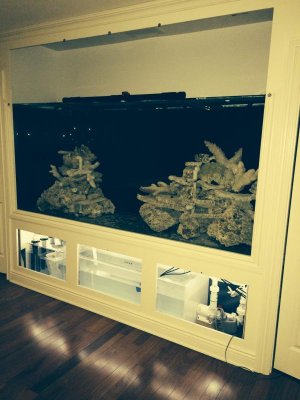
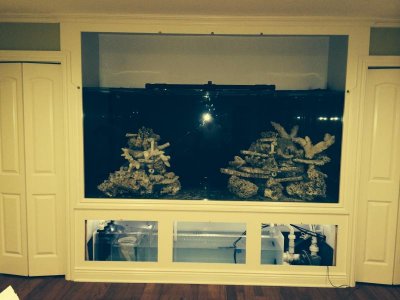
I got the dry rock delivered and set-up the aquascape on saturday. 150lbs pukani, 100 lbs shelf rock and 50 lbs Tonga Branch. I made two structures in the aquarium. The one on the left takes up about 25% of the tank and the one on the right tales up almost 50%; leaving about 25% of open space inbetween the two structures for fish to swim.
It took me about 3-4 hours to place all the rock and about another hour to fix some epoxy putty to the rocks. I used about 6 sticks toake sure all the rocks are solid.
Lots of ledges for corals and open rockwork for water flow. I have the rocks built around two closed loop returns with two 1" 45 elbows per return that will be fed by the L1 Vectra. That pump will push close to 3000 gph and can be set either as a constant flow or a random mode. I hope it pushes enough water so that I don't need to get any additional power heads; we'll see.
Anyway, looking forward to filling up the tank with salt water some time this week and getting her going so I can add the live sand, cure the rock and be on my way to adding some livestock in a few weeks.
I will post a pic with all the cabinet panels on so everyone can see the trimwork once the 2nd coat of paint dries
CrazyDiamond
New member
CrazyDiamond
New member
CrazyDiamond
New member
Filling Her up...
Filling Her up...
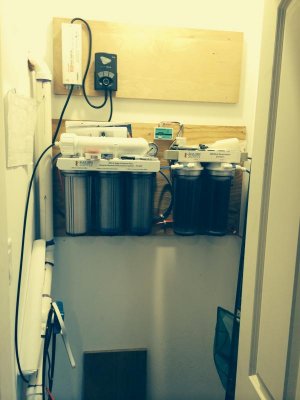
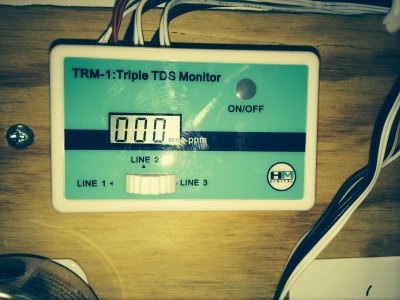
Allright- I am filling up the aquarium with RO/DI H20. I am taking TDS from 10PPM to 0 PPM on a 75 gallon per day BRS 6 stage system. Started the fill process 2 days ago and have been running 24x7 non-stop. I figure I should be all filled up by Tuesday-ish.
Also, I am using 15 (20 lb) bags of the caribSea Fiji Pink for substrate. It has a really nice look to it with about a 2-2.5" sandbed throughout the display.
I'll mix my initial salt mixture in a Brute 40 gallon can and pump it into the system as the 'last leg' of the fill, crank up the heaters and start running the pumps. Once I get her going, I suspect that I'll begin to get some die-off from the rocks and it will smell like low tide in here. (Of course I'll probably be at work and that lovely phone call will come from the wife - hee hee).
Can't wait to get the water moving in the tank and begin the cycle.:bounce2:
Attachments
CrazyDiamond
New member
CrazyDiamond
New member
All Trimmed and Painted
All Trimmed and Painted
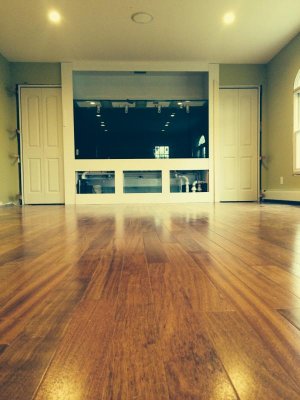
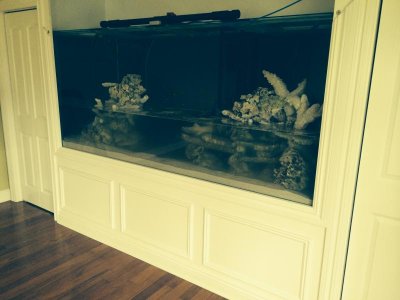
Here is a nice shot of the completed Trimwork around the Aquarium.
We used really strong earth magnets to hold the three small bottom panels & the one large top panel in place. All the panels are easily removeable for access to service the tank and sump.
We may decide to paint the panels green to match the walls and leave all the trim white. Not sure yet. Wife keeps looking at pintrest for 'inspiration'.
Similar threads
- Replies
- 6
- Views
- 3K
- Replies
- 2
- Views
- 308

