"The Cavernous Reef" - A 180G Build

rickcasa

New member
So I figure this is my chance to realize this vision of The Cavernous Reef in my head ever since I donned on my first snorkel gear when I was just 7. Exploring the rocky shores of Guam on my annual summer visits to join my dad who was working abroad as an architect, I find myself chasing after one colourful fish after another through the underwater rocky cliffs and natural deep caves, I peer skyward to let the blue light guide me to the surface for the Nth time to gasp another breath filling my lungs so I can quickly dive down to resume my quest of spotting as many fish on that day's outing.

How do I get this vision in a glass box?? You see, it's not only about the fish, the corals, the rocks...it's more about how caverns and overhangs paint shadows and deliver that sexy silhouette. But last I read, shadows don't grow much corals, lol.

Andros-Blue-Hole.jpg


Diving-the-Cenote-Caverns-and-Caves-in-Mexico.jpg


Mindy-Scuba-Diver.jpg


scuba_diver-2638.jpg


Healthy-coral-reef-and-di-001.jpg


tumblr_livrjwjcEM1qi9fxdo1_500.jpg


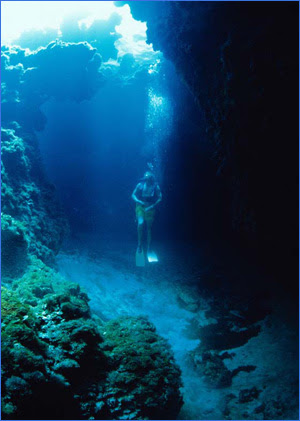
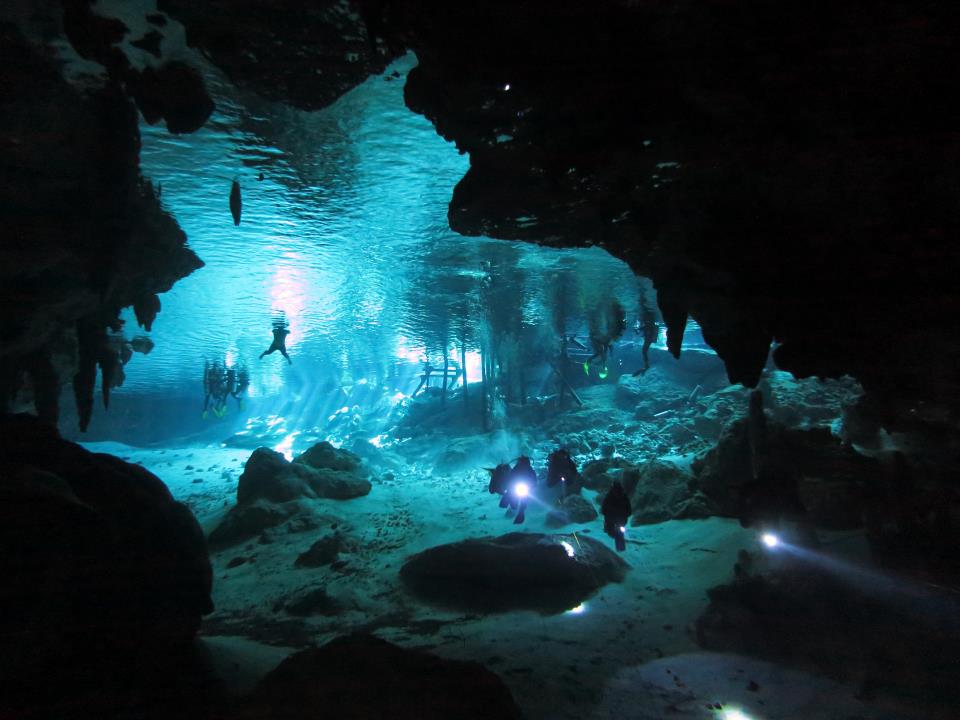
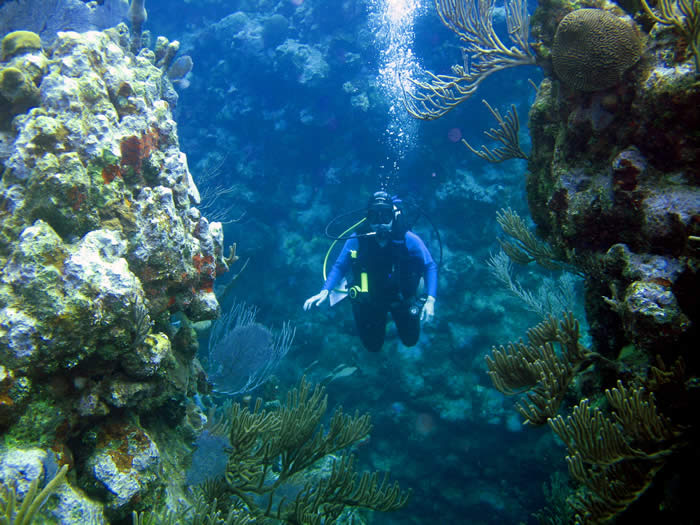
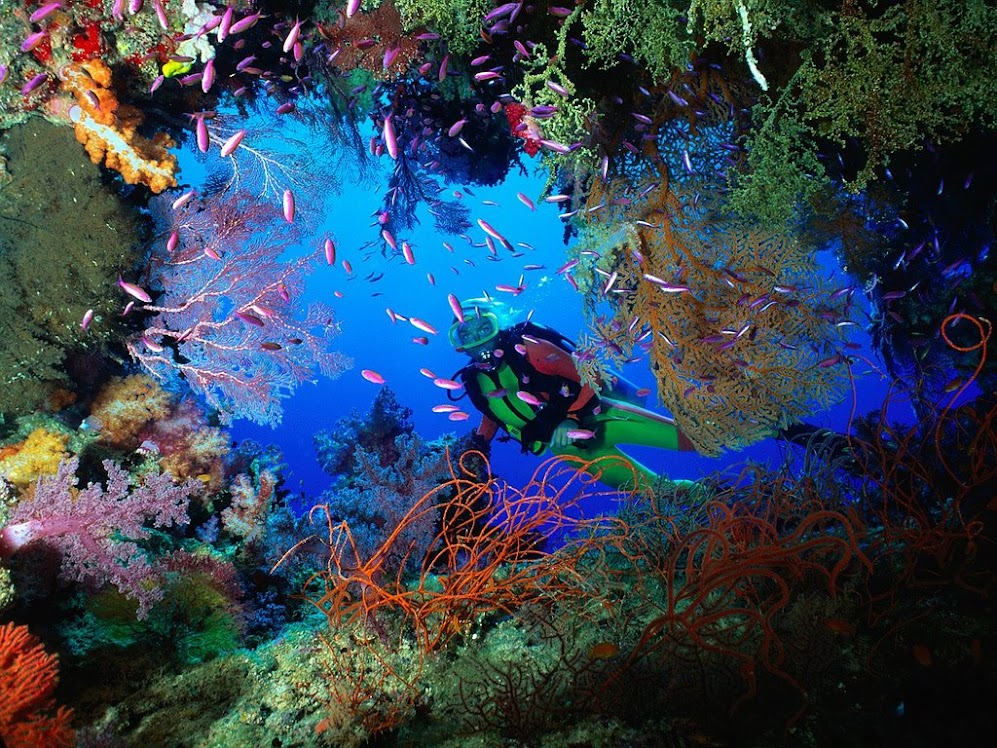
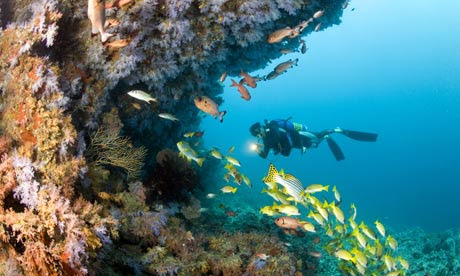
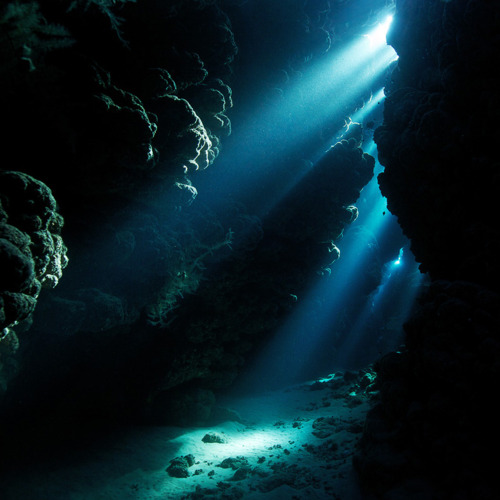
Picture my clown trigger (yes, reef safe and gets regular grooming from a coral banded pair and jockeys a red fire shrimp) swimming through a brilliant, shimmering mixed coral forest on the left side and meanders through a dark gorgonian-lined cavern. The rock work continues to the right side with a wrap around cliff structure rising to form a lacey overhang over a gsp covered bottom and zoa garden. I need suggestions. :spin2::confused::spin2:


Here's my equipment list that I have acquired over the past 2 months.

TANK: Miracles 180G (72x24x24) 3 sided Starfire; double exterior overflows; closed loop drilled at the bottom (1 in, 4 out).

SKIMMER: Super Reef Octopus 3000int

SUMP: 54"x18" Acrylic Wet/Dry (Converting to include built it reactor chambers and filter socks

RETURN PUMP: DC5000 or Velocity T4 (may use for water change)

CONTROLLER: Aquatronica . This was bundled in when I bought the tank. Thought I was going to resell it in favour of a Neptune set but after much research I think I'll buy the touchscreen display and control ATO, lights, CL pumps.

LIGHTS: 2x Maxspect Razors 27" 160w-16000K

FLOW: 2x MP40wes; CL

REFUGIUM: 100G RDSB

Only thing missing I think is my CL pumps. Since I want to keep energy consumption low, I will overlook any Reeflo's obvious advantages. I was considering OM as I have a modified ver3 sourced out, but leaning towards 2 DC5000s or a Waterblaster 10000.
 
The sump wont fit under the DT stand as it's a taller that average height. So it will be right next to the tank under the counter top which I intend to build with bar sink.

The tank bottom is still under scrutiny. I have 200lbs of CaribSea Live Black Hawaiian all set to go, but I like the idea of a detritus controlled base without going bare bottom. I may go DIY concrete (Epoxy clad) strata along the sides and back and have a lagoon of 3" deep sand in the middle.

180+Build.JPG


Here's my initial plumbing layout. I really don't know how to plumb the dual exterior overflows.

Plumbing1.JPG
 
I would recommend a second separate plumbing for the overflow boxes, just in case something gets stuck in one of them the other works flawless and keeps your chances of a dry room. So connect the emergencies and the main return lines to separate plumbing.

Best regards
Thomas
 
I remember seeing a 60 gallon cube NPS tank where the guy created a "cave" much like the second picture in your original post. He made the entire rock structure much like zoo and aquariums exhibits do.

I know I read the thread on this website but it was about two years ago and I never saw the tank with water in it but he did get the cave completed. Was a great idea.
 
Wow, great looking tank, love the external overflows. Would agree w running plumbing for each of the drains, just in case.
 
An opaque acrylic sheet with holes of various sizes over top of part of the tank could mimic the shafts of light shining down through the overhanging reef without actually taking up tank space with rockwork if that's the sort of look you want to go for.

Dave.M
 
I would recommend a second separate plumbing for the overflow boxes, just in case something gets stuck in one of them the other works flawless and keeps your chances of a dry room. So connect the emergencies and the main return lines to separate plumbing.

Best regards
Thomas

Thanks Thomas, bmullikin1... I was trying to keep the pipe runs down to a couple keeping the clutter around the tank down. Even thought about drilling each overflow and connect them with a 2" tube so they equalize each other's volume and then I can treat both boxes as one. Then go with a Bean Animal system with one extra emergency drain to boot for redundancy. But that just introduces more points of leakage.

So here's food for thought. These overflows have 4x 1 1/2" holes combined. If kept wide open, no fancy standpipes, and with a fairly short drop to the pipe leading to the sump, will there be much gurgling still I wonder? I could tune the Return down if need be. Do I really need 10X turnover for this 180 given the generous flow that will be delivered by 2x MP40 + CL?
 
An opaque acrylic sheet with holes of various sizes over top of part of the tank could mimic the shafts of light shining down through the overhanging reef without actually taking up tank space with rockwork if that's the sort of look you want to go for.

Dave.M

Thanks for the idea Dave, you got what I'm after!! Shafts of light rays...I almost wish the tank was taller and deeper, come to think of it. But I'll do with what I have. Even taking it further by having these varying light columns somehow 'slow dance'. Maybe think adding blue underwater moonlights on the right side and scoot the 2 Razors to the left.

Thanks, wlyon. I know I can't get away from doing massive diy aquascaping, so I better read up more on this. Love this site for the volumes of infos at my fingertips. There's not much anyone can ever imagine that hasn't already been done on this site.
 
Last edited:
If you use the holes-in-roof idea, you could put softies or gorgs on top of it so that when they move around they will change the beams of light going through the holes.
 
A shadowbox behind the tank will add the sense of depth and provide shadows. Check out this thread or do a search on shadowbox:
http://www.reefcentral.com/forums/showthread.php?t=1868825&highlight=shadowbox

This should be a fun build, I'm subscribed.


I'm familiar with this build and in fact was the inspiration for me wanting to get a bigger tank. However, I quickly dismissed that idea when I landed this exterior overflow tank and blacked out back panel.... So, how could pull it off??

Tradewinds, you got me back on track!! I think it may even be better because adding the rock columns effectively and creatively obscures the overflows adding a more dramatic effect. Check out these crude sketches I did this morning! Don't look at the top of the rockwork yet. I need to carve them out to make it more open to the 'sky'. That's when I'll add Dave's idea of a black holey acrylic roof.

Caverns_01.JPG


Caverns_02.JPG


Caverns_03.JPG


After a second glance, the rock work looks too dense but I don't intend to make the tank look crowded and 'steal' space away from the inhabitants. I need to keep editing away rock work so I'm left with an open concept while achieving the desired effect.
 
Last edited:
If you use the holes-in-roof idea, you could put softies or gorgs on top of it so that when they move around they will change the beams of light going through the holes.

That idea is a keeper! Thanks Santa Monica!


Come along for the ride FUA, rpjaws and SushiGirl...I'm learning a lot from you all. Thanks!
 
Make sure when you do this:

Caverns_01.JPG


You still have easy access to this closed loop intake. they will clog.

IMGP1413.JPG


Here is how I did it. those strainer pop right off for cleaning (I have an extra set so I just have to exchange them)

01012_25_2012.jpg
 
I was thinking a bit more about the holey roof. ;)

yet_another_church_ceiling_by_milesspencer1-d5ui6aq.jpg


You might want to start out with a sheet of cardboard first to experiment as to where, how many, and how big to make the holes. Live with each version for a few days until you find your final solution. A sheet of acrylic is going to cost you major bucks and you will want to do it right the first time.

Dave.M
 
Back
Top