Air Powered ATO
Air Powered ATO
OK... I would be pretty disappointed if I looked at these instructions to learn how to do a DIY project. I couldn't take very good pictures because everything's assembled and zip-tie'd in. This would have been better to write up DURING the build. Anyways..
Parts:
-
Air powered pump from Petco
-
Relay from Radio Shack
-
12v power supply
-
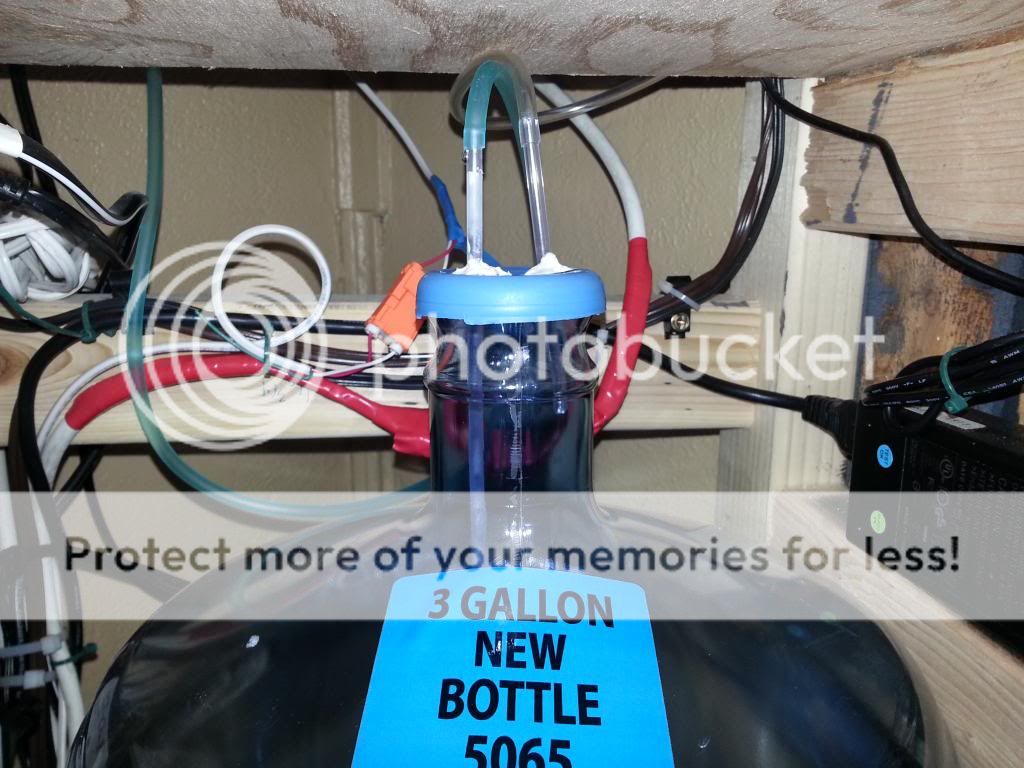
Reservoir: I found a great 3 gallon drinking water jug at the grocery by the water refill machine. You could use a Gatorade bottle or something, but you'd need to refill more often.
-
bracket for float switch(es)
-
airline tubing
-
rigid airline tubing
-
Super glue or silicone or both
-
Project box
- OPTIONAL misc items:
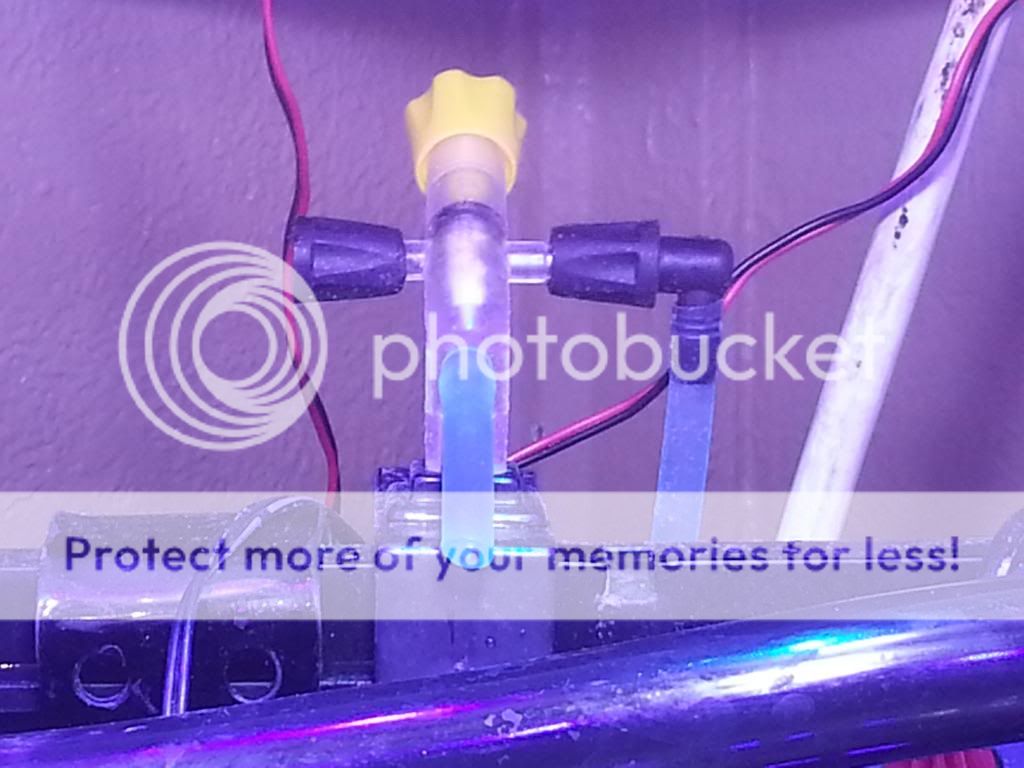
clamp on airline valve to secure output of airline tubing to tank,
shrink tube and solder for any splices if you don't want to use
wire nuts,
extension cord if you don't want to cut your air pump's power cord.
Socket for your relay if you'd prefer to use screw terminals on your electrical connections.
Put simply, this ATO uses the air pump to force air into an airtight reservoir which forces water out of another piece of airline tubing running to your tank.
Steps:
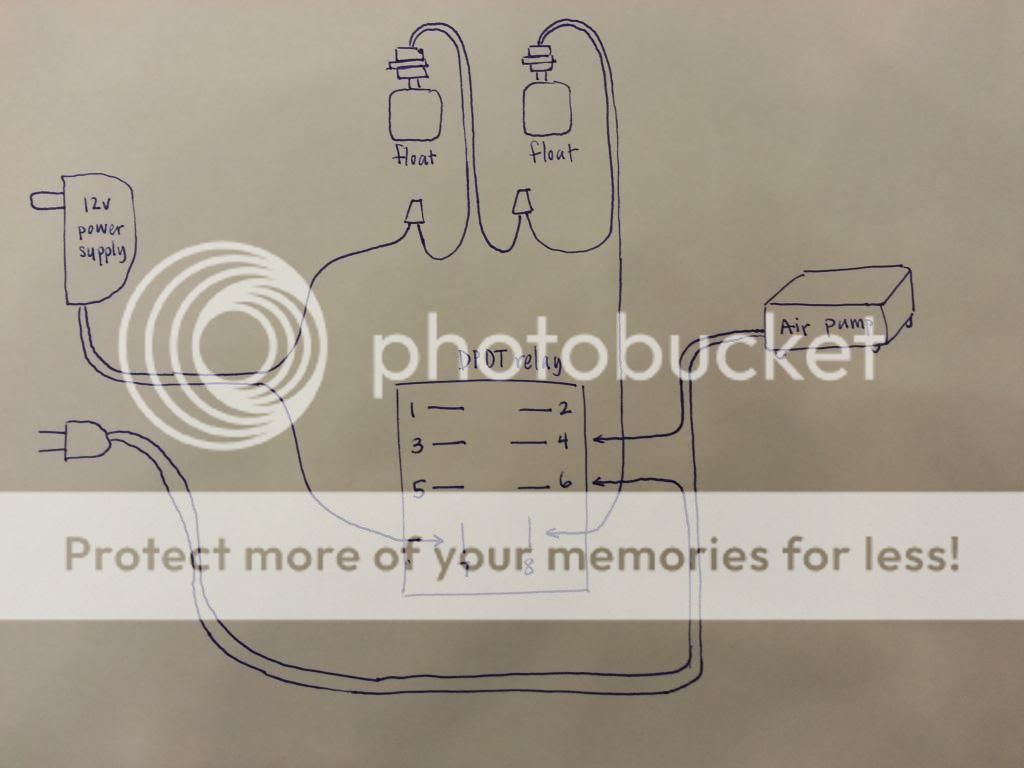
Electrical:
notes: You're using the 12v relay and power supply simply to keep 120v out of your tank. You will have to cut your air pump's power cord. If you'd rather not void your $10 Petco air pump, you could always use a cheap $2 extension cord to cut into.
1) Take the power cord for your air pump (or extension cord) and cut ONE wire. Peel a couple inches back on each side and strip back a bit of the jacket. These exposed ends plug into pins 4 and 6 on your relay. The order doesn't matter. I soldered my wires to the relay pins. In retrospect, I would have definitely grabbed a few female wire connectors and used those. Much easier.
2) Take the wire from your float switches and make connections to 12 volt power supply and pins 7 and 8 on the relay. You can use 1 float switch or 20. Doesn't matter. I won't get into details on how many float switches you want to use for safety or redundancy or the best way to wire them. There's a lot of info on that here about wiring float switches. My diagram shows 2 float switches. You may need to extend your float switch wiring down to your relay. If you do, use whatever wire you're comfortable with to extend it. I used an old plug in wire you would find on the back of a VCR or something. I suggest using shrink tubing and soldering your splices for safety.
Both power supplies will be plugged in and left plugged in. The signal from the float switches activate the relay which converts the 12v to 120v, activating the air pump. Stuff your relay into a project box, tidy your wires, and be done with it.
Hand drawn diagram below:
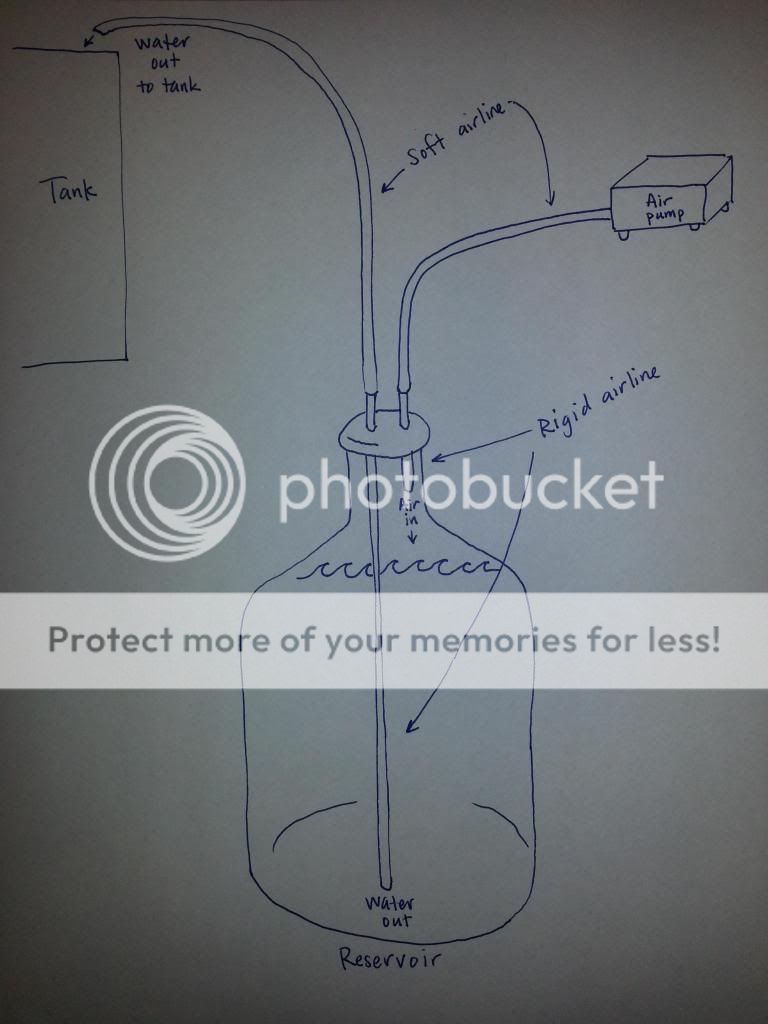
Tubing and reservoir:
1) Take the tight fitting lid of your reservoir/container and drill 2 holes just a bit smaller than your rigid airline tubing. Cut one short piece, about 4", then the other longer one to reach to the bottom of your reservoir with about 2" left to come out of the top. Push the tubing through the holes you drilled. I suggest Super gluing the tubes in place AND siliconing them for maximum airtightness. The air pump output tubing goes onto the shorter tube on the lid. Run another piece of soft airline tube from the longer piece of rigid tubing on the lid up to the tank. I used the clamp on airline valve shown in the pic below, which I found in the FW section of my LFS. This piece basically keeps the tubing out of the water to eliminate the possibility of a syphon.
notes: this $10 Petco air pump easily pumps the 4 ft from my reservoir to my tank. If you have a lot further to go, you may want to splurge on a $15 pump

I would also suggest letting the silicone or caulk dry until firm and dry. I made the mistake of being impatient and got it wet while it was soft.
Float switch bracket:
I won't get into a ton of detail on this. You can buy one, make one, or maybe you have one lying around. If you need to make one, run to your local store that sells acrylic, snap off a couple pieces, and shape them as needed for your tank and float switches with a lighter or other heat source. You should really try to make this thing adjustable.
Couple more comments..
There are a lot of ways you can splash/snail proof your float switch(es). Pill bottle, 35mm film canister, pvc end caps. I used pvc end caps and drilled a bunch of little holes so water can flow through. I find that this setup is perfect in terms of the system coming on and off. It's not constantly switching on and off.
Also, this is a GREAT setup if you ever want to does KALK. No pump comes into contact with the water and you have an easy jug to work with and clean out if necessary.
Good luck and enjoy. Let me know if anything needs clarification.