cmacld
New member
a week before Xmas i had to give my dear friend TSAZAMA his gift (as i couldnt stand to have another tank sitting in my basement).
it has taken 3 months to progress further than moving it into his basement..
The time is here... and tag along if you like.
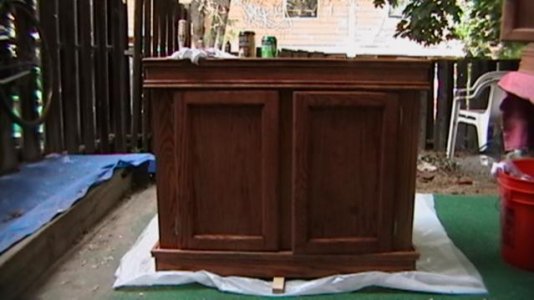
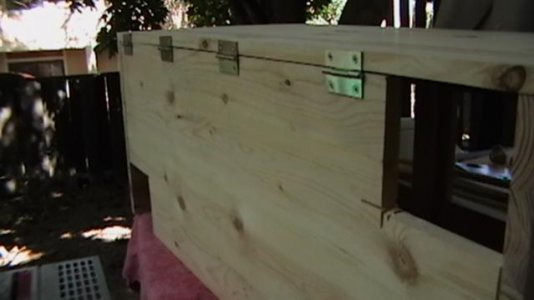
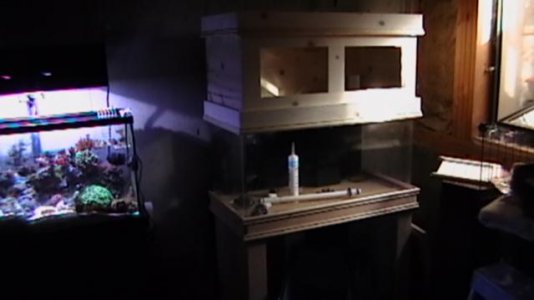
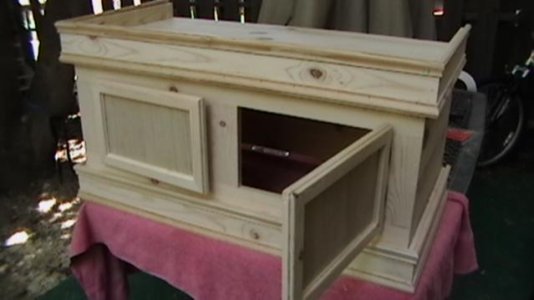
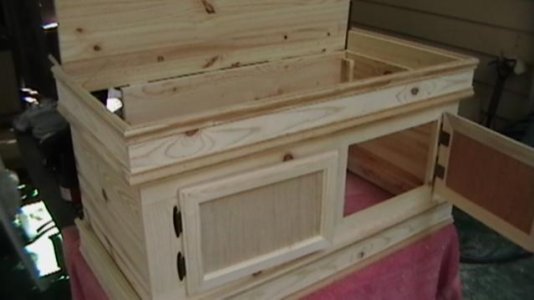
The Stand
when we picked up the tank the stand was a bright cherry almost red finish.. as we wanted to match it to tonys house.... we would need to sand her down
<a href="http://s27.photobucket.com/albums/c171/cmacld/tsazama/?action=view¤t=IMG_0542.jpg" target="_blank"><img src="http://i27.photobucket.com/albums/c171/cmacld/tsazama/IMG_0542.jpg" border="0" alt="Photobucket"></a>
<a href="http://s27.photobucket.com/albums/c171/cmacld/tsazama/?action=view¤t=IMG_0550.jpg" target="_blank"><img src="http://i27.photobucket.com/albums/c171/cmacld/tsazama/IMG_0550.jpg" border="0" alt="Photobucket"></a>
<a href="http://s27.photobucket.com/albums/c171/cmacld/tsazama/?action=view¤t=IMG_0549.jpg" target="_blank"><img src="http://i27.photobucket.com/albums/c171/cmacld/tsazama/IMG_0549.jpg" border="0" alt="Photobucket"></a>
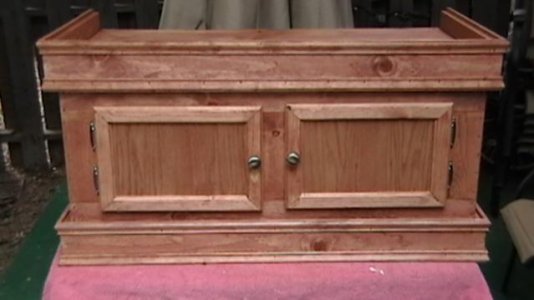
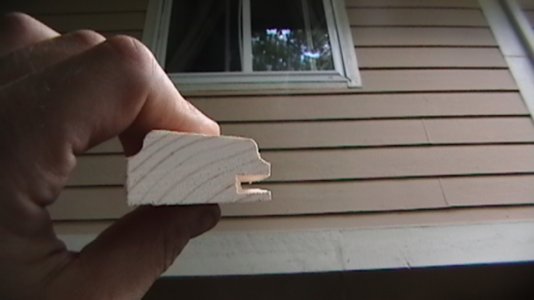
not being super impressed with the rounded edges of the stand...
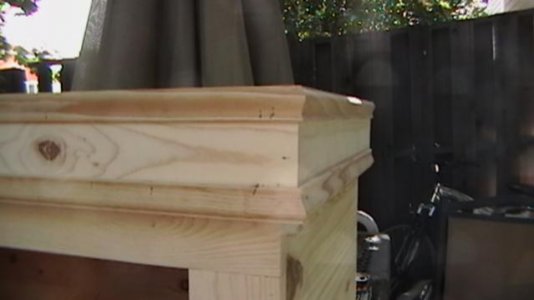
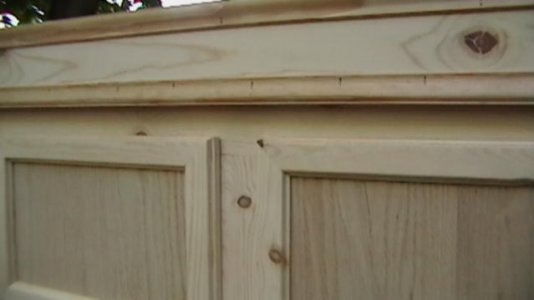
we wanted to add a nice molding to it..
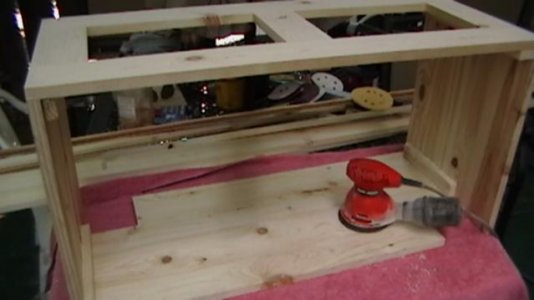
however we ran into a snag..
the stand had been glued to death!! not to mention the biscuts holding this sucker together..
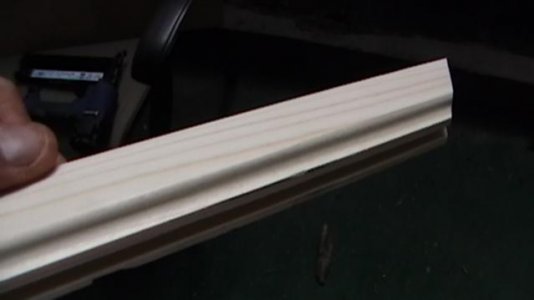
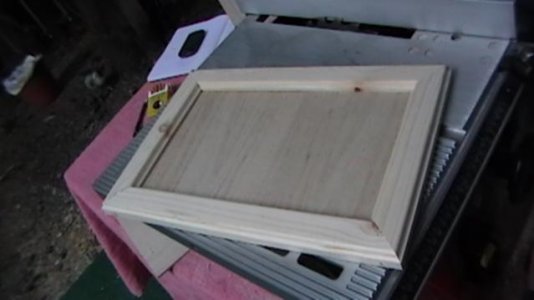
We found a great alternative to destroying the lip of the stand!!
A nice thin piece of crown should do the trick!!
<a href="http://s27.photobucket.com/albums/c171/cmacld/tsazama/?action=view¤t=IMG_0552.jpg" target="_blank"><img src="http://i27.photobucket.com/albums/c171/cmacld/tsazama/IMG_0552.jpg" border="0" alt="Photobucket"></a>
<a href="http://s27.photobucket.com/albums/c171/cmacld/tsazama/?action=view¤t=IMG_0551.jpg" target="_blank"><img src="http://i27.photobucket.com/albums/c171/cmacld/tsazama/IMG_0551.jpg" border="0" alt="Photobucket"></a>
<a href="http://s27.photobucket.com/albums/c171/cmacld/tsazama/?action=view¤t=IMG_0556.jpg" target="_blank"><img src="http://i27.photobucket.com/albums/c171/cmacld/tsazama/IMG_0556.jpg" border="0" alt="Photobucket"></a>
<a href="http://s27.photobucket.com/albums/c171/cmacld/tsazama/?action=view¤t=IMG_0557.jpg" target="_blank"><img src="http://i27.photobucket.com/albums/c171/cmacld/tsazama/IMG_0557.jpg" border="0" alt="Photobucket"></a>
<a href="http://s27.photobucket.com/albums/c171/cmacld/tsazama/?action=view¤t=IMG_0560.jpg" target="_blank"><img src="http://i27.photobucket.com/albums/c171/cmacld/tsazama/IMG_0560.jpg" border="0" alt="Photobucket"></a>
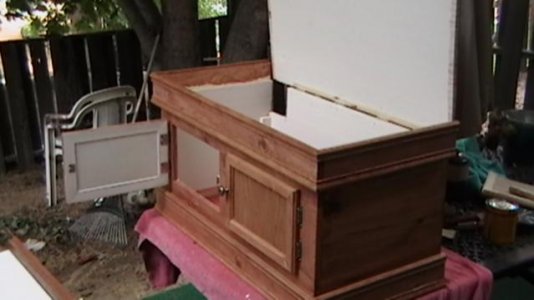
While all the sanding was going down on the stand (good job tony)..
I was trying out some NOVUS acrylic refinishing..
I must say.. i have never tried this method... but i have heard from many fellow reefers that it works great..
We found some and i thought we would give it a shot...
<a href="http://s27.photobucket.com/albums/c171/cmacld/tsazama/?action=view¤t=IMG_0544.jpg" target="_blank"><img src="http://i27.photobucket.com/albums/c171/cmacld/tsazama/IMG_0544.jpg" border="0" alt="Photobucket"></a>
now before we start... i should state that the left side of the tank was extremely scratched and the front and other side were no jem.. these pics dont even really do it justice you cant really see all the scratches...
here is the start..
<a href="http://s27.photobucket.com/albums/c171/cmacld/tsazama/?action=view¤t=IMG_0536.jpg" target="_blank"><img src="http://i27.photobucket.com/albums/c171/cmacld/tsazama/IMG_0536.jpg" border="0" alt="Photobucket"></a>
it has taken 3 months to progress further than moving it into his basement..
The time is here... and tag along if you like.
The Stand
when we picked up the tank the stand was a bright cherry almost red finish.. as we wanted to match it to tonys house.... we would need to sand her down
<a href="http://s27.photobucket.com/albums/c171/cmacld/tsazama/?action=view¤t=IMG_0542.jpg" target="_blank"><img src="http://i27.photobucket.com/albums/c171/cmacld/tsazama/IMG_0542.jpg" border="0" alt="Photobucket"></a>
<a href="http://s27.photobucket.com/albums/c171/cmacld/tsazama/?action=view¤t=IMG_0550.jpg" target="_blank"><img src="http://i27.photobucket.com/albums/c171/cmacld/tsazama/IMG_0550.jpg" border="0" alt="Photobucket"></a>
<a href="http://s27.photobucket.com/albums/c171/cmacld/tsazama/?action=view¤t=IMG_0549.jpg" target="_blank"><img src="http://i27.photobucket.com/albums/c171/cmacld/tsazama/IMG_0549.jpg" border="0" alt="Photobucket"></a>
not being super impressed with the rounded edges of the stand...
we wanted to add a nice molding to it..
however we ran into a snag..
the stand had been glued to death!! not to mention the biscuts holding this sucker together..
We found a great alternative to destroying the lip of the stand!!
A nice thin piece of crown should do the trick!!
<a href="http://s27.photobucket.com/albums/c171/cmacld/tsazama/?action=view¤t=IMG_0552.jpg" target="_blank"><img src="http://i27.photobucket.com/albums/c171/cmacld/tsazama/IMG_0552.jpg" border="0" alt="Photobucket"></a>
<a href="http://s27.photobucket.com/albums/c171/cmacld/tsazama/?action=view¤t=IMG_0551.jpg" target="_blank"><img src="http://i27.photobucket.com/albums/c171/cmacld/tsazama/IMG_0551.jpg" border="0" alt="Photobucket"></a>
<a href="http://s27.photobucket.com/albums/c171/cmacld/tsazama/?action=view¤t=IMG_0556.jpg" target="_blank"><img src="http://i27.photobucket.com/albums/c171/cmacld/tsazama/IMG_0556.jpg" border="0" alt="Photobucket"></a>
<a href="http://s27.photobucket.com/albums/c171/cmacld/tsazama/?action=view¤t=IMG_0557.jpg" target="_blank"><img src="http://i27.photobucket.com/albums/c171/cmacld/tsazama/IMG_0557.jpg" border="0" alt="Photobucket"></a>
<a href="http://s27.photobucket.com/albums/c171/cmacld/tsazama/?action=view¤t=IMG_0560.jpg" target="_blank"><img src="http://i27.photobucket.com/albums/c171/cmacld/tsazama/IMG_0560.jpg" border="0" alt="Photobucket"></a>
While all the sanding was going down on the stand (good job tony)..
I was trying out some NOVUS acrylic refinishing..
I must say.. i have never tried this method... but i have heard from many fellow reefers that it works great..
We found some and i thought we would give it a shot...
<a href="http://s27.photobucket.com/albums/c171/cmacld/tsazama/?action=view¤t=IMG_0544.jpg" target="_blank"><img src="http://i27.photobucket.com/albums/c171/cmacld/tsazama/IMG_0544.jpg" border="0" alt="Photobucket"></a>
now before we start... i should state that the left side of the tank was extremely scratched and the front and other side were no jem.. these pics dont even really do it justice you cant really see all the scratches...
here is the start..
<a href="http://s27.photobucket.com/albums/c171/cmacld/tsazama/?action=view¤t=IMG_0536.jpg" target="_blank"><img src="http://i27.photobucket.com/albums/c171/cmacld/tsazama/IMG_0536.jpg" border="0" alt="Photobucket"></a>
")