You are using an out of date browser. It may not display this or other websites correctly.
You should upgrade or use an alternative browser.
You should upgrade or use an alternative browser.
240 gallon acrylic reef build
- Thread starter h2so4hurts
- Start date
h2so4hurts
New member
The shop I go to only has WO16 and WO3. WO3 is way too fast setting for me. I like to let WO4 soak in. It gives better seams IMHO. I'll do a video or something if I have time.
h2so4hurts
New member
Moved all of the sheets to the master bedroom. I was afraid they'd warp in the heat in the garage. My wife is already ****ed that I'm going to be building the tank in our bedroom, but it's the only carpeted room in the house that's big enough to fit this beast.
h2so4hurts
New member
I'll take melted carpet over stained wood floors any day.
h2so4hurts
New member
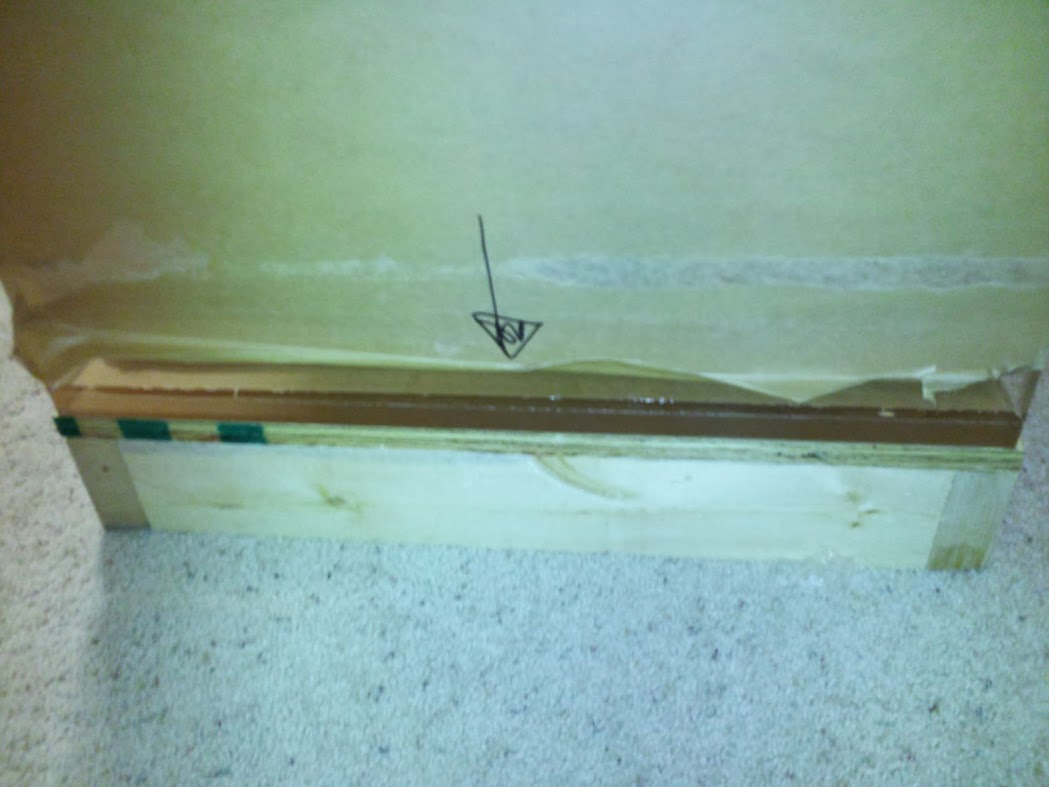
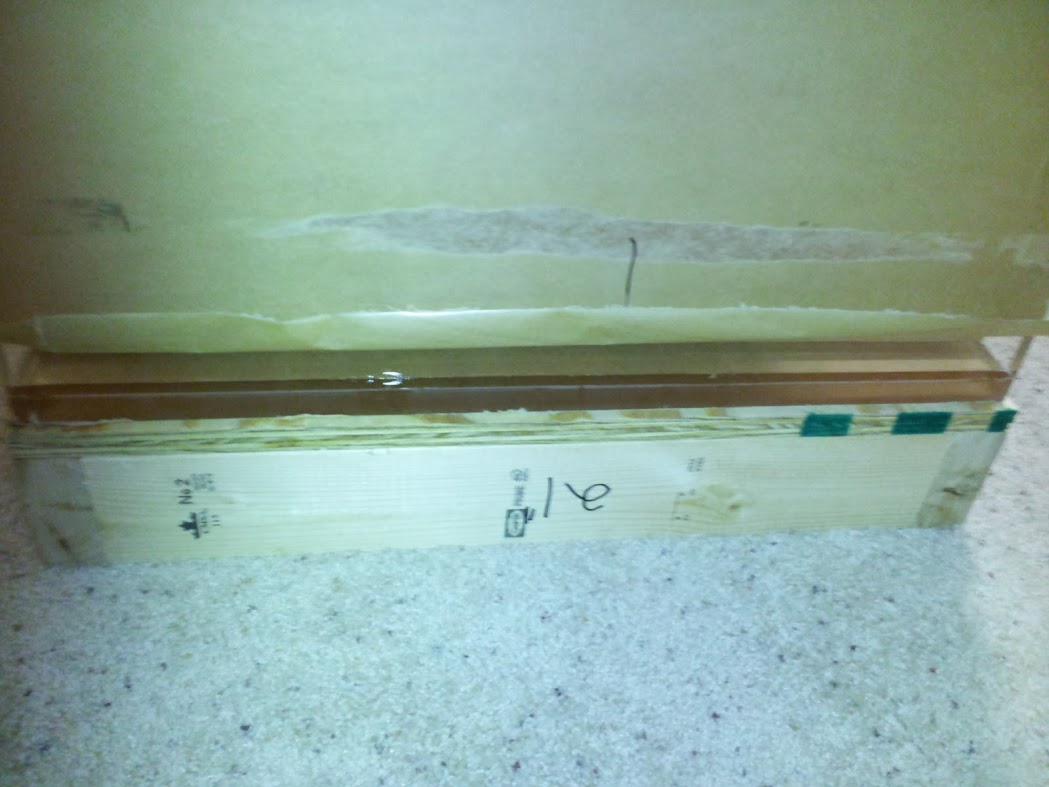
Did the edge prep last night. It only took about an hour because the CNC router cut sheets came out of the shop really smooth. I do my edge prep by scraping with a razor blade held nearly perpendicular with the acrylic edge. I scrape until it feels and "sounds" smooth.
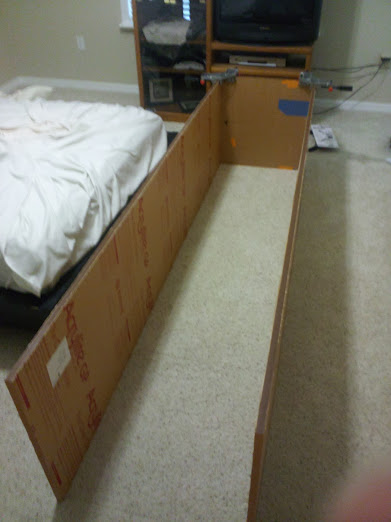
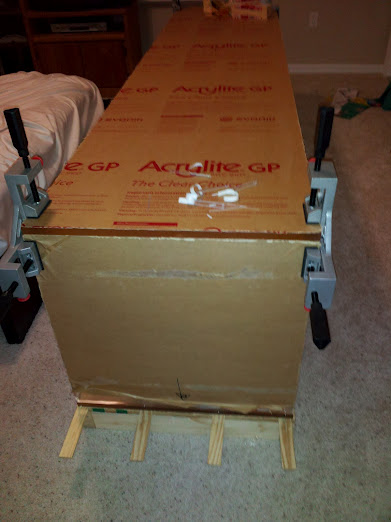
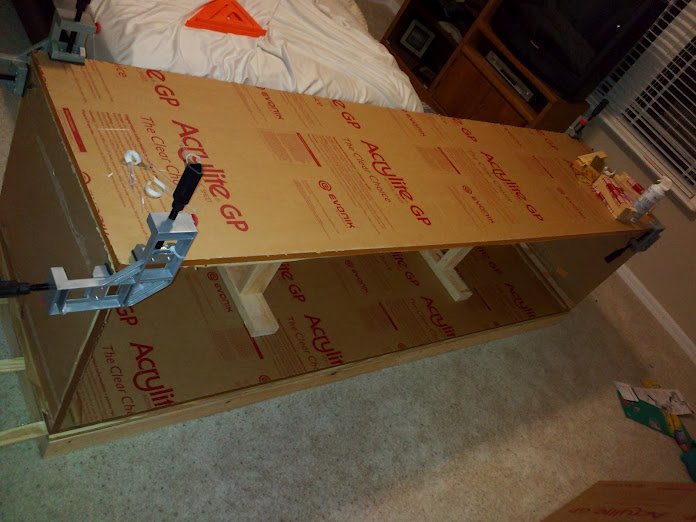
I did a dry fit just to be sure the depth measurements were correct. Looks like I'll start welding as soon as the weldon comes in. I'll probably work on the lights this weekend and start skinning the stand.
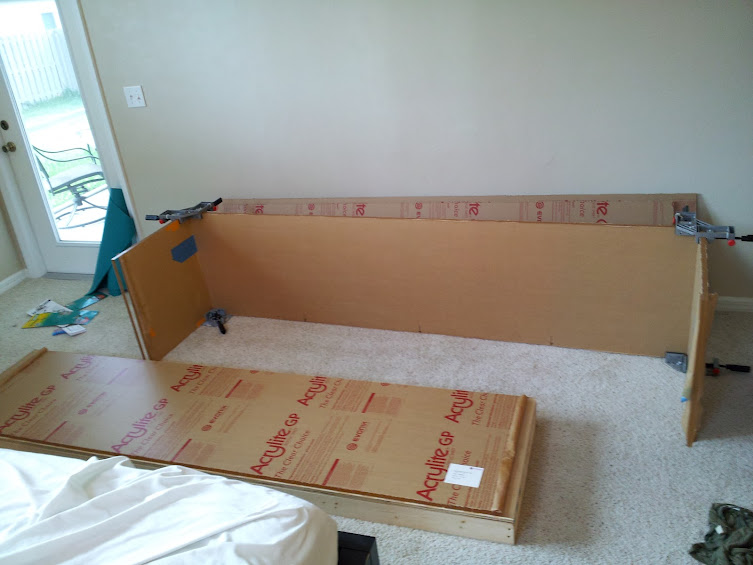
I did a dry fit just to be sure the depth measurements were correct. Looks like I'll start welding as soon as the weldon comes in. I'll probably work on the lights this weekend and start skinning the stand.
h2so4hurts
New member
Did a couple things today. USPS said the WeldOn4 would be in today, so I set up the platform, pinned and shimmed my pieces and...no WO4. Hopefully it comes Monday or Tuesday.
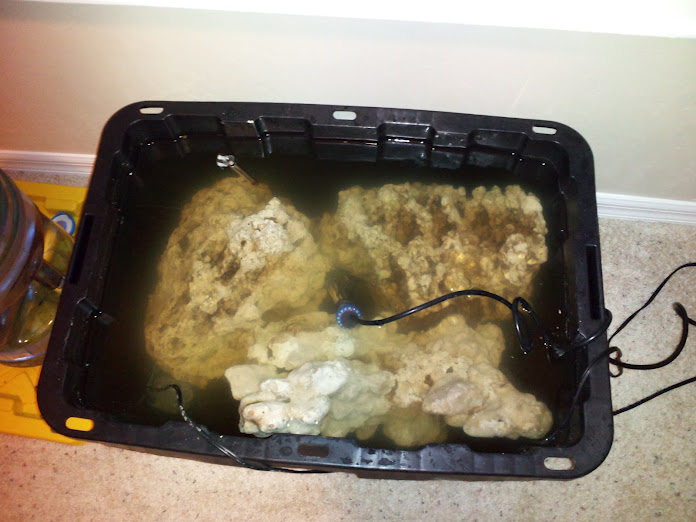
I also started cooking my rocks. I put the 50lbs of BRS reef saver in the sump system of my 150 gallon tank and I put the nasty detritus covered Pukani in it's own tub with a heater and some powerheads. The room already smells like saltwater death.
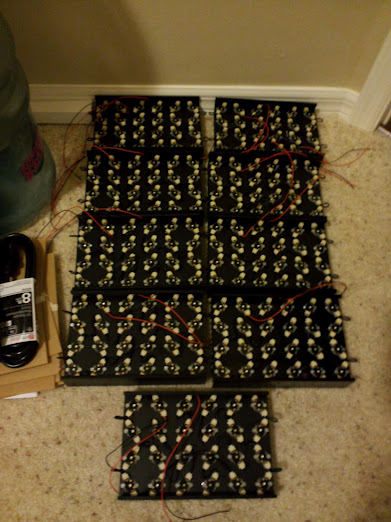
And since the WeldOn didn't come in...I put my lights together. That's 9 pendants each with 24 XP-G/XT-E solderless Cree LEDs. It took about 4 hours to put them all together. Next I have to hook them up to the driver circuits and since they'll be run in parallel, I'll have to use terminals and resistors and make sure that each string is drawing the same Amps. I just hope I don't have to move too many of the LEDs around to balance the strings out.
I also started cooking my rocks. I put the 50lbs of BRS reef saver in the sump system of my 150 gallon tank and I put the nasty detritus covered Pukani in it's own tub with a heater and some powerheads. The room already smells like saltwater death.
And since the WeldOn didn't come in...I put my lights together. That's 9 pendants each with 24 XP-G/XT-E solderless Cree LEDs. It took about 4 hours to put them all together. Next I have to hook them up to the driver circuits and since they'll be run in parallel, I'll have to use terminals and resistors and make sure that each string is drawing the same Amps. I just hope I don't have to move too many of the LEDs around to balance the strings out.
Acrylic edge prep
Acrylic edge prep
Very interesting build ... I will follow. I have a question about edge prepping acrylic before welding the acrylic pieces together. I have heard of two methods one is to sand using a orbital with 320 grit and scraper method. Based on your experience which method produces the least air bubbles when welding the edges together? I'm trying to build a sump and i don't know which method to use. Thanks!
Eugene
Acrylic edge prep
Did the edge prep last night. It only took about an hour because the CNC router cut sheets came out of the shop really smooth. I do my edge prep by scraping with a razor blade held nearly perpendicular with the acrylic edge. I scrape until it feels and "sounds" smooth.
I did a dry fit just to be sure the depth measurements were correct. Looks like I'll start welding as soon as the weldon comes in. I'll probably work on the lights this weekend and start skinning the stand.
Very interesting build ... I will follow. I have a question about edge prepping acrylic before welding the acrylic pieces together. I have heard of two methods one is to sand using a orbital with 320 grit and scraper method. Based on your experience which method produces the least air bubbles when welding the edges together? I'm trying to build a sump and i don't know which method to use. Thanks!
Eugene
h2so4hurts
New member
I scrape with a razor blade. DO NOT use an orbital sander to do edge prep. It's way too easy to round off the edges with a power sander and then the edges of your seams won't make good contact and they'll bubble. If you want to use sandpaper, get a good hand block and keep it absolutely flat against the edge of the acrylic. Other people use routers or jointers to take off 1/16 or 1/32 of the edge. My pieces came off of a CNC router, so all I needed to do was knock down some of the tool marks with a razor blade.
h2so4hurts
New member
I switch out the razor about every 8 feet (20 scrapes every 2 ft so ~every 100 scrapes). I'm sure it'll last longer than that but I have a whole box of them so it's really not that expensive to keep them fresh. You can also use an official plastic scraper (http://www.amazon.com/Craftics-Edge-Scraper/dp/B0010S88P0/ - I have one but don't like it. I've rounded a lot of edges with it. They slip a lot and are hard to keep flat) or the back of a hacksaw blade.
WO4 should be in today. At least USPS says its in town. Although, they also said it'd be delivered last Saturday, so we'll see!
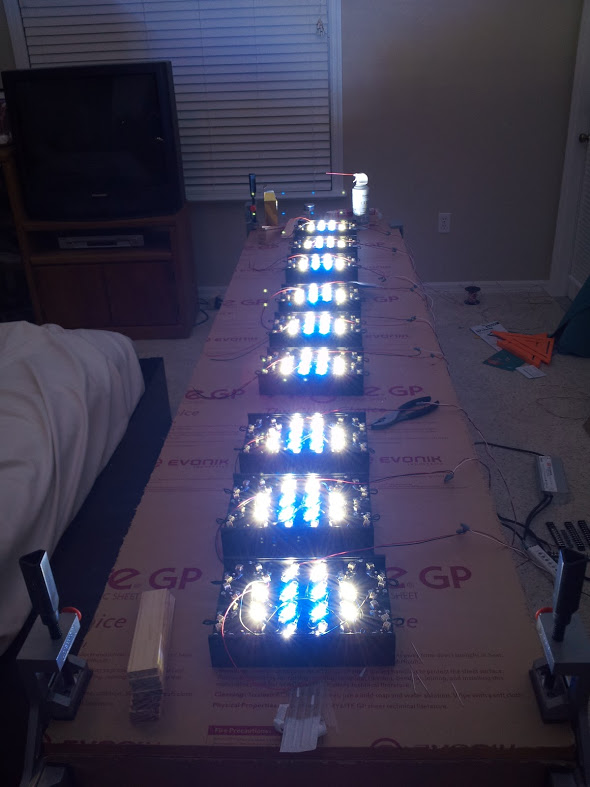
I worked on the circuits for my LEDs last night. I'll weld the first side of the tank tonight and wire up the lights to the drivers. Hopefully I can do a test fire of them too!
WO4 should be in today. At least USPS says its in town. Although, they also said it'd be delivered last Saturday, so we'll see!
I worked on the circuits for my LEDs last night. I'll weld the first side of the tank tonight and wire up the lights to the drivers. Hopefully I can do a test fire of them too!
h2so4hurts
New member
Welded two seams tonight. They turned out pretty well. I got two large-ish bubbles in each one that I couldn't squeeze out. It's not anything bad from a structural integrity standpoint, but I'm a perfectionist so it ticks me off ")
Newbie Aquarist
Reefing is my middle name
Welded two seams tonight. They turned out pretty well. I got two large-ish bubbles in each one that I couldn't squeeze out. It's not anything bad from a structural integrity standpoint, but I'm a perfectionist so it ticks me off
Just curious if the needle is small enough you could fill those bubbles in right? i just saw your time stamp, maybe not.
h2so4hurts
New member
@newbie, They're only 1/8" x 1/2". No one else will really notice them unless they're acrylic addicts and looking for them. Of course they'll probably be the only thing I see. Here's a few pics.
I also did some work on the lights last night. I got one of the parallel circuits done.

The wiring
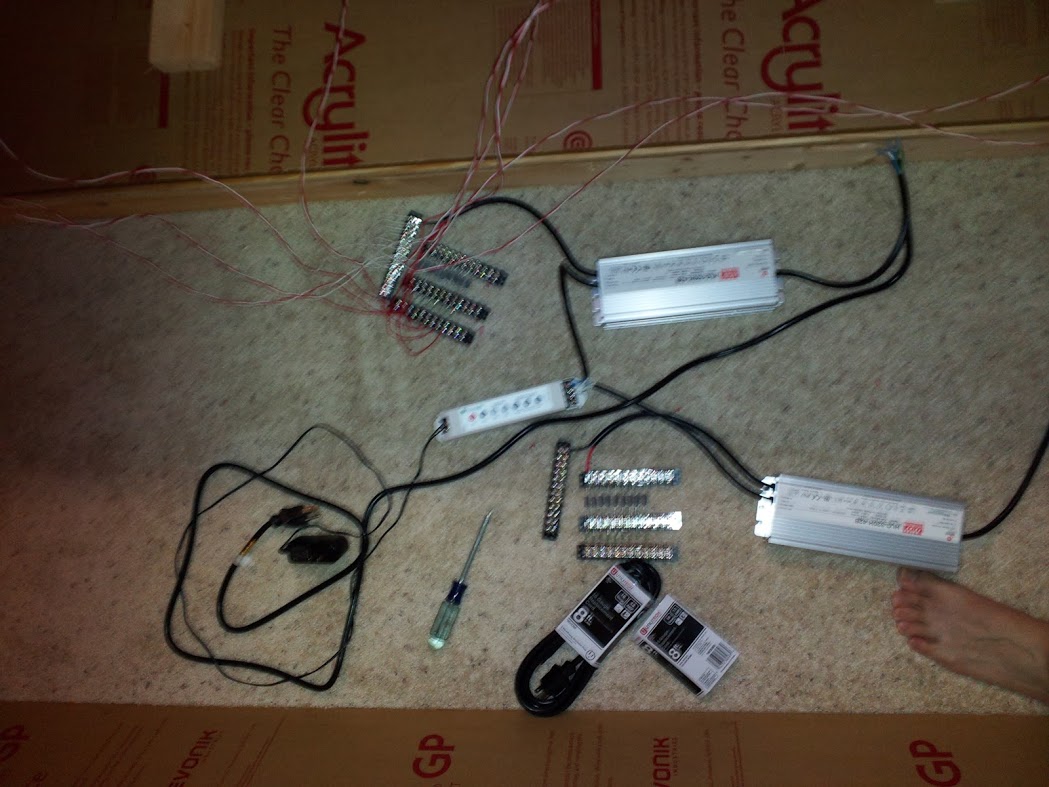
These guys are bright! I still need to check the amps on each line, but they all look pretty similar in brightness by eye. I know that doesn't mean a whole lot though until I get the multimeter on there.
I also did some work on the lights last night. I got one of the parallel circuits done.
The wiring
These guys are bright! I still need to check the amps on each line, but they all look pretty similar in brightness by eye. I know that doesn't mean a whole lot though until I get the multimeter on there.
Newbie Aquarist
Reefing is my middle name
I see. If you're happy with it I'm happy with it. Nice progress still especially with the lights.
h2so4hurts
New member
If you're happy with it I'm happy with it.
I don't really have much of a choice
I'm not worried about it from a tank explosion standpoint, but things that aren't perfect do annoy me. :crazy1:Newbie Aquarist
Reefing is my middle name
I don't really have much of a choice
You are not alone, you are not alone. You should have seen the before and after of my tank after I had it buffed. And the guy did a great job.
h2so4hurts
New member
I saw that! My 150 is slowly accumulating micro scratches too. Whoever gets it from me should probably buff it with some Novus 3 before filling it back up. The awesomeness of the final product will cover for these minor blemishes though!
Newbie Aquarist
Reefing is my middle name
I saw that! My 150 is slowly accumulating micro scratches too. Whoever gets it from me should probably buff it with some Novus 3 before filling it back up. The awesomeness of the final product will cover for these minor blemishes though!
The have a kit that you put like a 1500 micron sand paper on a magnetic algae scraper that buffs the acrylic for you when you clean your tank.
Similar threads
- Replies
- 1
- Views
- 385
- Replies
- 4
- Views
- 231
- Replies
- 7
- Views
- 280