You are using an out of date browser. It may not display this or other websites correctly.
You should upgrade or use an alternative browser.
You should upgrade or use an alternative browser.
240g and Fishroom build
- Thread starter rcmania
- Start date


rcmania
Im So Confused!
Love the build so far. We like lots of pictures. I am coming along for the ride.
Hey, welcome aboard.
I spent almost all night in google sketchup designing the stand and skin for it. Here is a picture of the final product. I work the next few days but I plan on getting the lumber for the stand Wed or Thursday to start the build. Im also thinking about using a pocket hole jig during the build so Ill have to pick one of those up as well.
Attachments

rcmania
Im So Confused!
I got WOOD!!! and a few toys!:dance:
Made a trip to the local Lowes and picked up a few items including this pocket hole jig. This thing is awesome. So split wood ends, makes for nice tight joints.
Also picked up a box of exterior screws and a few other items.
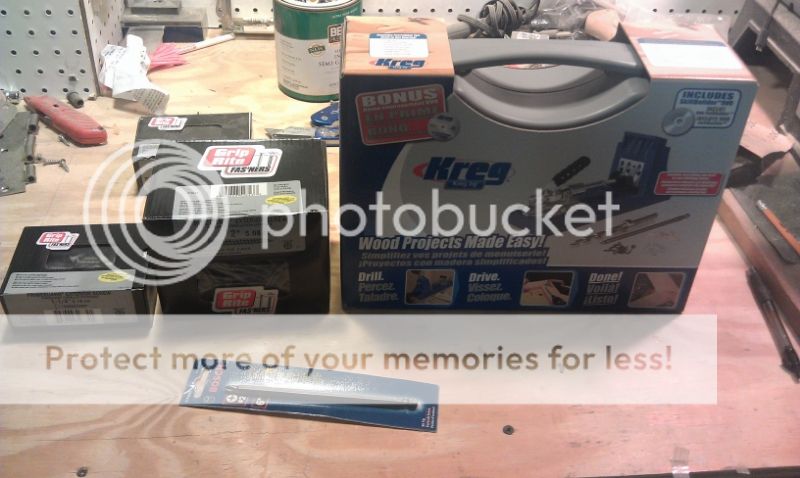
Also picked up 9 2x6x8
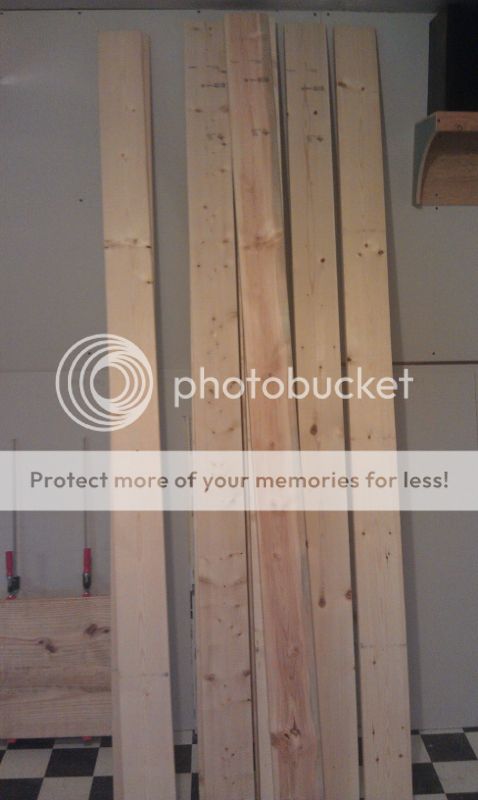
AND a handful of 1x2 for the canopy

Made a trip to the local Lowes and picked up a few items including this pocket hole jig. This thing is awesome. So split wood ends, makes for nice tight joints.
Also picked up a box of exterior screws and a few other items.
Also picked up 9 2x6x8
AND a handful of 1x2 for the canopy
rcmania
Im So Confused!
Built the top and bottom first. After cutting my boards I glued, clamped and then screwed the boards together using the pocket hole jig. This made for nice and tight joints.
I then had to rack it a hair and attached the corner brace on for a couple of hours until the glue dried, This held it square.

I then placed it on top of the aquarium to test the fit and squareness.


Now it was time for the upright (legs). I rough cut the two boards to length and glued and screwed them together. I then put the leg on the cross cut sled and cut them all to the same length. The ends of the legs were also glued and screwed to the top and bottom, making sure that the seams of the legs over lapped the seams of the top and bottom so they didnt line up.
Here it is, the hard shell of the stand. Its not done yet though. I have the corner supports to add and support under the cross braces. I have a buddy coming tomorrow to help me lift the tank up and onto the stand so I can make sure of the bulkhead clearance from the corner support. Ill finish that up tomorrow and then Ill start the canopy.

I then had to rack it a hair and attached the corner brace on for a couple of hours until the glue dried, This held it square.
I then placed it on top of the aquarium to test the fit and squareness.
Now it was time for the upright (legs). I rough cut the two boards to length and glued and screwed them together. I then put the leg on the cross cut sled and cut them all to the same length. The ends of the legs were also glued and screwed to the top and bottom, making sure that the seams of the legs over lapped the seams of the top and bottom so they didnt line up.
Here it is, the hard shell of the stand. Its not done yet though. I have the corner supports to add and support under the cross braces. I have a buddy coming tomorrow to help me lift the tank up and onto the stand so I can make sure of the bulkhead clearance from the corner support. Ill finish that up tomorrow and then Ill start the canopy.
rcmania
Im So Confused!
Question:
I cut and removed the tile where the tank will sit. I also pulled up the backer board that was under the tile. My question is, someone placed MDF board on top of the subfloor which I didnt think much of it and was going to leave and just place plywood on top to bring it back up flush with the tile around the area. Is my original thought Ok to do this or do I need to pull the MDF up?
I cut and removed the tile where the tank will sit. I also pulled up the backer board that was under the tile. My question is, someone placed MDF board on top of the subfloor which I didnt think much of it and was going to leave and just place plywood on top to bring it back up flush with the tile around the area. Is my original thought Ok to do this or do I need to pull the MDF up?
How does the MDF look? Keep in mind that any water out of the tank might make it's way to the MDF underneath.
If the tank is NOT going to be moved/slid you could leave the small lip and place the tank inside it. .
This still does not take into any account of water going down the tank in an overflow situation.
If the tank is NOT going to be moved/slid you could leave the small lip and place the tank inside it. .
This still does not take into any account of water going down the tank in an overflow situation.
rcmania
Im So Confused!
Here is a picture of the area after the tile and backer board has been removed exposing mdf and the sub floor is under that. Now as it sits a 3/4 on top of the mdf will bring me flush with the tile surrounding the tank. Well it will bring me a hair over the tile. The MDF is actually in great shape.

Two decent size people can lift the tank if you want to take that chance. Its more bulky then anything. If I had to guess its around 350 to 400 lbs.
I would definitely pull up the MDF sitting under the tank stand. It is not very water resistant and will swell. Better to just replace it with 3/4 ply.
BTW, was your tank pretty manageable with 4 people? Can I assume 2 would not be sufficient?
Two decent size people can lift the tank if you want to take that chance. Its more bulky then anything. If I had to guess its around 350 to 400 lbs.


rcmania
Im So Confused!
How does the MDF look? Keep in mind that any water out of the tank might make it's way to the MDF underneath.
If the tank is NOT going to be moved/slid you could leave the small lip and place the tank inside it. .
This still does not take into any account of water going down the tank in an overflow situation.
The tank will not be moved once it is filled. And I will have a water level sensor attached to my profilux. I will have a back up for the water sensor, I just havent come up with one. I can tell you this that if this tank over flows Ill be MIA and on unsolved mysteries. My wife will absolutely be :angryfire:
Bilk
New member
That underlayment is covering the entire subfloor. If it is indeed a composite board - they put thinset over it for the tile and it didn't seem to effect it - then removing it in just that area isn't going to do much if there's a major water incident. May as well just paint that area and move on from there. If you want the stand to sit flush with the tile floor, put a piece of Hardy Board, Durock or some other cementitious board in that area of suitable thickness. Then just caulk around it. It shouldn't be a problem.Here is a picture of the area after the tile and backer board has been removed exposing mdf and the sub floor is under that. Now as it sits a 3/4 on top of the mdf will bring me flush with the tile surrounding the tank. Well it will bring me a hair over the tile. The MDF is actually in great shape.
Two decent size people can lift the tank if you want to take that chance. Its more bulky then anything. If I had to guess its around 350 to 400 lbs.
rcmania
Im So Confused!
That underlayment is covering the entire subfloor. If it is indeed a composite board - they put thinset over it for the tile and it didn't seem to effect it - then removing it in just that area isn't going to do much if there's a major water incident. May as well just paint that area and move on from there. If you want the stand to sit flush with the tile floor, put a piece of Hardy Board, Durock or some other cementitious board in that area of suitable thickness. Then just caulk around it. It shouldn't be a problem.
I think ill do that and call it good. The floor is already perfectly level on that MDF. I will put a good primer over the MDF and then my plywood on top with a coat of primer as well, it should be good. Ill take a tube of caulk like you suggested and seal around it. Not to mention the bottom of the stand will have a sheet of ply on it also.
Update: I had opened up the hole the tank will sit in. It has been moved over 4 inches to the left. Im now constructing the new wall up and should have it done by Saturday. Im also heading to pick up my ply then also to skin the stand. So HOPEFULLY come Sunday my stand and tank will be ready to be put in place.:bounce3:


Similar threads
- Replies
- 1
- Views
- 386