Laziness!. Honestly though, lack of time. Too much other stuff to do and just got a new job. Finishing off the plumbing so I can get the tank cooking for real is the priority at this point. Plus, I want to see how things do with pure LEDs first. People seem to be doing very well with pure Radions. If it works well, it's got a number of plus factors (less electricity, less complicated programming, etc.).
You are using an out of date browser. It may not display this or other websites correctly.
You should upgrade or use an alternative browser.
You should upgrade or use an alternative browser.
250 gallon living room attraction
- Thread starter thefuz
- Start date
")
Thanks, C!
Venting will happen eventually via a pair of 140mm Noctua fans; one in, one out. I'm also guessing I'll need to pull in some fresh air via the skimmer in the basement as pH may be an issue with the furnace right around the corner.
I did a test with the lights on for a full cycle the other day and temp increased by about 1 degree. Not bad considering no venting and no water circulation to the basement (only internal via Gyre 150/MP60) on top of the baseboard heat behind the display. All things considered, I'm cautiously optimistic that the system will be quite well balanced.
Cabinet does rest on top of the tank. While not ideal, I don't think it's heavy enough to cause an issue. Weight is distributed across the eurobrace. If anything, I'd wager the weight adds to the stability of the brace as the majority of the mass is contacted where the brace is siliconed to the glass (1/2" all the way around).
")
dudemeister
New member
So sweet!
Glad you crossed posted to the local club forum! Didn't realize you got this far already! lol. Looking sweet and can't wait to see it in person.
Hear you on getting lazy about adding the T5s...Took me almost a year-and-a-half to finally supplement my Radions with T5s! And like you, I wanted to see how my corals did with just the Radions... :thumbsup:
Laziness!. Honestly though, lack of time. Too much other stuff to do and just got a new job. Finishing off the plumbing so I can get the tank cooking for real is the priority at this point. Plus, I want to see how things do with pure LEDs first. People seem to be doing very well with pure Radions. If it works well, it's got a number of plus factors (less electricity, less complicated programming, etc.).
Hear you on getting lazy about adding the T5s...Took me almost a year-and-a-half to finally supplement my Radions with T5s! And like you, I wanted to see how my corals did with just the Radions... :thumbsup:
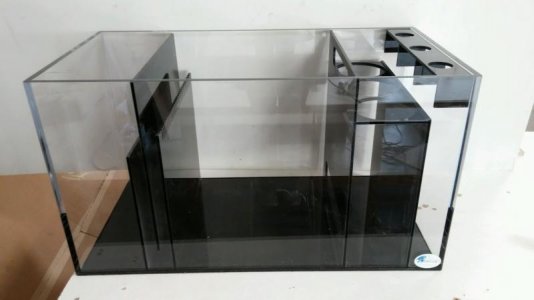
While the tank is still cooking on ich (don't ask! fish fiasco. ~5 more weeks fallow to go!!), I've decided to take a stab at a custom sump. Design attached, compared with the current Rubbermaid stock tank (which I think will result in lots of microbubbles and isn't convenient for filter socks, nor a refugium).
Beananimal triple drain coming in on the right. The drain is plumbed via schedule 80 bulkhead inside the sump on the left side. The skimmer is external (Bubble King 250) and will rest on a platform across the top of the sump.
Center section will be used as a refugium with dark acrylic on both sides.
Can probably go tighter on triple drain side (2" pvc here).
Not sure if I need to go wider on the filter sock deck (7" socks).
Is the spacing wide enough on the baffles?
Should the return section be wider? Initial setup will drain into a Reeflo Hammerhead but maybe I should consider space for a separate return pump in the future (not sure if the quiet DC pumps will have enough head pressure)?
Comments/suggestions? Anyone recommend a place that might be able to craft this for me? Thx!
There used to be a place on Perry Avenue that did fabrications - built somebody a submarine once... - Don't know if they're still there, but have no reason to believe they're not. If you come up Main Avenue to the CVS, Perry's on the left. Cross the Norwalk river, and this place came up pretty quickly on the right.
~Bruce
~Bruce
Custom sump it is. RTMA recommended Advanced Acrylics and they've been awesome to work with thus far. Final design is very similar to the one I attached above (although I talked myself into going with a longer sump to soak up all the space in that area of the basement - no waste!). Should have photos to share in a couple of weeks. Until then, time to redo some plumbing!
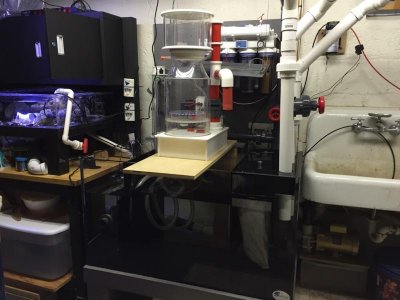
New sump installed and water flowing!! Just had one leak to patch (and a bunch of water in my face from an unattended hose) and it's up and running.
Dialing in parameters now. Woohoo!
Skimmer needs a metric conversion fitting so I think I may go with an alternate stand-in at first. Plus, this beast is overkill until I get all the critters into the display.
Huge thanks to sniper2be for helping out with the final plumbing/startup!!
Dialing in parameters now. Woohoo!
Skimmer needs a metric conversion fitting so I think I may go with an alternate stand-in at first. Plus, this beast is overkill until I get all the critters into the display.
Huge thanks to sniper2be for helping out with the final plumbing/startup!!
Attachments
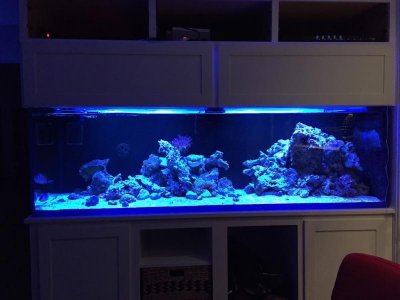
FTS and Sump in nearly full swing. Going with caulerpa/chaeto combo. We'll see which one sticks. Picked up an LED grow light on Amazon also.
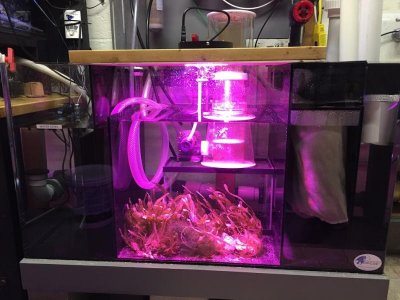
Now to get the fish moved over. These buggers are hard to catch! Don't they know they've got a bigger home in store?!?!
Now to get the fish moved over. These buggers are hard to catch! Don't they know they've got a bigger home in store?!?!
Attachments


jstephens24
New member
such an awesome tank
Similar threads
- Replies
- 5
- Views
- 306
- Replies
- 20
- Views
- 513