300 Gallon Miracles Aquarium

maik1

Member
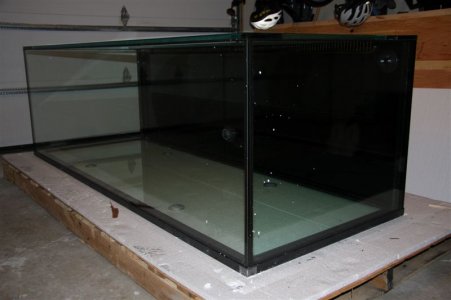
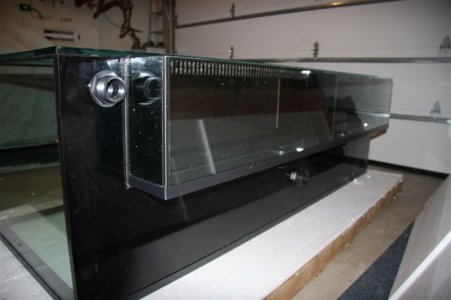
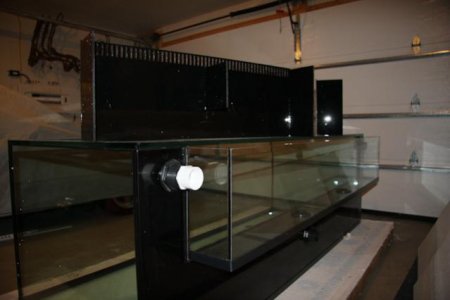
2 years into the hobby and now upgrading to my 300 gallon Reef Tank. It's made by Miracles Aquariums here in Canada. 84"x32"x27" with a 72"coast to coast external overflow box and Starphire front. 9 holes for returns and Oceans Motions closed loop system.
attachment.php

just unwrapped.

attachment.php

Just like Christmas!

Short video of the delivery.http://www.youtube.com/watch?v=1EBPXXJ1r2Y

Maik1
 

Attachments

  • IMG_8615.jpg
    IMG_8615.jpg
    58.7 KB · Views: 12
  • IMG_8611.jpg
    IMG_8611.jpg
    57.5 KB · Views: 12
Nice tank - I am planning the same one, but about a foot shorter in length. With your coast-to-coast, did Miracle give you any other options for the overflow instead of the "teeth"? I thought I read somewhere on Bean Animals post to avoid the teeth if possible. I was currious of your thoughts on this.

Also, can you provide the dimensions for the external coast-to-coast and the diameter of the holes. Thanks!
 
Last edited:
The coast to coast is 72"x6"x12" and the holes are 2" for 1.5" final plumbing.

attachment.php


The teeth are 2 inserts, the back of the tank was cut out 1.5"x72".
 

Attachments

  • overflowinsert.jpg
    overflowinsert.jpg
    24.6 KB · Views: 11
Are the inserts necessary? Was this your design or Miracles?
Otherwise I guess the 1.5" cut in the back would need to be screened somehow to prevent animals gettting into the sump.
Great tank!
 
New LED Lighting System from Rapid Led

New LED Lighting System from Rapid Led

Thank you Rapid Led for your great product and service and a BIG thank you to Rickets Reef on youtube: http://www.youtube.com/watch?v=4I_5uh4R_QQ .

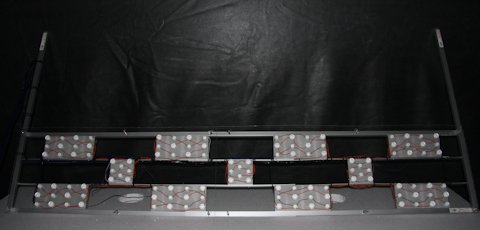
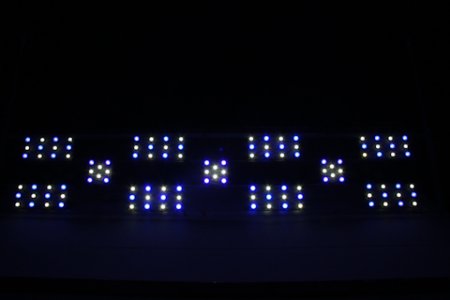
I ordered 120 LED's.

60 CREE XR-E Royal Blue 3W LED with 65 degree white Lenses.
60 CREE XP-G R5 Cool White also 65 degree white lenses.

10 Mean Well ELN-60-48D dimmable drivers so I can dimm them via my APEX controller.

8 Drilled and Tapped 4.25" x 9" Heat Sinks and 3 Drilled and Tapped 4.25" x 3.9" Heat Sinks.

attachment.php


I used Aluminium tubes to keep the heat sinks in place and to keep the weight down.
The dimensions of the setup are 78" x 15". I covered the LED rack with Plexiglass to keep water off.

attachment.php


I am running the LED's now on my old tank until I get the new one up and running I hope in the next 6-8 weeks.

The light is and will be perfect for the new tank.
The PAR readings are CRAZY!

Money well spent for sure!

Maik
 

Attachments

  • led_setup.jpg
    led_setup.jpg
    99.7 KB · Views: 16
  • led_pattern.jpg
    led_pattern.jpg
    100.9 KB · Views: 11
Wow really nice DIY led.. and wicked tank with all the perks and extras. Love it. Cant wait to see pics of the LED's over it
 
Liking it so far, could you please give more info, pics etc. of the LED setup?
 
The Move!

The Move!

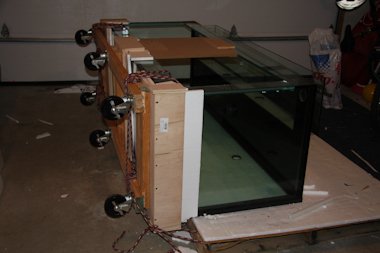
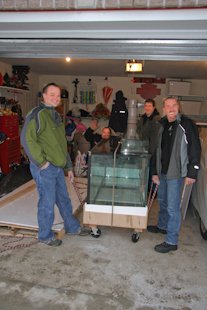
Today was the BIG DAY! I/we are moving the tank into the house. I made a dolly for the tank to sit on so we can roll it from the garage into the walkout basement doors. In order for us to be able to lift the tank (700-750 lbs) I added rope with PVC tube handles on all 4 corners of the dolly.

attachment.php


We had to lift the tank 3-4 times so the tank would not get jolted.

attachment.php


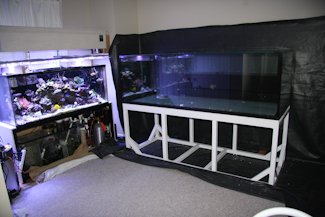
First exiting the garage and lifting the tank over 1 step onto the patio and then over the door sill into the house. Then we rolled it into my fish/office room. Because the tank is 32"+6" wide I had to place it onto its front (27") so it would fit through the office door. Last lift was onto the stand.

DONE!

attachment.php


Behind and under the tank is a pondliner to keep everything dry, just in case!

Maik:bounce3:
 

Attachments

  • added_wheels.jpg
    added_wheels.jpg
    97.5 KB · Views: 12
  • 115G_and_300G.jpg
    115G_and_300G.jpg
    99.6 KB · Views: 11
  • My_helpers.jpg
    My_helpers.jpg
    101.8 KB · Views: 11
Back
Top