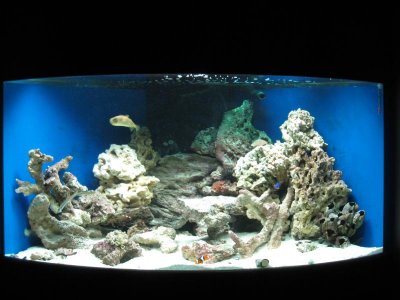
320 gallons of Serenity, Sea Monsters & Sanctuary

Continuing to avoid the pump noise issue, I moved on to the ventilation of the hood. The room is already heated by sunny windows, a box turtle terrarium, 4 LCD monitors, 3-4 workstations and sundry electronics. I have a hard time keeping it at 84degF without freezing the wife in other parts of the house. So, I would like to vent any lighting heat possible just for my comfort and secondarily for keeping the tank coil. A good 50% of the ultimate water will however be in the basement with an ambient temperature of 60-64degF winter to summer. So cooling for my wet guests should not be an issue.

Here's what I did to vent my hood. Lowes provided a low profile dryer vent that is expandable to accommodate various heights. I separated the two halves and drilled holes to match my canopy then flipped it over so the vent port was pointing away from the canopy. A little flat black the structure disappears into the gap behind the tank.

The vent hole is positioned to match a similar dryer line installed in the wall down to the basement. A vent fan with thermostat will draw air from the room, through the canopy and into the basement. Depending on the heating needs of the tank, I have considered venting this hot air into an "cabinet" enclosing some of the spare water reservoirs.

Vg2jDDQ.jpg


sb6PoWq.jpg


nv0hq6k.jpg
 
Last edited:
Ah. A sense of order returning. The CL returns are now secured to the foundation and tank stand rather than the rafters. Not quite as pleasing but definitely reduces vibration conduction and resonance. Right above the horizontal securement bar, I will cut the vertical pipes and add more flex tubing to dampen the vibrations further.

r7bDPIW.jpg
 
Last edited:
First photobucket SNAFUs show up.

But, let me introduce you to the Guardian Angel.

4m2c1fx.jpg


One switch all water stop flowing! Praise the Lord.
Forget and leave it off, the stink of death! Damn the Unnamed One.

Whoops, too, had a nasty back accident: iliosacral joint tear, herniated L4-L5 & bulging L3-L4. Still recovering but back into the man/fish cave. Therefore, progress has negligible on the project.

Dreamy Greek god:
HFVczX5.gif


Lifting 1000+ stones from water's edge:
fmtoMXn.gif
 

Attachments

  • 92 Corner.6.dark room.jpg
    92 Corner.6.dark room.jpg
    61.5 KB · Views: 2
Last edited:
OKAY!!!, Here we are back from a emergency pothole repair...our pond (i.e.- largest fish tank) had a leak that needed repair. Hence the back damage. The physical therapy cost more than the rental of the excavator. It was massively fun however.

n9w9UHi.jpg


MIte3CZ.jpg


bGPRjgi.jpg


abYSrc3.jpg


z4RmfAg.jpg


End Result:
rnMlndT.jpg


Large Mouth Bass:
8OfE0Bz.jpg


Small Mouth Bass:
pYzCFZ5.jpg


Pretty Fishies:
6gWSGj8.jpg


Big Pretty Fishies:
mvDPjOb.jpg
 
Last edited:
Now back to fishiness…

Got the rock cooking…
7hA6qns.jpg


Also, got a sink installed. Wow! Be upgrade ever.
15kserU.jpg


Finally, I went Craigslist and bought a setup from someone moving. The real intent was the stand and canopy for a discus tank. However, the 120gal fit my refugium space in my filter rack perfectly so I just had to replace the 90gal. I would have been foolish otherwise. (Hey, the wife went for the idea!)
hlGMqF9.jpg


jneNxJN.jpg


And added my first mascots for the project:
PLiQYtJ.jpg


ipN3GQF.jpg


Unfortunately, the seller's tank had gone past old tank syndrome to downright nasty so all the fish had various skin lesions. There was little to do but watch them wither day by day. Without a doubt, the DSB in his tank was saturated with blackening regions under the live rock. The trapped phosphates and sulfuric zones must have been sky high. The skimmer had reached a point that it was entirely full of dried, condensed skimmate with the overflow line leading right back into the sump. Matched with a 150X gal, the stand and canopy do look awesome.
3wXhRAJ.jpg
 
Last edited:
Wow

Wow

Hey idea for the noise on the pvc and wood...you might want to try adding some 3m tape in between the brackets and wood, or use dynomat. It's used for stereo systems and prevents noise for emmenating.
I personally would feel comfortable with the pvc pipes secured, instead of hanging freely.

Keep up the good work!
 
Thanks mystical, KRBNSOL and davehead86.

I am at a minor impasse and could use some ideas. While I was in PT, I did a lot of reading both on RC and TRT. Man there are some great theory meets experience threads between those two sites. Three things interested me in particular because I want to combine large messy eaters with low nutrient corals on the same system. That leaves one solution, really cleaning up after the bigger poopers.

(1) DSB.
(2) BB.
(3) Lots & lots of LR.

I like sand. Sand brings a look that is very satisfying. I ran a SSB in this tank previously and diligently vacuumed it regularly. However, a DSB is attractive as a stabilizing processor of nitrates and sink for phosphates. It just needs proper maintenance to avoid the 5 saturation and dreaded crash. So here's is my way overboard filtration idea...

First, "Sea Monsters" becomes "Pandemonium" and gets an arrangement of Fiji base rock just provide a few territorial markers and depth. Then, its gets a layer of 1-2 inches black sand. This will make vacuuming very easy and it's right next to a bathroom to dump the waste water. This tank will be based on overstocking semi-aggressive fish (like discus). If two dwarf angels will fight until one fatigues and dies, eight will constantly be watching their own backs rather than bully anyone else.

Second, "Coral Country" gets a white HDPE base caulked into the bottom and either faux or bare bottom. A little sand constantly being blown to the front (and moving wastes into the water column) gives the quick view appearance of sand before the amazing corals swoon the viewer. The rock in this tank will be almost exclusively Pukani giving the best chances for keeping multiple mandarins.

Third, "Sanctuary" gets replaced by the 120 gallon and filled with any left over rock creating a massive LR filter. The rock will be elevated from the bottom of the tank allowing bacteria flock and phosphate precipitates to be blown from underneath BB style. On top, I put egg crate to make a 4'x2' fragging tank.

So the lots & lots of LR and BB experiments are taken care of. Now for the DSB or more specifically remote DSB. I've thought this was a great experiment for awhile now. I plumb the rubbermade holding tank, that I am now using to cook rock, into the system with very low flow. I make dividers to create 4 different sections and fill each section will all the sand that isn't going back into the tanks. After year 1, I clean the sand in bed number one then leave it in these to start over. I move through the other sections, cleaning a year 2, 3, and 4 sequentially. Maybe I get nitrate reduction without the 5 year crash because no section gets more than 4 years out but I get stability because of the additional years in the tank.

(1) rDSB
(2) BB
(3) Lots & lots of LR.

And my compulsive need to over engineer in order to entertain myself.
__________________
Jason

Single system called Pandora Too of three tanks:
• Pandemonium: 92 gal corner Softies/FOWLR on fish overload (office)
• Coral Country: 150X gal LPS (&SPS?) (family room)
• Sanctuary: 120 gal REFUGIUM (50% chaeto/50% all dark bacterial LR) (fish/man cave)
• Filtration: 60 gal sump, 35 gal settling tank?, DSB?

• Serenity: FW105 gal Discus (bedroom)

"Physics is a b!tch. She's always right no matter how sure you were about your plumbing design." Me, standing in a puddle of water...

"You cannot allow [yourself] to avoid the brutal facts. If [you] start living in a dream world, it's going to be bad." General "Mad Dog” Mattis.
 
Last edited:
I forgot my QUESTION!

I was thinking of using PVC snap on pipe tees to create supports to hold up the egg crate in the LR filter. Those are very effective at allowing the bacteria flock to be blown away rather than trapped in the space below the LR. However, I am concerned that no matter how many of these I use support the egg crate, 12+ inches are going to crush through somewhere where it is not supported. The egg crate should be great for the frag shelf but that is on top. The bottom level needs to be open to allow flow to push the flock & phosphates to the overflows. They are mega flows, so the have inlets top and bottom. I will drill out the bottom of the overflows to create maximum flow there rather than over the top.

I need confirmation that the egg crate should stand up, suggestions on something else to do the job, or general improvements for this LR filter/frag tank.

Thanks!
 
Last edited:
So here is a mock up. I used 1.5FS T-fittings which I cut in have with a chop saw. Here is one finished and one ready to flip to the other side. The idea is the open single are of the T-fitting allows debris, flock to sink to the bottom space. The half circles of the cut section of T-fittings will allow debris, flock to be blown to where the overflows can pull it continuously into the sump & skimmer.

xief9G7.jpg


WgSFJFI.jpg


From there, I arranged them on a 4x2 pattern to void any spacing gaps of greater than 12". Connecting these T-fittings are fiberglass rods 3/8 in diameter. I found them for $1.50 a piece in the scrap pile at Rural King...I bought everyone I could find. These connect the T-fittings, keep the T-fittings spaced, provide 1.5" diameter support to the egg crate and provide longer lengths of support.

OY2iqKe.jpg


JnDJbED.jpg


I am still worried about breaking through the egg crate with hundreds of pound of rock but at least this seem worth prototyping. What could go wrong? :blown:
 
Last edited:
Rule #1 is in serious danger...

KrYlf9A.jpg


OMG!! Sixty gallon inductor tank. It could...
(1) Serve as the settling tank. Even strong flow into that volume of water would allow settling to occur.
(2) Replace my 65 gallon drum of dead volume.
(3) Allows a tank that could be isolated for up to 60 gallon water changes.

Is any of this serving to justify breaking Rule #1? I will need a convincing argument to sell the wife.
 
Last edited:
Wow, lots of stuff going on here!!

of course i like the settling tank idea. my settling tank is working fairly well. i am still working on ways to keep the detritus from "sticking" to the HDPE on the sides. i have a wiper that is made out of acrylic, velcro, and an old algae magnet that a sweep the sides of the conical part a few minutes before doing a water change out of the settling tank. it works ok, but i think it could be better. this is on a 30g settling tank, so something like this is going to be a must on a 60g settling tank where the height is problematic. you will probably need powerheads in the top part of the settling tank to encourage settling in the lower areas. using egg crate as a flow divider works great for this at the top of the conical section.

trying to read through all of the thread. are you still trying to get all of the tanks fed and returned to the same sump? i think you might want to think about cascading some of the systems into others, then finally into the sump/settling tank/live sump. with the "cleanest" water being sent back to the SPS system.

G~
 
G~ thanks for looking.
nuxx - thanks very much!

So the egg crate is intended to dampen circulation transfer from the upper portion to the conical portion? I have been considering flow patterns in the settling tank. I believe the standard is entering about 20% above the cone and overflowing at the top allowing the huge increase in diameter to slow the velocity of the flow.

First, is the height too much for the value of effective settling? I am somewhat concerned that with some much plumbing length and interior surfaces that "grabbing" or accumulation on the inner surfaces will counterproductively create nitrate producing surfaces before detritus gets to the skimmer/ST.

I have been considering the dynamics of two alternatives.
(1) A vertical drop in a standpipe at the center of the ST. The bottom of the standpipe (say 4") would impact a diffuser plate (an 6" cap with the opening facing upward) glued to the bottom with spacers so that the flow immediately reverses direction. This would hopefully provide a lower velocity albeit more turbulent input to the tank.
(2) Angling the inflow in the standard configuration to hug the tank wall, this would (?) prevent accumulation on the walls and allow the detritus that enters the center region of the tank to fall in a more laminar region.

I am still trying to tie one system together. I recognize the challenges better now of high nutrient ("lagoon") parameters reefs that will be more happy with big waste producers versus low nutrient ("reef crest") parameters for the SPS/LPS. However, my maintenance routines are poorer so monitoring and maintenance of one system and a little higher reliance on water changes seems a better match to my habits.
 
correct the egg crate is to dampen the flow. i needed the egg crate in my current CST to hold up the devices in the CST. i have the inlet coming in under the egg crate directly from the skimmer. i have an elbow on the skimmer outlet to create a circular current along the edge of the cone. the outlet of the CST as close to the center as i could. in my case it is not very close to the center because the skimmer itself is in the way.

for the larger system i will be looking for the widest cone tank that would fit in my area. i would like it short, rather than tall. to get the flow working for me, i will look into those MaxSpect Gyre's. turning one on its side to keep the flow laminar around the edge of the cone tank to keep the detritus from being able to stick to the HDPE.

here is a drawing of how my CST is setup if you did not see it in my build thread. this is a very cramped "sump". when i go bigger i will not be doing it all in one device unless i can find a very large diameter CST. wider is definitely better than taller. if there is room available.

attachment.php


the way it looks.

attachment.php


picture of the cleaning wand.

attachment.php


HTH,

G~
 
Thanks MCR and G~.

That's a bunch of ideas on the CST (conical settling tank?). If you can, give your build thread a shameless plug here (i.e.- what's the link because I am lazy?). There is more to that CST than a quick sidebar gives credit.

I believe the reference to the outlet of the skimmer indicates that it goes below the grate. Why? I would think we want to discourage flow of clean water into that area.

Would the Gyre be worth the expense versus using a T-fitting and making a spray bar?

Given the same footprint, I was considering that more vertical would give a better return (i.e. 60 versus 35 gallon). Is the thought that the larger diameter would provide better settling (more stagnant flow region)? Or is it because of the space available for cross purposing it as a sump? I have a ton of basement space versus the limited footprint of the stands.
 
So here is the update for today.

The modified T-fittings were drilled at the bottom of the slip neck so that the 3/8" rods lie in the slots and the fitting top/rod are flush with the bottom of the egg crate.

Will it hold? LET'S FIND OUT!! I piled dry Fiji rock on top of the egg crate. The result was surprisingly sturdy. So I piled some more.

YvCCbO1.jpg


eEQddRI.jpg


I am contemplating adding another row of fittings & a rod and omitting the front to back rods that I was considering adding. That would eliminate the rod-over-rod difference in height.

I also noted that some rock fragments still fell through the egg crate so I will need to leave an opening and have a method for removing these which will otherwise defeat the easy flow of flock to the overflows.
 
Last edited:
Thanks MCR and G~.

That's a bunch of ideas on the CST (conical settling tank?). If you can, give your build thread a shameless plug here (i.e.- what's the link because I am lazy?). There is more to that CST than a quick sidebar gives credit.

correct, conical settling tank. shameless plug.

I believe the reference to the outlet of the skimmer indicates that it goes below the grate. Why? I would think we want to discourage flow of clean water into that area.

i put the outlet below the great because i wanted any of the big stuff that may have made it through the skimmer to immediately fall to the bottom and not get stuck on the grate. is it necessary, not sure. i may take off the extra pipe and let the skimmer just dump into the CST above the grate. having the outlet below the grate was the original plan when the CST was going to go directly after the overflow and before anything else. i wanted any larger pieces of detritus to fall out of suspension without the risk of getting trapped on the egg crate. with the CST now after the UV and the skimmer it may not be necessary and like i mentioned earlier i may change the plan.

Would the Gyre be worth the expense versus using a T-fitting and making a spray bar?

not sure how a T fitting would work the same as a Gyre, but a 90 elbow would. depending on the amount of flow from the inlet the elbow may be enough, but doubt it from what i am seeing in my CST. i am planning on adding another propeller PH into the CST to increase the flow around the edge to keep the sticking of detritus to the HDPE down even more. watching the demos from MACNA, the Gyre's create a pretty tight laminar flow. it should work very well for this purpose. keeping the flow to the outside edge of the CST, while keeping the center slow in flow to allow settling.

Given the same footprint, I was considering that more vertical would give a better return (i.e. 60 versus 35 gallon). Is the thought that the larger diameter would provide better settling (more stagnant flow region)? Or is it because of the space available for cross purposing it as a sump? I have a ton of basement space versus the limited footprint of the stands.

the thinner the settling tank the harder it is to get the flow in the center slower. the bigger the volume the better, but it is the total cross section of the tank that determines the velocity of water through the entire device. the tighter you can get the high velocity flow around the edges the better. if one can get a nice laminar flow along the edge that quickly drops off towards the center, than a taller thinner CST will work just fine.

i am playing around with making the CST also a sump. my original plan when i got the CST for the old tank was to use it just as a settling tank, nothing else in it. siphoning sumps of detritus can be a pain. i was giving a settling sump a try here. i just happen to have my old CST so i decided to give this a try instead of creating a sump with a V shaped bottom and a valve.

G~
 
Back
Top