Raoul5Duke
Active member
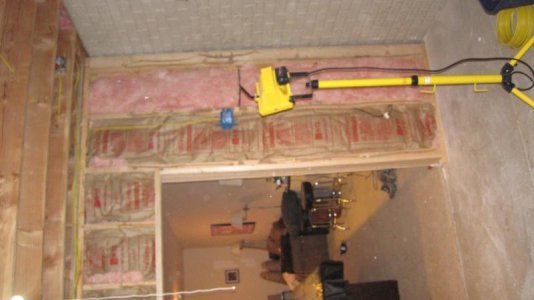
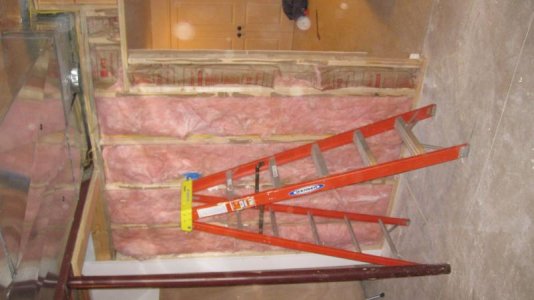
I've been planning a large build for some time now, but I just received delivery of my tank and sump yesterday so I thought it was appropriate to finally start my build thread. I welcome any comments, suggestions or constructive criticism from my fellow reefers. I also want to thank all those that have created their own build threads on ReefCentral and especially the Large Reef Tank forum as I have learned a lot from exploring and enjoying these threads.
Background:
I've been keeping saltwater aquariums for approximately 6 years now. I started off with the typical 55-gallon FOWLR but it didn't take long for me to get interested in corals and start upgrading equipment. Soon I had 2 tanks and was planning a third, basically the full blown addiction. After getting married in 2010 and moving to a larger place I decided that I really wanted to have a large tank one day, but I told myself that I needed to prove that I could keep SPS and other difficult corals before I upgraded to a large system. Over the last 3.5 years I have accomplished that objective and now I feel that I have outgrown my cobbled together ~150 gallon system and I am ready to invest in a large system. The system will be an in wall DT in my basement with a fish room behind it. I plan on this being a mixed reef, but I primarily enjoy SPS and LPS corals.
Equipment List:
Tank & Sump:
Tank "“ 96"x36"x24" or ~ 360 gallons. The tank will be made out of ¾" acrylic. I chose acrylic over glass for a variety of reasons but one of the main factors was the tank will sit next to our pool table in an area where the kids often play. I do not plan on painting the back as the room behind the tank is used as an exercise area and I want to be able to access it and enjoy it from both sides.
Sump "“ 60"x24"x16" or ~80 gallons. The sump is acrylic as well. I belive ¼" thick. Pretty simple design where the water flows into three 7" filter socks and then 2 large areas before hitting the return section. The skimmer will sit in the first large area while the second I have not decide what to do with. Possibly extra live rock, an algae turf scrubber or my reactors might go here.
The tank and sump were designed and built locally near Cleveland, OH by Aquatica. They were great to work with and came up with several ideas that improved upon my initial design ideas.
Water Movement:
I project I will need 20-40x my DT turnover inside the aquarium = 7,200-14,400 GPH. I plan to start with the following "“
2x Vortech MP60s (3,500-7,500 GPH ea.) "“ I have heard these are pretty loud at 100% so I am assuming I will run them at 60% which should total around 9,000 GPH.
1.5" Sea Swirl = 3,500-5,800 GPH "“ I assume 3,500 GPH based on my return pump. I have always wanted to try these. If I need more turnover or I don't like the Sea Swirl I will likely add 1-2x MP40s on the back wall.
For my return pumps, I am shooting for 5-10x my DT turnover flowing through the sump = 1,800 - 3,600 GPH. I plan on using 2x Reeflo Dart/Snapper hybrids. One will be the return pump while the other will run my manifold, yet will be plumbed in so I can switch over to it if I need to take the other pump off line for repairs. I really wanted to try the new DC pumps, but I just can't get comfortable with their reliability right now based on the research I have done.
Filtration:
JNS Shark Series 7 Skimmer fed by 2x Modified Sicce 5.0 pumps. The skimmer is rated up to 1,000 gallons, has air intake of 3,000 LPH and 16 inch diameter chamber. I was recommended this skimmer by Drae in the skimmer forum who informed me that it's the same skimmer as the AquaMaxx Cone 7, just rebranded and cheaper!
Carbon & GFO Reactors "“ I am undecided on brand, but I have not be happy with the BRS dual reactor so I am looking into single reactors for each
3x 7" Filter Socks "“ as mentioned previously. The guys at Aquatica designed a nice system where the socks slide into a shelf that holds each of them in place
Algae Scrubber? "“ I have experimented with some homemade and purchased scrubbers and I will likely continue to use this as part of my nutrient export.
Display Fuge?? "“ Currently I do not plan on using a fuge as I think it would be too small to really help with nutrient export. I think most fuges people set up are too small to do much good. Longer term I might plumb in a display fuge more for enjoyment that expected nutrient export.
Live Rock "“ Approx. 180 lbs that will be transferred from my current tanks. I want to have a very open aquascape in the display so there is plenty of room for corals to fill out and the fish to swim. If I begin having trouble with keeping my parameters in check then I can add more later.
Water Change & ATO:
Genesis Reef System Renew and Storm Pro models will be used for top off and automated water changes. I am really looking forward to automating my water changes. I always get really busy in the fall with work and coaching so inevitably my maintenance starts to lapse. I am hoping this will help out and increase the time I get to enjoy my tank instead of cleaning it, etc.
2x 80 gallon storage tanks plumbed to an old Mag 12 for mixing saltwater.
Lighting:
4x Ecotech Radion XR30w Pro Generation 3
Temp Control:
4x 500w Finnex Titanium Heaters controlled by 2x Ranco Controllers. There is no need for a chiller as it doesn't get warm enough in Cleveland to worry about it.
Controllers:
Apex and Ecotech Reeflink
Other/Misc.:
I plumbed in a janitor's sink to a Liberty 404 "“ 1/3 hp remote sink/drain pump system. Additionally, I plan on getting a 50-70 litre/day dehumidifier to keep humidity levels in check. I might look into an exhaust fan, but for now I am going with just a dehumidifier.


")