Floyd R Turbo
Either busy or sleeping
Don't set it out in the sun. UV rays will make it brittle. Never set an acrylic tank in the sun unless you don't want to use it anymore ")
Don't set it out in the sun. UV rays will make it brittle. Never set an acrylic tank in the sun unless you don't want to use it anymore
Have been reading through the thread and have seen people saying to use both an upcut or downcut spiral router bit. Am planning on getting a whiteside 1/2" spiral bit but don't know if I should get upcut or downcut. Which one is better in which application and why?
Regards,
Taylor
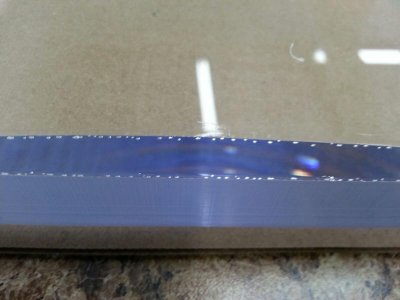
I was wondering what you think is the reason for microbubbles on the edges after cementing? The seams looked good while applying cementing. After a certain amount of time, microbubbles form.
are you shimming the edges? I had the same issues, just finally shimmed this time around and literally had perfect seams, only had a few bubbles at the ends, but once again, if I shimmed those parts might have solved that issue as well. I believe they have to do with the piece not sitting fully flush, then as the solvent starts to evaporate it takes in air and creates the air bubbles. Could probably use the non adhesive side of cellophane around the joint to see if that prevents them also. That is per direction from the Tech team at Cyro
Questions:
I would like to make a 4x2x2 acrylic tank with 1/2" and euro brace. Should I use Weld-on #40 or #4?
How do I apply Weld-on #40 without making a mess?
Please share some process/tips.
Thanks.
Floyd"¦. i don't have any AA, but i have plenty of methylene chloride.
can i just use the Methylene Chloride, or should i avoid it?
I'm building a sump out of 3/8" acrylic.