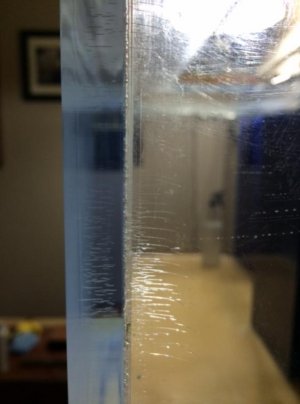
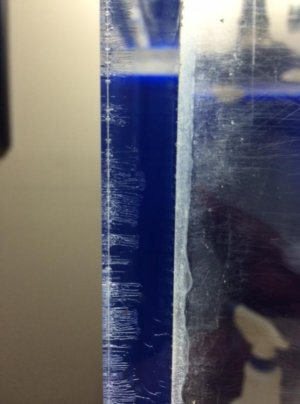
Acrylic fabrication questions? I can help!

What about using a router to trim down the material that is left? set a couple of boards in with double sided tape to hold in place and then use spiral cutting bit set just a hair higher than the back.

That might work, but only as far as you can get the router to go (meaning, in the corner, you have to resort to other means)
 
When I said grinder earlier what I really meant was a disc sander that didn't orbit running at low speed.

This http://www.lowes.com/pd_386374-70-D...L=?Ns=p_product_qty_sales_dollar|1&facetInfo=

DEWALT 6-Amp Disc Sander

6-amp motor delivers performance in high torque sanding applications to speed up the sanding process
0-3,700 OPM - VS trigger-dial for versatility in a wide array of sanding applications
Adjustable dust shroud can be connected to vacuum to provide improved working environment
Mid-handle design with soft grip and side handle provides increased balance and relieves user fatigue
Accepts 5-in, 8-hole hook and loop paper, allows for readily available paper to be changed quickly and easily
 
OK so I bought a long shallow acrylic tank. It is 10" deep x 8.5" tall x 7' long. It need a couple braces across the top and I have the material but no glue. My question is what glue do I use? The braces are 2" x 10" so there would only be 2 inches welded on each side of the brace.
 
The more effective solution would be to bond a strip all the way across the front. What thickness are the walls? Is there a eurobrace on it already, even just a perimeter one? If not, are the top edges polished?
 
The top edges are not polished. I haven't measured the thickness but its less than 1/4". I only have the two pieces that I described and there is no euro brace on it. It is just bare acrylic. The cuts are nice and clean.
 
Less that 1/4"...do you think it is close to 3/16" (0.1875), or is it more like 0.236 (a hair under 1/4")

If the latter, then that is 1/4" (the metric equivalent) and pretty minimal material for an 8" tall tank. You can bond the bars in place using weld-on #4 or #3, I wouldn't use #16 just because this is pretty much a structural bond and #16 sucks for that. This will also need to be a very strong bond as there is going to be outward pressure on that joint, so you will want to flip the tank upside down and place it on top of the strips, make sure both surfaces are clean, and use the pins method so you get a good 15-20 seconds of soak time before pulling them to ensure a good bond
 
The tank is 8 inches tall by 10 inches deep (front to back) and 6 feet 7 inches long. I was kinda wondering why you were suggesting so much bracing.
 
Never mind. I see that you knew that. So you think that its pretty flimsy and needs that extra support? I might just get rid of it. I have never done any acrylic and don't really want to chance it on my first attempt. It would kinda suck to have this thing crash down in my newly remodeled basement.
 
If you only put 6" or so of water in it, it might not bow that much. Fill it to within 1" of the rim and you will likely see it bow right away - probably by about an inch.

The bracing will help, but you will eventually see bows inbetween the bracing (you will see 3 bows on each side). Just fill it only as much as you need to cover the frags, 6" should be OK as long as your frag racks don't stick up too far.

FWIW I had a local club member who had a 48" long x 12" wide x 10" tall frag tank blow a seam on him in under 2 years, that was made out of 1/4" with poor vertical seams.
 
Had a question about WO40/42. If I am using them in a room that also has a frag tank in it what precautions should I take? I am already planning on turning the skimmer off and doubling up ROX carbon in one of my reactors. If absolutely necessary I can roll it out of the room but its kind of a pain and not without its own set of risks...


WO40 MSDS said:
Skin Protection:
Prevent contact with the skin as much as possible.
Butyl rubber gloves should be used for frequent immersion.
Use of solvent-resistant gloves or solvent-resistant barrier cream should provide adequate protection
when normal adhesive application practices and procedures are used for making structural bonds.

Also what type of gloves? butyl rubber? nitrile? I don't plan in immersing my hands in it LOL...

Is the 3M Tekk Protection Professional Multipurpose Respirator ok for this work?

Last question for now... What material can I use for backing that WO40/42 don't want to readily stick to?
 
I've never used gloves, but I suppose it's not a bad idea. I just try not to get the stuff on my hands :)

As for working in a space with fish/corals, FWIW I've seen an episode of Tanked where they repaired a crack in the bottom of an overflow that was a result of over-tightening a bulkhead by pouring the stuff right into the overflow (when dry) and letting is set up for a bit, then firing up the system. It may smell horrendous, but just making sure that the room is well ventilated should do the trick. That means all windows open and fire up a bunch of fans as soon as you pour the stuff where you want it - that's when the smell kicks in. I have a friend with no sense of smell and even he could tell the stuff was strong & nasty. But the smell dissipates pretty quickly.
 
Advice to salvage acrylic

Advice to salvage acrylic

Hiya, looking for some ideas/advice to salvage what was once my glorious 340gal aquarium. Movers crushed and scratched the hell out of it a few years ago. I took a saws-all to the seams to cut it down to be able to store the various sheets flat until I could do something with them. Now I am in a postion where I could possibly do something. The question would be what to do? Specifically,
1. Whats the best/cleanest way to trim and square up my hacked up pieces? (3/4 inch panels). How about most effective method to sand/polish back to useful state?
2. Theres no way I can put it back together as it was, so probably cut the pieces to square and them build a new or use panels as front panels for concrete or other material aquariums? (heres where I really could use some advice or ideas).
3. Failing any of that, anyone in the Hampton Roads area want to buy some 3/4" acrylic panels?
Thanks
 
Good question!!

Here is what I would do.

Step 1: refinish.

This is easiest to do now. Take vinegar soaked paper towels or cotton cloth (old t-shirt material, or the wipe you can buy at Lowes) and soak off all the coralline/etc.

Then, get yourself a Preppin' Weapon (google it) and some wet/dry sandpaper and have at it. Depending on the scratches, you might need to start with 400 on some but should need more than that. Then work your way through the grades. If you really want to get fancy, rent an air compressor and an air-driven orbital wet/dry sander and do it that way. Remember always sand wet, rinse a lot.

Finish it off with a high-speed polisher with Meguiar's Ultra-cut first, then Swirl-free polish next, using a different pad for each (the magenta one).

After you finish each side, mask it with new paper mask (you can buy these in rolls). This is kind of a PITA but you will be happy you did it.

Step 2: cut & prep

So figure out what you can make, and design the tank using the material you will have available. Rough cut and router edge prep as normal, per info in this thread.

Step 3: build.

What it says.
 
Salvagable or Scrap Heap?

Salvagable or Scrap Heap?

I have a 125 gal tank and have noticed crazing at the seams. Is this: (i) okay to use, (ii) needs gussets for additional support, or (iii) ready for the scrap heap. I have read a lot about crazing on this thread, but still am not sure how to distinguish between primarily cosmetic issues and serious concerns. Thanks for your thoughts!

craze1.jpg

craze2.jpg
 
Gussets can't hurt. Most of the time (emphasis: most) a structural failure in an acrylic tank will not happen suddenly. You will be able to see progression over time.

Sudden failure usually happens in tanks put together using WO40 or 42. A solvent welded seam is generally stronger than the material itself when done right (meaning, the panel will break first, rather than at the joint)

Surface crazing at the corners this is almost always due to flame polishing and is mainly cosmetic. It is an indication of bound stress in the material that cannot self-release (without annealing). I'm guessing this is the case in pic #1

Crazing within the joint itself is more of an issue. Again, it is stress related and goes back to the method used to assemble the tank, or it could have to do with the stand/foundation. The flame polishing probably did not help the situation either. I'm guessing this is the case in pic #2

FWIW there's a 600g acrylic tank at our LFS that has seam separation at the bottom front corner that is so bad, the entire joint is white for 6" and it looks to me like the whole tank is being held together in that area by about 1/16" of material. I'm flabbergasted that the tank hasn't exploded but they say it's been that way for years.
 
Thanks for the reply!. For gussetts, would a 1/2 rod work? (the original acrylic is 1/2") What adhesive would you recommend - WO4? What method of applying? I have read a lot about the pin method, but not sure that would work where you are joining two sides at the same time that are perpendicular to one another.
 
For gussets the best thing to use, if you can, is WO40 and 1" triangle rod. You can use 1/2" square rod too but the issue is that the inside corner usually has a bead of acrylic solvent that creates a non-square area. So you have to shave or hone down the edge that will 'sit' in the corner so that there is not an air pocket.

Generally with WO40 you need to leave a gap, and the WO40 fills that gap. If you press a piece in place tight and squeeze all the 40 out, the joint will not be solid. Most triangle rod comes "flared" so that it will sit off from the inside corner itself, leaving an air space to be filled. That is what I used to gusset up a poorly made (big) sump and it worked well, but there were air bubble pockets so it wasn't "presentation" work. I also made corner blocks 1" square and bonded those in the corners so that I didn't have to do any fancy mitering of the triangle rods to make them fit together like baseboards or crown molding does.

If you have a piece of 1/2" rod that is honed to fit in the joint perfectly, then you would solvent weld this as solvent is not a gap filler, and needs a tight fit. WO3 or 4, or even 16 can be used for that (3 or 4 preferable)
 
Okay I've got a question for ya:
What do I do with a 9.5' tank if I suspect I am moving- i.e. If I can't sell it can an acrylic tank be cut apart, refinished and reassembled or modified into a different dimension tank easily enough to justify the effort? My tank is 9.5'x4'x15"T made of 0.75" acrylic, and I'm concerned I may have a difficult time selling it. I do not anticipate any chance of having a place to use it or store it so I'm beginning to look at it like scrap I could reuse for a (few) smaller sized tanks.
The tank was used when I got it from a LFS- used to have stingrays. It's scratched up, but I didn't think beyond repair (in its present shape) when I first got it.
 
Hey guys, I have questions about an acrylic sump I am considering building.

Sump will be 30"L x 18"W x 12"H w/ 3, possibly 4 baffles running roughly 8" high made out of Acrylite GP.

Will 1/4" be okay for this low/ small amount of water?
Weld-on 16?
 
Back
Top