Algae Scrubber Basics

What is the best way to keep the algae from clogging up the holes above the screen? It seems like I am having to run a needle in the holes every other day to get the flow back
 
I finaly built mine!
I started it today with very little flow because it's splashing a lot. I guess it will be better when starting to have some algae.
I took a tee of one of my herbie overfloe. It's all one inche pipe. I measured 320 gph but I can get more out of it.
For the lights, I bought one GLW 30 W and one 20 W. I was thinking to start with the 20 W for about half an hour, few times per day and increase and eventually connect the 30 W.
I am feeding 5-6 cubes a day so I planed for a 9x9 screen. But it end up a little larger and I let it go to the water since it splash less that way.
Here are some pics, feel free to comment!
bffa6ec48d51d49104e200dcb1b9eee1.jpg


6ebc52a23729c3eb39119e41956c1382.jpg


2b1053a82df047a62466836dc38e9563.jpg


af82983bbebaabe62ae0fc8196da2cfa.jpg


daaf7aaa5bb7303bbe7ea2e2a1e9d1b1.jpg


f2cbcb1a28d5a601640e0333f72a78de.jpg
 
The splashing will get worse actually/usually when the algae grows. That is a giant screen by the way lol. Something that large in my opinion should be enclosed with lots of flow. I noticed a huge change in mine when I cranked the flow up.
 
The splashing will get worse actually/usually when the algae grows. That is a giant screen by the way lol. Something that large in my opinion should be enclosed with lots of flow. I noticed a huge change in mine when I cranked the flow up.
Thanks for the comment! I start to understand why people install acrylic panels on each side, I think that's I will do.:)
 
Thanks for the comment! I start to understand why people install acrylic panels on each side, I think that's I will do.:)

I looks like to only flow control to the screen pipe is a ball valve? Consider adding a gate valve for more sensitive control over flow. I have a ball valve to stop flow for cleaning/maintenance and a gate valve, that once adjusted I don't have to reset. Works better for fine control. JMO
 
Looks like flow is weak.

And lights a little to far from screen. Might not be to bad until the screen breaks in
 
I looks like to only flow control to the screen pipe is a ball valve? Consider adding a gate valve for more sensitive control over flow. I have a ball valve to stop flow for cleaning/maintenance and a gate valve, that once adjusted I don't have to reset. Works better for fine control. JMO

Yes, I know, thank you! I didn't have gate valve at a reasonnable price so I went cheap with a ball. If it's so bad, I'll change it. :)
 
Looks like flow is weak.

And lights a little to far from screen. Might not be to bad until the screen breaks in
Thank you outy I really appreciate all the comments!! I will open more the valve and in few days, will get the lamp closer (maybe after adding an acrylic splash guard)
 
Yes, I know, thank you! I didn't have gate valve at a reasonnable price so I went cheap with a ball. If it's so bad, I'll change it. :)

Don't just change it, use both. I use the ball valve as an on/off only and the gate valve to adjust the flow.
 
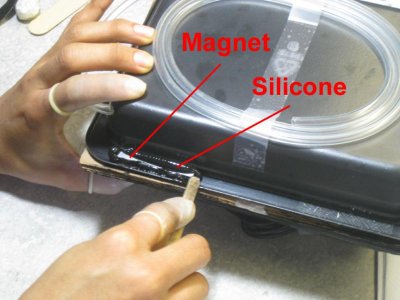
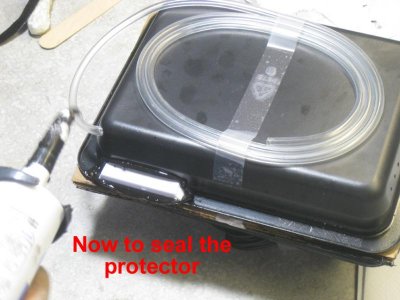
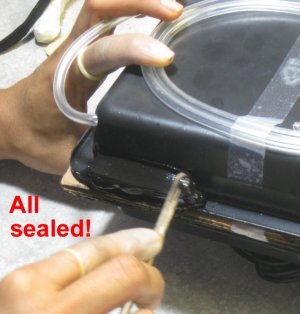
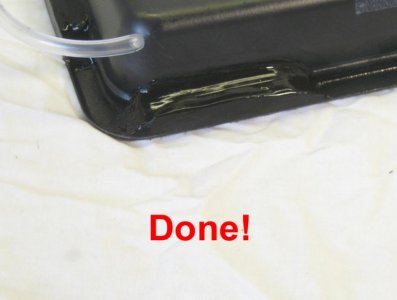
Anyone who is building upflows with magnet attachment to the glass, might like to make use of the new technique of putting a hard plastic protector over the magnet; in case you let the wet side magnets snap to the LED magnets, the protector will prevent the silicone from being scraped off.

Any square piece of plastic will work, like the corner of a plastic box.
 

Attachments

  • mag-covers-2.jpg
    mag-covers-2.jpg
    54.9 KB · Views: 2
  • mag-covers-4.jpg
    mag-covers-4.jpg
    54.9 KB · Views: 3
  • mag-covers-5.jpg
    mag-covers-5.jpg
    61 KB · Views: 2
  • mag-covers-6.jpg
    mag-covers-6.jpg
    31.8 KB · Views: 2
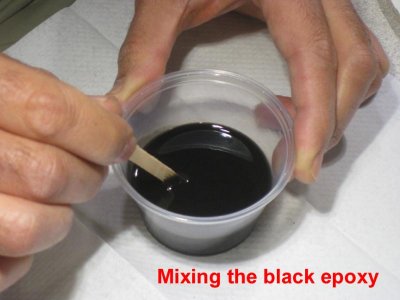
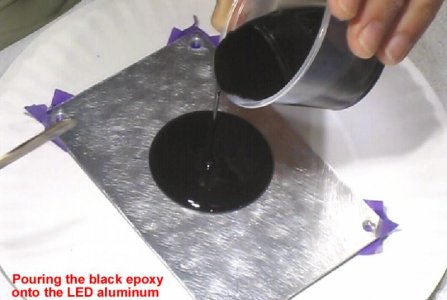
...And if you are instead building a floating version and you want to really seal the LED, pour epoxy (like Devcon 2-ton) onto the alumimum instead of using paint.

The epoxy does not need to be black like shown here; the regular color works fine. Just pour it on (after cleaning the aluminum well with alcohol), and use a stick to spread the epoxy evenly. Keep an eye on it for the next few hours to make sure it stays even and does not run off one edge.
 

Attachments

  • floating-epoxy-1.jpg
    floating-epoxy-1.jpg
    42 KB · Views: 2
  • floating-epoxy-2.jpg
    floating-epoxy-2.jpg
    45.7 KB · Views: 2
Back
Top