You are using an out of date browser. It may not display this or other websites correctly.
You should upgrade or use an alternative browser.
You should upgrade or use an alternative browser.
Bubble King Setup, Tuning and trouble shooting thread. Post your questions here!
- Thread starter machodik
- Start date
Leave it at 16.5 for now and let it remove what ever is in the water causing the overflow. I suspect it's something in your rocks/system that is causing it. Let it run for a while and it will likely calm down as the skimmer removes what ever is causing the condition. At some point down the line probably a couple weeks, you should be able to gradually make the water level in the sump deeper.
ok thank you
there is one more thing that the small bubble ...
even when It leave 16.5cm...
there is many small bubble... in my tank.
slief
RC Sponsor
ok thank you
there is one more thing that the small bubble ...
even when It leave 16.5cm...
there is many small bubble... in my tank.
They are called micro bubbles. The skimmer is breaking in. Also, from the sounds of it, your tank is new and you don't have any load in the tank to generate proteins. The proteins allow the bubbles in the skimmer to stick together and when they do that, more bubbles end up at the top of the skimmer instead of going out the effluent pipe. As such, the skimmer will tend to create more micro bubbles until your load increases. You likely also still need to fine tune the nozzle more once you export whatever was causing the overflowing issues which I suspect may have been from the rocks and your cleaning process. Just give it some time.
ReefKeeper64
Wanna be a reefkeeper
ReefKeeper64
Wanna be a reefkeeper
slief
RC Sponsor
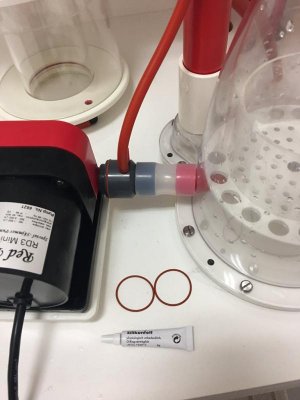
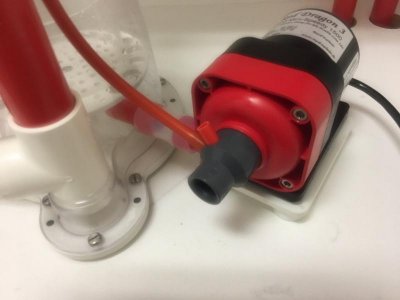
Is this correct?
That is not correct. Did you not get an instruction manual with your skimmer?
http://royalexclusiv.com/images/content/bk_dc/eng/bk_dc_operating_maintenance_eng.pdf
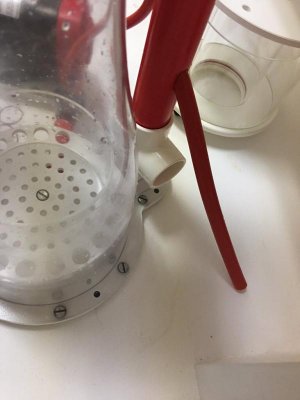
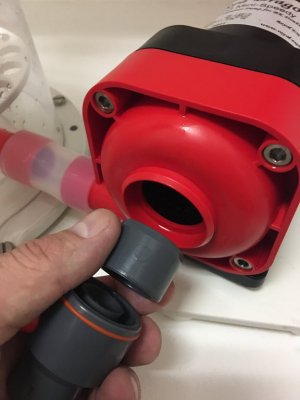
The nozzle with the venturi connections slips into the front of the pump. It's held in place by the little red o-ring that is seated into the end of the gray nozzle. The large diameter silicone tube connects to the side/output on the pump.
This picture shows the correct installation of the pump.

Last edited:
vhuang168
New member
That is not correct.
The nozzle with the venturi connections goes it the front of the pump. The silicone tube connects to the side/output on the pump.
Silicon tube is correct but the air intake is not.
Sent from my iPhone using Tapatalk
ReefKeeper64
Wanna be a reefkeeper
It's that silicone tube at the bottom of the picture.
Sent from my iPhone using Tapatalk
Thanks Vincent. I appreciate your help with that.
slief
RC Sponsor
Silicon tube is correct but the air intake is not.
Sent from my iPhone using Tapatalk
That is true.. :beer:
Not sure why you were quoted in that reply. Musta fat fingered my tablet. Never seen anybody attempt to install the nozzle there. That is a new one for me! I see you posted a picture too. Tag team! :thumbsup:
slief
RC Sponsor
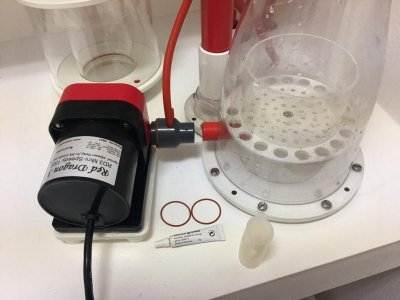
The o-rings are spares that are used on the nozzle. They are there in case you damage the existing one. The nozzle is meanted to be easily removed from the pump so you can inspect and clean the venturi port and remove any salt creep without having to dissasemble or remove the pump. It pops right off but some people manage to damage their o-rings so a couple extra were included along with silicone grease to properly lubricate the o-rings on the nozzle, collection cup and in the pump as part of routine maintenance.
ReefKeeper64
Wanna be a reefkeeper
ReefKeeper64
Wanna be a reefkeeper
The o-rings are spares that are used on the nozzle. They are there in case you damage the existing one. The nozzle is meanted to be easily removed from the pump so you can inspect and clean the venturi port and remove any salt creep without having to dissasemble or remove the pump. It pops right off but some people manage to damage their o-rings so a couple extra were included along with silicone grease to properly lubricate the o-rings on the nozzle, collection cup and in the pump as part of routine maintenance.
Hey Scott, thanks for the details about the o-rings and silicone use. I appreciate it.
ReefKeeper64
Wanna be a reefkeeper
ReefKeeper64
Wanna be a reefkeeper
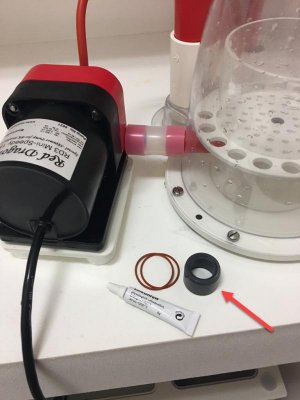
I don't think so. I think that pipe is an adapter for a different skimmer.
Sent from my iPhone using Tapatalk
OK, I'll set it aside for now. Scott can confirm. Thanks Vincent!
Last edited:
ReefKeeper64
Wanna be a reefkeeper
slief
RC Sponsor
OK, I'll set it aside for now. Scott can confirm. Thanks Vincent!
That smaller gray PVC piece is used to adapt the pumps output to larger diameter silicone tubing used when connecting the pump to larger skimmers.
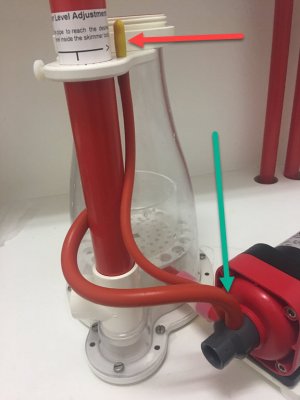
I just want to confirm a couple of more things before I start this baby up.
Red Arrow:
The yellow cap has to be removed. Correct?
Green Arrow:
I believe the red hose connects here. Correct?

The above looks correct. The yellow cap is used to plug the ozone port when ozone is not in use. I normally cut the cap down and install in on the smaller port on the pumps nozzle as it's one less tube/hose to disconnect from the pump when doing pump maintenance. I then set the smaller red silicone tube aside in my spare plumbing drawer.
Assuming this is a Double Cone 180, you will want to run the pump speed between 18 & 20 watts if your tank is stocked and has a decent load. That is about the ideal speed/flow rate for this skimmer and allows optimal contact time while also providing good air and water rates into the skimmer. Note that when you press the buttons up or down on the controller, the first number you will see is an estimate of the wattage. The final/settled number will be the actual wattage and that is the number you want to base your settings on.
Similar threads
- Replies
- 345
- Views
- 15K
- Replies
- 33
- Views
- 7K
- Replies
- 172
- Views
- 7K

