Building 1300-gallon Reef System (construction pictures)

What are your humidity plans? That's one thing I thought of but underestimated when I build my ~850ish gallon tank... also what are you planning to light it with? With it being that deep you will need something serious. I'm running LEDs now but I'm thinking about dropping in 4 solar tubes.... Ill definetly be tagging along

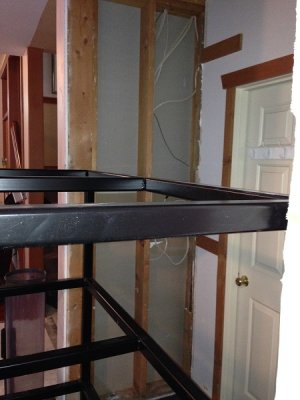
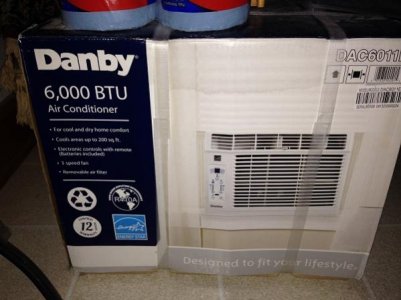
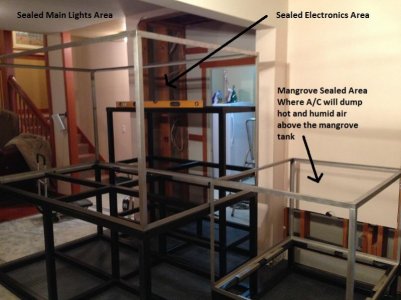
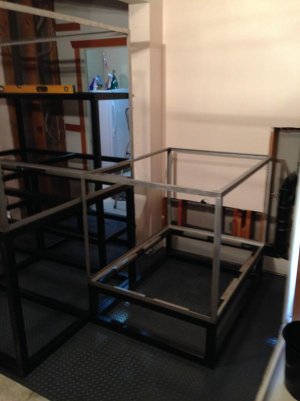
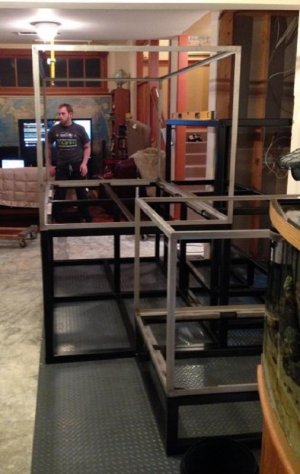
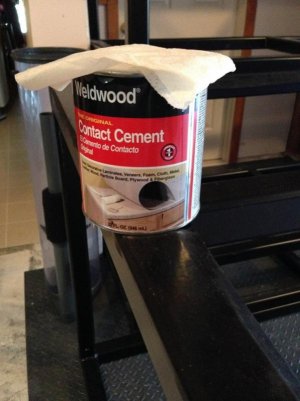
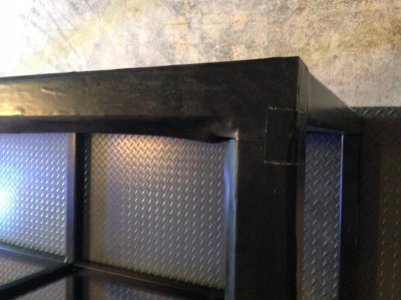
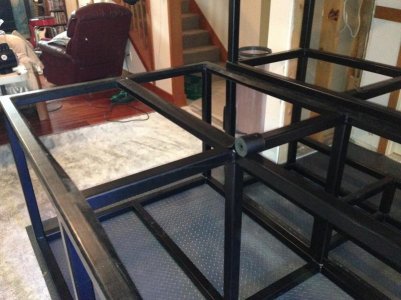
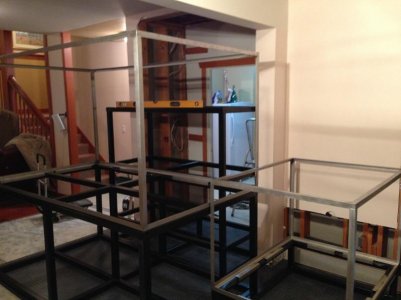
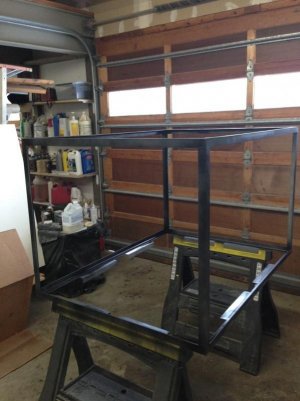
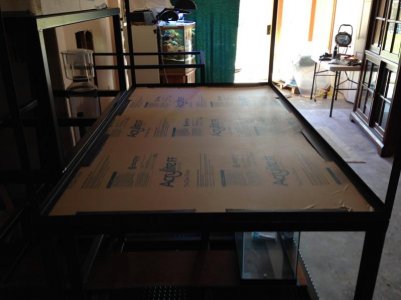
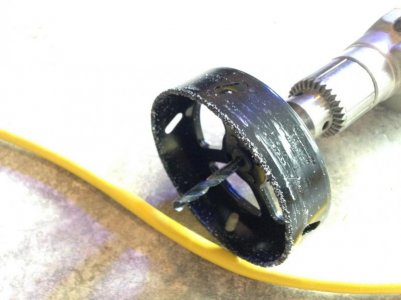
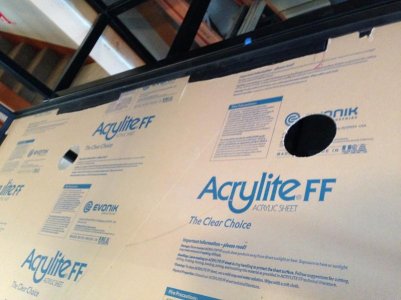
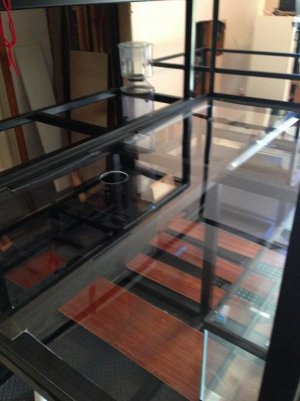
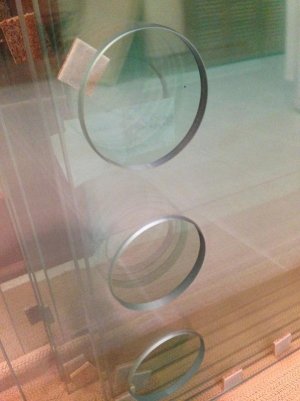
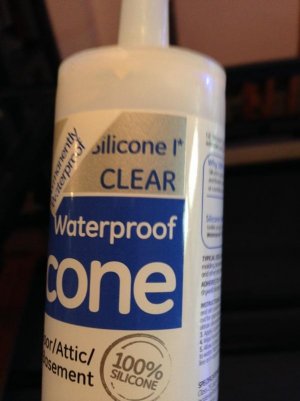
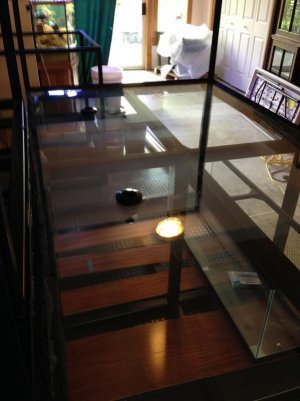
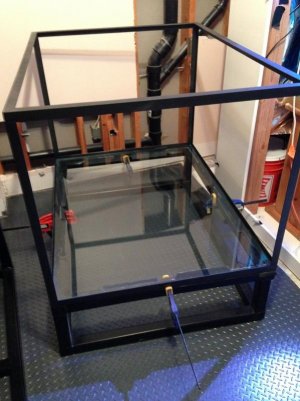
So for the humidity I have an interesting plan. I bought a small A/C unit from Costco and the plan is to isolate and seal the area above the main tank where the lights will be, the area where the PLC and electronics will be (shown in the first picture) in between the studs will be sealed in with Plexiglas and the area around the closet stand. Each of these three areas will be served be multiple ducts that converge into a large duct that will connect to the A/C unit (picture 2). The area above the mangrove tank will also be sealed from the top of the tank to the bottom of the light compartment with Plexiglas and from the back a single duct will open into the mangrove system and all of the hot/humid air will be dumped into the system to keep the mangroves hot and damp. I will also have some gauges and a diversion duct so that I can dump the heat outdoors if everything is really overheating, but the area stays pretty cold.

Here is some of the equipment I have gotten for the tank.
2X Hamilton Cayman Sun Reflector 250 Watt DE HQI 14K System
2X AquaticLife Expert Series 46 Inch 234 Watt Cree LED Light Fixture (3 Watt x 72)

The lighting layout will be included with the other diagrams later.

Main pumps...
2X Dolphin Amp Master Diamond External Marine Pump - 6250 GPH (Type-2)

Skimmer...
1X ASM G-6 Protein Skimmer w/ 2xSedra 15000 Pumps

Controller...
1X Digital Aquatics ReefKeeper Elite (Net) Controller

All these components are for the main tank. I have most of the additional pumps and lighting for the rest of the system.

I also have a link for one more video of my bow-front that I took today since the ones I posted yesterday were a bit outdated.

http://youtu.be/KCp-n1gN2XI
 

Attachments

  • Electronic area (web).jpg
    Electronic area (web).jpg
    90.5 KB · Views: 7
  • AC (web).jpg
    AC (web).jpg
    38.5 KB · Views: 6
  • AC areas (web).jpg
    AC areas (web).jpg
    59.3 KB · Views: 7
  • IMG_0163 (web).jpg
    IMG_0163 (web).jpg
    42.6 KB · Views: 7
  • IMG_0164 (web).jpg
    IMG_0164 (web).jpg
    54.7 KB · Views: 5
I think you will need bigger AC unit. My 6000 never cut off so I ditched it and added a dehumidifier but it pulls like 7amps.... in the summer just fans blowing outside were fine but when it got cold and I had to drop my window it got humid fast. Love the equipment list, I run 3 asm skimmers I love love to have a g6. Can't wait to see the rest of it, good work so far
 
+1
With that amount of humidity I would say at least 12000 BTU or even 18000 would be appropriate. I doubt the 6000 BTU unit will make even a dent in your humidity levels.
 
I think you will need bigger AC unit. My 6000 never cut off so I ditched it and added a dehumidifier but it pulls like 7amps.... in the summer just fans blowing outside were fine but when it got cold and I had to drop my window it got humid fast. Love the equipment list, I run 3 asm skimmers I love love to have a g6. Can't wait to see the rest of it, good work so far

+1
With that amount of humidity I would say at least 12000 BTU or even 18000 would be appropriate. I doubt the 6000 BTU unit will make even a dent in your humidity levels.

Thanks for the input. I am going to take that back tomorrow and at a minimum double up.
 
Attaching rubber to the Steel Stands to protect Stainless

Attaching rubber to the Steel Stands to protect Stainless

I bought some conveyor belt skirt-board rubber and applied it to the stand using basically rubber cement. I painted it onto the steel and the rubber, waited 20 minutes and set the rubber in place. The biggest pain was removing the bubbles that form as the rubber is getting pushed down, but once I messed with it for awhile it came out pretty smooth.

The pictures tell the story.

I did remove the duct tape after the glue dried and the reason the rubber overlaps on the inner edge will become apparent with the next post.
 

Attachments

  • IMG_0165 (web).jpg
    IMG_0165 (web).jpg
    54 KB · Views: 6
  • IMG_0167 (web).jpg
    IMG_0167 (web).jpg
    51.6 KB · Views: 5
  • IMG_0177 (web).jpg
    IMG_0177 (web).jpg
    38.4 KB · Views: 7
  • IMG_0179 (web).jpg
    IMG_0179 (web).jpg
    60.3 KB · Views: 6
  • IMG_0166 (web).jpg
    IMG_0166 (web).jpg
    58.4 KB · Views: 6
Stainless Steel Frames

Stainless Steel Frames

The stainless frames that I had made have some of the most incredible welding I have ever seen. I am an amateur welder, which is why I didn't try to weld this stuff, but I know enough to know that it is difficult.

The pictures focus on the welds and the support brackets.

The outer welds were space-filling and were not ground at all, that is just how good they look.

The inner welds were ground flush so that the glass is sitting level.

I had some extra material and it is really expensive, so I had the welder use all the extra to weld in brackets all around the bottom/inner edge of the main and mangrove frames. You can see where they fit onto the steel frame and they are not very snug, but with the rubber they fit well and once that thing is full it won't be going anywhere.
 

Attachments

  • IMG_0168 (web).jpg
    IMG_0168 (web).jpg
    51.1 KB · Views: 6
  • IMG_0169 (web).jpg
    IMG_0169 (web).jpg
    47.5 KB · Views: 6
  • Inner Weld (web).jpg
    Inner Weld (web).jpg
    53.2 KB · Views: 6
  • IMG_0178 (web).jpg
    IMG_0178 (web).jpg
    71.8 KB · Views: 6
  • IMG_0162 (web).jpg
    IMG_0162 (web).jpg
    50.5 KB · Views: 6
What are you protecting the stainless from with the rubber?

Basically protecting the stainless, the powder coating and the steel from each other. With the combination of the salt water, there can be some long term reactions that can degrade both sides, kind of rust them together and over time there can even be elemental diffusion of specific ions into and out of each metal which could weaken the crystalline structure, but more importantly the welds can eventually degrade.

Not a very high possibility, but with that much force I don't see any reason to mess around.

So today I painted the stainless frame for the mangrove tank and started taking the measurements so I can hopefully order all my glass panels tomorrow. The stainless didn't need to be painted, but my family and I thought ascetically the black would distract less from the tank.
 

Attachments

  • IMG_0173 (web).jpg
    IMG_0173 (web).jpg
    51.9 KB · Views: 6
  • IMG_0172 (web).jpg
    IMG_0172 (web).jpg
    39.8 KB · Views: 6
  • IMG_0174 (web).jpg
    IMG_0174 (web).jpg
    58.3 KB · Views: 6
  • IMG_0175 (web).jpg
    IMG_0175 (web).jpg
    41.9 KB · Views: 6
Everyone has been awesome about answering my questions. I really appreciate it.

One nagging question that I have been working on for awhile is looking for a good distributor for the large amount of live rock and Aragonite sugar-sized sand that I will be needing.

In the past I have bought live rock from liveaquaria and for 90 lbs amounts that are subsequently well-cured they tend to develop well enough. I was just hoping I could find a dealer that might give me a break on the unit cost and/or shipping since I am getting such a large quantity. If nothing else, it would be nice I find someone who could deal in some larger pieces so I don't have to build a 3 x 3 foot tower out of little 5 lbs rocks.

Thanks again for all the help.
 
You may be buying enough to get Walt Smith to let you work with one of the distributors, or at least lump an order in with one. If I were in your position I would also call Jeremy at premium aquatics to try to work a deal. In reality most anyone is probably going to cut you some kind of deal.
 
Shaping acrylic for main tank support

Shaping acrylic for main tank support

Hi everyone. Thank you for the replies and sorry that I have been out of the loop for a little while. I went on vacation for a week and then this week I finally got all the glass for my system. I am hoping to catch up this weekend and bring you all up to date on the system progress.

First of all, when ordering the glass, I also ordered a whole 4' x 8' sheet of 1/8" thick acrylic. Since the stainless frame for the main tank is 1/8" thick, I decided to use the acrylic to make up the rest of the gap between the main tank stand and the main tank frame so that the load on the bottom panel of glass is evenly distributed to the steel stand. It is kind of weird to explain, but the pictures should tell the story better.

I made the initial cuts with a table saw, then skill saw, and finally used a heavy duty dremel tool my dad has to refine the tabs.

Skill saw video; http://youtu.be/YHpUyYI322w
Foredom video; http://youtu.be/RvriObidYNc

The holes were drilled with a 4-3/8" hole saw. These aren't super important, they just give enough room for the bulkheads once the glass is in place.
 

Attachments

  • Marking cuts (web).jpg
    Marking cuts (web).jpg
    61.4 KB · Views: 6
  • Cut acyrlic in place (web).jpg
    Cut acyrlic in place (web).jpg
    49.9 KB · Views: 6
  • 4 inch hole saw (web).jpg
    4 inch hole saw (web).jpg
    45.3 KB · Views: 6
  • Acrylic holes (web).jpg
    Acrylic holes (web).jpg
    57.1 KB · Views: 5
  • Acrylic in place (web).jpg
    Acrylic in place (web).jpg
    54.8 KB · Views: 6
Glass order

Glass order

So for this post, I just wanted to show everyone the glass that I ordered and how all of it applies to the system.

The first three pictures show the actual paper order that I gave to my local small town glass company and if you look closely, the lady I worked with wrote the price of each individual pane next to its description.

The 1/4" un-tempered panes are nothing special and are much like the glass that most small to medium aquariums are built from. None of these panes were pre-drilled and I will drill them once I am positive where I will need the holes and the flow rates involved.

The 3/8" tempered glass which is only for the main tank and the mangrove tank is a different story all together. I was a bit concerned going in, because my calculations for the main tank indicated that I would need either 3/8" tempered glass (which is roughly 3 times stronger than equivalent un-tempered pane glass) or obviously basic un-tempered glass that would be over an inch thick; making it much heavier and difficult to deal with. The problem was, as I am sure most of you already know, that it is not possible to drill tempered glass. So I thought that I would need to mix undrilled 3/8" tempered glass with drilled 1" thick un-tempered glass which would be a pain.

Luckily, after talking with my glass supplier, she informed me that she had recently heard of a large glass supplier in the state (Washington) that offered to make custom panes, drill them and then temper the glass after it had been drilled. Fortunately this process was not cost prohibitive and made all of the tank construction a much more simple design. The paper order shows all of the drilled panels with specific dimensions and I was really impressed with the end results. The holes were clearly water-jetted and all of the edges were beveled so there were no sharp edges. The biggest panel (which is the bottom of the main tank) weighed less than 100 lbs and if I had used the 1" thick un-tempered glass instead, it would've weighed a lot more and been significantly harder to work with.
 

Attachments

  • Glass order 1.jpg
    Glass order 1.jpg
    54.2 KB · Views: 6
  • Glass order 2.jpg
    Glass order 2.jpg
    60.1 KB · Views: 6
  • Glass order 3.jpg
    Glass order 3.jpg
    67.5 KB · Views: 6
  • Tempered glass (web).jpg
    Tempered glass (web).jpg
    46.7 KB · Views: 5
  • Overflow holes (web).jpg
    Overflow holes (web).jpg
    51.6 KB · Views: 5
Initial tank construction

Initial tank construction

Okay.

So yesterday I installed the bottom glass panes for both the main tank and the mangrove tank.

I have pictures of both, but the video is of installing the mangrove pane.

The reason I only showed that and not the main tank is that both were done more or less the same, but do to the awkward size and weight of the main tank's pane, I didn't have an extra set of hands to record a video while that job was being done.

The link to the video is; http://youtu.be/9AUNaBOYU_w

I am hoping that today and tomorrow I will get the rest of the mangrove tank assembled and the images posted. I have to wait a few more days on the main tank as I am waiting on some additional rubber for the frame and I need my brother to get back from vacation so that I have enough extra hands available to be comfortable doing it. With those tempered panes, it is essential to have complete control as if it is dropped or swung quickly, it will not knock a chip out of the glass, the whole pane will shatter.
 

Attachments

  • Silicone type (web).jpg
    Silicone type (web).jpg
    40.3 KB · Views: 6
  • Silicone bead (mangrove) (web).jpg
    Silicone bead (mangrove) (web).jpg
    53.9 KB · Views: 6
  • 1.5 inch bulkhead (web).jpg
    1.5 inch bulkhead (web).jpg
    52.3 KB · Views: 6
  • Glass and acyrlic in place (web).jpg
    Glass and acyrlic in place (web).jpg
    54.3 KB · Views: 6
  • Mangrove bottom panel in place (web).jpg
    Mangrove bottom panel in place (web).jpg
    66.6 KB · Views: 6
Responses

Responses

Thanks again for all of the positive comments.

I will be using a ASM G-6 PROTEIN SKIMMER W/ 2XSEDRA 15000 PUMPS that I bought from marinedepot.

It is probably a little under-sized for this system, but with the deep sand ecosystem that I use for denitrification, I have had serious issues with nitrate levels so low over time that I wasn't able to keep filter-feeders like Tridacna sp. alive long term.

In my current 72 gallon bowfront I have not done a water change in about 6 months and every two weeks during that span I have had ammonium, nitrite and nitrate levels that will not even register. I am hoping that by skimming less I am able to maintain a nitrate level between 10-30 ppm so that there are some nutrients available for pure filter-feeders and also less photosynthetic corals.

I have a B.S. in Biology and have been interested in this hobby for years. As I continue this build I will also try to expound some on this deep sand system I have been using for several years. By supporting and cultivating specific organisms from the macroscopic sand-sifting stars and snails to the microscopic zooplankton and bacteria the sand bed stays well aerated and as I said above; once the system is stable and all the organisms are breeding to maintain their levels, I have had relative ease maintaining incredibly low levels (actually below threshold testing levels) of nitrate well performing less that 4 water changes annually.

Thank you again for your interest and I am more than happy to answer any other questions that anyone might have.
 
Link

Link

You have to make the video available to the Public for the rest of us to see it.

Dave.M

Thank you for the heads up Dave.M

I am clearly not much of a tech wiz, I have always been much better at biology than technology.

So hopefully for the last time, here is the link.

http://youtu.be/fIeITL-WTTQ

Please let me know if I still haven't figured it out.

I really appreciate the help. I wouldn't even bother to learn except that I love the dialogue and camaraderie that this website engenders.

Thanks again.
 
thumbs_up.gif


Placing a pane of glass in bare feet? Must be a new safety protocol I haven't heard about.

Dave.M
 
Back
Top