cerreta
Premium Member
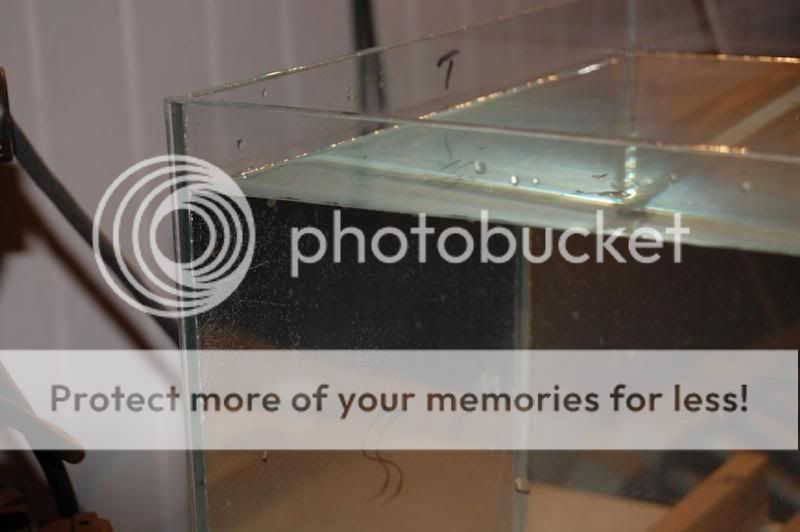
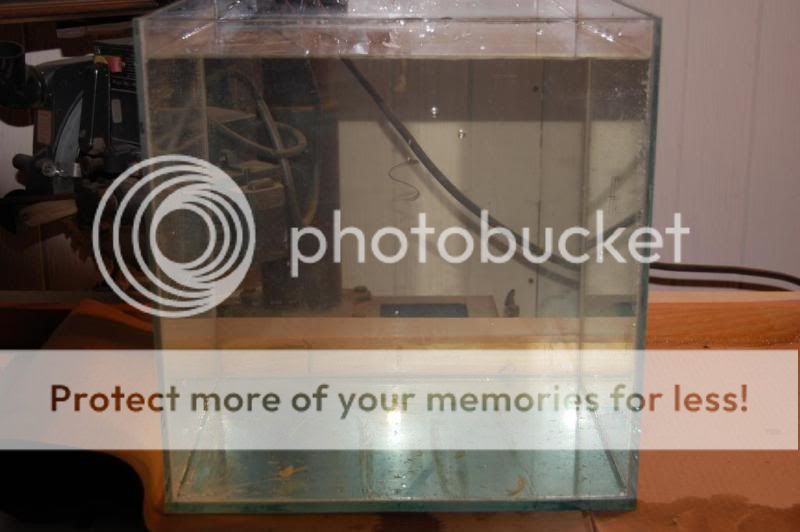
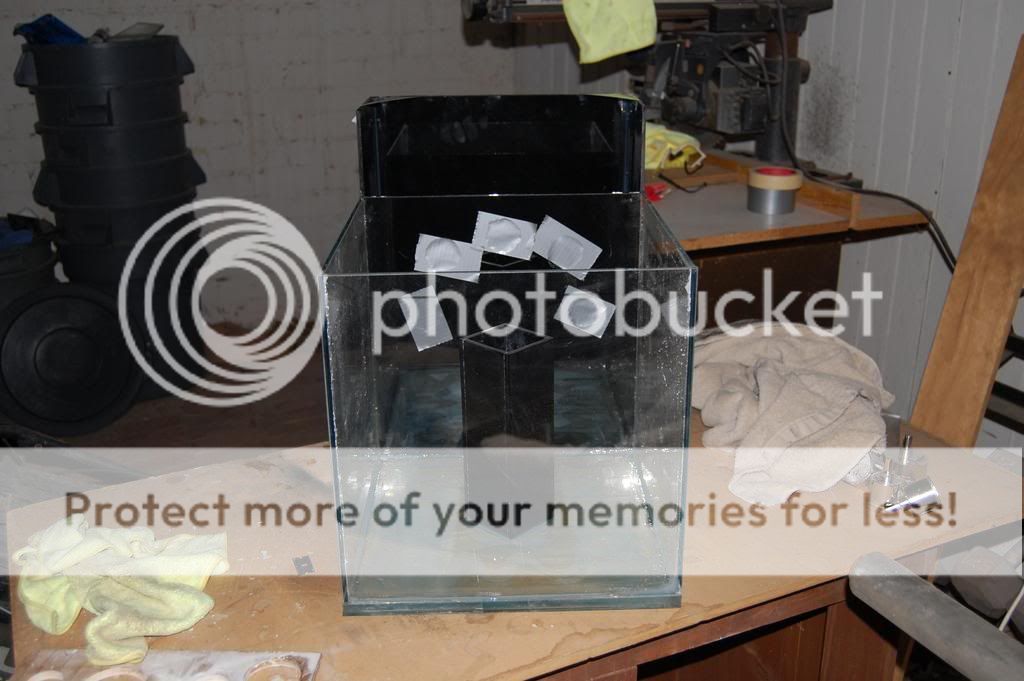
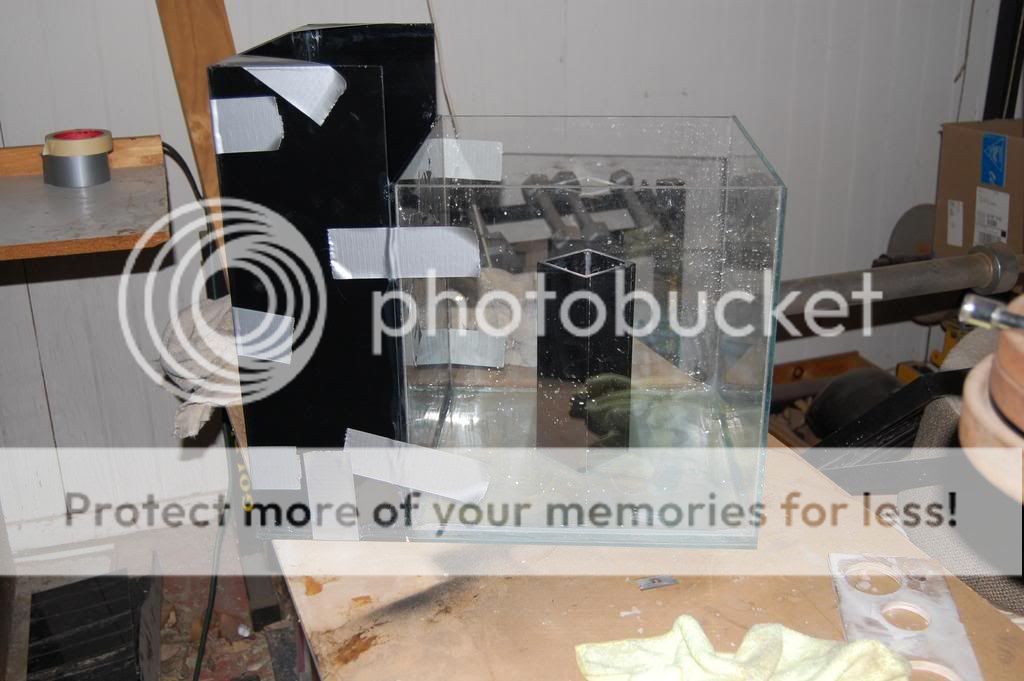
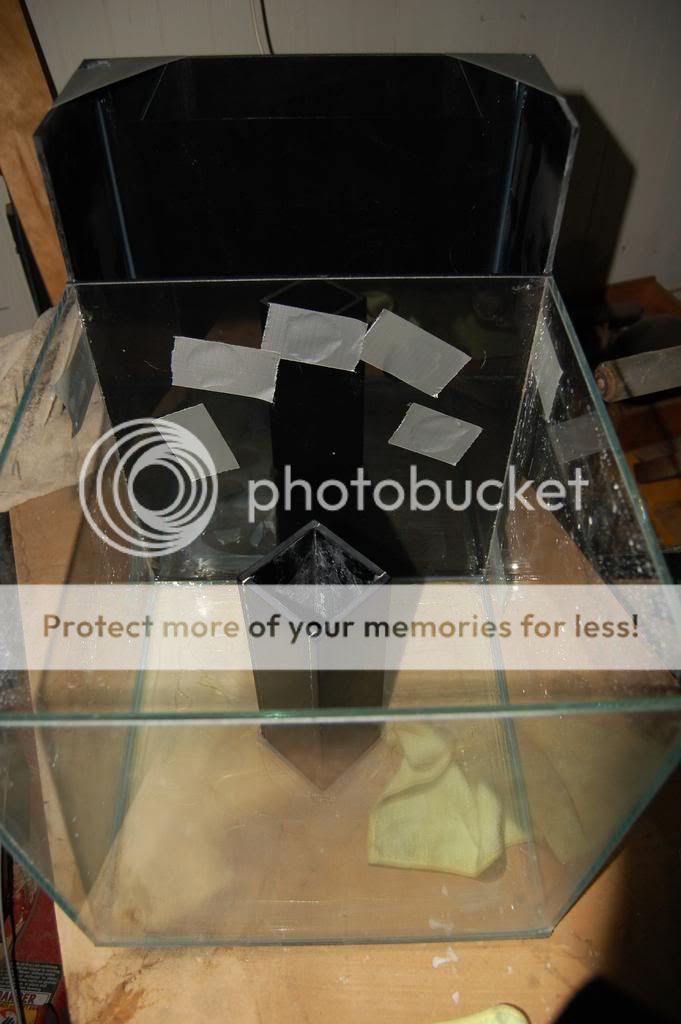
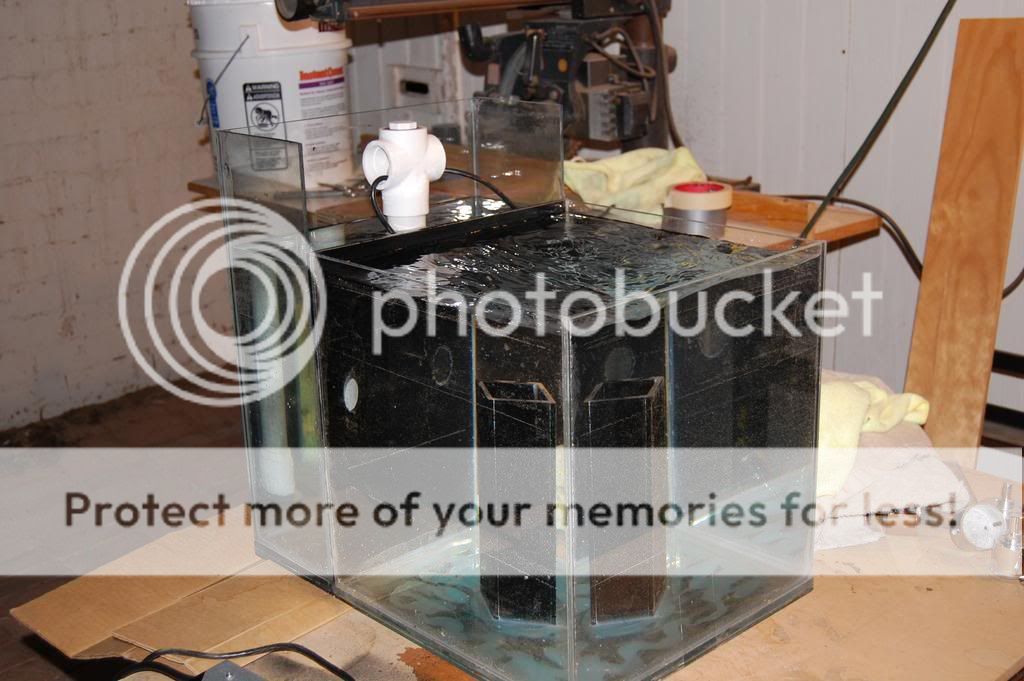
I am building a 15 gallon starfire trimless “RC Artsy-Cube.†The main display is a 14†cube tank. The internal Closed-Loop Sump is 5 Gallons
Being in the hobby for several years has given me the opportunity to build relationships with many people in the hobby. In Tucson I have helped many reefers with their aquarium projects, including aquascaping and helping newbies by supplying them with free or very low cost corals to get them started in the hobby.
The objective of this project is to use those relationships developed here on Reef Central and build this project with materials and labor from the RC people.
Although a small aquarium, my budget for this project is $1500. I plan to use high end equipment and exotic corals. Luckily I have plenty of frags to stock this tank, but I am looking for “show-piece†colors for this project.
I have asked several people for their assistance with this project. These people have offered to help at no cost, frag trades, or even for chocolates. I have a very good connection with that. I wish to keep these people anonymous since their contributions are so generous and they could get a flood of offerings for helping out with TOO many other projects. However, if they wish to announce themselves here on this thread, then that is cool!
Currently, the tank has been assembled, but nothing has been drilled or tested at this point. I am definitely open for suggestions and more ideas. If anyone has an expertise, equipment, or a skill they are willing to share, please help. The more the merrier.
Here are some of the ORIGINAL (October 2007) design ideas: (CAPS REPRESENT NEW COMMENTS MADE TODAY)
BASICS:
The artsy look comes from using classic colors black and silver with geometric shapes predominately squares and circles. The entire project from light to plumbing has been chosen to accent the colors and shapes. If it does not look like art, then it will not be used.
The premise is a stylish tank with no external sump, no skimmer, no chiller, no extensive filters or media, no live rock, and no exposed wires or equipment of any kind. It must be ultra quiet and produce no appreciable heat. It will be an sps display tank with a few snails and one high dollar fish. I am considering a Helfrichs or Red Frog fish Angler. I sure could use more ideas for a solitary cool fish. I will rely on weekly water changes and Oceans Blend 2 Part to export nutrients and maintain Alk / Ca, respectively.
TANK:
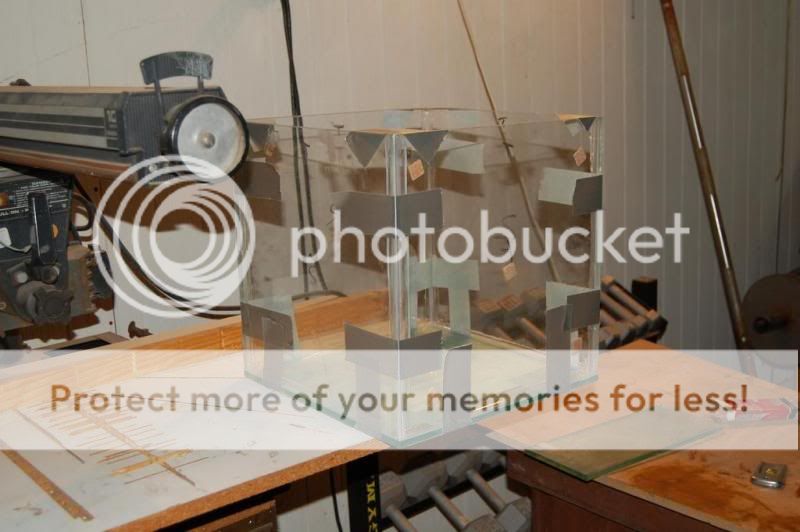
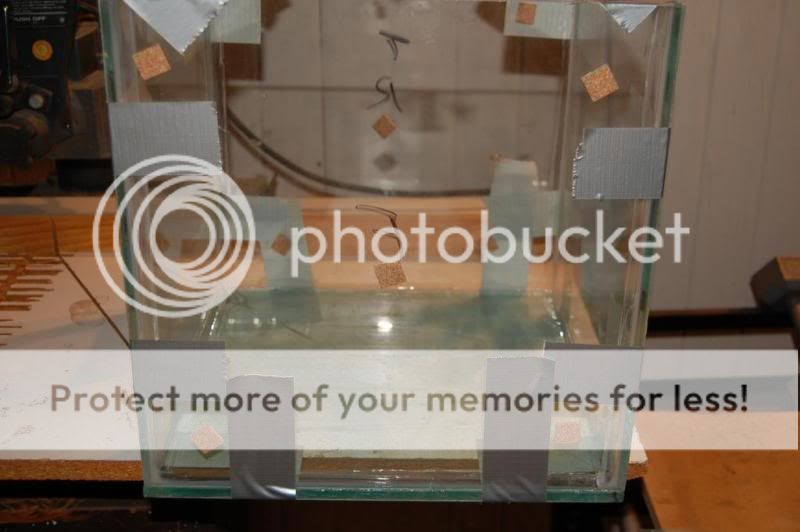
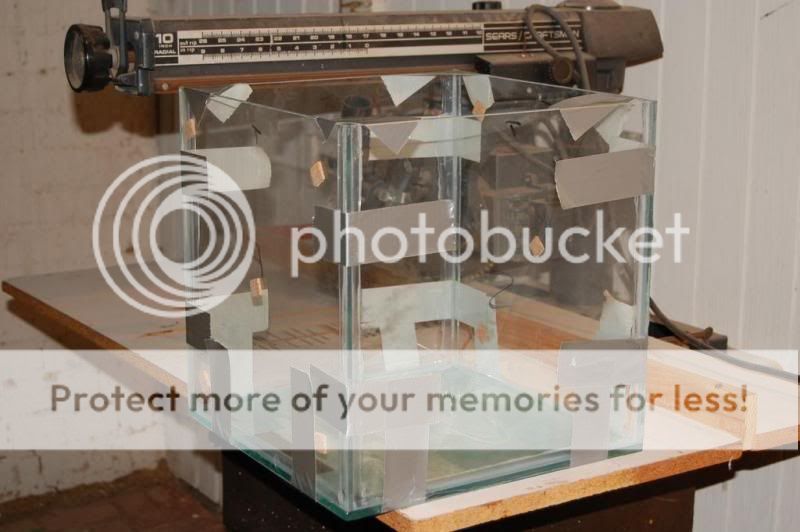
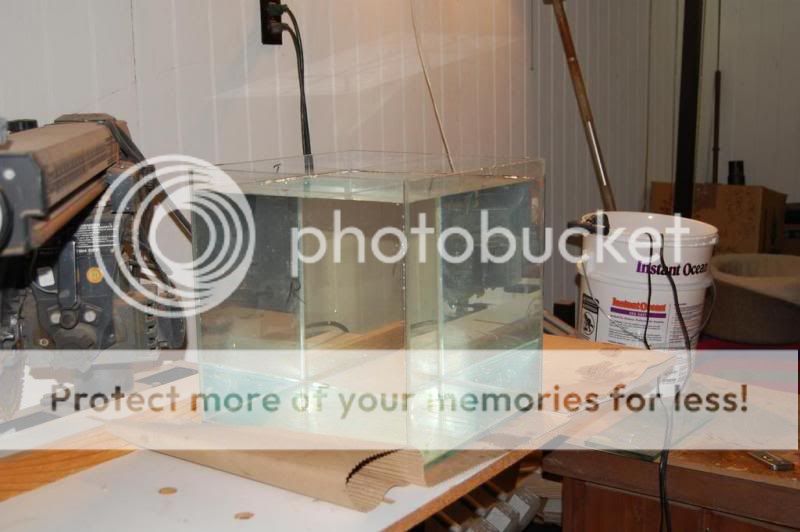
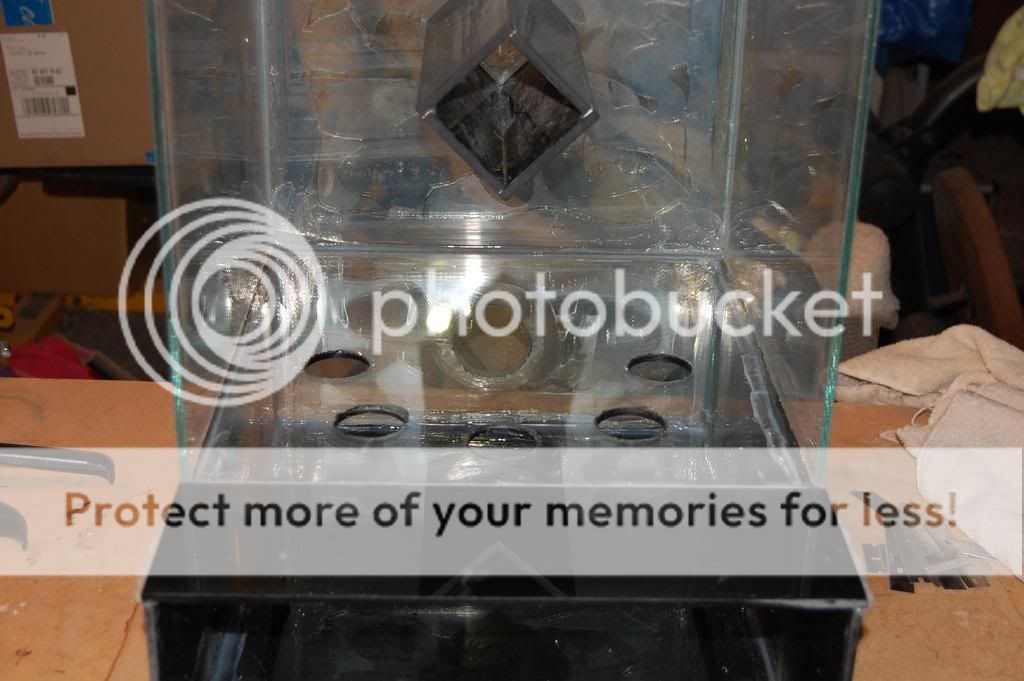
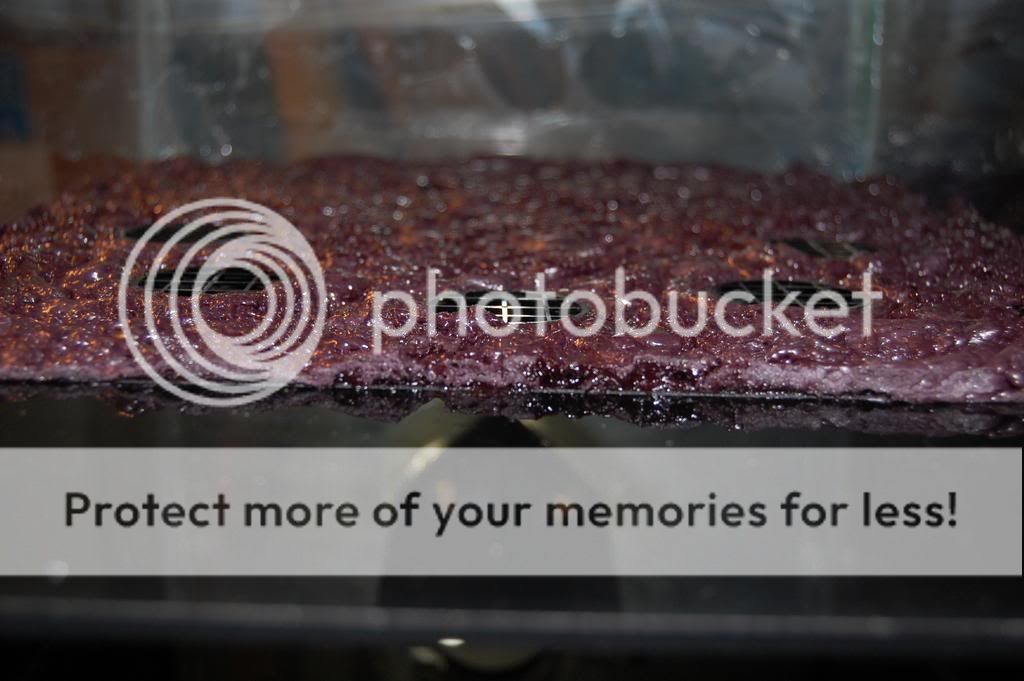
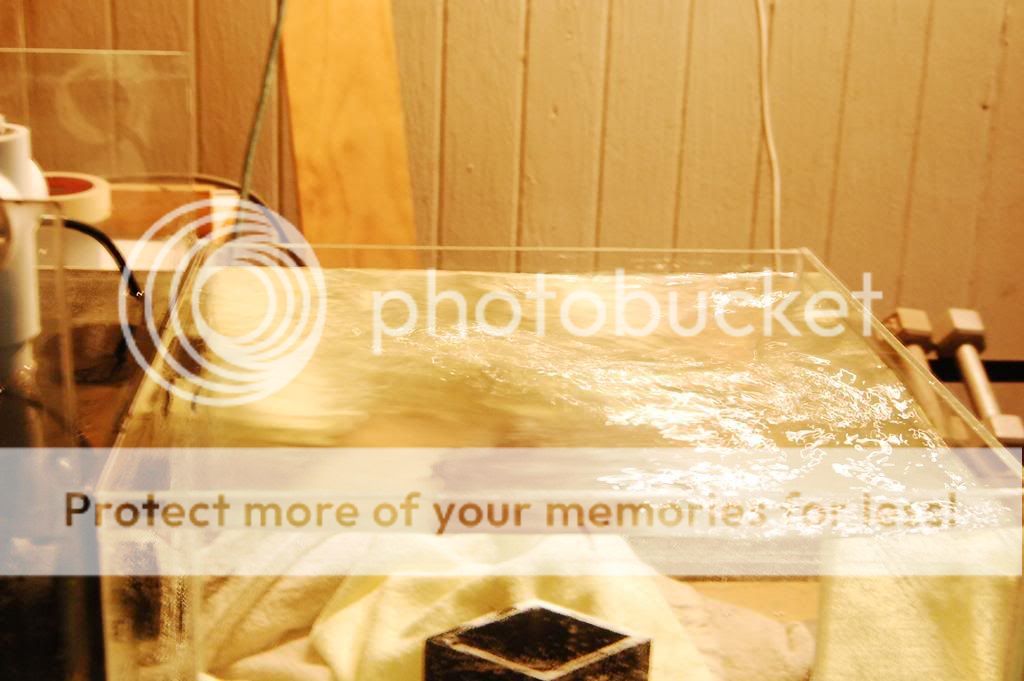
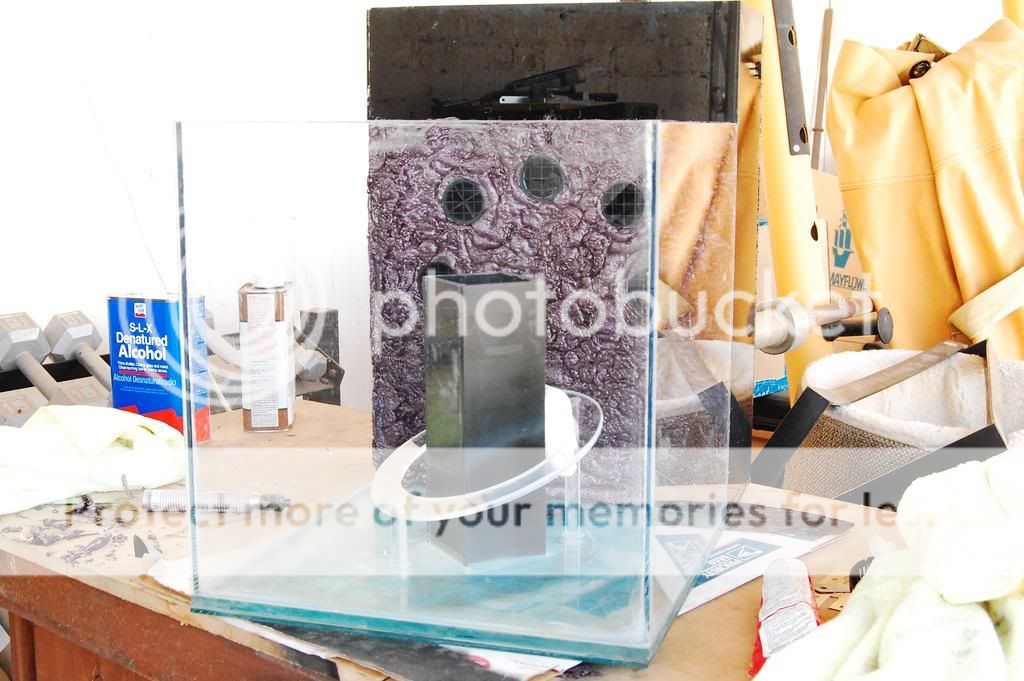
The tank features starfire glass and it is trimless. I used clear silicone to seat the glass with a very generous bead. After 24 hour curing all the excess silicone was cut away. Therefore the only silicone holding this tank together is what lies within the joints. With the exception of the bottom pane.
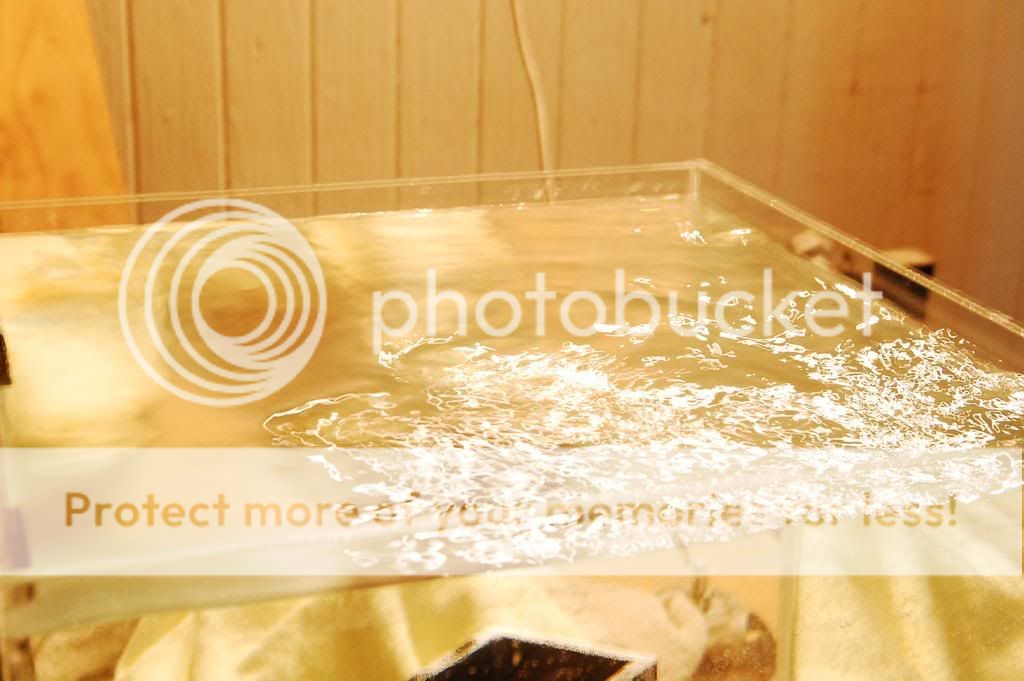
WATER CIRCULATION
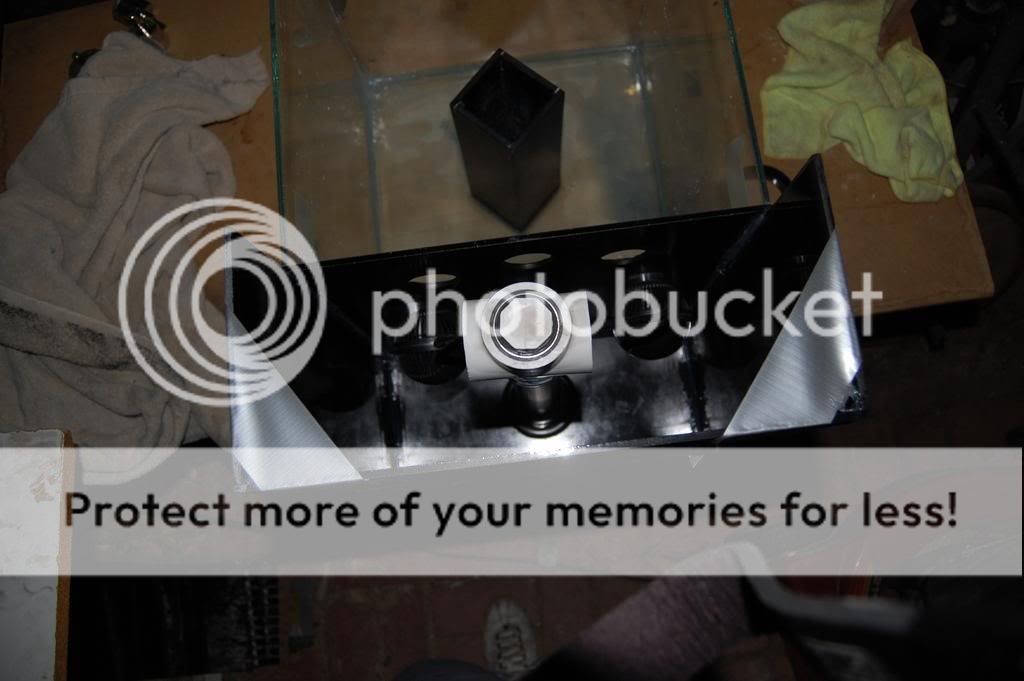
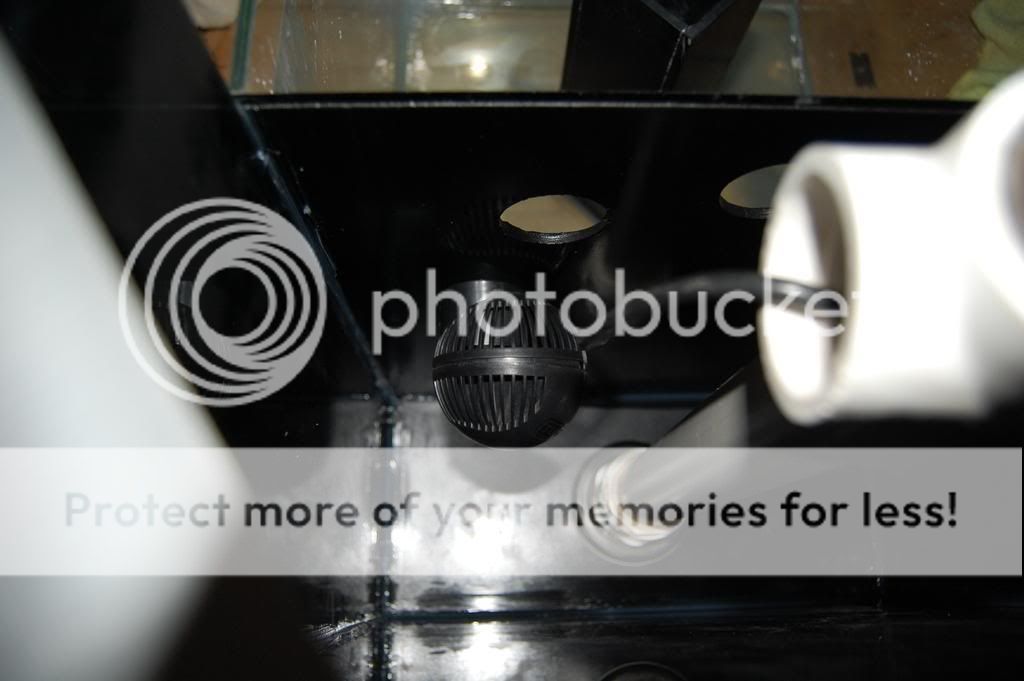
The internal sump sits directly in the middle of the cube. It has a fixed bottom portion and a rotating top. The top houses two Tunze nano stream 6025 pumps. The pumps are connected to a wavemaker (I am leading towards a Neptune Aquacontroller Jr) and alternate on/off in a one minute intervals. When one pump cycles on, the top rotates from the propulsion of flow 180 degrees to a stop point. In one minute, it shuts off and the other pump cycles on and rotates the top back the other direction. The pumps should provide adequate flow, maybe even too much. The top rotates smoothly on a sealed bearing from a Cervelo bicycle headset (I just changed the bearings and this was a handy extra part). THIS DESIGN FAILED. IN ORDER TO INCORPORATE THE PUMPS, THE TOP WAS TOO LARGE AND THE CORALS WOULD NOT GET ADEQUATE LIGHT. I MAY ATTEMPT THIS DESIGN IN THE FUTURE WITH A 24†CUBE.
HIDING DEVICES
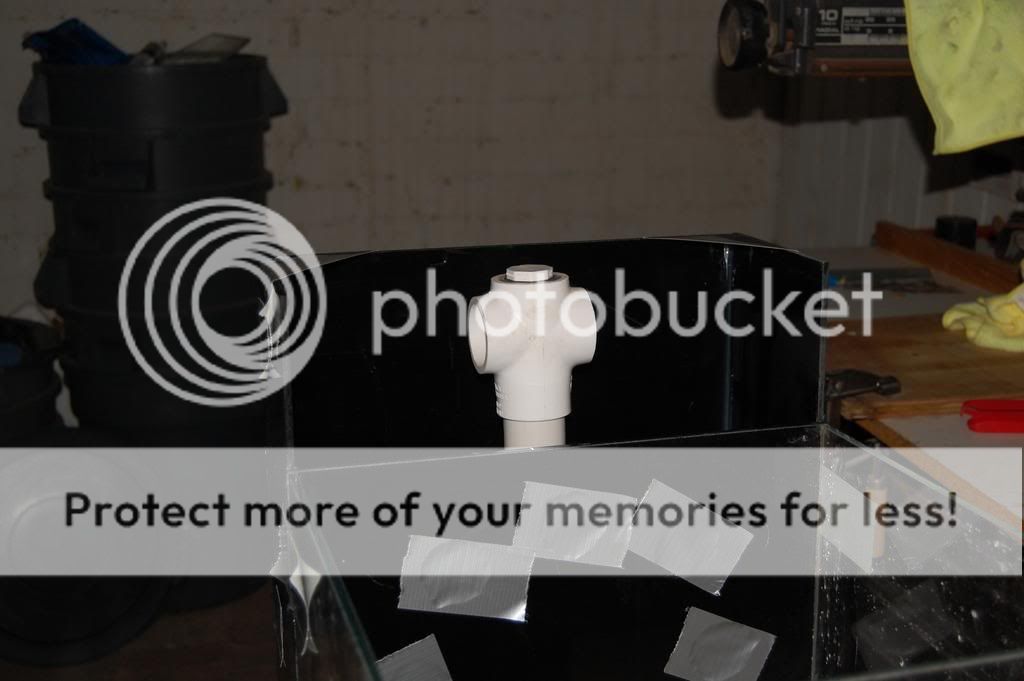
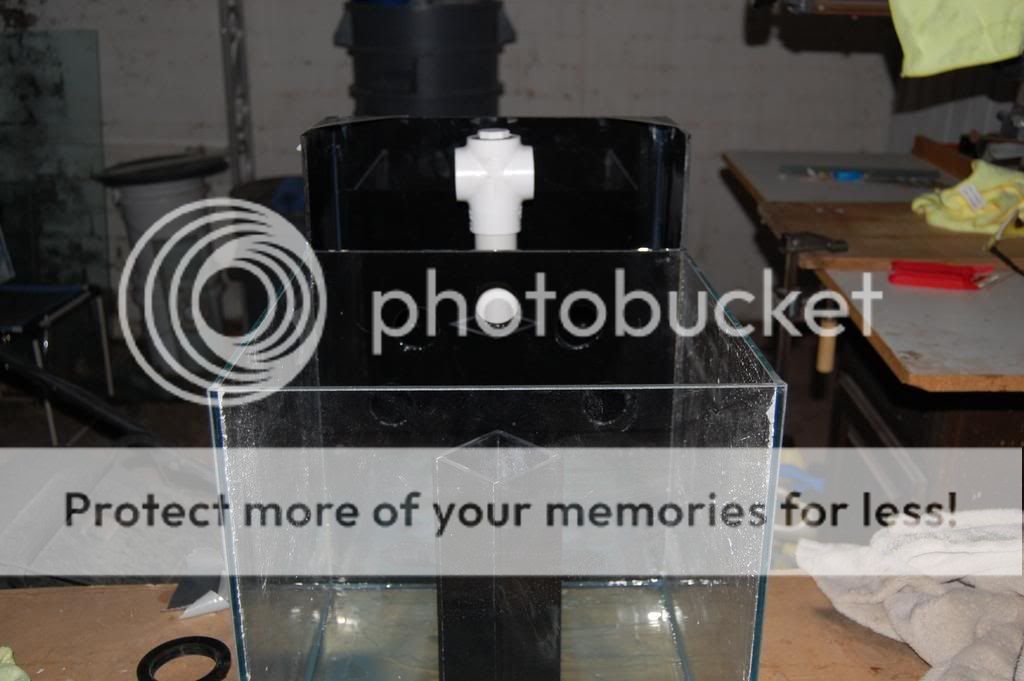
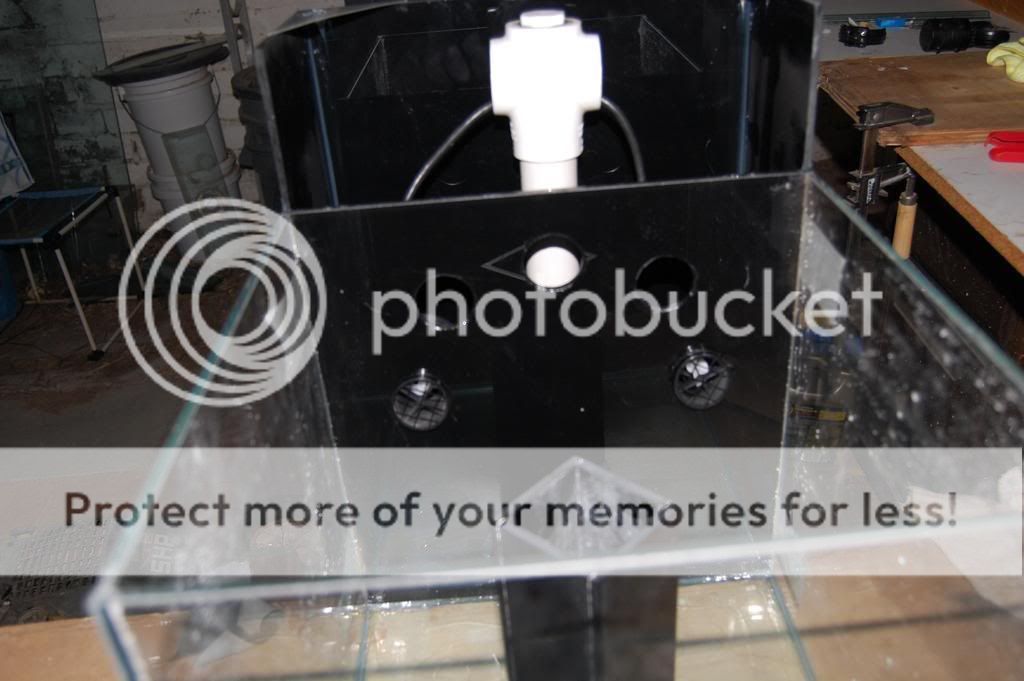
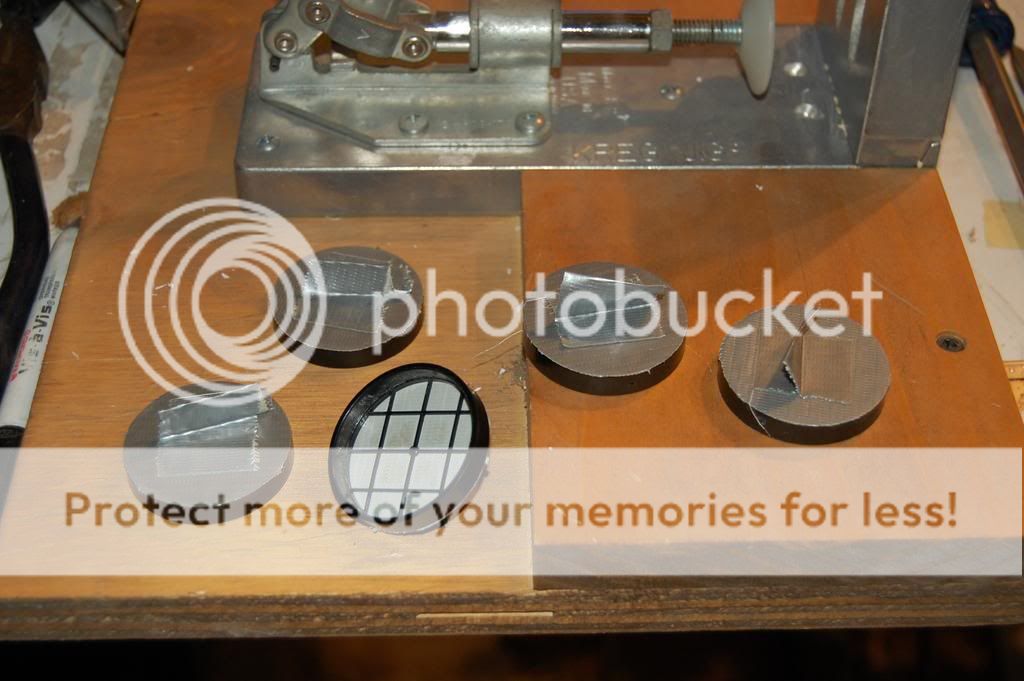
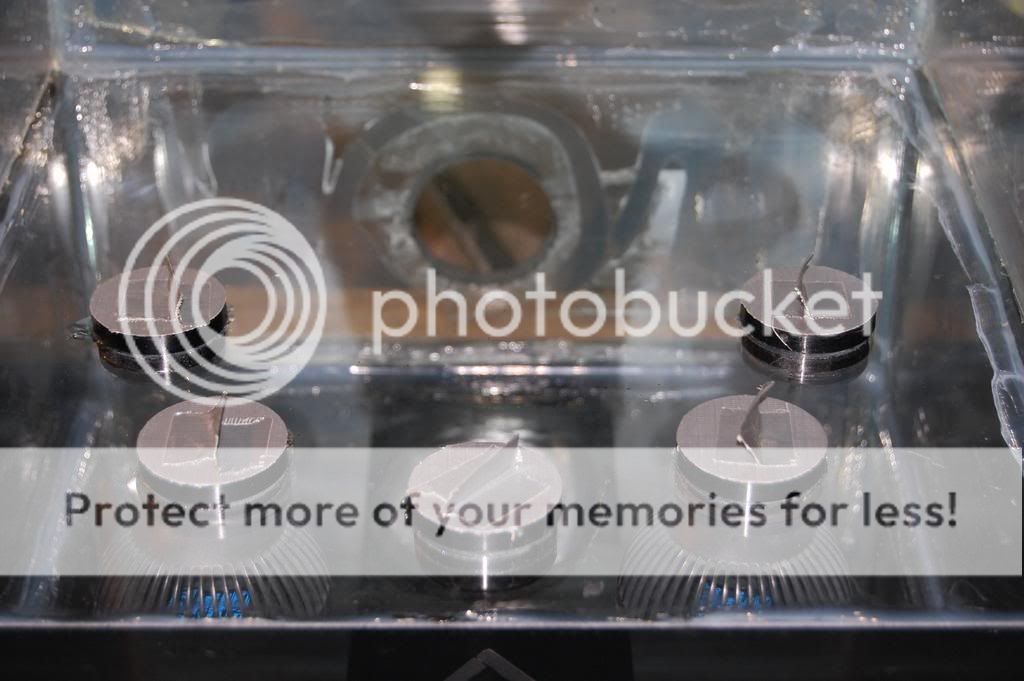
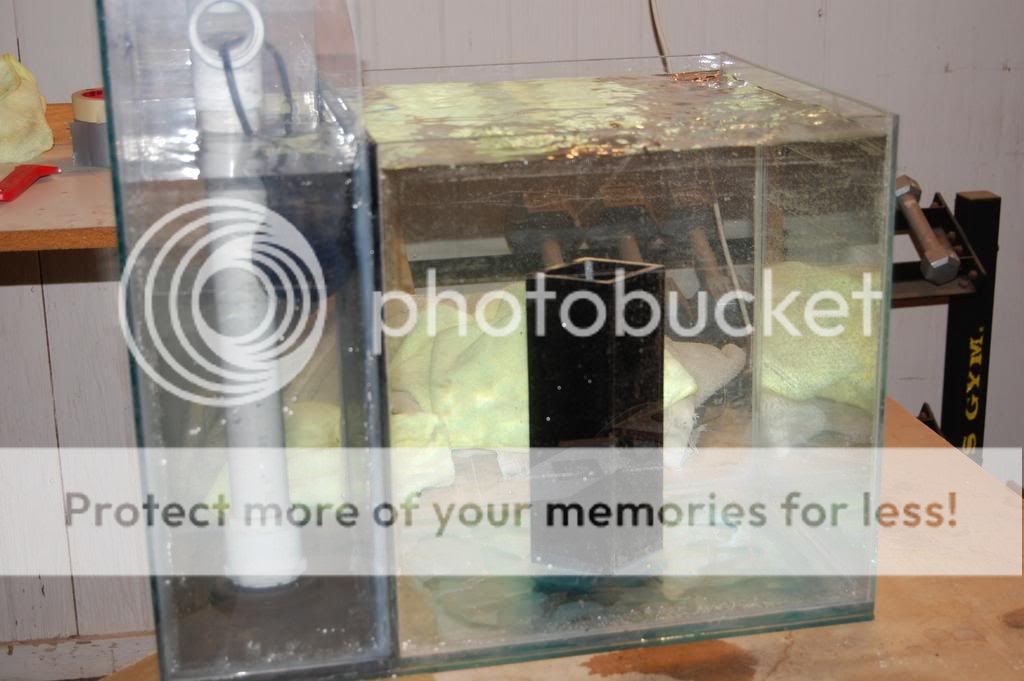
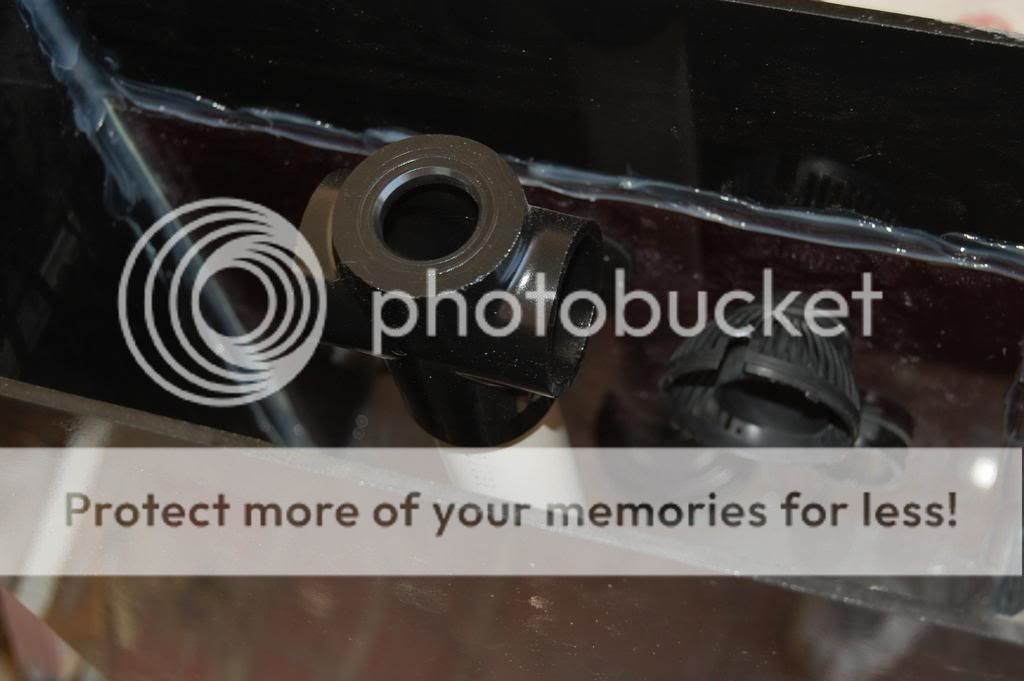
All electrical devices will be stored inside the internal sump. All wires are routed through the 1 1/4" PVC pipe which leads through a single bulkhead into the custom stand where the electrical boxes, controllers, and auto-top off device are located. In order to keep the cords dry, the PVC pipe extends above the surface of the water. The rotating top also extends several inches above the water’s surface to hide the plumbing.
TANK INHABITANTS
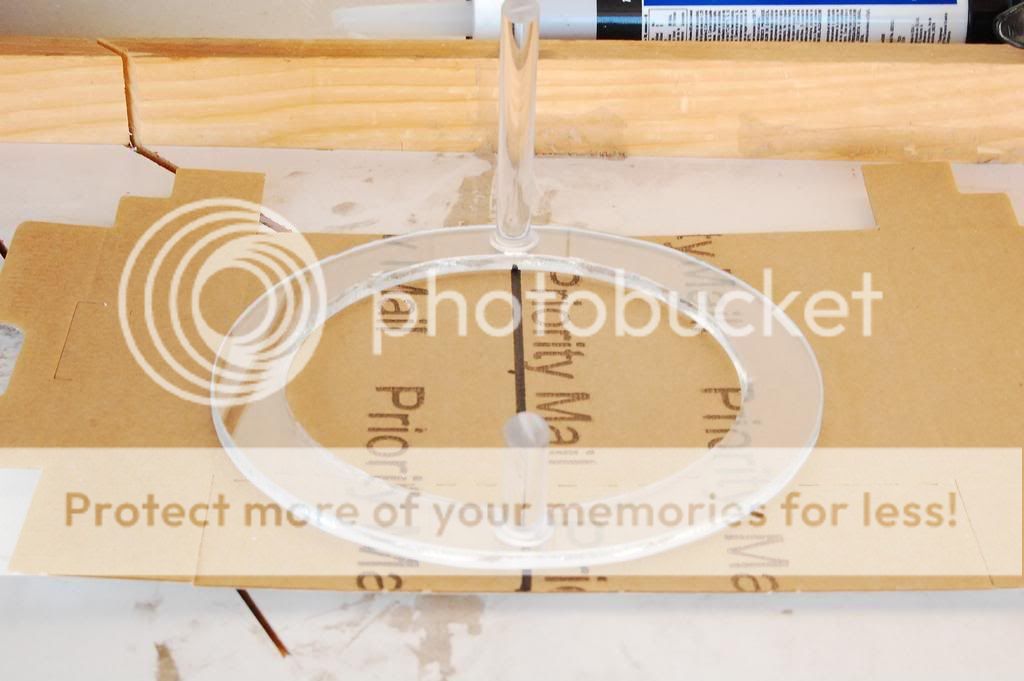
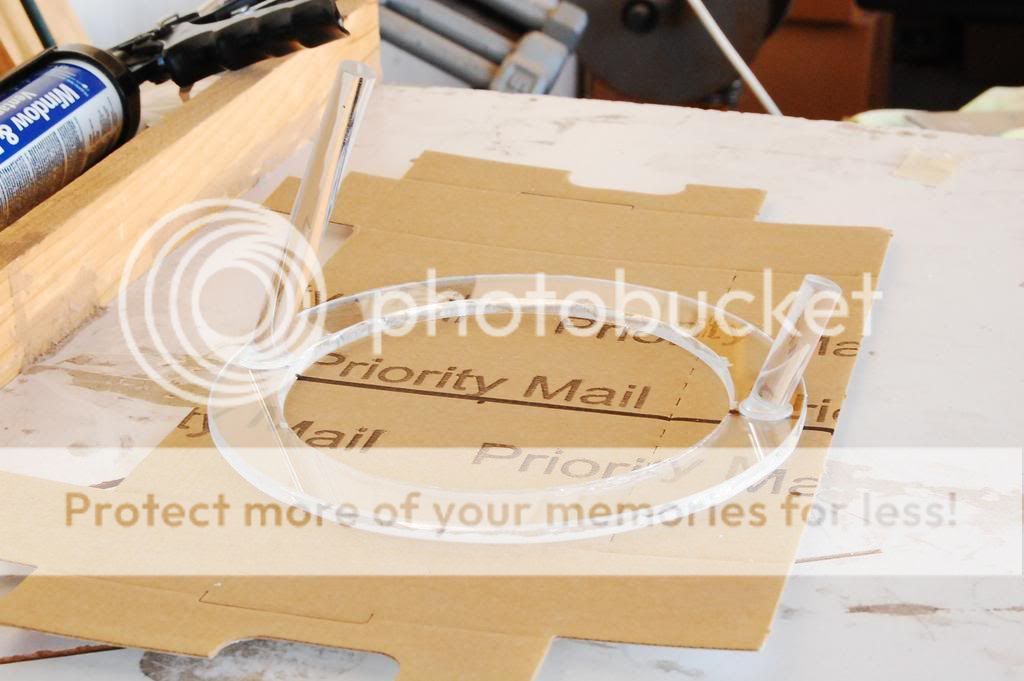
A one inch black sand bed is used on the bottom of the tank. Four sps Acropora corals are mounted to each of the four sump walls. A Starfire glass ring is mounted in a suspended fashion around the sump walls and suspended by 1/2" clear acrylic tube. Four sps Montipora caps are mounted to the ring aligned with the corners of the sump walls. The tank is stocked with eight corals twelve snails, and one fish. Again, this is the plan at this point. I am sure things will change during the build process.
STAND:
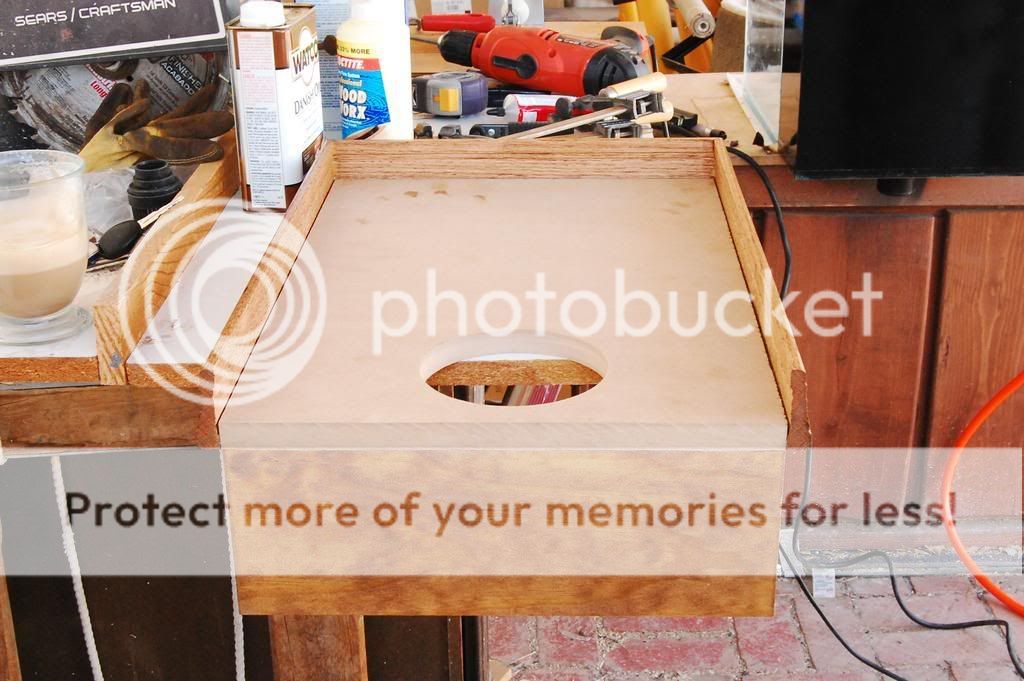
The stand will be custom built from an 8" steel pipe mounted to a 14†square top and bottom metal sheet. A section will be cut from the pipe lengthwise to make the tube a C shape. A couple of shelves will be placed inside the tube for storage of supplies and electrical equipment. An idea I have been considering is to mount a large bearing on the top and bottom of the tube so that it can rotate 360 degrees. Since this will be in my office, it will be nice to have the C-tube closed so that no supplies are visible, then when I need something, I can just spin the tube to position the opening at the front and I can access the goods. Any thoughts? I FIGURED IT OUT. MORE LATER.
LIGHTING:
At this time, the light fixture will be the brand new Solana brushed aluminum Orb with 150 watt HQI 14k lamp. I will likely change to a Radium 20K lamp. However, I am very hot for the new Solaris I4 LED lamp. The new series includes a 14†model which would fit perfectly over this Artsy-Cube. It features the same computer and all its functions as its bigger brothers: dimming, color temp adjust, cloud cover, moonlighting and seasonal settings, etc. It also has more power than previous generations and provides equal PAR compared to a 15K lamp 400w MH !!! STICKING WITH THE SOLANA FOR NOW.
Project Contributions:
TANK DESIGN:
A fellow RC reefer and I were driving back to Tucson from a Phoenix fish store shopping spree. A boring 2 hour drive led to the development of this tank. Originally we talked about building a 24†50 gallon cube, but with my limited office space, we are going nano! We conceived the idea of building a starfire trimless tank with no exposed wires. We actually had several great ideas and this is the one that surfaced. The rotating powerheads was not a part of that brainstorming. We had originally designed using a powerhead at the bottom of the internal sump and using a 4-way splitter to propel water out of each side of the baffle walls. If the rotating idea fails, this is what I will likely do. NOPE, I CAME UP WITH AN EVEN BETTER PLAN.
STARFIRE GLASS:
Custom cut by an RC member. I traded zoanthids and some chocolates and cashews for the starfire glass. I think he got the better deal. . . just kidding.
BLOWN GLASS:
Suspending the starfire glass ring in the tank will be tricky. Instead of mounting it flat, I will angle the glass to break the conventional lines and perspective. I will use some custom blown glass to anchor the ring and maybe some additional shapes where needed. I LOST MY CONNECTION FOR THE BLOWN GLASS, SO I OPTED FOR CLEAR ACRYLIC TUBE.
STAND:
A fellow RC reefer is experienced with welding and steel pipes. We will try to build a stand that accentuates the geometrical shapes contiguous through the project. We have yet to work out the details, I have lots of chocolates for you, your kids and even their friends. THE IDEA CREATED FOR THIS STAND IS JUST AS COOL AS THE TANK!!! I HOPE IT CAN BE DONE.
CORALS:
I received one coral that was especially donated for this project. It is a brilliant bright blue Acropora sp. Others that will go in there are a Acropora yongei (Green Slimer), Acropora acilles (sp), Acropora tort (Cali blue tort), Montipora capricornis (Idaho Grape, Green with purple rim, Orange-Red) and I am in need of one more Monti cap. Anyone willing to trade something with unusually brilliant colors?
Here are some photos:
This is a 2D Sketchup image. To view the 3D model, log into Sketchup (free download from Google). Click on the tool "Get Models" then type "artsy cube" and click search. You will be able to view the 3D model and a description of the build.

Being in the hobby for several years has given me the opportunity to build relationships with many people in the hobby. In Tucson I have helped many reefers with their aquarium projects, including aquascaping and helping newbies by supplying them with free or very low cost corals to get them started in the hobby.
The objective of this project is to use those relationships developed here on Reef Central and build this project with materials and labor from the RC people.
Although a small aquarium, my budget for this project is $1500. I plan to use high end equipment and exotic corals. Luckily I have plenty of frags to stock this tank, but I am looking for “show-piece†colors for this project.
I have asked several people for their assistance with this project. These people have offered to help at no cost, frag trades, or even for chocolates. I have a very good connection with that. I wish to keep these people anonymous since their contributions are so generous and they could get a flood of offerings for helping out with TOO many other projects. However, if they wish to announce themselves here on this thread, then that is cool!
Currently, the tank has been assembled, but nothing has been drilled or tested at this point. I am definitely open for suggestions and more ideas. If anyone has an expertise, equipment, or a skill they are willing to share, please help. The more the merrier.
Here are some of the ORIGINAL (October 2007) design ideas: (CAPS REPRESENT NEW COMMENTS MADE TODAY)
BASICS:
The artsy look comes from using classic colors black and silver with geometric shapes predominately squares and circles. The entire project from light to plumbing has been chosen to accent the colors and shapes. If it does not look like art, then it will not be used.
The premise is a stylish tank with no external sump, no skimmer, no chiller, no extensive filters or media, no live rock, and no exposed wires or equipment of any kind. It must be ultra quiet and produce no appreciable heat. It will be an sps display tank with a few snails and one high dollar fish. I am considering a Helfrichs or Red Frog fish Angler. I sure could use more ideas for a solitary cool fish. I will rely on weekly water changes and Oceans Blend 2 Part to export nutrients and maintain Alk / Ca, respectively.
TANK:
The tank features starfire glass and it is trimless. I used clear silicone to seat the glass with a very generous bead. After 24 hour curing all the excess silicone was cut away. Therefore the only silicone holding this tank together is what lies within the joints. With the exception of the bottom pane.
WATER CIRCULATION
The internal sump sits directly in the middle of the cube. It has a fixed bottom portion and a rotating top. The top houses two Tunze nano stream 6025 pumps. The pumps are connected to a wavemaker (I am leading towards a Neptune Aquacontroller Jr) and alternate on/off in a one minute intervals. When one pump cycles on, the top rotates from the propulsion of flow 180 degrees to a stop point. In one minute, it shuts off and the other pump cycles on and rotates the top back the other direction. The pumps should provide adequate flow, maybe even too much. The top rotates smoothly on a sealed bearing from a Cervelo bicycle headset (I just changed the bearings and this was a handy extra part). THIS DESIGN FAILED. IN ORDER TO INCORPORATE THE PUMPS, THE TOP WAS TOO LARGE AND THE CORALS WOULD NOT GET ADEQUATE LIGHT. I MAY ATTEMPT THIS DESIGN IN THE FUTURE WITH A 24†CUBE.
HIDING DEVICES
All electrical devices will be stored inside the internal sump. All wires are routed through the 1 1/4" PVC pipe which leads through a single bulkhead into the custom stand where the electrical boxes, controllers, and auto-top off device are located. In order to keep the cords dry, the PVC pipe extends above the surface of the water. The rotating top also extends several inches above the water’s surface to hide the plumbing.
TANK INHABITANTS
A one inch black sand bed is used on the bottom of the tank. Four sps Acropora corals are mounted to each of the four sump walls. A Starfire glass ring is mounted in a suspended fashion around the sump walls and suspended by 1/2" clear acrylic tube. Four sps Montipora caps are mounted to the ring aligned with the corners of the sump walls. The tank is stocked with eight corals twelve snails, and one fish. Again, this is the plan at this point. I am sure things will change during the build process.
STAND:
The stand will be custom built from an 8" steel pipe mounted to a 14†square top and bottom metal sheet. A section will be cut from the pipe lengthwise to make the tube a C shape. A couple of shelves will be placed inside the tube for storage of supplies and electrical equipment. An idea I have been considering is to mount a large bearing on the top and bottom of the tube so that it can rotate 360 degrees. Since this will be in my office, it will be nice to have the C-tube closed so that no supplies are visible, then when I need something, I can just spin the tube to position the opening at the front and I can access the goods. Any thoughts? I FIGURED IT OUT. MORE LATER.
LIGHTING:
At this time, the light fixture will be the brand new Solana brushed aluminum Orb with 150 watt HQI 14k lamp. I will likely change to a Radium 20K lamp. However, I am very hot for the new Solaris I4 LED lamp. The new series includes a 14†model which would fit perfectly over this Artsy-Cube. It features the same computer and all its functions as its bigger brothers: dimming, color temp adjust, cloud cover, moonlighting and seasonal settings, etc. It also has more power than previous generations and provides equal PAR compared to a 15K lamp 400w MH !!! STICKING WITH THE SOLANA FOR NOW.
Project Contributions:
TANK DESIGN:
A fellow RC reefer and I were driving back to Tucson from a Phoenix fish store shopping spree. A boring 2 hour drive led to the development of this tank. Originally we talked about building a 24†50 gallon cube, but with my limited office space, we are going nano! We conceived the idea of building a starfire trimless tank with no exposed wires. We actually had several great ideas and this is the one that surfaced. The rotating powerheads was not a part of that brainstorming. We had originally designed using a powerhead at the bottom of the internal sump and using a 4-way splitter to propel water out of each side of the baffle walls. If the rotating idea fails, this is what I will likely do. NOPE, I CAME UP WITH AN EVEN BETTER PLAN.
STARFIRE GLASS:
Custom cut by an RC member. I traded zoanthids and some chocolates and cashews for the starfire glass. I think he got the better deal. . . just kidding.
BLOWN GLASS:
Suspending the starfire glass ring in the tank will be tricky. Instead of mounting it flat, I will angle the glass to break the conventional lines and perspective. I will use some custom blown glass to anchor the ring and maybe some additional shapes where needed. I LOST MY CONNECTION FOR THE BLOWN GLASS, SO I OPTED FOR CLEAR ACRYLIC TUBE.
STAND:
A fellow RC reefer is experienced with welding and steel pipes. We will try to build a stand that accentuates the geometrical shapes contiguous through the project. We have yet to work out the details, I have lots of chocolates for you, your kids and even their friends. THE IDEA CREATED FOR THIS STAND IS JUST AS COOL AS THE TANK!!! I HOPE IT CAN BE DONE.
CORALS:
I received one coral that was especially donated for this project. It is a brilliant bright blue Acropora sp. Others that will go in there are a Acropora yongei (Green Slimer), Acropora acilles (sp), Acropora tort (Cali blue tort), Montipora capricornis (Idaho Grape, Green with purple rim, Orange-Red) and I am in need of one more Monti cap. Anyone willing to trade something with unusually brilliant colors?
Here are some photos:
This is a 2D Sketchup image. To view the 3D model, log into Sketchup (free download from Google). Click on the tool "Get Models" then type "artsy cube" and click search. You will be able to view the 3D model and a description of the build.


")