dangerwills 150 gallon reef build

Dangerwill

New member
These threads have to start somewhere so I would like to start by giving out some acknowledgements to some of my big supporters. I would like to thank my wife for not killing me for using her garage spot for the build along with so much of our discretionary money. I would like to thank all the people on reefcentral and the guys at SEA for giving me lots of good advice and even some confidence when I am poking a drill through a big piece of glass. I need to give a big thanks to craig and his list for saving me tons of money. So here goes

so here is my current tank

20121019_220355.jpg


She is 90 gallons of starphire magic that is in need of of a good coraline scrape but I love her. Unfortunately my fish, my corals and my rock collection is beginning to out grow the confines of the tank and cabinet.

picked this puppy up off of cl, big, heavy, dirty and given up on

20120929_102809_zpsc6bdfce3.jpg


got it home and trimmed it up, painted sealed stained and hung some doors

20120929_132040.jpg


20121021_160506.jpg


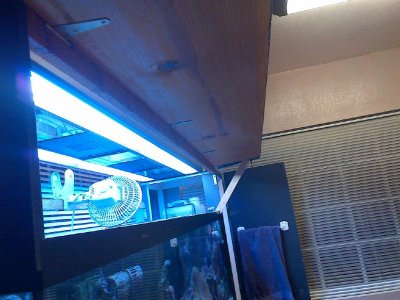
Decided to give myself an easy access panel on the side

20121015_134241.jpg
 
Here is the new tank, I drilled the Beananimal silent failsafe along with 2 outflow holes for my closed loop.

20121028_095715.jpg


20121028_095754.jpg


new(ish) sump

20121028_095735.jpg
 
seal everything with marine spar, especialy the inside of the canopy, the best part of spar is its very saltwater resistant, and uv resistant. its made for boats, looks great! If you dont want to have to lift the end panel, you can route out holes for magnets, glue them in the holes and the magnets will hold the panel on when you need it, and no need to bang your head on it :-) For the back of the tank if you decide to paint it, i like krylon fusion, its an epoxy base, and is more durable than a traditional spray paint for our salt water application, great job on the sump, it was a mess before
 
And this week I got some new toys

20121028_091758.jpg

Thanks Miguel

20121028_091723-1.jpg

Thanks Ed

20121028_091710.jpg


Thanks craigslist

The lighting system is 2 250 watt icecap ballasts and pendants that will be joined by 4 54 watt 48 inch t5s pushing ati bulbs and a couple led moon lights.
 
Thanks guys, I appreciate the compliments.

This was my first time doing pretty much everything that I have done. I am building the canopy this weekend and ordering all the plumbing pieces. I have learned a lot including that having the right powertools probably makes life a lot easier, big props to the Amish, though its unlikely any of them will ever read this, I have a great deal of new found respect for people that make beautiful furniture with a hand saw.
 
now the big hole in the sump seems right doesnt it? make sure you get all new filters and membrane for the ro. If it were me id do one more chamber on the rodi at least. do sediment, large micron, then small micron carbon, then membrane, then one or 2 di chambers. The more polished the water, the longer things last. Im a fan or more gpd on the membrane than a lower gpd unit, If I need water in an emergency water change senario I want it now, vs letting it run a couple days to get the same water. It looks like it already has a flush kit. Other doodads i would get are a pressure guage on the unit so you can monitor it. The units tend to run better at higher pressures. Auto shut off valve. If you do decide to run it to a holding bin, you will want it to shut off when it gets full, and also stop producing waste water when its not needed. And last a dual inline tds meter, this will let you see whats is being produced from the membrane, and what comes out of the di chambers. This is important so you can trouble shoot a bad or plugged membrane, and let you see when your di chambers are exausted. Call me if you have any questions, im happy to help walk you through setting it up. With this you also have the option of T-ing it off to run great regular ro water to the house too. I did a pressure tank and a taste filter. I have 0 tds water to my ice maker, and water from my fridge. No more getting home from shift to find the girlfriend drank all the water street station water and im left thirsty and drinking tap.
 
Last edited:
Thanks guys!

I built the canopy today, looks pretty good for having no natural carpentry ability and only the most basic of tools. I got it stained and I am going to seal it tomorrow night. Trying to decide fan placement, my 90 has them built into the canopy and Im not a fan pardon the pun. Might do some kind of clip on thing and I would welcome other suggestions.

And I picked up krylon fusion, I am going to spray it down next weekend. Amazing how fast these weekends fly by.
 
Lookin good. Don't forget the flapper check valve for your return pump. I do two fans one clipped inside the canopy center blowing on top and another in the sump. both on the same thermostat as the chiller. I was running the top fan with the halides which cycle on at noon and off at 800pm. My 8 39w t-5s run 10am to 10pm. With the cooler temps I moved it to the thermo. I will move it back to the halides when summer comes again. Stand is looking awesome. +1 for the magnets on the doors thats how all my panels attach..keep the tread going I'll be following:thumbsup:
 
Mask off well before you spray, because it is epoxy based its a pain to get overspray off. I'm playing with fan options as well, I run my fan and heater off of my reefkeeper, it lets me be control when the fan turns on and off by temp, this helps with evap and humidity in the house so the fan doesn't need to run unless its needed. As for location and type, I've played with 120v computer fans, loud and not a lot of air for the noise they produce. I recently tried an air king fan on my sump and it's ok. My next try is going to be a smaller version of the fans that carpet companies use to dry carpet, cylender shaped with the flat long discharge opening. I'm going to try one on the back of the canopy blowing in and positive pressure charging the canopy, I hope the increased cfm will help, and hope for less notice than 120v pc fans, the last thing I have seen done is a tower fan turned on its side mounted along the back of the canopy, huge airflow, adjustable speeds, and easily replaced if it gets noisy. Side note hydroponic stores are a great place to look for specialized fans, most sold there are designed to run in moist growing areas
 
Right now on my 90 I have a big box fan blowing behind the canopy and it seems to drop the temp by about 2 degrees but its loud and it looks like I have a big box fan propped up against my cabinet.

The hydroponics store is a great idea. I drive by one all the time on my way to home depot and think to myself I bet there is some cool stuff that could be adapted into the reef hobby but never stop by.

I bought magnets to do the door in the original phase of bulding the stand and changed my mind to hinges at the last minute.
 
Think about a chiller. It costs more than fans, but you don't have as much evaporation loss. Water has a cost also. A combination of fans and chilling I think is great. Saves a little power and a little water. Then you have kind of a dual cooling system incase one fails the other will maintain temp. The tower fan is an intersting idea......
 
Been a pretty busy guy with work and have not had much time to work on tank or update thread. I have painted the tank, got everything inside and my wife now has her garage spot back which has definitely made her a happier camper. I finished the stand and canopy though I am not in love with the canopy. I think I may go open top and just screen the top and hang some lights. The tank is waayyy too tall to be able to work on it comfortably without removing canopy even feeding corals will be a chore that involves a ladder and a long baster. Here is a couple of pics.

20121119_181300.jpg


To give perspective i am 6'4

20121119_181544.jpg
 
Last edited:
you can throw doors in the front and side of the canopy, or cut the front 1/3 and put a piano hinge in so it folds back, then you can mount reflectors in it no problem, and get your arm all the way to the sand bed no problem
 
you can throw doors in the front and side of the canopy, or cut the front 1/3 and put a piano hinge in so it folds back, then you can mount reflectors in it no problem, and get your arm all the way to the sand bed no problem

+1 Work in a hinge in the front you definately don't want to have to try to work over the top of the canopy. Put a support across the front top on the inside and hinge the whole front cover off of it.
 

Attachments

  • open canopy.jpg
    open canopy.jpg
    72.9 KB · Views: 5
  • closed canopy.jpg
    closed canopy.jpg
    62.5 KB · Views: 7
Last edited:
How were you able to move the tank around to do the drilling? Friends? I'm 5'4" and weigh 130lbs. I cant even lift my tank up and I am ripped like Bruce Lee....well...close, okay i'm just half asian. You get the idea. I'm small and the tank is heavy. Nice job on the stand an cleaning it up.

What size bulkheads did you use?
 
I am part incredible hulk and part dude with a sore back…

I had the tank on a flat top about 7 inches above the ground in my garage and I tipped it onto its front ont a flat rolling platform and rolled it out to the driveway, turned on the hose and started drilling. Then rolled it into the house had had my buddy help me lift it onto the stand.

Part of the reason my tank is so tall is I made a 36 inch tall cabinet for it. I wanted a good viewing angle on it. I hate stooping over to look in.
 
Back
Top