I wanted to make a mesh top on top of my aquarium, but I didn't necessarily like the look of the metal screen kits, and unfortunately the professional custom options were far too expensive for my big tank.
So I made a DIY version. I certainly didn't come up with this idea, other people mention doing similar things in other threads on RC but I don't think there were any step by step guides. So hopefully this is helpful to somebody if they are considered a similar idea.
My total cost for 2 covers, which were 32" x 44" each, was a little under $130. The bulk of the cost was the acrylic which I paid for by the sqft, so if your covers are smaller your cost will be significancly less.
Acrylic from TAP acrylics: $100
1/4" mesh from BRS: $12 x 2 = $24
25 ft of .140" vinyl spline from hardware store: $4
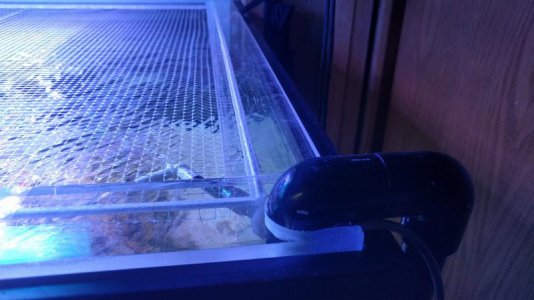
Each one looks like this:

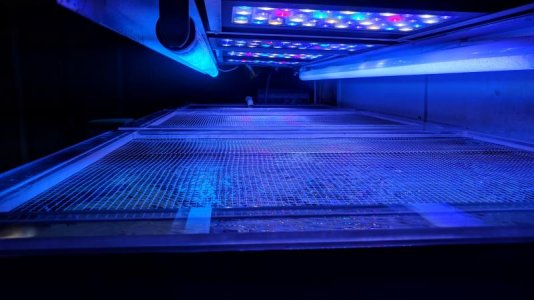
And both of them on the aquarium:

Here is how they are made:
Step 1. Acquire Acrylic
First, I got the acrylic from my local acrylic shop, TAP acrylics, pre-cut.
For each one, the pieces were 2" x 28", and 2" x 44", and they were 1/2" thick cast acrylic.
If your tank is smaller you could probably have 1" or 1.5" width, but for my tank the 2" was just right. I don't think you want to go any thinner than 1/2" to maintain the strength of the cover after you put the spline groove in it.

Step 2. Glue acrylic sections together
I'm not an expert acrylic worker, so I did not attempt to or actually do a precision job of this. But it does show that anybody can do this.
I used some Weld-on 16 I had lying around, lined up the corners, put a giant dap of the 16 in there and then lightly clamped them together.


If you look closely you'll notice I had pre-routed one of the spline grooves before gluing. Don't do that, I found the splines were easier to route afterwards.
Speaking of which..
Step 3. Route out the spline groove
Any plunge router with an edge guide will do. I used a standard 2 flute 1/8" bit, which did a workable job but a bit designed for acrylic would have almost certainly done a better job at chip clearing. Just take your time and and route the full depth in multiple passes.

I made the groove a little over 3/16" of an inch deep, approximately in the middle of my 2" acrylic strips. You just need to do this on all 4 pieces and make sure the grooves all connect at the ends.

Step 4. Sand the edges on the spline groove
This is important, as the edges on the spline groove are very sharp and will slice right through the 1/4" netting as you install it (ask me how I know!). I used 80 grit followed by 120 grit, but I think all that matters here is taking the sharp edge off.

Step 5. (Optional) Chamfer the sides
I used my router and a chamfer bit to put a chamfer on the inside and outside edges to soften them and make it easier to slide around on top of the aquarium.
If you don't use a chamfer bit you should at minimum sand the sharp edges a little bit to soften them.
Step 6. (Optional) Put on some corner braces
I put corner braces on all 4 corners for a couple reasons:
1. To reinforce the joints and ensure they are strong enough. I'm *fairly* sure that the acrylic joint would be strong enough without reinforcement, but no harm in overengineering.
2. The corner braces give me something to grip onto when moving the cover on and off

If you don't have a CNC machine, you can easily just glue two strips of acrylic in an L shape to make a corner brace. Just make sure they don't cover the spline groove.
So I made a DIY version. I certainly didn't come up with this idea, other people mention doing similar things in other threads on RC but I don't think there were any step by step guides. So hopefully this is helpful to somebody if they are considered a similar idea.
My total cost for 2 covers, which were 32" x 44" each, was a little under $130. The bulk of the cost was the acrylic which I paid for by the sqft, so if your covers are smaller your cost will be significancly less.
Acrylic from TAP acrylics: $100
1/4" mesh from BRS: $12 x 2 = $24
25 ft of .140" vinyl spline from hardware store: $4
Each one looks like this:
And both of them on the aquarium:
Here is how they are made:
Step 1. Acquire Acrylic
First, I got the acrylic from my local acrylic shop, TAP acrylics, pre-cut.
For each one, the pieces were 2" x 28", and 2" x 44", and they were 1/2" thick cast acrylic.
If your tank is smaller you could probably have 1" or 1.5" width, but for my tank the 2" was just right. I don't think you want to go any thinner than 1/2" to maintain the strength of the cover after you put the spline groove in it.
Step 2. Glue acrylic sections together
I'm not an expert acrylic worker, so I did not attempt to or actually do a precision job of this. But it does show that anybody can do this.
I used some Weld-on 16 I had lying around, lined up the corners, put a giant dap of the 16 in there and then lightly clamped them together.
If you look closely you'll notice I had pre-routed one of the spline grooves before gluing. Don't do that, I found the splines were easier to route afterwards.
Speaking of which..
Step 3. Route out the spline groove
Any plunge router with an edge guide will do. I used a standard 2 flute 1/8" bit, which did a workable job but a bit designed for acrylic would have almost certainly done a better job at chip clearing. Just take your time and and route the full depth in multiple passes.
I made the groove a little over 3/16" of an inch deep, approximately in the middle of my 2" acrylic strips. You just need to do this on all 4 pieces and make sure the grooves all connect at the ends.
Step 4. Sand the edges on the spline groove
This is important, as the edges on the spline groove are very sharp and will slice right through the 1/4" netting as you install it (ask me how I know!). I used 80 grit followed by 120 grit, but I think all that matters here is taking the sharp edge off.
Step 5. (Optional) Chamfer the sides
I used my router and a chamfer bit to put a chamfer on the inside and outside edges to soften them and make it easier to slide around on top of the aquarium.
If you don't use a chamfer bit you should at minimum sand the sharp edges a little bit to soften them.
Step 6. (Optional) Put on some corner braces
I put corner braces on all 4 corners for a couple reasons:
1. To reinforce the joints and ensure they are strong enough. I'm *fairly* sure that the acrylic joint would be strong enough without reinforcement, but no harm in overengineering.
2. The corner braces give me something to grip onto when moving the cover on and off
If you don't have a CNC machine, you can easily just glue two strips of acrylic in an L shape to make a corner brace. Just make sure they don't cover the spline groove.