DIY LEDs - The write-up

Status
Not open for further replies.
Finally finished my latest build a couple weeks ago and just getting around to posting it here. Its a standard 4x2x2 120g. Its a new tank build and getting that up and cycling was the priority obviously before building the fixture.

Initially went with 24CW, 6 NW, 44 RBs. After a week I pulled out 6 whites and replaced with RBs.

I am now running 44 RBs on a MW HLG 185-42 in 4 strings of 11. At full power each string is running from 1070-1150...a little larger spread than I wanted but I'm running them dimmed back about 80% because they are XPEs so life is good.

After replacing some CWs with the RBs I have a mix of XPE and XPG balanced between 3 strings of 10 running off a MW HLG 120-42. Full bore am getting anywhere from 910-970ma so not bad.

I'd like to note that each string of 10 only has 30.9 to 31V across it...my meter resolution only has 1 decimal.... and the 11 count strings on the other driver also a very low 34V. This suggests you could run strings of 13 on the 42V version with current XPG/XPE.

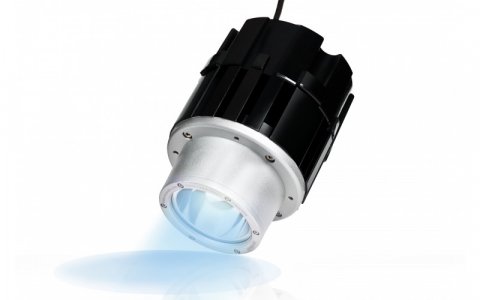
here's a couple pics

Heatsink - yes big...10" profile 36" long, mounted on frame which is for mounting in canopy. I know alot of people like to glue them on but thats crazy to me.... a #40 drill provides a perfect hole for a #4 x 3/8" sheet metal screw. Screws rights in.....no tapping required.....with nylon washers under the heads makes it quick, easy, and serviceable.
1024.jpg


1024.jpg


in the canopy...you can see I included the drivers on the frame using acrylic sheet mounted to the frame....and I put 2 fans in the top of the canopy...fixture runs very cool to the touch
1024.jpg


Current look - very difficult to get a good pic of the color...this is shade more blue than it appears to the eye.
1024.jpg


Again its a new tank so its still pretty bare but I'm loving it so far. Trying to locate a PAR meter still to get an idea of whats happening in various locations. No optics on this build and the fixture is 8" off the water.

I have the whites dimmed back quite a bit on the dimmer...maybe 60% based on position of the pot but didn't take measurements. RBs at about the 80% position.

Are you running the is series or paralell?
 
How would you wire them??

Skippy they are series parallel configuration...strings made up of series connected LEDs and the strings are then connected together in parallel. Suggest you do some reading to make sure you are familiar with all this. Its not hard but you need to understand it.
 
Silly mistake - Good Test Result

Silly mistake - Good Test Result

While I was admiring my tank this evening suddenly the blues all went out at once. Hmmm I thought why would I blow a fuse? Grabbed my meter and did a quick check with the fixture in place and everything seemed in order from the driver end so i pulled the fixture and found 4 blown fuses...hmmmmm.

Upon closer examination I managed to have used 1A fuses rather than the 1.5A fuses I intended to use and still had in the unopened bag.

This side of the fixture is capable of 1.1A per string and given I have been tweaking up the dimmer I must have finally touched the magic spot and popped one and then the rest did their job accordingly!

So while it was a dumb mistake the protection feature of the cheap simple fuses did their job immediately and without hesitation.

Thought this would be good to share for obvious reasons..even though it was a careless mistake on my part.
 
Say $600 for 100 watts.

Ok say 36 LEDs 3 watt LEDs at $6 (expensive) is $216 add $100 for drivers. Leaves heatsink, wire, paste, solder,etc probably less than $100. So $416 versus $600 and it depends on what you have lying around.
 
Say $600 for 100 watts.

Ok say 36 LEDs 3 watt LEDs at $6 (expensive) is $216 add $100 for drivers. Leaves heatsink, wire, paste, solder,etc probably less than $100. So $416 versus $600 and it depends on what you have lying around.

Great breakdown! Thanks!
 
Finally, I have finished wiring and dry- tested the LEDs. Polarity correct, no shorts, and all the LEDs lit up with the meter set to diode test using the solder joints from neighboring LEDs. Special thanks go to Jpccusa , TheFishman and kcress for their detailed explanation on how to test an unpowered fixture.

64 XR-E - RB - 8 strings parallel with 8 LEDs in series on a MW HLG-185H-30B (6.2A)
40 XM-L - CW – 4 strings parallel with 10 LEDs in series on a MW 150H-36B (4.2A)
16 XM-L - NW – 2 strings parallel with 8 LEDs in series also on a MW 150H-36B (4.2A)

Next step was testing the strings across the resistors with the power on.
The 4 XM-L –CW strings and 2 NW strings were spot on, -4 strings @ 1.04A and 1.03A for the CWs -and 2 strings @ 2.08 for the NWs.

The royal blue strings give different readings, 6 strings between 735/750mA - no problem there, but 1 string measuring 790 and one 810mA.
I have tested the strings after 10 minutes and again after 2 hours on full power.
What do you guys think, do I still need to ballance those strings.
 
Finally, I have finished wiring and dry- tested the LEDs. Polarity correct, no shorts, and all the LEDs lit up with the meter set to diode test using the solder joints from neighboring LEDs. Special thanks go to Jpccusa , TheFishman and kcress for their detailed explanation on how to test an unpowered fixture.

64 XR-E - RB - 8 strings parallel with 8 LEDs in series on a MW HLG-185H-30B (6.2A)
40 XM-L - CW "“ 4 strings parallel with 10 LEDs in series on a MW 150H-36B (4.2A)
16 XM-L - NW "“ 2 strings parallel with 8 LEDs in series also on a MW 150H-36B (4.2A)

Next step was testing the strings across the resistors with the power on.
The 4 XM-L "“CW strings and 2 NW strings were spot on, -4 strings @ 1.04A and 1.03A for the CWs -and 2 strings @ 2.08 for the NWs.

The royal blue strings give different readings, 6 strings between 735/750mA - no problem there, but 1 string measuring 790 and one 810mA.
I have tested the strings after 10 minutes and again after 2 hours on full power.
What do you guys think, do I still need to ballance those strings.

nice...those 2 high strings...well you're within 10% and the guys recommend 5%...I shoot for 50 ma myself. I go LED by LED and take voltage readings on the low and high strings and then swap the LEDs with the major V diff between the strings.
 
Jimmy54; I'm not real clear on how you stated the White numbers.. 2.08?

On those blues... It would probably be fine since you aren't seeing a continued drift in current. But. I'd probably do a leveling between a 735 and the 810mA. Remember that you could just re-wire the two you swap and not actually remove them. It generally doesn't matter if a LED is misplaced physically. You won't see any difference unless you oddly run only groups of LEDs.

It's great those threads helped.

Welcome to the LED club!
 
kcress; thanks.

2.08 means 2080 mA for the NWs and 1.04/1.03 means 1040/1030 mA for the CWs.
Unfortunately re-wiring is not really an option, the way the fixture is build and wired doesn't allow that without having wires all over te fixture.
But that's no problem, I already had to replace an LED because I knocked off its tiny little lens, and all together it took less than 5 minutes to replace the LED.

So now what, do I have to look for welding goggles to measure the Vf's individually?
 
Last edited:
OK, you really are running 2A through those LEDs. No heat problems? What are you using for heatsinks?

Yeah LOL welding glasses aren't a bad idea. That or try to get way over on an angle... Naw welding goggles. You can actually buy what look like reallly reeeeelllly dark glasses which are for gas welding, really cheap. They would do the trick nicely.

I use them whenever I want to read a book in direct sunlight. They work great.

i tried really dark sunglasses and that didn't help :) I end up at a really sharp angle but it still hurts and cannot be good for the eyes.
 
kcress; Yes, only the NWs. I don't think they actually gonna run at 2A above the tank, it's an amazing amount of light they put out at 2A and also a lot of heat. I know the HLG is a bit of an overkill for 2 strings of 8 XM-Ls, but dispite accurate calculations things have changed a little along the way and how knows, maybe I need to change things again in the the near future.
I have 16 small heatsinks mounted on 3 aluminum U frames, I will post some pictures as soon as the camara gets back from vacation ...... together with the wife ... I hope.

What I can't figure out is why the the sum of the Vf, measured from each individual LED in a string, does not read the same as the total voltage measured through all the LEDs of that string.
The sum of the individual LEDs is 27.49V, and through the string it is 27.80V.
Is it the DMM or am I doing something wrong?

BTW, I've used a couple of LED-lenses over the LEDs to see where to put the probes.
 
Last edited:
brass: Dark dark glasses don't hold a candle to light welding glasses. LOL. I'm talking about ones like this:
http://www.safetyglassesusa.com/sw11-ir5.html


Jimmy; You have an over-unity machine!! Patent it! Bleed off the extra and run your refrigerator. LOL

No. It's easily explained in the voltage drops of the wires between the LEDs. Pay no attention to it. Love to see a few pics eventually if you can swing it.
 
Status
Not open for further replies.
Back
Top