Everything is awesome 120 peninsula build.

KnightMetro

New member
Long long ago, in a galaxy far far away.... a man tried to build a fish tank. Twas a Biocube 29. But said man didn't do his research, or know of reefcentral, so he became an algae farmer and killer of fish. 2 gallons of vinager later he sold it and thought that bigger was better. :reading:

He then purchased a 90g(twas the biggest that would fit in his Yaris) and had a beautiful Ikea inspired cabinet/canopy made. A few weeks before he put water in it, he moved and had to sell it. He then built a stunning 120 cherry mission setup, with LED's and skimmers, and plumbing that would make mario weep, and with salt and sand in hand, got laid off...sold it and moved to Alaska. :headwally:

Married, adopted 2 kids, just had a baby...:spin2:

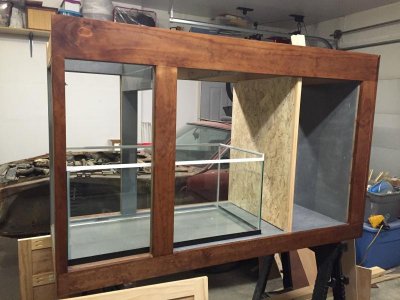
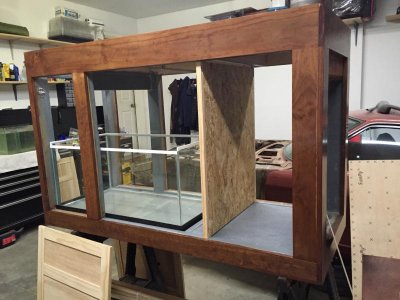
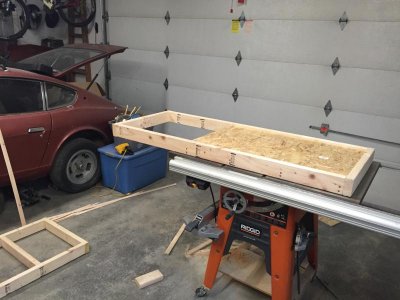
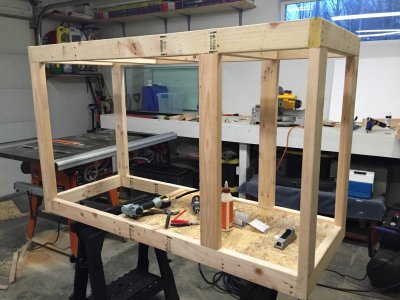
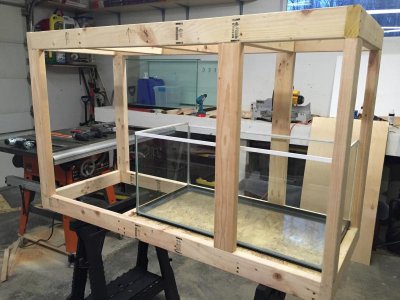
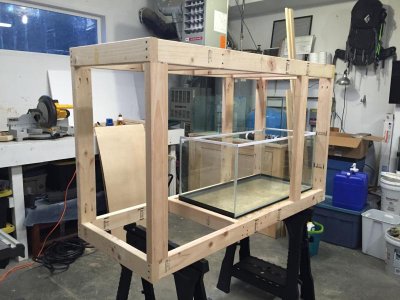
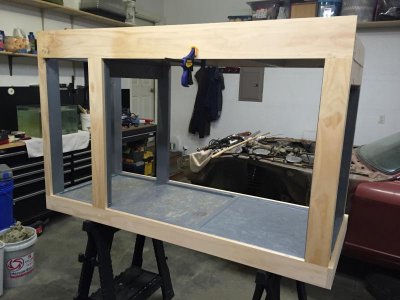
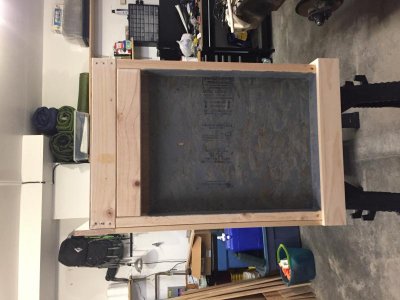
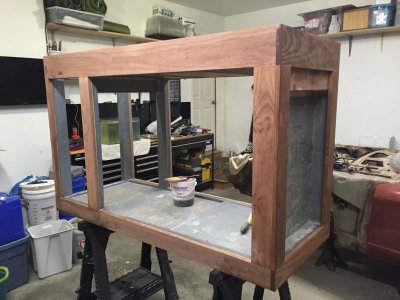
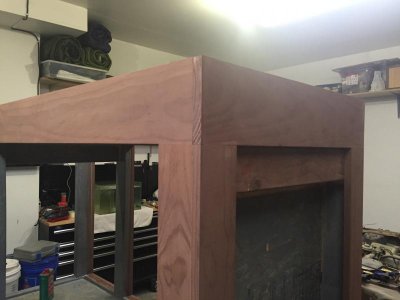
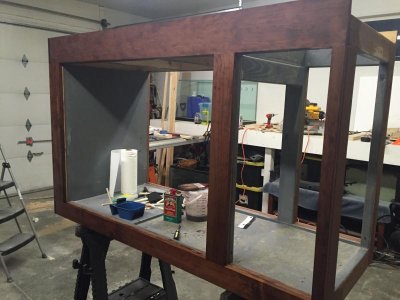
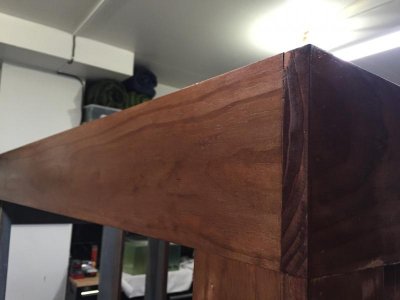
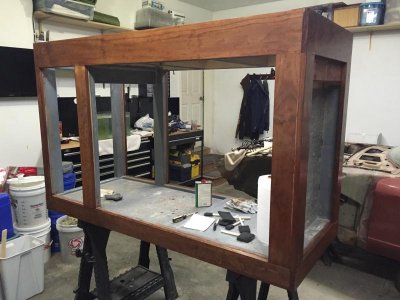
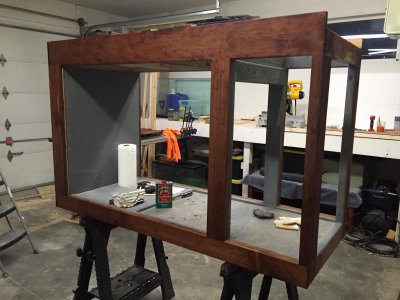
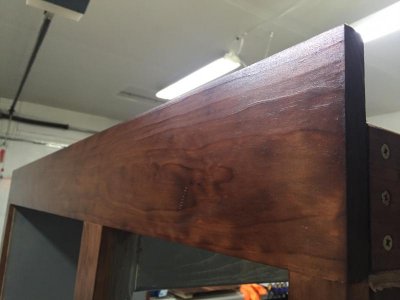
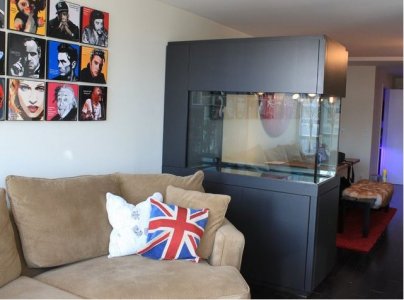
120 peninsula build yay! Now I have had a 30g cube reef and a biocube 14 office tank in the last couple years to itch the scratch, but it's time to jump back in with both legs and pray I get water in this thing.
 
So, what happen was.... I picked up a 75g and made a beautiful stand, with hidden doors and all the ideas in my head for optimized storage. Rimless with a ghost overflow clone in the works.

Until I found a great deal on Craigslist for a 120 drilled for a peninsula setup with eurobracing.

BIGGER makes dad smile. Plus most would agree a 120 is just a perfect size before something needs to frankly be built into a wall and/or have a fish utility room. Meaning you keep it till you die.

So that 75 is still in the garage, and I really need to sell it.

Anyway... ONTO THE 120 PENINSULA!

I am almost finished with the bottom stand frame and skinning. She is now stained (good story as I made the stain from scratch).

Pictures GO!
 

Attachments

  • 20151212_230025844_iOS.jpg
    20151212_230025844_iOS.jpg
    60.3 KB · Views: 4
  • 20151213_002820846_iOS.jpg
    20151213_002820846_iOS.jpg
    70 KB · Views: 5
  • 20151213_003732407_iOS.jpg
    20151213_003732407_iOS.jpg
    68.4 KB · Views: 5
  • 20151213_003747632_iOS.jpg
    20151213_003747632_iOS.jpg
    69.5 KB · Views: 6
  • 20151220_011414929_iOS.jpg
    20151220_011414929_iOS.jpg
    58.2 KB · Views: 6
More Pictures.
 

Attachments

  • 20151220_011422016_iOS.jpg
    20151220_011422016_iOS.jpg
    57 KB · Views: 5
  • 20151220_083330939_iOS.jpg
    20151220_083330939_iOS.jpg
    61.7 KB · Views: 4
  • 20151221_033652873_iOS.jpg
    20151221_033652873_iOS.jpg
    38.6 KB · Views: 5
  • 20151222_040114940_iOS.jpg
    20151222_040114940_iOS.jpg
    58.5 KB · Views: 4
  • 20151223_034033592_iOS.jpg
    20151223_034033592_iOS.jpg
    32.9 KB · Views: 5
More candy.
 

Attachments

  • 20151223_034057704_iOS.jpg
    20151223_034057704_iOS.jpg
    33.5 KB · Views: 6
  • 20151223_034141272_iOS.jpg
    20151223_034141272_iOS.jpg
    63.5 KB · Views: 6
  • 20151223_034200755_iOS.jpg
    20151223_034200755_iOS.jpg
    61.6 KB · Views: 5
  • 20151223_034215558_iOS.jpg
    20151223_034215558_iOS.jpg
    36.5 KB · Views: 6
Ok, the story behind the stain, just becasue this is my first time trying it, and it turned out pretty cool.

The wood is just off the shelf std pine from Lowes. What I did is dissolve steel wool in a bottle of white vinegar and added just a bit of my fav coffee. Like 1oz. The color after just one coat is night and day after a half hour or so. I did three coats to get the color in these pictures and sealed with Fromby's Tung Oil finish. I was stunned at the finished product. I added some dings, dents, scratched, mars, and pin holes to make the wood not look aged color - but perfect condition. Really nice look. Sealing the inside 2x4 frame with grey acrylic.

I think the gas produced by the steel dissolving in the vinegar gave me a wicked headache though. Produces hydrogen gas.

More to come. Below is the design inspiration.
 

Attachments

  • 20151202_225811130_iOS.jpg
    20151202_225811130_iOS.jpg
    62.9 KB · Views: 6
Looks like you have a good setup there. I hope you keep your job and don't have to move so you and your family can enjoy it. It will look nice when you get it up and running.
 
Tonight I will start making the doors for the stand. After going back and forth on inset or overlay, I think I'm just going to stick with overlay. I've done a full inset before and I found it to be a PITA to make all the gaps perfect for a novice woodworker.

I got a hold of a router and table to work with, but the bits my father has were 1/4" and the router has a 1/2" collet. Trip to Lowes today I suppose.

I'm going to start tearing the tank down this week as well. Not fully, but the side panel glass that was drilled for H20verflows is coming out. I'll order a new pane of glass and cut it for the Ghost Overflow clone I have from TXHoleyRocks. I'll then drop the new pane in and redo the eurobracing.

Only thing I got for Christmas was a Bosch impact drill, but that put a smile on my face with this project. I'm going to use the crap out of it.

Hope everyone had a wonderful Christmas. I shot myself in the foot by deciding to give my father my 30g rimless reef setup as a gift. So on top of the lifetime of IT questions he has for me, I now will be his saltwater consultant for the next few years. :facepalm:
 
That's a really good looking stand!

I just built one too, but I kinda built a whole room around it, so I opted for super sturdy instead of pretty. I'll do the pretty via the trim around the tank opening once I put the tank in. Also, very creative skills with the whole stain thing! I never would have thought of that. Does the steel wool change the color, or something else?
 
The vinegar ages the wood, on it's own. Especially after a few coats/dry, but the after effect is not really a color, just more of it looks like it has been sitting outside for a while. Dissolving steel wool in the vinegar actually changes the color. The oxide will have different effects on darkening the wood. When it dries, it's kind of a reddish brown stain. When you hit it with a sealer/oil/varnish, it REALLY changes.

The last batch I actually added an ounce or two of black coffee, but I am not sure if that actually changed the color at all. The "rust" and the chemical reaction of the wood, oxide, and vinegar are what makes the wood look like this.

This was three coats of the mixture, fully dried, and Fromby's Tung Oil Finish. I was pretty amazed at the color that turned out.

I'm on to the doors now. Frame and panel with a slight craftsman feel. Well that's the idea anyway. All new to me. I'm just fiddling with how to do tongue and groove with a dado blade, so it'll be interesting to see how they all turn out. I also need to grab an orbital disc sander, finally, tomorrow so I can finish them all flush and pretty, and some 24-26" clamps.

After I get the doors on, I'm going to mock up the tank on the stand and cut some finishing pieces, then move on to mocking up the backside frame.

Hopefully by the end of next week I'll have the interior paint done, nooks sealed, doors done, and moving on to the back and canopy.


See, now that's what I've always wanted to be able to do. You look at my build thread and you can see that I know how to do a bunch of crap, but it's all rough trades level. You're more in line with the craftsmen level, which I've never achieved, though I want to. It's all well and good to make something, but to make it beautiful - now that's the trick.
 
One door started. I'm decently satisfied with how it turned out, but I may try the next one with pocket screw and just a dado groove to inset the panel. getting all 6 of the tongues to line up with the grooves without gaps takes skill I don't have yet.

Shopping list for tomorrow.....orbital sander, 24" and 36" clamps, and mooore wood.

Oh, and some beer, chips, and goodies for the Cotton bowl tomorrow. GO GREEN!
 

Attachments

  • 20151231_075345476_iOS.jpg
    20151231_075345476_iOS.jpg
    56.4 KB · Views: 5
  • 20151231_075401651_iOS.jpg
    20151231_075401651_iOS.jpg
    60.1 KB · Views: 6
I scrapped the last door I made. I couldn't get the warp out, and then the overlay hinges and layout looked terrible.

So, I am moving to full inset hinges...if I can find any locally in more than a 1 pack...

I was able to cut two new doors this weekend and come up with a new plan to put a non-permanent wall inside the stand and install some drawers. More pics to come.

I'm going to order some slim wire management lengths from Amazon today and a slew of full inset hinges. I'll go down to Lowes and browse some drawer designs and see what I can make for a pull out work surface.
 

Attachments

  • 20160101_233625954_iOS.jpg
    20160101_233625954_iOS.jpg
    48.4 KB · Views: 4
  • 20160103_045754753_iOS.jpg
    20160103_045754753_iOS.jpg
    51.8 KB · Views: 6
Public Service Announcement:

If anyone (like me) is looking for great prices on hinges for DIY cabinets, after scoring almost the entire internet, I found these guys to have outstanding prices on hinges.

My full inset concealed hinges were only $2.85 a pair.

http://www.dlawlesshardware.com/
 
I got the wall fabricated and test fitted. This will be removable, so I can get the sump out if needed, but the space created will be used to make 4-5 drawers for equipment, testing, etc.

Right now I'm kind of waiting for my hinges to arrive so I can cut the next two doors without spacing issues.

Slow going.
 

Attachments

  • 20160105_050110503_iOS.jpg
    20160105_050110503_iOS.jpg
    62.7 KB · Views: 5
  • 20160105_050126174_iOS.jpg
    20160105_050126174_iOS.jpg
    64.3 KB · Views: 5
I got 4 doors done this weekend. Trim and sanded.

I did strip the stain and finish off the tank. One of the frame pieces when I mocked up the doors turned out to not be square. So the door to the right and the door to the left of it had annoying smalted gaps. Also, due to some expanding on the vinager/steel stain mix since I stained the frame(I added more vinager so I'd have enough to do the entire stand), I didn't want to try to stain the entire project, just to come out with a tone that was different than what had already been done. I am confident that when I go to stain the entire project, the stain is dark enough to come out even. If not, I'll stain it black/espresso.

So, I'll do the entire stain when the stand is done. Below is what I was able to do over the weekend.


Little bit on the carpentry side question.. How much gap do you leave around your door (all sides) before the hinges go in? 3mm, 5mm??
 
Back
Top