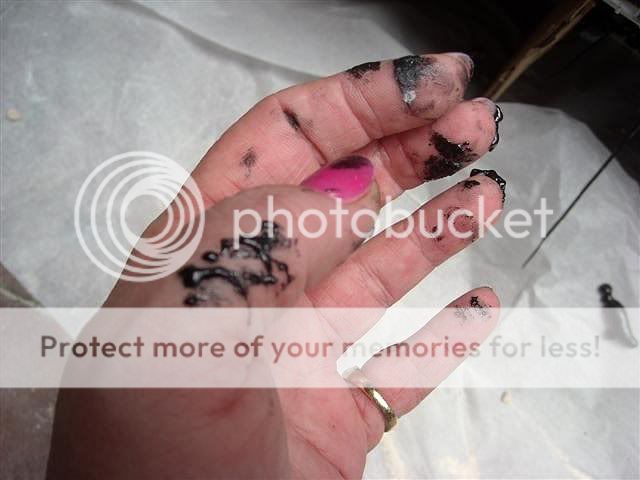
Foam/Rock Wall for my 265 gallon Tank!

Speckled Grouper

Sticks Suck!
Eversince I started reading Tiggsy's and Kannin's threads about their Foam/Rock Walls, I wanted to do the same.

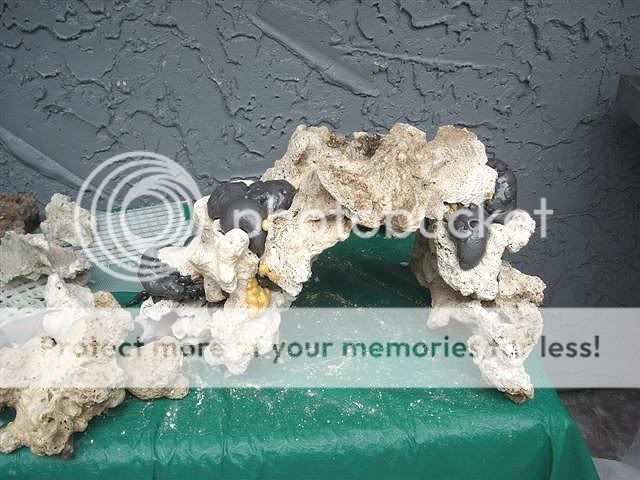
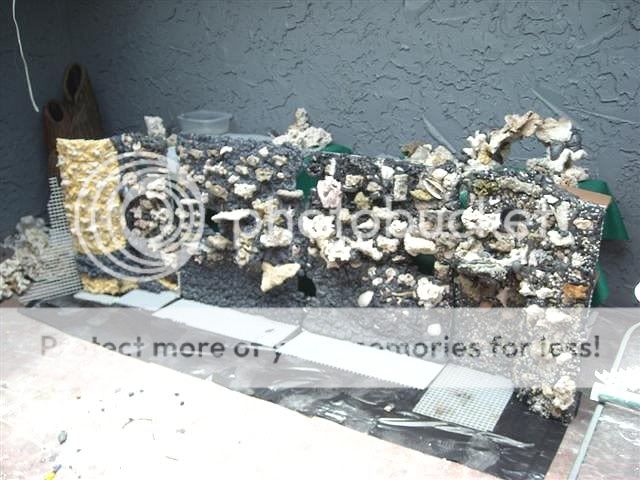
I want to get away from the "Great Wall of China" look...
I want frags to grow on the back wall, not just a black, boring background.

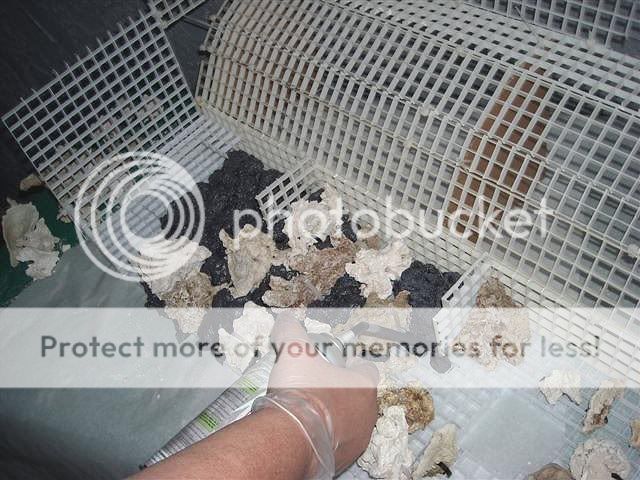
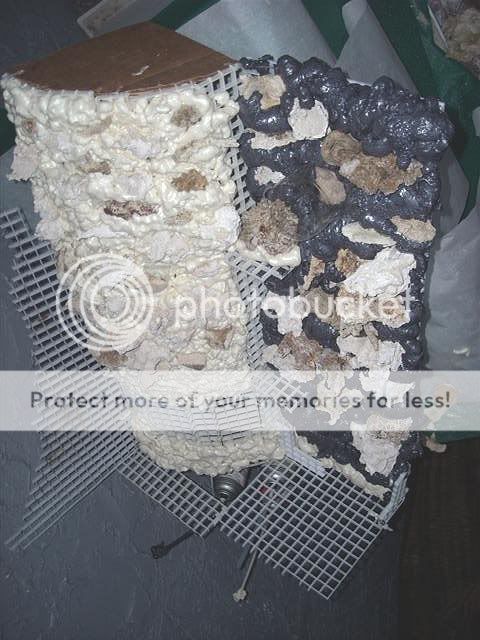
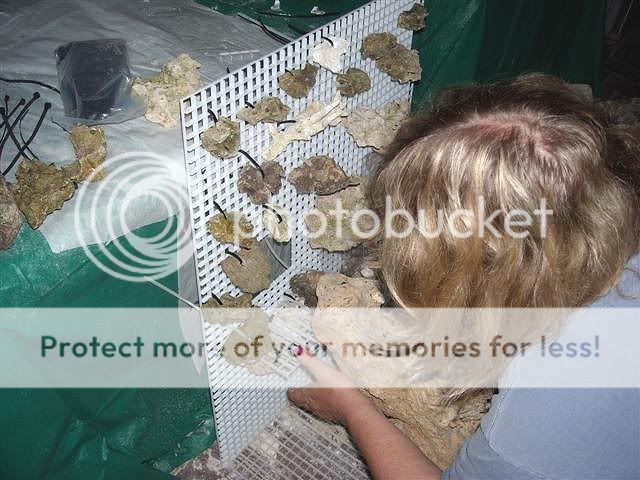
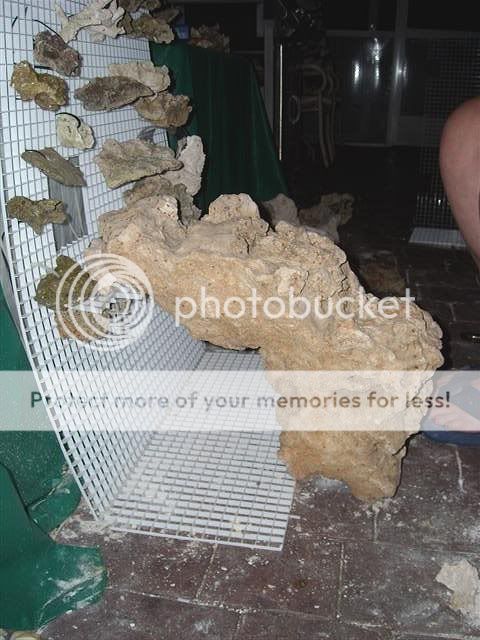
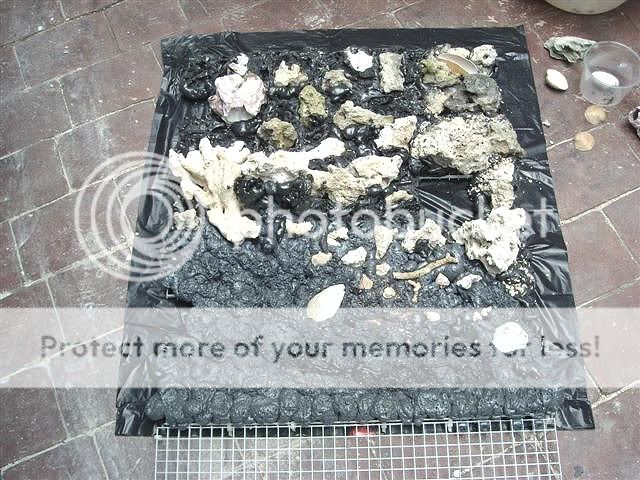
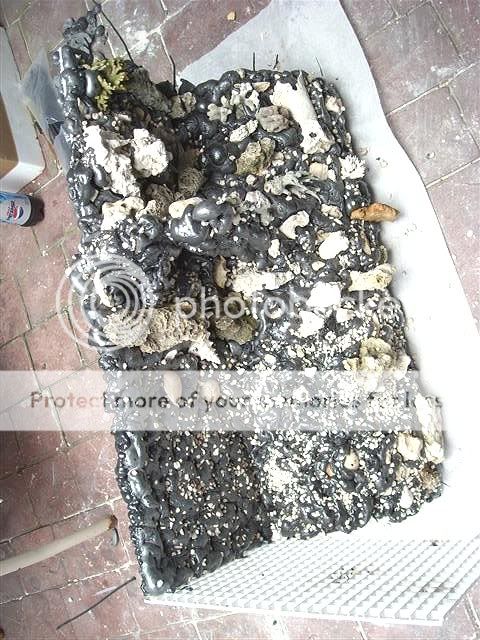
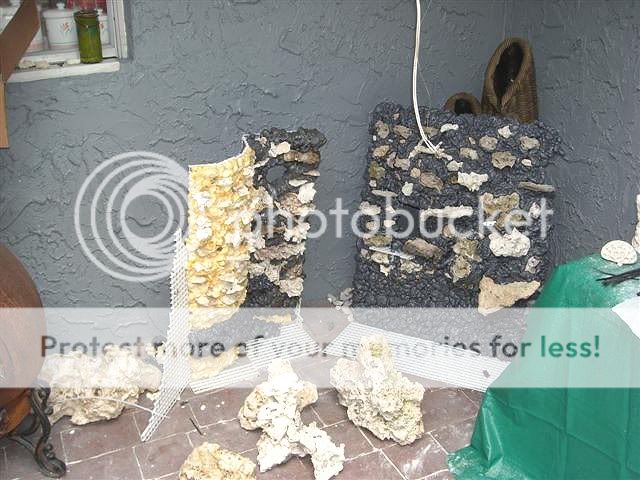
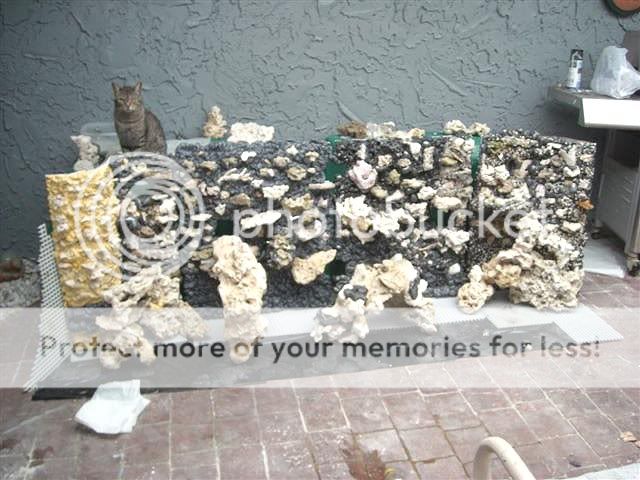
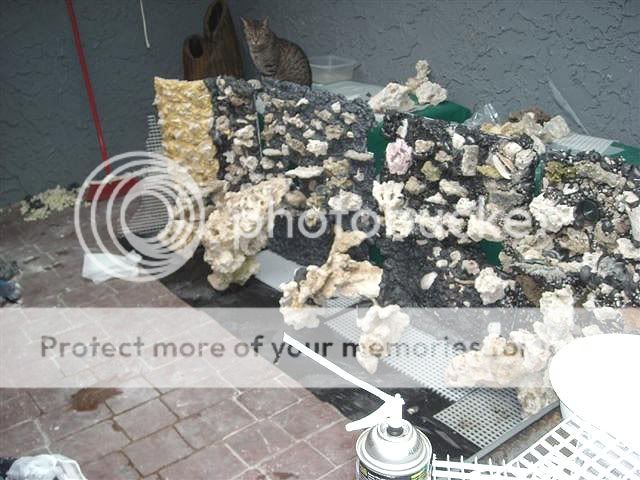
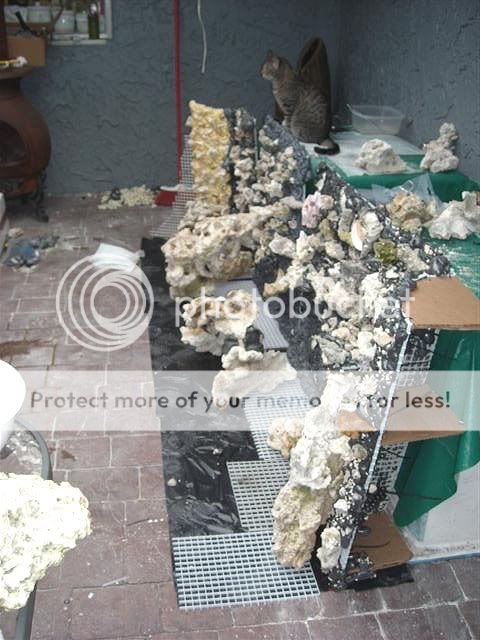
After reading pages after pages, sucking in as much information as I possibly could, I am now ready to share the beginnings of my new 265 g Perfecto with a full foam/rock back wall.

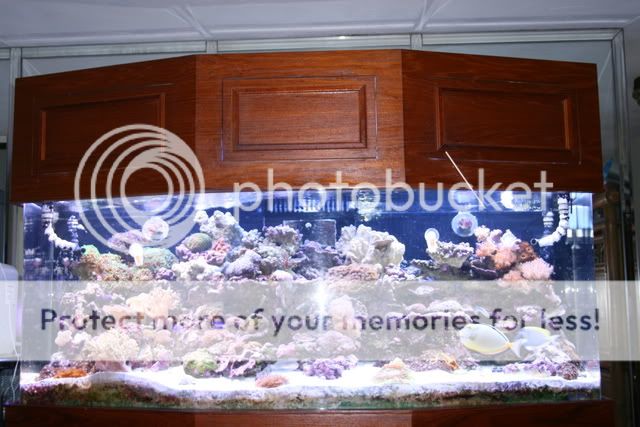
This is what I have now
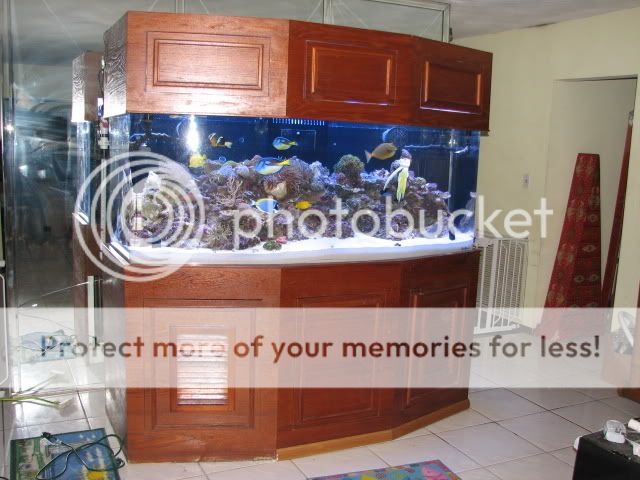
FW70.jpg


FW69.jpg


Here is my new tank

FW71.jpg


FW72.jpg


Do you hear it crying: Foam me! Foam me!
 
The humble beginnings:

I used this tool to trim the eggcrate
FW64.jpg


My boyfriend showed me the easy way
FW63.jpg


Wow, much faster
FW61.jpg


Worked out great, we had a lot of trimming to do

FW65.jpg


FW60.jpg


Here, we fitted it in the tank for the first time
FW58.jpg


FW59.jpg


So far:

4 sheets of Egg Crate from Home Depot
Zip Ties, I have 4', 8" and 15". luckily I get these from work for free.
 
Cut outs for the closed loop
FW57.jpg


I made templates out of cardboard for the overflow shape
FW50.jpg


And started to ziptie rocks on the eggcrate
FW51.jpg


FW53.jpg


And fitting the bigger pieces
FW41.jpg
 
Almost time to start foaming....

These are the different brands of foam I had available to me

Foam.jpg


Atlantic Falls Foam I got for $ 8.00 a can. It was really good to work with, dried pretty quick and I was able to shape it and get most of the air out of the foam. I used about 6 cans on the project.

Great Stuff, I bought at HD, because I wanted to try it out, since a lot of people have used it and had good results. It was easy to work with and easy to shape after it dried, but I liked the black foam better and eventually covered up the one piece I used it on.

Touch n Foam, I got for $ 6.00 a can and used 6 cans on the project. About the same as the Atlantic Foam, dries a little slower and messier but works very good overall. It states "Fish safe" right on the can and is designed for water falls, ponds, etc. I think it even said "UV safe". I have found it for even cheaper since and declare it my preferred foam!

Before you start foaming, make sure you put your plastic gloves on!!! And wear old clothes!

So I begin
FW47.jpg


FW46.jpg


FW44.jpg
 
Materials used so far:

4 sheets of Egg Crate
Zip Ties, 4', 8", 14"
Rock
Plastic Gloves
Great Stuff Foam (only one can, changed to other brands)
Atlantic Falls Foam (changed to Touch n Foam due to price)
Touch n Foam

Tools used so far:

Wire cutters
Grinder

Lessons learned:

Pond Foam works much better than Great Stuff
Must wear gloves

FW37.jpg


FW36.jpg
 
Very nice. At first... when I saw the two giant tanks in the same room, I thought... "Wow, your wife is so cool!" Then I saw your boyfriend's hairy arms and thought... "Wow, it's you that's cool!" Imagine how many cool tanks we could have together. I will deny that I ever said this.

More pics??? Of the tank... not your boyfriend's hairy arms.
 
<a href=showthread.php?s=&postid=13018157#post13018157 target=_blank>Originally posted</a> by Kannin
Very nice. At first... when I saw the two giant tanks in the same room, I thought... "Wow, your wife is so cool!" Then I saw your boyfriend's hairy arms and thought... "Wow, it's you that's cool!" Imagine how many cool tanks we could have together. I will deny that I ever said this.

More pics??? Of the tank... not your boyfriend's hairy arms.

LOL Kannin, I had 7 at one point until I realized I was nuts......
At the moment I have the 250g to be replaced (I promised myself) by the 265g and 3 propagation tanks with about 165g total water volume.

Anyways, back to the project.

The first part almost done
FW43.jpg


Starting on the second one
FW42.jpg


Fitting in of freestanding pieces that will be infront of the wall
FW38.jpg


Another one foamed
FW34.jpg


Lessons learned:

Use parchment paper under the eggcrate when foaming, saves a lot of material and time, keeps trimming of the backside to a minimum.

Close the zip ties to the front, not the back! eliminates the little bumps on the backside and they are easily hidden in the front.

Be bold with the rocks. Use big pieces even though you might think they are too big and heavy. Once the foam is on, the whole things gets strong and bonds together very nicely. I started out with little puny pieces of rock (like on the yellow part) that virtually disappeared in the foam. After I was done, I went back and added more rock until I was happy with the look.

I timed the curing of the foam until it was workable by hand (with gloves!) and smooshed it in, creating a more natural look, getting the air out and making it even stronger. I pushed it and pulled it and twisted it, even made little holes for frag plugs at this point.
 
looks great, keep up the good work, and keep the pics commin'. man is this method ever taking off...I'm glad I did mine this way also, you'll love the end result.
 
I have had a thought. To take a really good piece with great textures and stamp the foam to give it more of a natural look before it dries and adding the epoxy. What do you think?
 
<a href=showthread.php?s=&postid=13021182#post13021182 target=_blank>Originally posted</a> by Speckled Grouper
LOL Kannin, I had 7 at one point until I realized I was nuts......

Some of us go a whole lifetime without this realization...
w00t2000db6.gif
 
WOW I would love to do something like that to my tank. It looks great keep up the get work and keep us all posted with it.
 
<a href=showthread.php?s=&postid=13023033#post13023033 target=_blank>Originally posted</a> by EBOLII
I have had a thought. To take a really good piece with great textures and stamp the foam to give it more of a natural look before it dries and adding the epoxy. What do you think?

You mean taking a rock to stamp it? It would have to have a really deep texture, because the sand/crushed coral and the epoxy would cover most of it up in my opinion, and it would not be too visible at the end.
 
Here is another piece foamed. I sprinkled crushed coral on this one, but once it was covered in sand and epoxy, it wasn't visible anymore, so that was a waste of time.
FW35.jpg


Couple more
FW32.jpg


Here is one of the freestanding pieces I made
FW33.jpg


Putting them all together
FW31.jpg


And with the freestanding pieces in front
FW29.jpg


One more
FW28.jpg


Different Angle
FW27.jpg


Also wanted to mention that I used a tile bit to drill the rocks before I zip tied them to the egg crate. Worked great!
 
The cat: "Fishies.... soon you will be mine. All mine."

Is the arch drilled and pegged or ziptied under the foam?

Thats a great piece in particular, though the whole thing is coming along swimmingly. Bravo.
 
I built a cradle for the tip of the arch on the wall, it rests in there securely and it will be in about 3 inches of sand on the bottom.

It is a beautiful piece, full of holes and places to insert frags. I can't wait til it's covered with corals!
 
Back
Top