Griff's D-D Reef-Pro 1500S build

Griff500

New member
I've been into this amazing hobby for probably 6 years. It started as something for my son and he rapidly lost interest but I was hooked (excuse the pun).

A couple of tanks later and I've currently got a Reefer 350.

I eventually got it to the point where SPS were visibly growing. I then decided to 'fix' the numbers, dealing with a phosphate 'issue' that turned out to be more of a test kit issue. I eventually realised I should trust my eyes more than anything else and things started to settle down and corals started to grow again. I went through a horrible GHA phase but that passed once I got phosphate under control, although it was replaced with Cyano after getting the phosphate too much under control (Hana checker reporting far more phosphate than there actually was). Eventually things settled down and it looked like things were starting to go well...

It's now an absolute mess, having been completely taken over by Aiptasia. Initially a Matted Filefish was taking care of them but then he decided he much preferred the normal food. I tried various methods of dealing with them but the population exploded and are now beyond being dealt with. The only solution I can see is to remove everything from the tank and start again, putting into practice the lessons I've learned along the way.

So, a D-D 1500S is on it's way and should be with me in a few weeks!

In all honesty, I wanted a bigger tank anyway. ;)

I'll be starting the tank with fully cycled live rock and some Dr Tims to help it out a bit and will hopefully have a decent filter from the beginning, as my stock has to be transferred immediately. I'll be assisted in this transfer by the ever-helpful Dan at the Coral Cabin, who is reasonably local to me. His shop has come on leaps and bounds and I've always been happy with the service he provides. Well worth a visit. Some live sand will be used - I'm not sure it's actually of any help but... why not.

I'll be interested in any tips and suggestions that the community can provide along the way.

Stock to be transferred is:

- Pair of Picasso Clownfish (had them for most of my time in the hobby).
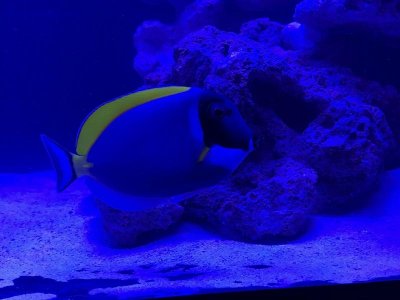
- Powder Blue Tang (fat and healthy and I've had him for a few years, but he looks like he would appreciate some more space).
- Purple Tang (again, I've had him for a few years).
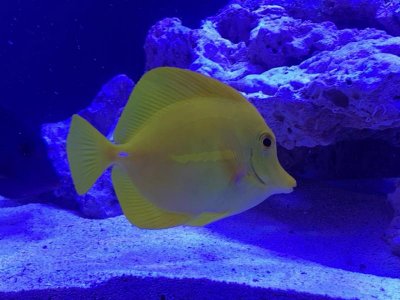
- Yellow Tang (had him even longer than the others, all of which get along well).
- Cleaner Wrasse (rather large and the most aggressive fish in the tank, so he will be sumped for a little while).
- Three Scribbled Anthias (a decent size these days but I don't think they look particularly healthy and they are certainly not as colourful or vibrant as they once were - I'm not sure if I want to keep them).
- Yellow Tail Tamarind Wrasse (a good size now and always active - lovely fish).

I'd like to get a couple more Wrasse in due course, hence the Cleaner Wrasse going in the sump - he cost me a gorgeous Diamond Tail Wrasse (a replacement for the previous one that jumped after a tank sitter decided to take the jump guard off and not put it back on correctly) and I'd like another.

Current equipment to be retained:

- Deltec SC1456 skimmer.
- Schego 300W heater (I have a second that I can also use).
- Two Gyre 250 pumps.
- Jecod 6000 DC return pump.
- D-D 39W UV.
- Clarisea filter.
- Radion Gen 4 XR30s with diffusers.
- Tunze Oslomator ATO.

The current tank is running on an Apex Classic. I've also got a Dastaco XtremA A1 with a light sensor that is somewhat redundant as I now have zero corals and will not have some for a bit and a Pacific Sun Kore 5th doser.

I'm contemplating selling the Apex, Pacific Sun and Dastaco and going with a GHL Profilux P4 with a KH Director and a couple of Slave Doser 2.1 units. I fancy trying the ATI Essentials Pro products.

For nutrient control, I have an ALR1 or I can carbon dose. I also have a Deltec FR509 media reactor available. I'd like to use a natural method but people's results seem rather hit or miss with the ALR? I've had success with carbon dosing but it does seem easy for the phosphate to get out of balance. I'm keen to keep things as simple and low-maintenance as possible - I've found that the more I try to do (chasing numbers, for example) then the worse things can get! I'm hoping to start things off in the right way, with the lessons I've learned along the way, and just keep doing that without messing around...

I'd welcome any thoughts on this, anyone who has used the ATI products and their thoughts on them. General ideas about current thoughts on systems, etc. I'll hopefully keep track of development here and report the good and the bad along the way, as I've found it very helpful to learn from other tank posts over the years.

So, let me have your thoughts on this while I'm still at the planning stages and wish me luck!

PS: I started this thread a short time ago on another forum but decided to have it on this forum as well, so I'll get it up to speed and then update as I go along.
 
I've been looking into light mounting options for the new tank. I've ordered a ReefTops jump guard and I wanted minimal cutouts for lights, so I thought of having the mounts at each end and using the multi-light rail. Unfortunately this would have required a 60" rail that would have been sticking out at each end of the curved mount arms. Quite ugly in my opinion.

I looked at the available options (ceiling mount is not an option for me) and I really like the GHL Flex Mounts - they attach to the cabinet, so no cutouts needed in the jump guard, look quite minimal and sleek, especially compared to the RMS mounts, and have nice cable management. It should provide a very clean look.

There will be a way to mount the Radions to them, but... the GHL Mitra LX7 lights look rather interesting... I don't see a huge number of people using them but those that do use them seem to be very pleased with them. I've always preferred the concept of LED lights that have the diodes spread out (like the Orphek Atlantic) compared the to Radions that I've been using. I've currently got the diffusers on them. The LX7 have six pucks and use reflectors instead of optics and diffusers... Very tempted...

The ReefTops jump guard will have a hole at each end just big enough for the Gyre cables and no other cutouts, which I am happy about. It will be in three equal sections with a feeding hatch in the middle section. Never again will a tank sitter give the fish the chance to perform the leap of faith!

For nutrient control, I'm leaning toward carbon dosing. My feeling is that carbon dosing would be more controllable and I know it works reliably. The only issues I've had with carbon dosing have been an apparent negative reaction to it by a BTA - perhaps there was some not-so-nice bacteria in the previous tank that the carbon dosing fuelled. I've got the FR509 reactor in case Phosphate needs any attention. I still have the ALR1 algae reactor as an alternative. I don't want the mess of trying to have an algae bed in the sump and I think that works better when there is a far greater surface area of algae than is provided by the sumps in these ready-to-go tanks.

For alkalinity, I've decided to sell the Dastaco XtremA A1 and go with ATI Essentials Pro. I've yet to see anyone unhappy with ATI Essentials and the Pro seems to be equally well received. The Dastaco is a great bit of kit but I think it's more than I needed on the previous tank and still more than I will need on this tank, at least for quite some time. If you've got an established tank with strong alkalinity consumption then the Dastaco is great and I believe they work better when not run at the very low end of their output.

Other equipment I'm toying with the idea of getting but doesn't really need to be replaced...

- Reef Octopus Regal skimmer - probably no need but I fancy one and I also like the level sensor in the head and the design of the skimmer. I've had issues with water splashing out of the top of the venturi and eventually running around the sump and out of the cabinet - probably a maintenance issue - and the Regal design looks like it would avoid this potential. I'd ideally go with the 200 for the extra air pulled in but I don't think it would actually fit in this sump!

- Reef Octopus Vario S return pump (least likely to do this at the moment). In the future, if I get flow sensors and possibly run reactors off a manifold, it would be nice to have a return that can be controlled automatically to maintain flow rate to the tank regardless of reactors being online or offline - automatic adjustment and potential notification that pump maintenance is required. I'd probably get the Vario S pump or something similar then as it can easily be integrated.

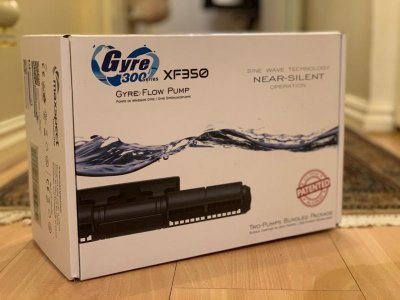
- Maxspect Gyre 350s - I'm very likely to get these - almost certainly. There's nothing wrong with my Gyre 250s but I have reasons for wanting to start fresh, part of which is the fact that I've got to transfer everything immediately and cannot spend time cleaning the current pumps thoroughly - I'm paranoid about transferring Aiptasia to the new tank. I could have one cleaned ahead of time and run the tank with one while I'm ensuring the other is pest free... or I could just get new pumps and then give the old ones a good soak in something over a week to kill off everything and sell them.

That's the current state of play. I'm nearly decided on the majority of everything involved with the new setup. Some final decisions to make and then an order to be placed for the required items. I'll then spend time before the tank arrives getting as much as possible to try to ensure a smooth transfer on the day!
 
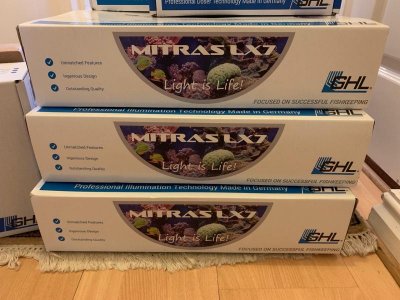
Lots more research done and I've decided to try the GHL Mitra LX7, so I've placed an order for three of them with the Flex Mounts. The reviews seem to be very good and I do prefer that they have used reflectors and spread the pucks out.

I also ordered the KH Director set as Alkalinity monitoring was definitely something I wanted to have on my new system.

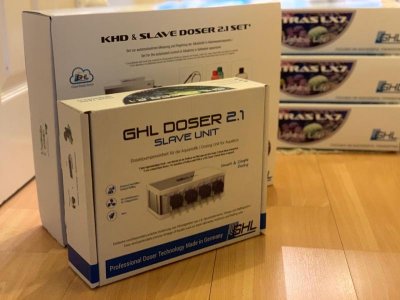
So while I was at it... I couldn't help myself and ordered another 4-head Doser 2.1 to take care of my anticipated dosing requirements.

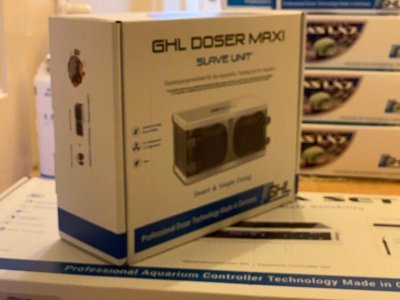
Oh, and a GHL Doser Maxi. I've got plans for that... two or three possible uses come to mind and I'll decide which soon.

And, of course, a Profilux P4 Mega set to control it all.

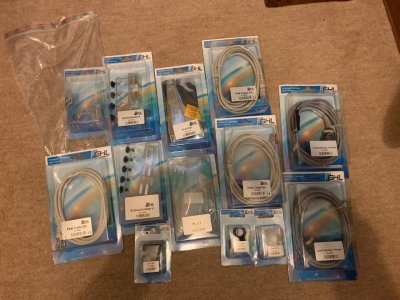
And some sensors, holders, etc...

I might have got a bit carried away... :dontknow:

A primary goal for this tank build is to automate as much as possible. I've gone with GHL based on their reputation and the fact that Neptune don't really seem particularly focussed on the UK market. While waiting for various Apex bits to become available here I've been watching GHL owners having these features already.

It will be a bit of a learning curve but it should be fun. I'll be going through as much of the setup as possible before the tank arrives.

I've also ordered a ReefTop jump guard. It will be in three sections - a feeding hatch in the middle and a small cutout in the middle of each end for the Gyre cables.
 
I’m using a Mac and GHL require Windows software. I've used Parallels before but I'd seen a free option mentioned elsewhere and decided to have a look at it.

It didn’t take long to figure this out but I hadn’t seen a decent guide and so perhaps this will be useful to others. If you are a Mac user and the Windows requirement was putting you off using GHL (or any other equipment that only has Windows software) then don't let it!

Using GHL Control Centre (GCC) on a Mac

The first thing required is a Virtual Machine (running a different operating system alongside the native system).

Rather than paying for Parallels I simply downloaded VirtualBox from Oracle:

https://www.virtualbox.org/wiki/Downloads

Completely free and works fine. There were a couple of security warnings thrown up by the Mac and so after installation I went to the security settings, clicked the lock and allowed changes by that application. I then simply ran the installation again and it went through without problems. I said yes to pretty much every question…

Next we need a version of the Windows operating system.

To get a free copy of Windows I downloaded the VirtualBox Windows 10 virtual machine:

https://developer.microsoft.com/en-us/windows/downloads/virtual-machines

When the Licence expires you can download another one, but you had better make sure you have taken backups of all of your settings for your equipment and saved them somewhere other than in the Windows installation (you could pop them onto a USB drive or you can enable a setting in VirtualBox that lets you copy and paste between Windows and Mac).

You can also download an ISO, which is basically a disc image:

https://www.microsoft.com/en-gb/evalcenter/evaluate-windows-10-enterprise

The developer edition has a licence for, if memory serves me correctly, 39 days and you don’t have to register any details, whereas the ISO has a Licence for 89 days but you need to register your details when you use it. If you download a paid-for version of Windows as an ISO then that’s not a concern of course. You used to be able to get Windows very cheap through a student discount website if you have a child in school – I haven’t checked if it’s still available.

I tried both and so I've written a brief guide for both options - it's very simple.

Instructions for the ISO version:

Open the VirtualBox application and click ‘New’. Give your new Virtual Machine a name (I chose ‘Windows 10 VM’ and select ‘Windows 10 64-bit’ from the menu (or whatever version of Windows you have downloaded).

The next page will be where you assign how much memory the machine has access to. I have 16Gb RAM available and so I changed this to 6000Mb – just under half. On the next page select ‘Create a virtual hard disk now’ and on the following page select ‘VDI – VirtualBox Disk Image’. Next is the Storage page – set that to ‘dynamically allocated’ and then just click ‘Next’ past the next page. Your Virtual Machine has now been created.

Right-click on your new VM and click ‘Settings’. In Settings click on ‘Storage’. You should see a SATA Controller listed with a disk image that will say ‘empty. On the right is an Attributes section where you can select a hard drive. We will be using a virtual hard drive so click the browse icon to the right of the drop-down menu and then ‘Choose Virtual Optical Disk File’. You can then browse to the Windows ISO that you previously downloaded and select it and then press OK.

All done and you can select your VM and click start (or just double-click the VM).

You’ll then need to enter your details and set up Windows. Once done skip to the GCC installation part.

Instructions for the Developer VirtualBox Windows Virtual Machine:

Extract the zipped folder that you downloaded.

Open the VirtualBox application and click ‘new’ This is where you create a virtual windows machine. Give it whatever name you want, leave the Machine Folder as default unless you have a reason for doing something else, Type is Microsoft Windows and Version is Windows 10 64-bit (unless you are installing your own Windows version or something else). Click ‘Continue’ and leave the memory size as it is (unless you have a reason for changing it) and click ‘Continue’. The next page asks about hard disk options – select ‘use an existing virtual hard disk file’ and then browse to the VMDK file that was created from the Windows evaluation download Click ‘Create’’.

You now have a virtual machine set up! Double-click on your VM in the left menu or select it and click ‘start’

If the window is very small and does not resize when you select full screen (Command + F) then you need to select Devices/Install Guest Additions. Go to Windows Explorer and double click the drive that represents the guest additions installation disc. Run that and it should install and then full screen will work. I also had to go to the VM settings and enable 3D acceleration and increase RAM to just under half of what I have available on my system.

This didn't take long to do but I hadn't seen a detailed guide and thought it might be useful for someone out there.

Now you are ready to install GHL GCC!

Open Internet Explorer and navigate to:

https://www.aquariumcomputer.com/downloads/

Download the latest version (but not the Beta) of the GHL Control Centre and install it.

Done!
 
Following along! Can't wait to see the progress. This will be an incredible system. Thank you for the in-depth instructional for the GHL software on Mac. You should copy it and do a post under the ghl Products!


Sent from my iPhone using Tapatalk Pro
 
Following along! Can't wait to see the progress. This will be an incredible system. Thank you for the in-depth instructional for the GHL software on Mac. You should copy it and do a post under the ghl Products!


Sent from my iPhone using Tapatalk Pro

Thanks Dan, I was hoping it would be useful for someone. I'll find the thread you are talking about and pop it in there!
 
I think I'm going to get a Reef Octopus Regal 150 - I don't think I need the 200 and I'm not sure it would even fit. In the US you can get the INT model with the external pump, which seems like a good idea for ease of maintenance, but I haven't seen it available in the UK.

A Reef Octopus Auto Neck Cleaner should help with my goal of keeping the tank low-maintenance and, in pursuit of the same goal, I think I'll get a small Davy Jones Skimmate Locker as well. It has the option of a GHL output for the sensor so it should all integrate very nicely!

If anyone has used any of this stuff then feel free to chime in with your thoughts and opinions - I haven't ordered these bits yet, but the GHL stuff is ordered and on it's way!

I've decided to try ATI Essentials Pro for this tank. I'm also interested in their Nutrition CNP product, although the 'C' part isn't available yet, but it should be in a few weeks and apparently ATI are going to be measuring carbon in their ICP tests... that seems interesting, with my finest nerd hat on...
 
Ok, I've now ordered the final hardware (well, I think that's about it):

- Reef Octopus Regal 150S.
- Reef Octopus Auto Neck Cleaner.
- Reef Octopus VarioS 6 return pump.
- Avast Davy Jones Skimmate Locker (wanted one of these for ages) with a GHL output.
- Pair of Gyre 350s.

I need a pint now.. :beer:
 
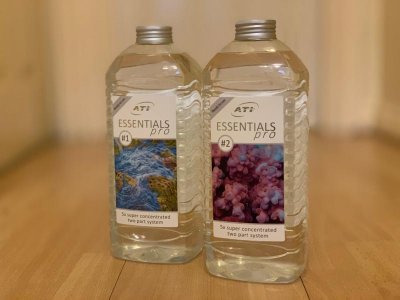
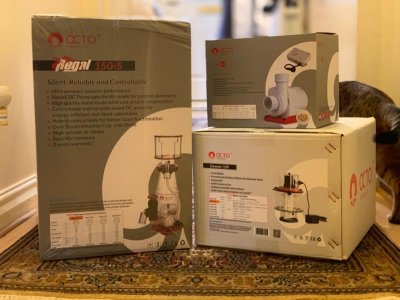
I had a delivery this morning!

attachment.php


And then the doorbell rang again...

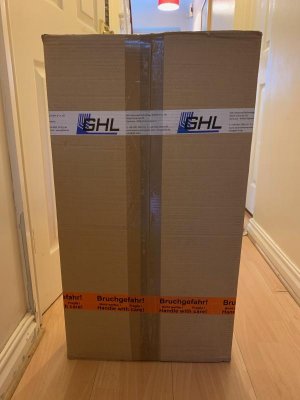
There was a rather small box... well, smaller than I was expecting...

attachment.php


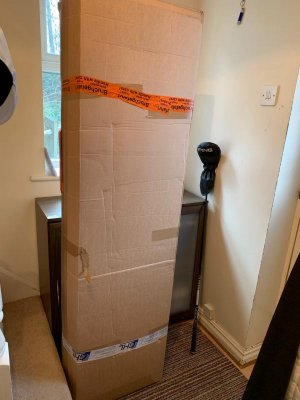
I asked the courier if he was sure that was it... "yes" he said, "that's all there is"... then the doorbell rang again... "sorry!"

attachment.php


Good grief... Some unpacking to do!! It's either a late Christmas or early birthday... except I've paid of course... :lolspin:
 

Attachments

  • ATI Essentials Pro.jpg
    ATI Essentials Pro.jpg
    43.5 KB · Views: 3
  • GHL Small Box.jpg
    GHL Small Box.jpg
    39.7 KB · Views: 3
  • GHL Big Box.jpg
    GHL Big Box.jpg
    48.9 KB · Views: 4
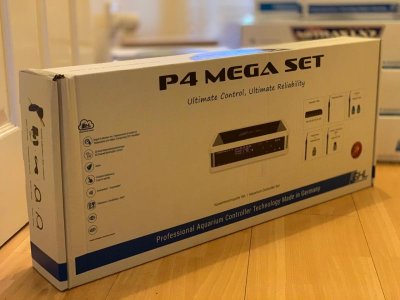
Finally got everything unpacked!
attachment.php


attachment.php


attachment.php


attachment.php


attachment.php
 

Attachments

  • Profilux P4 Mega Set.jpg
    Profilux P4 Mega Set.jpg
    46 KB · Views: 3
  • Doser Maxi.jpg
    Doser Maxi.jpg
    42.1 KB · Views: 2
  • KHD and Slave Set.jpg
    KHD and Slave Set.jpg
    50.8 KB · Views: 2
  • Mitra LX7 Stacked.jpg
    Mitra LX7 Stacked.jpg
    76.5 KB · Views: 3
  • GHL Accessories.jpg
    GHL Accessories.jpg
    74.8 KB · Views: 6
And the doorbell keeps ringing...

attachment.php


attachment.php


I'll have a look at those later. The Reef Octopus stuff seems nicely packaged.

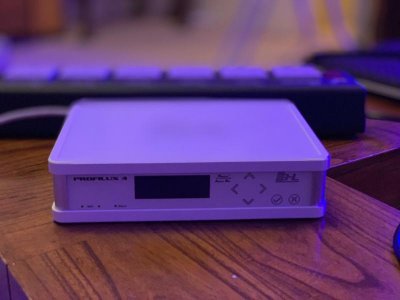
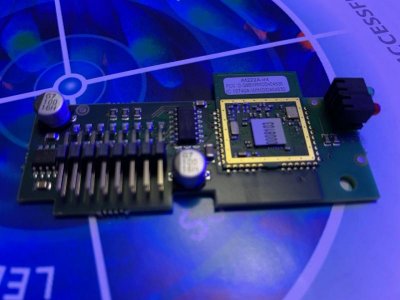
I've gone through connecting the Profilux P4 to the network, installing the PWC card for wireless control of the Mitra LX7 lights via the P4 and connecting the Powerbar to the P4. Once I stopped mucking around and following the Resource Guide that GHL provide online it all went rather well.

I'm impressed with the apparent quality - really nicely put together.

attachment.php


attachment.php


attachment.php


Only a couple of minor things still to arrive. Oh, and the small matter of a fish tank...

Still, that gives me some time to play around with the GHL equipment and get it set up as far as possible. I've got the heater control done and assigned to a Powerbar socket, which was as easy as it should be. I'll have to dig into the manual and get the hang of it. Fun!:D
 

Attachments

  • Reef Octopus.jpg
    Reef Octopus.jpg
    59.4 KB · Views: 3
  • Gyres.jpg
    Gyres.jpg
    47.4 KB · Views: 3
  • P4.jpg
    P4.jpg
    36.4 KB · Views: 2
  • PWC.jpg
    PWC.jpg
    46.5 KB · Views: 3
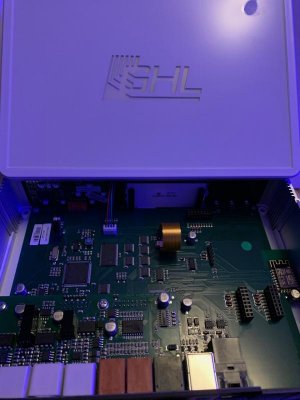
  • P4 Inside.jpg
    P4 Inside.jpg
    48.9 KB · Views: 2
I've been playing around with the Profilux P4 and found it very easy to add the various devices and program them.

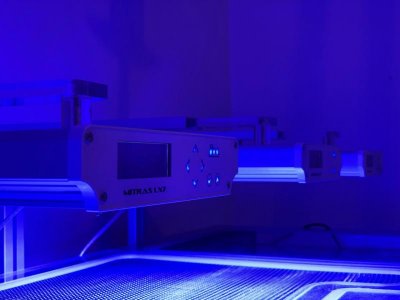
The Mitras LX7 lights look amazing - very slim and neat design and they appear to be built to a very high standard. Very pleased and I can't wait to have a tank to put them over! I have the PWC wireless card and so I just plugged it into the Profilux P4, started it up and then went to the system settings page. Clicking on the PWC under the P4 allowed me to access the configuration for the PWC. I noted the channel and set the address to '4', then connected to each of the lights, set them as slaves and gave them addressed of 1 to 3 (as I have 3 lights) and made sure the channel was the same as the PWC. That was it and I could then program all lights using the P4. Really easy!

I've got the KH Director and dosers all connected and they were just as simple, although I've not calibrated them yet as they are not installed in the new tank.

I'll start getting level sensors set up soon and hopefully all of this preparation will lead to a smooth transition on the day the new tank is delivered.
 
Hopefully the tank should be with me next week. Planning has continued and a bit of playing around. I have also ordered some additional level sensors and a couple of flow sensors and I plan on automating the return pump flow based on other items running from a manifold, speaking of which...

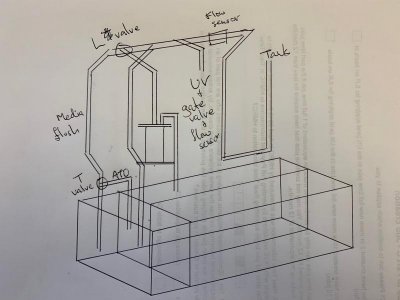
I'm thinking along the following lines and perhaps building in a flush system for the GFO:

attachment.php


The outlet from the reactor could be removed and replaced with tubing into a bucket when flushing or just have it as tubing all the time but a little longer than required so it would work for both purposes.

To flush fresh media it would simply be a case of redirecting the ATO flow up using the T valve and using the L valve to send RO to the reactor instead of water from the return. The return pump would be controlled by 0-10v automatically based on the last flow sensor in the chain.

The pump used for the ATO/flush would have to be powerful enough for the flush but not too much for the ATO. I could control it using 0-10v and then have a Maintenance task for the flush that increased the flow rate used and a lower flow rate when it's just performing ATO duties.

Thoughts?
 

Attachments

  • manifold.jpg
    manifold.jpg
    46.3 KB · Views: 4
I received the GHL flow sensors, additional level sensors and an additional card for the level sensors and a Propeller Breeze with controller along with some other bits and pieces and the new Breakout Box for controlling the return pump (and possibly an ATO pump for variable flow rates depending on whether it is operating under an ATO task or flushing the GFO reactor).

I'll be using an optical and level sensor for the ATO function, a low-level sensor in the sump and probably a high-level sensor as well and a low-level sensor in the ATO reservoir to let me know when it needs to be topped up. I'll probably have a light come on under the tank as a visual alert for this, just for the fun of it.

I continue to be impressed with the quality of the components produced by GHL. It's so nice to add or enhance functionality, such as adding more level sensor inputs, by simply plugging in another card instead of adding more and more boxes. I love the way that upgrades are clearly an inherent part of the design philosophy. Every component appears to be very well thought out and built to a very high standard.

The tank should hopefully arrive next week as there has been a little bit of a delay due to unavoidable circumstances.

Pipework to build the manifold that I have planned should arrive today. I've also ordered a media reactor for GFO from Pacific Sun that's been custom built to the height I wanted and this can be plumbed in and hang vertically. They were very responsive and I'm hoping it will be built to the high standard that I've found in other Pacific Sun products in the past.

I'll post pictures as and when I receive stuff if anyone's interested and I'll probably pop up a picture of the installed level sensor card. For some reason I love pictures of the guts of these things... Weird...

I can't wait to get this all set up!
 
Today was the day of getting the old tank out and setting up the new tank. The fish are waiting for the temperature to rise sufficiently and I'll be glad to get them in the new tank.

I've got to say a HUGE thank you to Dan at the Coral Cabin. I couldn't possibly have done this without his assistance and that of his assistant (I've forgotten his name already - I'm so terrible with names)! I couldn't have done it without his help and expertise and with bugger all mess (or at least none that I hadn't already created). Love the aquascape that he created and fingers crossed that the fish are ok with the move.

I'll update more and add some pictures as it settles down and next will be setting up the Profilux and other equipment. Lots to do but great progress today!
 
Time for an update, and it's a big one! Lots has happened but far more needs to be done...

The day before the install I got the Flex Mounts fitted. It took me a while to figure out that they need to be away from the back of the cabinet in order to allow the wires to exit... doh! Some square washers were sourced and that did the trick.

picture.php


They are really quite nice and simple. Easier to adjust for height than I was expecting, but I think that's because the guides online that I read said to put the part that holds the bolt into the upright in there the wrong way - follow the instructions in the GHL manual and have them sideways and it's easy. It couldn't be easier to adjust them forward and back either. I'm very glad I went for these. Instructions could probably be a bit more detailed for silly people like me but I got there in the end.

picture.php


I'd already got everything except the heater and sensors out of the tank, so 30 litres of this stuff hauled up the stairs and I was ready for the big day (or as ready as I could be...).

picture.php


Dan from the Coral Cabin and his able assistant turned up and got straight to work - drained the old tank, got the fish out and the rock with my Aiptasia Forest (I think they were quite impressed), shifted the old tank out and got the new tank in place. In fairness, I got stuck in as well, making drinks, etc. Absolutely shattered... All the old equipment has been shifted out and set aside to be cleaned up and sold. I can't believe how much Apex stuff I have...

Anyway, first things first and Dan asked what sort of aquascape I wanted. He had spent quite some time boasting about his alleged talents in this area, so I basically challenged him to prove it! Under no pressure whatsoever mate... off you go then...

picture.php


And this was what he came up with for his first attempt...

picture.php


Reflections... Anyway, right side:

picture.php


and the left side:

picture.php


I absolutely love it and didn't need to change anything. Ok mate, case proven!

Sand added (Red Sea Live Base Pink, I think) and then water added painfully slowly to try and minimise cloudiness, as the fish were going to have to be put in there as soon as the temperature was ok.

picture.php


It was far slower than they might usually have done it but it's not like they had to make alternative arrangements for the kids being collected or anything... In all seriousness, I couldn't possibly have done this without their assistance - great guys and I can't recommend them highly enough. Due to this the cloudiness really wasn't that bad initially.

picture.php


I dumped the Absolute Ocean in (ok, we did... it's heavy!), got the heaters on and powered up the Clarisea.

Once the tank was up to temperature I dumped the fish in and hoped for the best, adding 25ml of Microbacter 7 to help the live rock that Dan supplied. The tangs were immediately exploring the tank together, side by side at all times - safety in numbers I guess! The Wrasse went straight to the sand of course... The Clowns... well, they are Clowns... nothing seems to worry them.

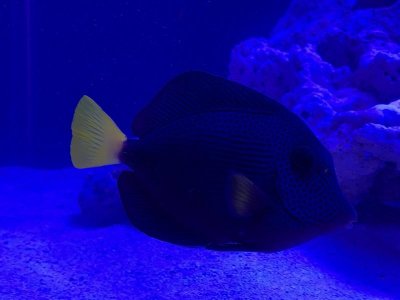
This was taken under the bluest of lights and immediately after putting the fish in:

picture.php
 
I was worried how things would go while I was at work today, but when I got home all the fish were out and swimming around, they took some food, the Clowns were making a nice hollow in the sand and all seems good.

So, I did an ammonia test, fearing the worst... so far, a zero reading for ammonia. Nitrate was at 5 and Phosphate at about 0.12, which is fine considering the live rock was out of water for pretty much the entire day, maybe something from the 'live' sand. Not a problem though and easily dealt with. Really pleased that the biological filtration seems to have done so well. I'm not sure the Microbacter 7 was actually needed but it can't hurt.

This evening I've set up the sensors on the GHL Profilux P4. I prefer the design of their conductivity sensor over the Neptune one that I had before. The reading exactly reflects what my refractometer tells me and I have that calibrated from a reference solution. I expect it to drift around a bit while the probe settles in and I'll recalibrate again in a few weeks if it starts drifting. Maybe it won't though!

Ph, Redox (why not, as I have the sensor) and Conductivity done. Neat little bottles as well...

picture.php


These pictures won't be great as the light isn't good. Even the sensors and the sensor holder are quality bits of kit.

picture.php


Calibration was really easy and quick and I can't fault the GHL equipment so far. SO glad that I went with GHL for this build.

I've used the pulse setting for temperature control (thanks [MENTION=72334]Lasse[/MENTION]) and it's working nicely.

Just basic control at the moment and I'll be setting up the rest of the equipment soon, get it all working and then figure out a way to hide it all away neatly in the cupboard.

In the meantime, a bad shot of the sump with the wires in all their glory (I've got plans for them...) and an equally bad shot of the tank - blue light and a very tiny bit of cloudiness still from the new sand. I was expecting far worse but we took our time putting the water in and there was minimal cloudiness and hardly any today. I expect it will be completely clear within a day or so and I've got the Clarisea roller filter doing it's work and some foam over the return pump inlet as well (temporary and the metal clip will be gone within day, assuming a few parts arrive in time for the weekend).

picture.php


picture.php


I have the Profilux controlling the neck cleaner - that was very simple and just needed a cyclic timer and the timer assigned to the socket on the Powerbar 5.1 (I'm going to want more of those - really solidly constructed of course and it's useful to see the power draw).

picture.php


It doesn't look as cloudy as it appears in the picture. I'll get some better ones when I'm home during the day this weeks.

So far, so good...
 
MyGHL works perfectly. No port forwarding needed or any of that nonsense - it just worked and I can make pretty much any changes I want on the fly. This is the main screen when I connect:

picture.php
 
attachment.php


attachment.php


attachment.php


attachment.php


So far there's not a sign of any stress-related issues and my PBT in particular seems to have calmed down a bit with a little bit of extra space. Levels are good and I've got a nice weekend ahead of setting up the rest of the equipment and then getting it all neatly put away (the last part might be a challenge)!

My love of this hobby is rekindled.
 

Attachments

  • IMG_7327.jpg
    IMG_7327.jpg
    34.3 KB · Views: 3
  • IMG_8231.jpg
    IMG_8231.jpg
    35 KB · Views: 3
  • IMG_9760.jpg
    IMG_9760.jpg
    61.4 KB · Views: 3
  • IMG_9270.jpg
    IMG_9270.jpg
    47.1 KB · Views: 2
Back
Top