It's Only taken 15 Years...In Wall 380L/100Gal Full Custom

ghengis

New member
After some kind encouragement on another thread, I've decided to compile the process of building my dream tank. The pics I have are not strictly sequential or consecutive, as I never really planned to do a build thread, but there should be enough info to get the message across. If there are any questions, please fire away...

First up, as you can see from my profile, I've been a member here for a number of years, though mostly as a lurker. My background was the typical plastic 20L goldfish tank, that eventually became 45L, then 60 planted and scaped with lights and gas (CO2), and finally 225L fully scaped high tech... I started looking into salt water sometime during those years, before becoming a member here in '09. My dream for a reef tank came and went, grew momentum and faded as I decided to wait "just a little bit longer" numerous times over the past 10 or so years. Roll on 2020, my partner and I decided to design and build our first home, and it wasn't long before I had to pop the question..."Honey, can we build a marine aquarium into one of the walls in the house??" She was pretty sceptical, but I promised her a very modest budget :)lolspin::lolspin::lolspin::lolspin:) and she gave her consent.

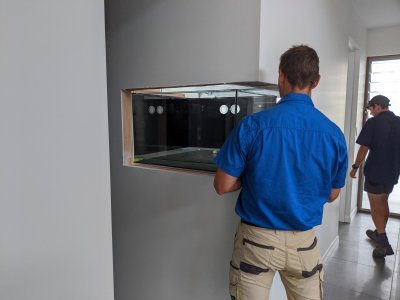
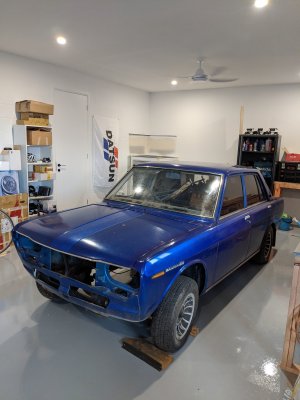
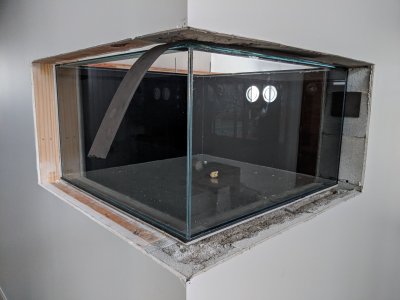
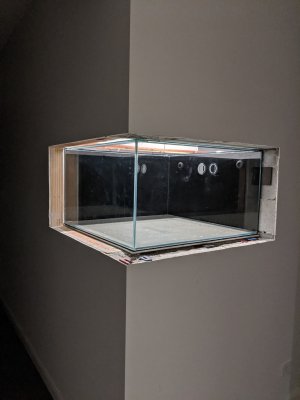
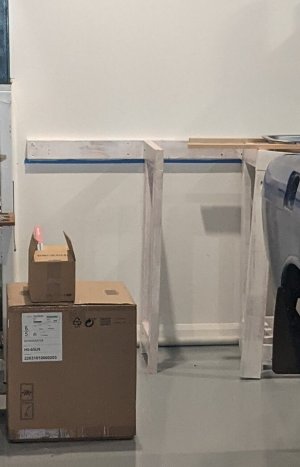
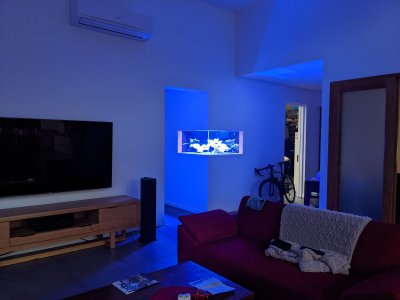
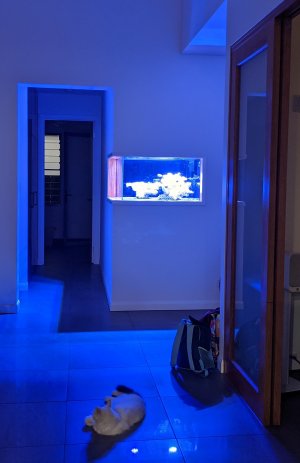
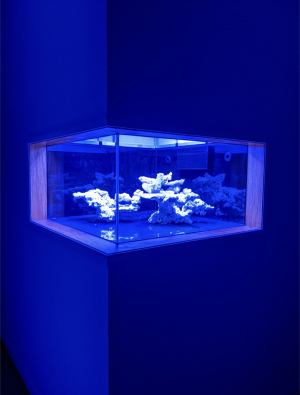
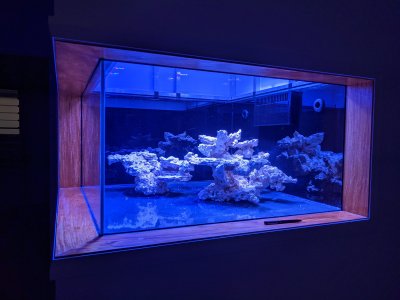
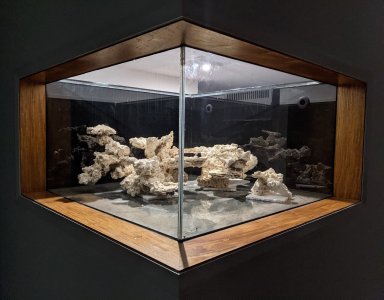
Our house design incorprated a 4 car garage (2x2 configuration), with the back section intended as my "man cave". The back wall here looked like the perfect spot for a makeshift fish room, with the tank itself mounted in the corner and visible within the lounge space and at the end of a small corridor that leads to the master bedroom.

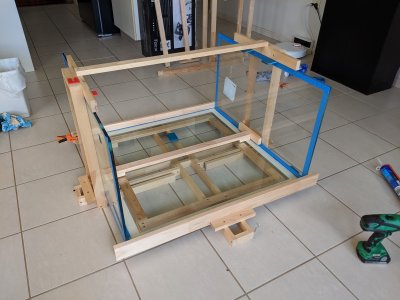
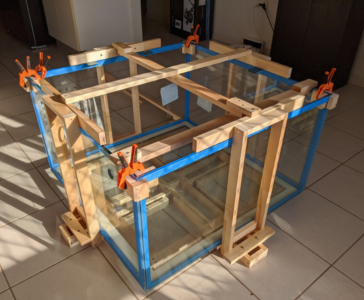
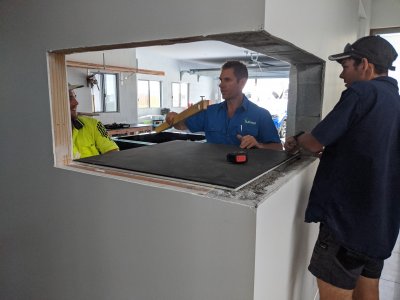
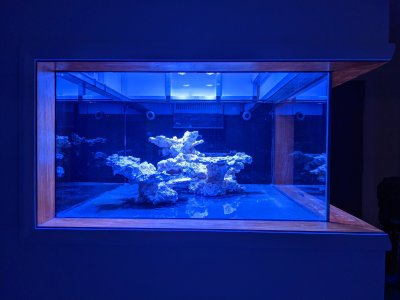
OK, enough background. As you're all well aware, the original design concept very quickly blew out, and I reckon I've spent nearly four times the original budget...but, I waited this long, and if I know one thing in life, it's to do something once and do it right. The build started in mid 2020 when I built the tank itself, and I got it wet in the first week of 2022....

Onto the show.

*NOTE - ALL MEASUREMENTS WILL BE IN METRIC :spin2:*
 
The tank was to be 900x900x500mm, for a volume of just under 380L (taking into account glass thickness). I had a local glass company cut me 2x float glass panels and 2x low iron panels, with a float glass base section. I also had them drill for returns and for the Eshopps overflow I intended using. I built a jig that essentially uses four L-shaped carriers for the side panels, and a + frame to support the base. I've built a few tanks in the past, and holding or supporting or taping sections into place for silicone is a royal PITA. This way, I could mount a panel, run a silicone bead, and slide the panel into place. I had stoppers to hold the glass 2mm away from conatct to allow space for silicone bead.

The stand was a (very dodgy!) weld job from 50x50x3mm box section. Since the garage has a 100mm step down, and I wanted the viewing angle at a more realistic 1200mm (than the stoop inducing 900mm that most stands are built at), I've made this 1300mm tall, with adjustable stainless screw in feet. The dimensions of the stand are also smaller than the tank footprint, so the tank sits slightly within the block and stud wall sections.
 

Attachments

  • photo411659.jpg
    photo411659.jpg
    2.4 MB · Views: 13
  • photo411660.jpg
    photo411660.jpg
    3 MB · Views: 14
  • photo411661.png
    photo411661.png
    2.9 MB · Views: 15
If you can forgive the sneaky cameo of my Datsun 510 project, you can see the corner into which the tank was to mount. I had to wait a while after moving into the house for our builder to be available to help with setting the tank in place...
 

Attachments

  • photo411662.jpg
    photo411662.jpg
    2.6 MB · Views: 10
  • photo411664.jpg
    photo411664.jpg
    2.9 MB · Views: 12
  • photo411665.jpg
    photo411665.jpg
    2.8 MB · Views: 10
  • photo411666.jpg
    photo411666.jpg
    3.5 MB · Views: 12
  • photo411667.jpg
    photo411667.jpg
    3.4 MB · Views: 12
While all this was occuring, I started to get my head around what space I would need, and features that were going to make life easy... A drain to the stormwater outside was a must, as was AWC capability. I needed a fridge, and a UV. And a sink. I wanted water storage outside (which eventually fell into the too hard basket for a number of reasons), and I had to have the chiller outside also.

Earlier in the house build, I had the builder core drill an 80mm hole in the block work, for my plan for drainage. This also worked for getting water to and from the chiller outside. But first things first, I needed to plan and design how all of the above was going to work in the space allowed. With some simple arithmatic, I decided two slide out cabinet sections, and an under sink space for the fridge would work. I fixed a batten to the wall, and off that, four rectangular support sections that also divide and support the cabinets. The cabinets are on heavy duty drawer slides, with rubber castors beneath (no point having something able to be slid out and away for fix ups or maintenance if you have to lift and carry the hole thing back into place!)

(EDIT - Had a melt down when adding pix. Soz)
 

Attachments

  • photo411670.jpg
    photo411670.jpg
    119.4 KB · Views: 10
  • photo411671.jpg
    photo411671.jpg
    2.2 MB · Views: 14
The cabinets themselves are based on a simple pine base section (deliberately left open to allow air flow against heat and humidity), with one built as a control panel, and the other shelving and storage for related items.
 

Attachments

  • photo411565.jpg
    photo411565.jpg
    2 MB · Views: 14
  • photo411672.jpg
    photo411672.jpg
    2 MB · Views: 13
One last piece of significance, I think, is the automatic hood. I built this from 25x25mm aluminium box section, with water proof bathroom laminate panel skinned to the outside. My Gen3 Radions are mounted into the frame and can be removed for maintenance very easily... The lifting mechanism, after a good few months figuring out linear actuators and the like, is a single electrically adjustable desk leg. This idea was sharked from Sam Parker of Parker's Reef YouTube fame (Sam actually has a hand in a few aspects of this build, namely the battery backup system, and helping to convert my Milwaukee pH controller to a more manageable Australian power system...if you're not aware of his channel, check it out. Dude has a mean reef tank!)
 

Attachments

  • photo411673.jpg
    photo411673.jpg
    1.8 MB · Views: 10
  • photo411674.jpg
    photo411674.jpg
    2.3 MB · Views: 6
  • photo411675.jpg
    photo411675.jpg
    2.9 MB · Views: 6
  • photo411676.jpg
    photo411676.jpg
    3 MB · Views: 7
  • photo411677.jpg
    photo411677.jpg
    3.3 MB · Views: 7
...so, that's about all I have in the way of the construction process. A lot of the rest, I think most here will be able to decipher from pics. As you can imagine, a build almost 18 months in the completion had a lot of trial and error, cstom fitting, repurposing different things to suit, and so on and so forth. A LOT of time spent staring into space with the missus wondering if I was in fact OK!

Still a few little details to iron out, but nothing significant. Just stoked to finally have this thing wet!!

Anyhoo, I'll just post a few more images, and if there's anything you need to know, just ask.

Cheers for reading.
 
Last edited:
Had a local plastics shop add a section to the overflow to allow a higher water level in the tank.
 

Attachments

  • photo411678.jpg
    photo411678.jpg
    2.3 MB · Views: 6
An eBay timber outdoor box to house the Teco 500 chiller, and the hole in the wall/pipework.

(This area also serves as clothes line location, so the box doubles as a conventient basket sitting spot)
 

Attachments

  • photo411679.jpg
    photo411679.jpg
    4.1 MB · Views: 6
  • photo411680.jpg
    photo411680.jpg
    4.1 MB · Views: 6
  • photo411681.jpg
    photo411681.jpg
    4.3 MB · Views: 7
  • photo411682.jpg
    photo411682.jpg
    5.3 MB · Views: 6
Electrical and water lines from the ceiling. Sink, fridge and UV location. UV/Chiller lines behind cabintes.
 

Attachments

  • photo411683.jpg
    photo411683.jpg
    2 MB · Views: 6
  • photo411684.jpg
    photo411684.jpg
    2.2 MB · Views: 7
  • photo411685.jpg
    photo411685.jpg
    2.3 MB · Views: 6
  • photo411686.jpg
    photo411686.jpg
    2.4 MB · Views: 6
RO and Water storage. RO booster sitting on Datsun roof ready for install, water drums needing some small adjustments.
 

Attachments

  • photo411688.jpg
    photo411688.jpg
    2.5 MB · Views: 7
  • photo411689.jpg
    photo411689.jpg
    3.4 MB · Views: 9
Some random general pics. (Slotted PVC pipe for cable management, pH controller modified)
 

Attachments

  • photo411562.jpg
    photo411562.jpg
    2.5 MB · Views: 11
  • photo411568.jpg
    photo411568.jpg
    2.7 MB · Views: 10
  • photo411690.jpg
    photo411690.jpg
    2.2 MB · Views: 10
  • photo411691.jpg
    photo411691.jpg
    3 MB · Views: 7
  • photo411692.jpg
    photo411692.jpg
    3.8 MB · Views: 8
I don't have any recent FTS, as I'm dealing with bacterial bloom right now. These will have to do.
 

Attachments

  • photo411693.jpg
    photo411693.jpg
    500.4 KB · Views: 8
  • photo411694.jpg
    photo411694.jpg
    1.4 MB · Views: 8
  • photo411695.png
    photo411695.png
    1.6 MB · Views: 9
  • photo411696.jpg
    photo411696.jpg
    3.2 MB · Views: 10
  • photo411697.jpg
    photo411697.jpg
    3.6 MB · Views: 13
Last edited:
What you have done with the wood surround on the tank looks really nice against the stand colour. Nice job.

I cannot claim credit for this. One of the builders tradesmen, a young soft spoken fella with epic skills, spent three days creating this for me. You're right though, it's a fantastic touch!
 
Back
Top