JG's Custom 120 Peninsula Build

Reefers4U

Active member
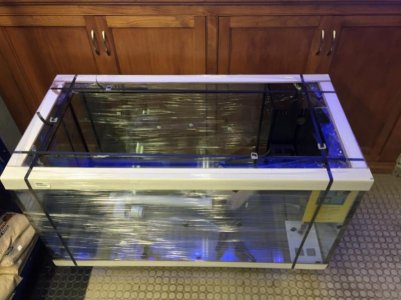
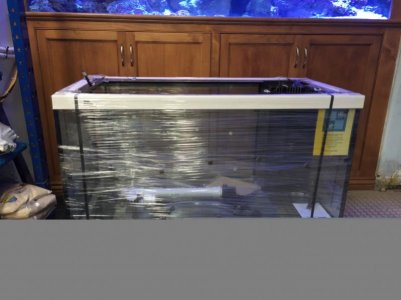
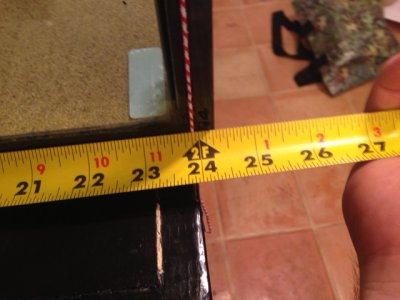
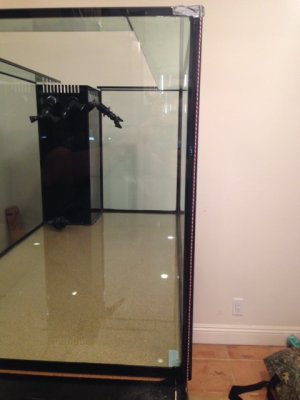
Excited my custom 48" x 24" x 24" euro style from precision aquatics will be here on Friday! W000t :beer:

I always see these awesome build threads. I thought this being my first custom tank I'd start one hopefully get some great advice from the coral wizards that lurk this forum and track the progress along the way.

This is going to be a reef tank. SPS/LPS and a few clams. About 8 small to tiny fish and maybe two or three water column swimmers - nothing too crazy. A pair of black and white clowns for sure. I'm throwing around the idea of an under-gravel filter.I had one on a 60 some years back - one of my better tanks actually. Anyone had experience running an under-gravel?

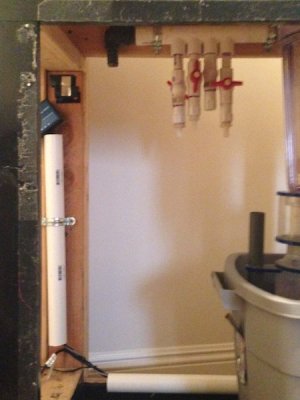
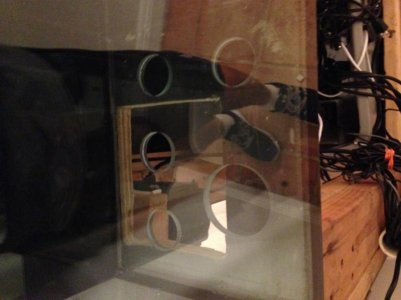
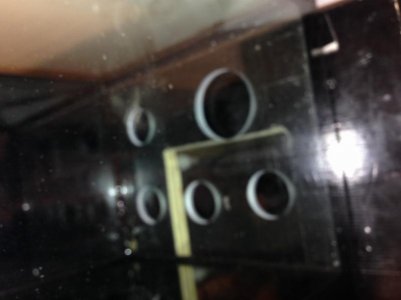
The tank's circulation system will feature holes in the right rear corner drilled into the bottom and covered by a black overflow box. Two returns of locline. The water will leave and return from the overflow box hiding all the plumbing and leaving it quasi-peninsula with just the overflow box visible from the opposite side (rear). There is a diagram attached to the bottom of this post which explains it better and I'm really not an expert on tank plumbing.
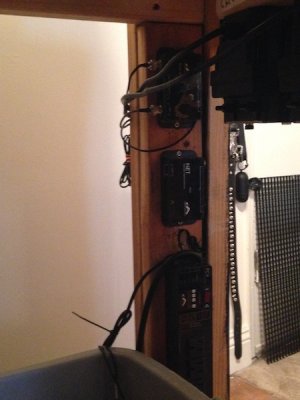

Gear on hand:
2 Reef Radiance LEDs
Eschopps Skimmer rated to 150
1 return rated at 1500 gph
ATO system w/ 2 5 gal reservoirs.
Reefkeeper Lite + .net 1PC
Reactor
2 Dosing Pumps
HOB Refugium w/ light
Sump
MP10
1/4 hp chiller


Gear Needed:
MP40
Live Rock (80lbs enough?)
Live Sand (black?)
~120 gals of Seawater
New PC4
New Head unit

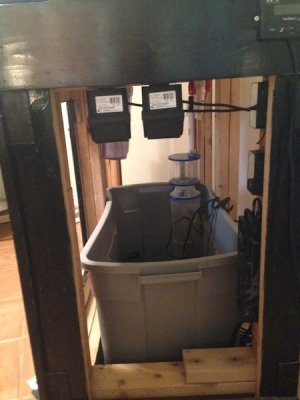
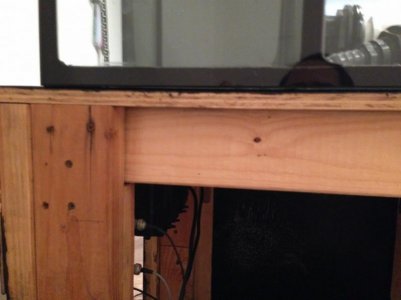
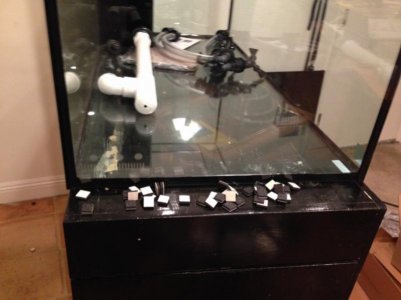
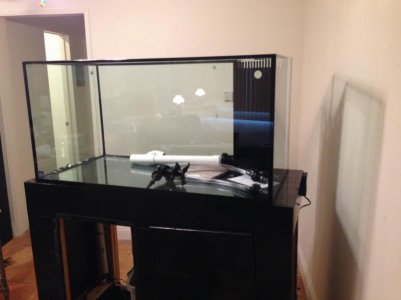
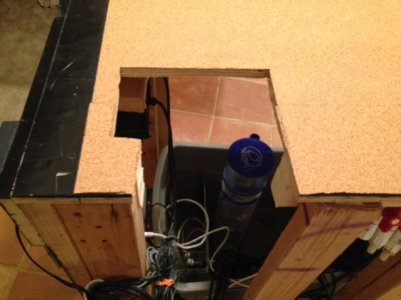
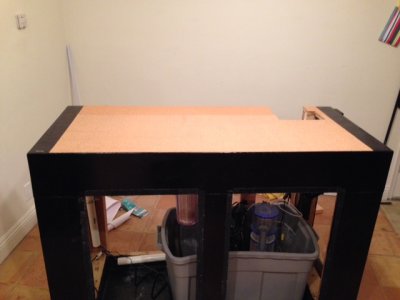
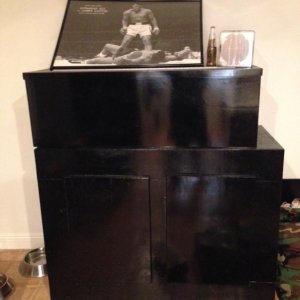
Here is a pic of the tank as it is today, just the stand and canopy. Feel free to add comments, opinion, likes and dislikes and constructive thoughts.

side note: does anyone know some movers who can transport the tank from the Valley to Hollywood? I'm a disabled from the war and can't really lift to well now - not without serious repercussions the next day and I don't want to risk dumping the tank if my back goes out.
 

Attachments

  • IMG_0863.jpg
    IMG_0863.jpg
    32.3 KB · Views: 19
  • IMG_1021.jpg
    IMG_1021.jpg
    33.9 KB · Views: 21
Last edited:
Isn't an undergravel filter a nitrate factory? How do you remove the poop and food that gets trapped underneath?
 
@ m0nkie: good tip. thanks!

@ blkg I don't know if it would be or not. Good question, something to think about.
 
here are some updated pictures from installing the equipment into the stand.

The bottom of the stand has some paint on plastic and is waterproof up to about 1/2 a foot. I picked a tote because I don't have any more cash for a proper sump right now.

I noticed after taking these the manifold is a little far over so I've moved it to the other side.

Just waiting for the tank and water now!
 

Attachments

  • IMG_1039.JPG
    IMG_1039.JPG
    78.1 KB · Views: 19
  • IMG_1041.JPG
    IMG_1041.JPG
    77.5 KB · Views: 22
  • IMG_1040.JPG
    IMG_1040.JPG
    72.1 KB · Views: 17
BUILD UPDATE:

Gear Acquired:
MP40wQD
MP10wQD
PC4
Head unit

Gear Needed:
Live Rock (80lbs enough?)
Live Sand
~120 gals of Seawater
The tank is ready and just waiting me to have some open time for install. Looking to Friday.

Labor Needed:
I'm disabled from the war and can't risk me dumping it. So one or two to help the delivery guy with the tank. Anyone know a guy or in the area and wanna make some cash?

Tank nerds are always invited to stand around, drink free beer, and criticize.


Pretty much at this point we are go for launch.


Reefkeeper and probes reporting data (w/ the exception of the temp prob but I think its just a corroded connection and easily fixed) Reefkeeper is connected to the internet via hardwire powerline and the GUI looks good. Still working on the networking/notification features.

The circulation pumps, skimmer and return are in place and plumbed.

TO DO:
Integrate the lighting pumps and reefkeeper.
Plub to tank when installed
Secure Gear and Labor Needed
Aquascape
Solve Temp Probe issue
Cycle
Add Baffles to Sump (thanks @ blkg35)
Networking/notification features.
 
If you go with an UG filter on this tank it really needs to be a reverse undergravel filter. A regular undergravel filter is a disaster in a salt water tank. I would set it up to run very slow, like 150gph down each tube, no faster. And run the water through a sponge filter before it goes under the gravel.
Good luck
 
Thanks Paul - nice to have an RC celeb bless my thread. I'm thinking I'm not going to do a RUGF because I want to use different sand than dolomite. Its interesting tho, how did you stop the tank from siphoning out if there was a power outage?


Here are a few pics of the new tank.

Specs: 48''X24''X24'' regular glass

Euro style bracing

Black silicone

Two returns and two overflows - the second overflow is if I want to use it to gravity feed something like a skimmer or chiller.

The returns are plumbed back up the overflow box which makes it nice but I've got to open up the cut out in the stand.

This thing is going to look sick under the LEDs.

One slight Issue tho: My old tank had the returns plumbed directly into the back of the tank. The new tank's returns will come up through the overflow - which means I need to jig saw out a few inches of the current overflow hole in the stand. See first picture
 

Attachments

  • IMG_1057.jpg
    IMG_1057.jpg
    31.2 KB · Views: 19
  • IMG_1056 (800x600).jpg
    IMG_1056 (800x600).jpg
    61.8 KB · Views: 20
  • image1 (800x600).jpg
    image1 (800x600).jpg
    50.7 KB · Views: 16
Last edited:
The tank is here! Your friendly home depot contractors were able to get it up the stairs no problem.

But I do have a few build issues going forward:

1) The back panel hangs off the stand about 1/4 of an inch - pic 3 below

2) the overflow box is too big for the hole in the stand. The pass-through hole needs to be expanded 3 inches in depth and width. But expanding it deeper makes me have to cut right through a main bracing on the back. pics 1 2 & 4 below
 

Attachments

  • IMG_1063 (800x600).jpg
    IMG_1063 (800x600).jpg
    46.6 KB · Views: 21
  • IMG_1064 (800x600).jpg
    IMG_1064 (800x600).jpg
    36.3 KB · Views: 21
  • IMG_1062 (800x600).jpg
    IMG_1062 (800x600).jpg
    44 KB · Views: 17
  • IMG_1060 (800x600).jpg
    IMG_1060 (800x600).jpg
    29.3 KB · Views: 18
  • IMG_1066 (800x600).jpg
    IMG_1066 (800x600).jpg
    33.6 KB · Views: 24
Last edited:
You don't want any part of your tank hanging off the stand. You definitely do not want to go through a brace in the stand. You aren't going to want to hear it, but I would rebuild the stand. You can repurpose some parts, but rebuild.
 
After talking to some folks, to include the people who built the tank and the stand, we've come up with the following.

1) Cutting through the back brace, and placing additional braces to the left and right of the overflow cut out. I've got to cut out a bigger hole for the overflow anyway and adding two vertical braces isn't that hard.


2) The tank folks don't see an issue with the tank hanging over .5 of an inch and didn't seem to think it would void my warranty BUT they did suggest adding cork to the bottom - just basically laying a sheet of cork down, putting the tank on top. Anyone do this before - this is the first I'm hearing and a google search turned up the following: Surprisingly there are a few schools of thought about how the tank should sit on the stand - some say just by the very edges and others say the bottom and edges need to contact???

The tank right now sits perfectly around all the edges except for the very middle of the sides. Pic below.
 

Attachments

  • IMG_1075.jpg
    IMG_1075.jpg
    43.9 KB · Views: 19
Last edited:
here are some updated pics. From the looks of things its the seam that's causing the issue.

At the top of the tank the measurements are correct. But they've added 66% more silicone to the bottom joint kicking it out ~.4 of an inch too far.

I can adjust the tank back a little so that both pains partially sit on the stand?

Re: the sag, I added the cork and things are considerably better - my thinking is with the water and sand it will sit down correctly.

The tank looks level and doesn't rock at all. The level measurements in below pics are repeated when the tank is on top of the stand.

If I can get this glass measurement thing figured out WE'RE READY FOR WATER! W0000t (do people still say w00t?)

The overflows have been jigged out and plumbed. Will add the brace today - there will be only one brace because there isn't room for another on the other side.
 

Attachments

  • IMG_1079.JPG
    IMG_1079.JPG
    78.6 KB · Views: 23
  • IMG_1078.JPG
    IMG_1078.JPG
    99.7 KB · Views: 17
  • IMG_1081.jpg
    IMG_1081.jpg
    38.1 KB · Views: 18
  • IMG_1084.JPG
    IMG_1084.JPG
    69.8 KB · Views: 21
  • IMG_1080.JPG
    IMG_1080.JPG
    72.5 KB · Views: 21
Last edited:
I would recommend going to the hardware store, and purchasing, at minimum, a 24" level, 36" would be better. The trouble with small levels like the one you have, is that they are only good for small projects, the advantage of a larger level is that it will give you a more accurate picture of the soundness of your material. Wood is malleable, it will bend, you may be "level" on one part of the stand, but could be complete off on another. a larger level will account for the size of the piece, it will also be able to point out to you any low points in the stand by shining a flashlight at the level.

IMO I am in agreement with above, you dont want your tank hanging off the stand. I would recommend potentially getting yourself a piece of MDF and making a new top that will support the entire foot of the tank. it can be trimmed to look nice and finished around the edges. if you have SOME sag, and I cant emphasize SOME enough, I would say 1/32" and MAYBE 1/16" this can be accounted for with some foam or rubber matting between the tank and stand.


this echos some good advice I recently received the level has been purchased and- although most people are on the fence if this amount of overhang presents a real danger - I've held off on plans to fill.


Build Quality:
I've got a call into the manufacture and sent pictures for an explanation.The measurements are perfect at the top of the tank - but there is 60% more silicone at the bottom joint which is kicking out the face of the tank .4'' more than the top and it doesn't sit on the stand properly. There is a possibility the tank might go back but I need to come up with some plan Bs.


The Stand:
My dad and uncle built the stand; they could easily build a house. So I'm sure the stand is in good shape and its been customized to my specs. In short, I'd like to keep it in service because my mom said no way she's dealing with those two building another stand - haha


Is it possible to just replace the deck of my stand with something slightly larger? The thought being that I'll just add an additional inch to the back side, and you wont even see it. Is it easier to replace the whole stand haha?
 
Hi, I came over from your DIY thread.

No way would I accept a tank that has really different seams like you describe. When you measure front to back at the top and bottom, you get different numbers? WOW!

The cork does nothing to help with a non-coplanar top. If you can mod the stand, add another sheet of ply, shim between them to achieve a coplanar top. Perhaps you won't need to change the size when the tank is repaired/replaced.
 
@Woodnaquanut thanks for dropping by - I appreciate your wisdom and salt.


for sure the two are different measurements. off about 1/4th of an inch or so causing it to hang off.


How about this idea: a 2x4 which is drilled into the stand horizontally across the top-back and supporting the tank edge - some hard wood like oak with proper screws for the job - maybe Bringing vertical braces up to support? The question really at issue is can that setup support the tank edge?

The new level is here and the measurement on the stand and the measurement on top of the tank are the same and all level with only a very slight deviation - less than a degree
 
If the tank is not built square, or the side panels are different sizes, even a 1/4", it can cause excess stress in other areas. I'd see about sending it back, especially since its a custom built tank by a manufacture.

As for the stand, I've built a few. You really don't want any part of the tank hanging off the stand, it needs to be fully supported. But you don't want to be cutting thru a main support beam either and trying to jury rig a brace to it.

Sorry about the bad news, but I wouldn't trust it.

Same sentiment here.
 
Back
Top