Large sump layouts - please share

My sump will be all in one. 8x4x2.5. 350 gal +- Plywood x glass built.
Will have socks, skimmer, 2 fuge sections, and frag section.
Manifold for GFO ,carbon, and bio-pellets.
May change as needed.
Will use miracle mud with maze-like section for a long linear flow path.
Need to finalize design. :reading:
pics?
Daniel. :beachbum:
 
RE Dreambox + Refugium an you have what you need. Almost every sice possible


uploadfromtaptalk1445232111731.jpguploadfromtaptalk1445232154265.jpg
 
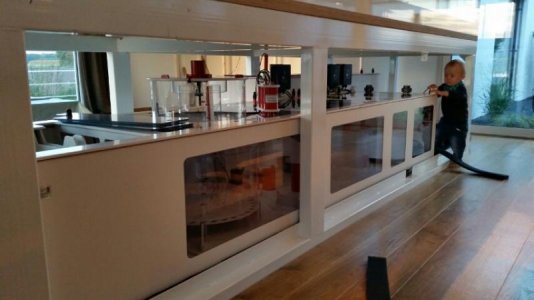
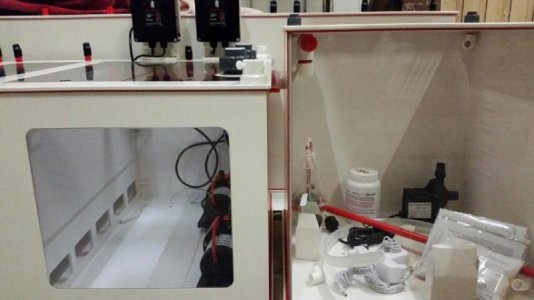
We decided to go bare minimum with our new sump. No filter socks, no fuge, no bubble traps, no LR or other media. Nothing that can trap any detritus.
Flow is drain - frag - skimmer - frag - return/reactors. Tunze 6105 in both the frag sections keeps everything suspended so the skimmer can sort it out. Anything that builds up can be vacuumed out when needed. ATO res is also built into the rear of the sump so heats the top up RO, total foot print is roughly 108" x 36" x 16"


That's not very tall for a sump. Will it handle all the backflow during a power outage?

Dave.M

The syphon breaks are high up on the returns so with a complete power out only about 30 gallons drain back to the sump raising the level just over 1". Water level runs around 11" so plenty or room.
Sump is only there to hold the skimmer, pumps & frags, really no reason to have it any taller I figured.
 
When I designed my new sumps over 5 years ago, I had space constraints as I had to get them between pre existing door openings below my tank. This was a retrofit that was installed while the tank was full and stocked. I had a 44" x 90" floor space below the display but the door openings were 33" wide. I ended up designing my sump setup as two separate sumps. One that is 30"x38"x18" tall that housed my four 7" filter socks and protein skimmer and the other which is a refugium at 30"x36"x18" tall. I also designed a bypass line that allows me to isolate and shut down the refugium and keep the return pump flowing. The refgium is unique in that the water enters the refgium through a false wall that has slots cut in the entire width of the refugium exits the opposite side through a false wall again with slots the entire width of the refugium.

The design has worked out very well. The ability to isolate the refugium allows for easy maintenance without shutting the system down. The refugium houses a deep sand bed with mud, sand and live rock rubble along with macro algae. Both the refugium and sump are covered to minimize evaporation.

This is the design I came up with.
sump-and-fuge_WEB-1_zpsacd37f69.jpg


This is the finished product. I did most of my plumbing in advance so the install was simple and quick. The sumps are connected via union ball valves so they could be easily connected below the tank. You can see the bypass line running in front of the refugium.
Sump-and-fuge2_zps46e073c1.jpg


This is how the refugium bypass line connects to the return pump.
Pump_zps07d7e3a7.jpg


This is the return section of the refugium.
DSC01006_zps6ee36fa3.jpg


Another view.
Both-Sumps_zps45e1441f.jpg
 
this thread is awesome. Keep the designs coming! I need to design a new sump soon and this is great food for thought.
 
Back
Top