low res images??

raen

New member
I shot tons of pictures during the holiday, they all looked great. I got them back today, an they look terrible!!! Very grainy, not sharp, almost out of focus. I nhave never had this problem before. I shot a D80, SB900, A&P modes, various iso, depending on the lighting and situation.

Any advice would be great, thank you so much in advance.
 
<a href="http://s278.photobucket.com/albums/kk106/raen9765/?action=view&current=christmas_eve_and_morn_008.jpg" target="_blank"><img src="http://i278.photobucket.com/albums/kk106/raen9765/christmas_eve_and_morn_008.jpg" border="0" alt="Photobucket"></a>
<a href="http://s278.photobucket.com/albums/kk106/raen9765/?action=view&current=christmas_eve_and_morn_022.jpg" target="_blank"><img src="http://i278.photobucket.com/albums/kk106/raen9765/christmas_eve_and_morn_022.jpg" border="0" alt="Photobucket"></a>

Just 2 example that were super bad on paper.
 
So they werent grainy on your computer but when you got them back from a printing company they were?

Or did you not view them on your computer?
 
I hate to say it, but your pretty much covering all the bases. If you don't already know what went wrong in these images, you just need to learn some basic fundamental photography skills. The settings you used on the reef for example were wrong to a point of being ridiculous. If I was standing next to you and you told me your settings, I could have told you it would come out like that before you took the picture. Actually I'm surprised it came out as well as it did. I can't see what you did on the portrait shot, no exif.
 
<a href=showthread.php?s=&postid=14041846#post14041846 target=_blank>Originally posted</a> by Recty
So they werent grainy on your computer but when you got them back from a printing company they were?

Or did you not view them on your computer?

That's right. I don't understand. All of the photos that I have gotten back in the past have been great.
 
<a href=showthread.php?s=&postid=14043026#post14043026 target=_blank>Originally posted</a> by TitusvileSurfer
I hate to say it, but your pretty much covering all the bases. If you don't already know what went wrong in these images, you just need to learn some basic fundamental photography skills. The settings you used on the reef for example were wrong to a point of being ridiculous. If I was standing next to you and you told me your settings, I could have told you it would come out like that before you took the picture. Actually I'm surprised it came out as well as it did. I can't see what you did on the portrait shot, no exif.

Well, thank you for the response. Since I am totally new at photography, I thoughtthis would be a good place to start with my questions, since I see all of the beautiful images here. I have gotten so many mixed bits of advice on what settings to use that I am more confused than ever before. I think the "ridiculous" comment is a bit harsh. I a REALLY new, and am only trying to learn. I am trying to do my best, sorry the images aren't great. I just do this for fun, and to capture memories for my family. All of that said, what 'cha got for me??? I apparently need a bunch of help.
 
I am sorry, I didn't mean to offend. It is 1:00 in the morning and this is going to turn into a novel so let me get back to you later. I promise I'll come back.

You need to research Aperture, Shutter Speed, and ISO first.
The Aperture of your first shot if I remember correctly was f/13. It wont let me view exif now which is very odd. Aperture is used primarily to increase depth of field (how much of the picture is in focus). For your reef shot you don't need much depth of field without a background, so a MUCH wider aperture such as f/4 would has sufficed. When you go all the way out to f/13, image quality starts to suffer. You are also wasting a lot of light coming in through the lens because f/13 is so far overkill for what you needed. This is exponentially true because you didn't have enough light to get your shutter speed up. Again I can't see the exif now but if I remember you used a shutter speed of 1/4 of a second. I think you were at something like 60mm, but I'm really guessing on the focal length. I don't know what camera your using so we'll say you have a 1.6x crop factor. Well you should be hand holding at least 1/100 of a second. If you pulled your aperture down to f/4 or f/2.8 this would have been fine and the picture would have been crisp and sharp.
The crazy thing is that you didn't use full auto mode. You used aperture priority (if I remember) which mean you selected f/13 on purpose. Your poor camera was forced to pick a shutter speed of 1/4 and the blurry photo is the result. These settings that didn't make any sense were intentionally selected, which is what prompted my statement that they were ridiculous. I stand by that statement but we will hone your skills and have you working for National Geographic in no time.
 
Last edited:
You just made me smile REALLY big! NG?!?!?! Cute as stink you are! So A mode, I thought that since we were low light, and I am trying really hard to stay out of the Auto zone, would be best. Then I read that "P" mode would be good too. I have seen a couple of DVD's, and read a couple of "dummies" articles, so I am going on bare bones. I am shooting a Nikkon D80, with a SB900 flash. I have 2 diff lenses, (I will be more presice in the am). I have read many of your posts on this thread before, so I TOTALLY respect your advice, and appreciate that you have even taken the time to read my little thread. ANY advice (basic, dummy mode please) would be appreciated. I would love to shoot like threats on this thread!!!!!! PS, I only use Picaso, no photoshop, maybe one day, but, I would like to go without it as much as poss.

QUOTE]<a href=showthread.php?s=&postid=14047613#post14047613 target=_blank>Originally posted</a> by TitusvileSurfer
I am sorry, I didn't mean to offend. It is 1:00 in the morning and this is going to turn into a novel so let me get back to you later. I promise I'll come back.

You need to research Aperture, Shutter Speed, and ISO first.
The Aperture of your first shot if I remember correctly was f/13. It wont let me view exif now which is very odd. Aperture is used primarily to increase depth of field (how much of the picture is in focus). For your reef shot you don't need much depth of field without a background, so a MUCH wider aperture such as f/4 would has sufficed. When you go all the way out to f/13, image quality starts to suffer. You are also wasting a lot of light coming in through the lens because f/13 is so far overkill for what you needed. This is exponentially true because you didn't have enough light to get your shutter speed up. Again I can't see the exif now but if I remember you used a shutter speed of 1/4 of a second. I think you were at something like 60mm, but I'm really guessing on the focal length. I don't know what camera your using so we'll say you have a 1.6x crop factor. Well you should be hand holding at least 1/100 of a second. If you pulled your aperture down to f/4 or f/2.8 this would have been fine and the picture would have been crisp and sharp.
The crazy thing is that you didn't use full auto mode. You used aperture priority (if I remember) which mean you selected f/13 on purpose. Your poor camera was forced to pick a shutter speed of 1/4 and the blurry photo is the result. These settings that didn't make any sense were intentionally selected, which is what prompted my statement that they were ridiculous. I stand by that statement but we will hone your skills and have you working for National Geographic in no time.
[/QUOTE]
 
I don't want you to use the automatic modes either. Selecting "A" was probably a good choice, but you went the wrong way! First off you need to learn to profile a shot to decide what aperture would be best.

If it is reletivly bright (outdoors in the daytime perhapse), and I do not care about what is behind my subject being in focus or not, I will use f/8.

If I want the background of my subject in focus (maybe its a mountian), then I'll use f/11 - f/22.

If I do not want the background in focus, I'll use f/2.8-f/4.

If I don't have much light to work with (and I am not using flash such as your reef shot), I will use the widest aperture I can get for the sole purpose of increasing my shutter speed (f/2.8)

Now in most shots, your flash will change everything. You have a very nice flash unit and it will serve you well. If there isn't enough light, you can still use f/8 because you can just add more light. If the light is harsh or there are weird shadows on your subject, you can add just enough light to correct that. Flash is your friend!

To get an idea how how much depth of field you can achieve with various combinations of these, check out this site:
http://www.dofmaster.com/dofjs.html
 
Last edited:
<a href=showthread.php?s=&postid=14047767#post14047767 target=_blank>Originally posted</a> by TitusvileSurfer
I don't want you to use the automatic modes either. Selecting "A" was probably a good choice, but you went the wrong way! First off you need to learn to profile a shot to decide what aperture would be best.

If it is reletivly bright (outdoors in the daytime perhapse), and I do not care about what is behind my subject being in focus or not, I will use f/8.

If I want the background of my subject in focus (maybe its a mountian), then I'll use f/11 - f/22.

If I do not want the background in focus, I'll use f/2.8-f/4.

If I don't have much light to work with (and I am not using flash such as your reef shot), I will use the widest aperture I can get for the sole purpose of increasing my shutter speed (f/2.8)

Now in most shots, your flash will change everything. You have a very nice flash unit and it will serve you well. If there isn't enough light, you can still use f/8 because you can just add more light. If the light is harsh or there are weird shadows on your subject, you can add just enough light to correct that. Flash is your friend!

To get an idea how how much depth of field you can achieve with various combinations of these, check out this site:
http://www.dofmaster.com/dofjs.html


All good advice.

First thing you need to do is 'see the image'. By that I mean you need to envisage what the result you are trying to achieve.

That will then determine whether you need a shallow depth of field (background out of focus) or a deep depth of field (background in focus). Remember the rule small depth of field small f number, large depth of field large f number and you can't go wrong ;-)

Having selected the f-number the camera will select an appropriate shutter speed. That is if you are in 'A' mode.

Depending on what the camera has selected determines your next course of action. If its a slow shutter speed then you can either bang the camera onto a tripod, add more light, increase the iso or change your original idea and compromise on the depth of field.

There are so many options, but all will be a compromise in some way. You need to experiment to work out what is best in a particular situation. Practice, practice, practice.

Hope that helps a little.
 
<a href=showthread.php?s=&postid=14048186#post14048186 target=_blank>Originally posted</a> by Falcn
All good advice.

First thing you need to do is 'see the image'. By that I mean you need to envisage what the result you are trying to achieve.

That will then determine whether you need a shallow depth of field (background out of focus) or a deep depth of field (background in focus). Remember the rule small depth of field small f number, large depth of field large f number and you can't go wrong ;-)

Having selected the f-number the camera will select an appropriate shutter speed. That is if you are in 'A' mode.

Depending on what the camera has selected determines your next course of action. If its a slow shutter speed then you can either bang the camera onto a tripod, add more light, increase the iso or change your original idea and compromise on the depth of field.

There are so many options, but all will be a compromise in some way. You need to experiment to work out what is best in a particular situation. Practice, practice, practice.

Hope that helps a little.

Thank you for your help. Everything helps. What mode is the best for "everyday" shots. I have recently read that P mode is best.
 
My cameras are very rarely in any other mode than 'A' - Aperture priority.

That way even every day shots are taken using the same method. As I said, practice, practice, practice. It should become almost second nature after a while, no need to think about it.
 
You got some god advice so far Rae so I'll avoid explaining the generals and pinpoint issues in your pics,
In the 1st shot you posted nothing is really in focus (well may be the light bulbs) but it seems your camera failed to lock focus or maybe was still focusing when you took the shot. In Nikon you have 2 Autofocusing modes and 3 autofocus areas under menu (I'm sure Canon has the same but with different names) using any combination of each of those serve a different purpose. for this type of shots I would be using Autofocus AF-S and single area autofocus which you can select which area to focus on then you lock focus (half press) and then you're free to recompose if you need and if your aperture allows it (I wouldn't recompose if shooting with an aperture of 5-5.6) some other focusing modes like the Dynamic ... will keep focusing while you move your cameras and while your subject moves (mainly meant for sports and wildlife) and even allows you to shoot even if your camera did not lock focus so make sure you are not using that for those shots.
The other thing which I agree with above advice about about is metering. Thses are difficult shots metering wise. with the first one being more difficult. Here the camera metered for the lights as I don't see them really overexposed. In your camera you have three metering modes Spot metering, Center weighted and matirix. The first picture would have been good if you chose spot metering and take a reading of the dummy face for instance and apply whatever the camera gives you while shooting manual. Centerweighted would base 80% of the exposure on the center and 20% from the rest of the pics which could have worked in your second picture(as light behind you is not that intense) but not in the first as even if you're only allowing the light bulbs to change the exposure by 20% they are bright enough to make your subject look dark. why is this so important when we can boost the exposure by Post processing? it's because when you have such dark areas and you boost the exposure the result is excessive noise that would start to show up. while your pics looked fine on screen where the resolution is only 72 Dpi does not mean that they are really fine unless your viewing them at 100 % magnification. on paper the resolution is 300 Dpi usually and it will allow more detail or noise to show up. the processing lab could also have increase the exposure of your underexposed images which resulted in more noise.
Sorry can't really pinpoint a problem by seeing only 2 pics and without their exif data and also with tose pic in low resolution what I suggest you do is to assess your pics on a viewing software like Adobe bridge or maybe ACDSee or any other application that files your exposure parameteres next to the pictures look at those and try to understand what went wrong in each picture till you find a trend and then work on fixing that.
I would also suggest you start experimenting with shooting in M mode which is the only way to really understnad exposure and effects of different exposure parameters. Using A or S modes can work but don't think that you can work with P A or S mode without understanding exposure as if you don't enter exposure compensation parameters your images will be bad when the camera is fooled by bright or dark elements in the picture.
One last thing that was not mentioned is that you're using your flash on these shots as you mention, in this case unless you modified your camera default settings your shutter speed would be 1/60 which is way to fast for the first shot for example. In that picture I wouldn't worry about dropping my speed to 1/10 or slower (depending on focal distance and on how steady your hands are) use the aperture that the camera suggests to have a good exposure (look at the light meter in your viewfinder) while being sure you're metering from the dummy face (or main subject) then rely on your flash to freeze your motion. this way the flash contribution would not be that much and you would pickup the real colour atmosphere of that scene. At least use those exposure parameters as a starting point and modify them a bit if you think it's really too slow or if the lights turn out too bright... with A mode on that first shot dialing in +2 or +3 exposure compensation would have increased your exposure to overexpose the bulbs and give you a better exposure of the dummy....
Again shooting in M mode and learning to read your camera lightmeter in the viewfinder and in the LCD works a long way to get better pics out of the camera and cut down on Post processing which can take over your life. I currently challenge myslef to get the best image I can get straight out of the camera just to avoid postprocessing. I could keep writing till 2009 but I'll just stop here.
 
Last edited:
Thank you for your help. Everything helps. What mode is the best for "everyday" shots. I have recently read that P mode is best.

For a small P&S yes for a DSLR No.
You'll truly understand photography and get the best pictures and feel happy you reasoned and chose this or that parameter when you use M mode or at least A or S mode while thinking why chose this aperture or this shutter speed. That is the only reason I Purchased a film camera (F100) and still do some film photography when/if ever I have some time.
 
For me I would say...
75% "A" :This is my main workhorse. It behaves like full manual in a sence I can use "exposure compensation" to adjust the shutter speed within a couple stops relative to what the camera thinks is a correct exposure.
21% "M" :I use this if I don't want the exposure to change from shot to shot to shot. Portraits (i.e. I'm machine gunning off 10 pictures of the same subject), panoramic, some nature work, *I almost always "M" when I use flash*.
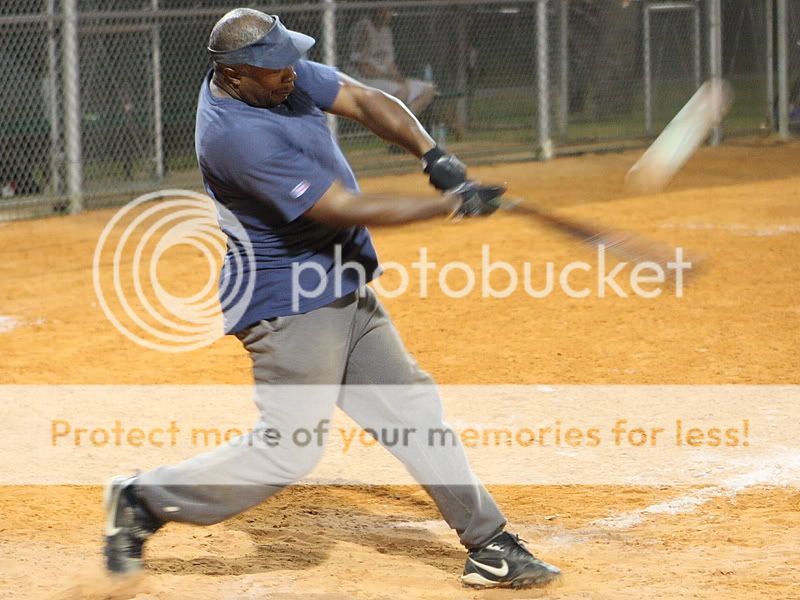
3% "S" :If I want the highest shutter speed I can get, I use "A" and select the widest aperture. If I want a very specific shutter speed such as 1/125, maybe to blur a baseball player in mid swing just right, I'll use "S".
1% "P" :This is when I hand the camera off to someone that doesn't know anything about cameras because they keep asking to take a picture and I trust them not to drop it or anything.

I don't know Nikon, and this may be one area where things really differ between us, but Flash works different depending on what mode your select. I would look into that.
 
Last edited:
WOW C thanks a bunch!!! I am printing all of the advice off to keep close at hand. I really don't have a hard tie outdoors, indoors I'm hosed. I need help with my new flash. It has more bell and whistles than my car, but I don't understand how to tweek it just yet.

Thanks again for everything. I will post more pics to give you a better idea.
 
Thanks "surfer" This is great. I like the breakdown and percentiles. About S mode, how and what to do when shooing soccer. Fast, near ad far, always on the move??? I usually end back up in auto because I screw this up. I like the crisp pics of the player, and maybe the blur of the ball.
 
We haven't learned what your two lenses are yet. If you want the crisp pics of the player, select "A" and pick the lowest f/# your lens will go to. If you want the ball to blur, how much blur you are going to get will depend on how hard the ball is kicked vs. your shutter speed. You will have to experiment until you get it right. I would start on "S" mode 1/60. If that is too blurry I would check out 1/80, and then 1/100 or 1/125.

This was taken at 1/100
IMG_2213.jpg

Now in this shot I used "A" and picked the lowest f/# I could get (2.8). I used my ISO speed to dictate what my shutter speed would be. I used "M" when I saw standing here to.

Warning: If your soccer game is at noon, the sun may be too bright to get a shutter speed of 1/80. If you are in "S" mode and the aperture number is blinking at you, it means that there is too much light for your lens to physically achieve that number. Of course the same thing will happen if there isn't enough light.
 
Last edited:
Back
Top