mms_citrus
New member
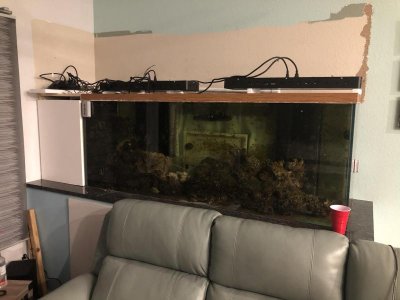
I started about 2 years ago planning our 210 overhaul. I designed a stand, did load calcs, hoping it doesn't fail lol. About 8 months ago I built the stand but the past 2 years we have been remodeling the house and the yard, too many projects and way to much work. On the plus side covid was a boon for boating so I've pretty much been stuffing the mattress. Sorry for those less fortunate.
Shortly after I built the stand I made a boo boo. My normal top off setup was down, so I was just doing it manually. Well my boy was 1 at the time. I was tired. I forgot I had the valve open. I diluted the tank super bad. It was Sunday evening and I was also out of salt. By the time I got to the store it had wiped out a bunch of coral. Softies mostly made it but nothing else. So I've been doing minimal maintenance for a couple months anticipating the rebuild. The tank has looked better but honestly everything that survived the kill is thriving, it's bizarre. I haven't done a water change or vacuumed up detritus in probably 3 months.
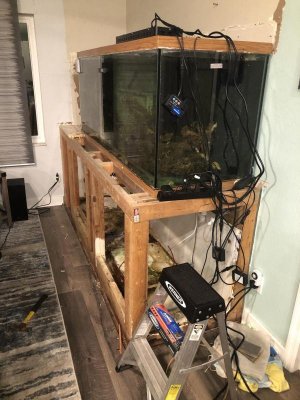
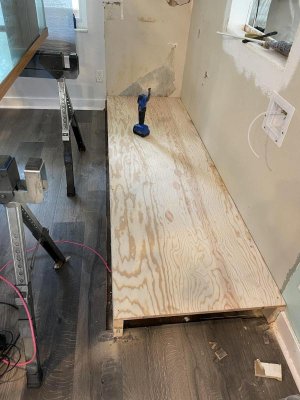
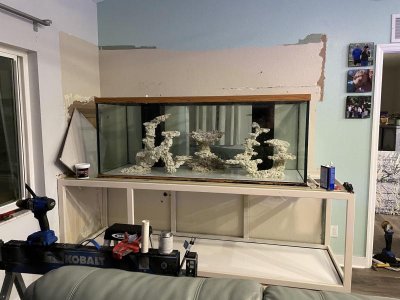
Anyway, last week I uncovered the stand and started prepping it. It's steel. I cleaned it up. Acid bathed it. Blasted it. Put about 6 coats of epoxy anti corrosive prime on it. Sanded it. Faired it out. 2 more coats of primer. And 2 coats of white urethane. It's the same stuff I use on boats. It's a good product. I don't expect trouble. I didn't take any picture of it but I have renderings I'll post. It's 96L 30H 30D.
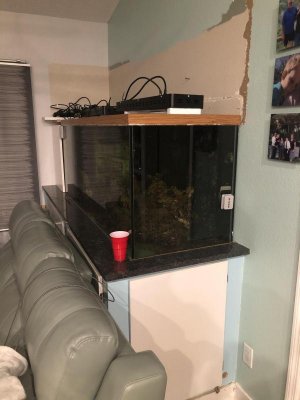
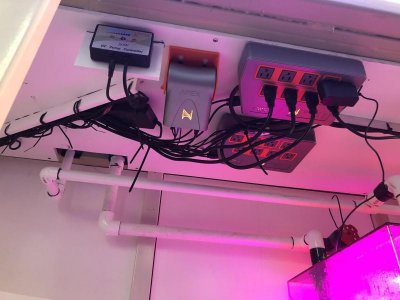
The other day I took down the gargantuan hood I had made to house ballasts and the triple halide setup I had been using. I threw some old leds up there in the meantime. Im not sure what lights I want yet.
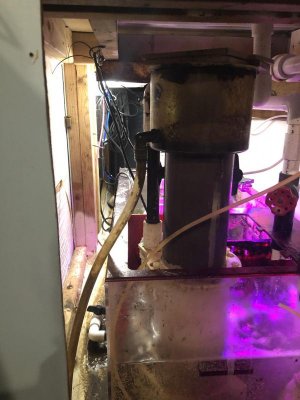
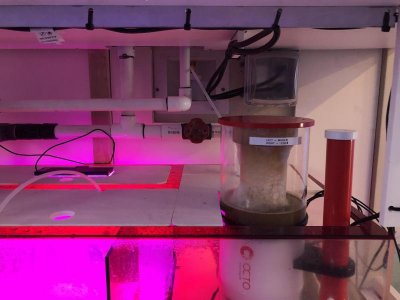
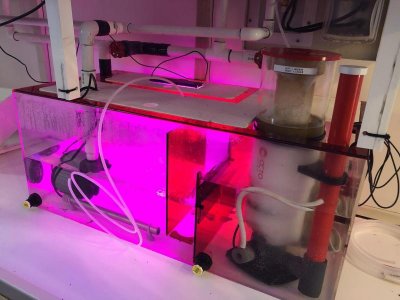
I've got a trigger ruby sump that I've had for years. I'm going to reuse it. I know the flow characteristics thru it. I don't have to guess. I am however going to modify it so I can run dual 7" socks. And I'm going to run my skimmer external. It's a downdraft type, pro clear I think made it. Honestly it's super old but it works really really well. It's running internal now but I want more space in the sump.
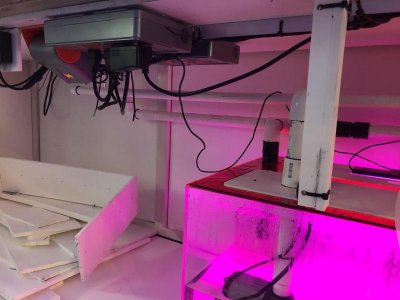
Everything for the existing tank setup is self contained. It's in a "œtub" if you will. It has a water supply. A Rubbermaid garbage can for water changes in the stand, plumbed to the sump. The sump is drilled and has drains for water changes. The tub drains out of the house. Overflows, spills, skimmer runoff, I can just hose it all out. I don't have to haul anything around. Just jump salt in the can. I want to replicate this again but with more finesse. This setup has worked for like 8 years but it's ugly and I want to be able to just press buttons and do it all electronically. So I've been designing the sump. I've decided to build a water change tank. Approx 30 gal. I can utilize the space better. I've been doing some tests with 1/2" pvc sheet, you can buy at Home Depot, and I think I'm going to use it. It glues up good. Strong enough for the purpose I think I'm going to use it for the cabinetry too instead of starboard, seeing as its 1/3 the cost and should hold up. I've not rendered this yet but I'm still working out if I can get away with a small sink built into the cabinetry, so the renderings I post may get updated.
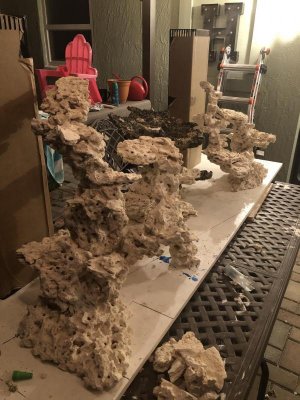
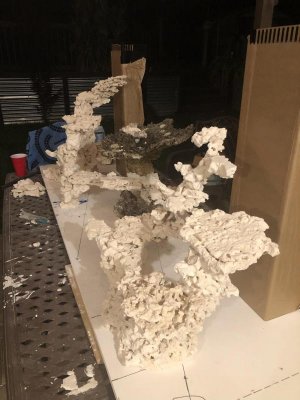
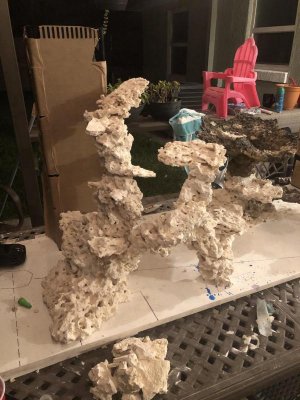
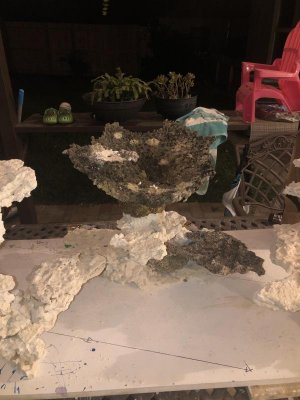
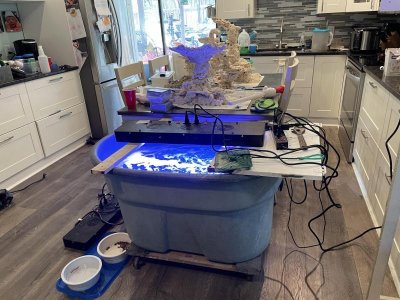
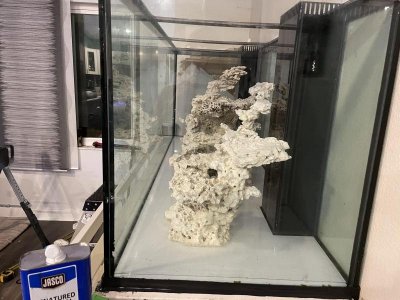
Today I finished the rockscaping . It's my first true rockscape. I've always just kind of piled up the rock. I was never really happy with it but it was good enough. This time I did it right. I am really happy with it. We run a bare bottom tank, so I've designed my rockscape with that in mind. I've got a preliminary powerhead setup in mind and worked it into the design. I used 2 pieces from the existing tank. The rest is all Marco rock or something like that. I bought it a year ago. I can't remember.
I purchased new acrylic over flows. I'm not sure if I'm going to baffle them and route some intakes lower or if I'll just stick with surface skimming. I'm open to suggestions.
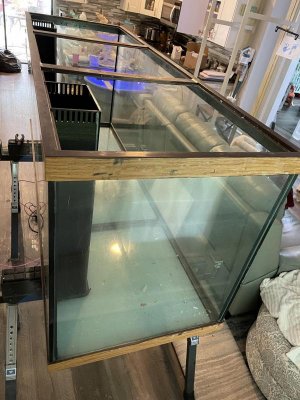
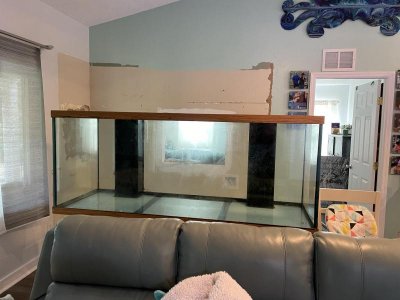
I'm going to reseal the tank. I'm not going to break down the panels but the corners are all mangled and I want to reseal it black anyway. I'd like to get a decent rimless tank but my wife is pretty sure I don't know what I'm talking about and that with a little work the tank we have is fine, lol. She's probably right.
That's all I have for now.
Shortly after I built the stand I made a boo boo. My normal top off setup was down, so I was just doing it manually. Well my boy was 1 at the time. I was tired. I forgot I had the valve open. I diluted the tank super bad. It was Sunday evening and I was also out of salt. By the time I got to the store it had wiped out a bunch of coral. Softies mostly made it but nothing else. So I've been doing minimal maintenance for a couple months anticipating the rebuild. The tank has looked better but honestly everything that survived the kill is thriving, it's bizarre. I haven't done a water change or vacuumed up detritus in probably 3 months.
Anyway, last week I uncovered the stand and started prepping it. It's steel. I cleaned it up. Acid bathed it. Blasted it. Put about 6 coats of epoxy anti corrosive prime on it. Sanded it. Faired it out. 2 more coats of primer. And 2 coats of white urethane. It's the same stuff I use on boats. It's a good product. I don't expect trouble. I didn't take any picture of it but I have renderings I'll post. It's 96L 30H 30D.
The other day I took down the gargantuan hood I had made to house ballasts and the triple halide setup I had been using. I threw some old leds up there in the meantime. Im not sure what lights I want yet.
I've got a trigger ruby sump that I've had for years. I'm going to reuse it. I know the flow characteristics thru it. I don't have to guess. I am however going to modify it so I can run dual 7" socks. And I'm going to run my skimmer external. It's a downdraft type, pro clear I think made it. Honestly it's super old but it works really really well. It's running internal now but I want more space in the sump.
Everything for the existing tank setup is self contained. It's in a "œtub" if you will. It has a water supply. A Rubbermaid garbage can for water changes in the stand, plumbed to the sump. The sump is drilled and has drains for water changes. The tub drains out of the house. Overflows, spills, skimmer runoff, I can just hose it all out. I don't have to haul anything around. Just jump salt in the can. I want to replicate this again but with more finesse. This setup has worked for like 8 years but it's ugly and I want to be able to just press buttons and do it all electronically. So I've been designing the sump. I've decided to build a water change tank. Approx 30 gal. I can utilize the space better. I've been doing some tests with 1/2" pvc sheet, you can buy at Home Depot, and I think I'm going to use it. It glues up good. Strong enough for the purpose I think I'm going to use it for the cabinetry too instead of starboard, seeing as its 1/3 the cost and should hold up. I've not rendered this yet but I'm still working out if I can get away with a small sink built into the cabinetry, so the renderings I post may get updated.
Today I finished the rockscaping . It's my first true rockscape. I've always just kind of piled up the rock. I was never really happy with it but it was good enough. This time I did it right. I am really happy with it. We run a bare bottom tank, so I've designed my rockscape with that in mind. I've got a preliminary powerhead setup in mind and worked it into the design. I used 2 pieces from the existing tank. The rest is all Marco rock or something like that. I bought it a year ago. I can't remember.
I purchased new acrylic over flows. I'm not sure if I'm going to baffle them and route some intakes lower or if I'll just stick with surface skimming. I'm open to suggestions.
I'm going to reseal the tank. I'm not going to break down the panels but the corners are all mangled and I want to reseal it black anyway. I'd like to get a decent rimless tank but my wife is pretty sure I don't know what I'm talking about and that with a little work the tank we have is fine, lol. She's probably right.
That's all I have for now.