My plan of a 125 gallon build

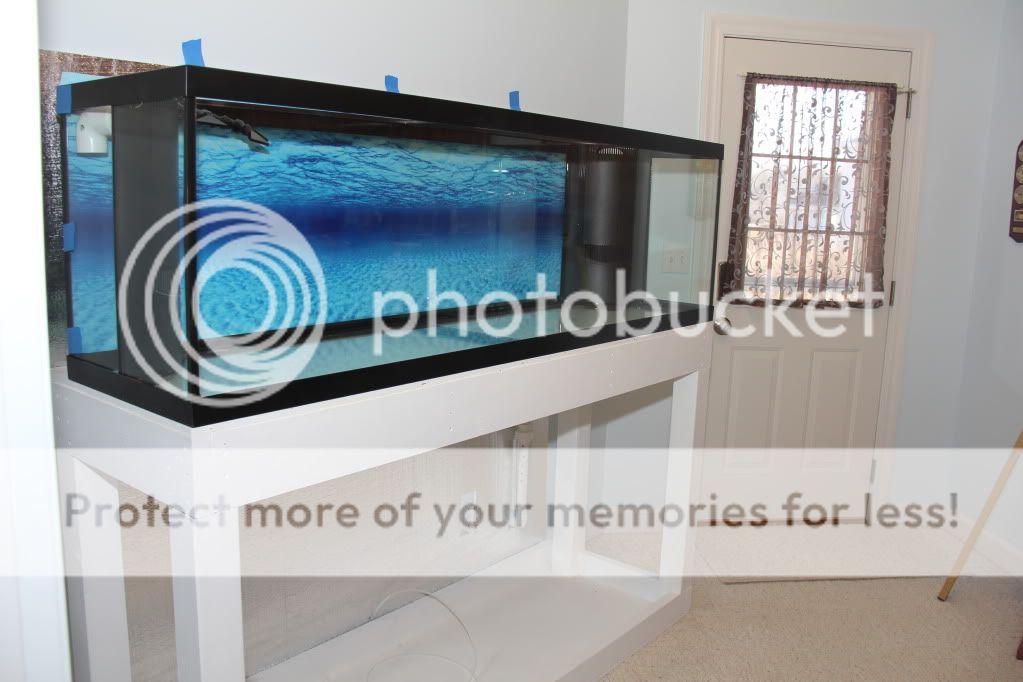
I made a little progress today. Here is a picture of my new tank. I just love the black silicone that they use in this tank, not the clear stuff. The 30g sump is just behind it. I can't find any one in town to drill a 1 3/4" hole for me so I am ordering a 45mm diamond drill bit from BRS and DIY. This will be a first for me:worried2:

004-15.jpg


This is one of the two plumbing kits that comes with the corner-flo: the drain is 1.5" and the return is 1". I wish they didn't glue the standpipes to the bulkheads.

002-24.jpg


I finished painting my "fish" room, aka office and ran a drain line to the utility closet drain for water changes.

003-18.jpg


Tonight I started building the stand. These are the four legs of the stand made with Douglas fir 4x4. Douglas fir is one of the strongest softwood. The cuts are a little complicated and I have to be careful in not making the wrong cut.

006-9.jpg


I also talked to someone in the long Failsafe Bean Animal thread and decided to make yet another change to my plumbing configuration. Hopefully this will be the final plan.

Green - full siphon
Purple - open channel
Blue - Failsafe or emergency drain
Red - Return
125g25.jpg
:bounce3:
 
Looks like you didn't just talk to "someone" in the bean animal thread, but got advice from uncleof6, who seems to really know his stuff! Make sure when you run the drain lines to your sump that they end just below the water line... maybe 1 inch or so. I know alot of people were having issues when they went deeper than that below the water line. Follow uncleof6's advice and the setup diagrams on bean's website and you'll be happy you went with this setup. I know I am.

The added bonus of running the bean overflow is that there are virtually no bubbles in the sump due to the fact that the main drain line has no air mixed in with the water. That also means there's not as much salt spray and creep in the sump to clean off.

Post some pics when you get it all set up!
 
If you want some help with drilling the glass, I have drilled alot of tanks when i used to breed clowns. Just let me know
 
If you want some help with drilling the glass, I have drilled alot of tanks when i used to breed clowns. Just let me know

I may take you up on this Trademark. I am waiting for the drill bit to come. Should be here in a few days. I will let you know and thanks for you offer to help.
 
Making progress slowly but steadily. I installed a room-to-room exhaust fan in anticipation of the heat and humidity from the tank.

001-18.jpg


Behind the wall is an utility closet so the humid air must be piped across the closet into the garage.
HomeRmtoRmFan.jpg


My measurements must be precise to avoid studs and the furnace in the closet. I was an inch from the furnace duct work when I punched thru the wall:bounce2:

However, the studs in the garage wall don't line up so I have to use a couple elbows to make the run.

005-10.jpg


Here is the output end of the fan. It is so quiet I have to attached streamers to know the fan is running.

003-19.jpg


Started on my stand at the same time. Here is the bottom frame, caulked and sealed with waterproofing paint. If it doesn't leak, it can hold 20 gallon of water!

006-10.jpg


I measured the floor to see if it is level. It is from end to end but from back to front over a span of 24", it dropped by 3/16":uhoh2:. I have to add a 3/16" plywood strip to the front to make the stand level.

I have made a lot of trips to Menards in the last few days. Thank goodness the store is only 3 miles away and with their 11% rebate on every purchase, I know I will have a chunk of money coming back .... only to be spent back in the store:lolspin:
 
Looking real good so far. I actually just ordered a bathroom fan that automatically detects high humidity levels and auto turns on and off. A little pricey but definitely worth it.
 
FWIW I have a 125 and for me it is the perfect size. Easy to reach the bottom/back, doesn't stick out as far in the room, and less to operate power wise and equipment. The scaping is definitely better on the 180 but with some ingenuity, the 125 is just fine. I made a rock wall for the back of mine.
 
I have been busy in the last couple days. I finally finished with the construction of the stand, moved it inside the house and tested for levelness. The stand is not heavy but I had to ask for my wife for help to move it three times which almost proved to be too much for her!:love2:

001-19.jpg


Still a hair off from being level but since it is sitting on carpet, some compaction may occur with weight of the water.

002-25.jpg


003-20.jpg


004-16.jpg


To protect the wall behind the tank, I added some 3/8" foam pad.

006-11.jpg


After added the 1/2 plywood top, cut out the holes for the corner flows and 3 layers of white paint, the stand was moved back into the room. I asked a neighbor of mine to help me with moving the tank. Boy was it heavy!:eek:

008-11.jpg


009-9.jpg


To be continued...
 
I spent a couple hours making the acrylic pieces for the baffles in the sump. Here are some pictures of the construction.

010-3.jpg


One of the pieces requires me to cut 1/4" teeth using my router table.

011-5.jpg


Well, I got it cut but managed to break off 3 teeth!:eek: Good thing about acrylic, you can glue them back and it is just as strong.

013-7.jpg


Next step: plumbing...
 
I really like that fence on your router table. Is it home made?

Yeah. I made that a couple years ago using a Formica shelf. It is quite versatile and I also made a few accessories. The stops in the picture are great for this kind of cut.
 
Uh-oh!:worried2: I found a chip on the inside corner of my tank. Please tell me if the tank is okay and safe to use!

The chip is on the inside right corner about 3 inches from the top. They put black silicone right over it either because they didn't see it or it wasn't significant.
014m.jpg


A close up of the chip corner
001-20.jpg


Looking from the inside
011-6.jpg
 
I would get store involved with that one. Even if they say that it is ok. It is good to get them on board before and not after. That sucks big time.
 
I did call the owner of the store and he is coming over at 7.30p to look at the tank.

BTW, I am still waiting for that UPS truck with my diamond drill bit order:(
 
A big thank you to Trademark for his help with drilling the first hole in my 30g glass sump! I definitely learned something new tonight. I didn't realize how slow the process was. Here is the success:

017-2.jpg


016-4.jpg


The store owner came over and looked at the tank. He didn't think the chip was bad enough to be a concern. I will put a little dab of silicone over it. At least he gave me the peace of mind.
 
After seeing your new BlowHole pump I researched it a little and I am impressed. I will wait to hear it run before I buy it for my back up pump.
 
An update to my build:

Last night I finished installing the baffles in the sump. The right 3 baffles will keep the water level at about 11" for the protein skimmer. The left 3 baffles will also keep the water level at about 11" and will be the fuge. The center compartment will be the return.

006-12.jpg


Today I decided to put a waterproof liner using a sheet of Formica.

004-17.jpg


005-11.jpg
 
The reasons I am going with the Reeflo BlowHole 1450 pump are: (not necessarily in this order)
1. Brand reputation
2. Adjustable flow rates - 3 settings: at 6' head pressure 1221gph using 160W, 897gph using 125W, and 591gph using 85W.
3. Extremely quiet operation
4. Small footprint - 6"x6"x6"
5. Cost

Here are some pictures of the pump

Front of the pump. 1" male threaded input and output and can be converted to female threaded ends with included parts
002-26.jpg


Back of the pump. I was told the metal screw is a plug to drain water out from the back. I can't imagine ever will need to do that. The red switch is the flow adjustable switch.

001-21.jpg


Here is how the pump is configured in my return plumbing

013-8.jpg
 
I finally finished my plumbing work last night and did a water and pump test. There was no leak in neither the display tank nor the sump:bounce3:.

The BlowHole pump wasn't working as well as I expected:angryfire:. When first started it was making an annoying hammering or ticking noise even at low speed:uzi:. At high speed it was just annoying. I thought may be the pump needs to be primed or there was some trapped air causing the noise. So I plugged and unplugged the pump multiple times in an attempt to purge any trapped air and ran for 20 min. But there was little improvement.

It was then I noticed that I installed both the double union ball valves with the flow in the wrong direction. I never realized there was flow direction indicator in any ball valve before. Anyway, it was a quick fix with this a double union ball valve, I simply flipped the valve the other way. Well, that didn't silent the pump. My next attempt: flip the pump 90 degree.

The pump was install with the front facing down (switch facing up), so I turned the pump 90 degree so the front and switch are facing side way. That improved the noise significantly. At low speed, I couldn't hear the pump running at all but at high speed it was still noticeable. I thought I could live with that until....:

I noticed as I went through different speed settings, there was no noticeable difference between the low and medium flow rates. I put the pump on a Kill-A-Watt meter and sure enough, both low and medium setting drew 93W and the "high" setting drew 130W. But where is the 160W setting? I think my pump only has two settings: low and medium instead of low, medium and high. I cannot live with that. An email to the supplier this morning prompted a quick response and a new pump is on the way from Reeflo with a tag to return the old one. Talk about customer service!

015-6.jpg


I set out to have a completely silent drain system by not using the standard overflow plumbing kits as intended. Instead I was going to use a modified Bean Animal system. The modification involves using, in the right corner-flo, one primary (full siphon) and one failsafe drain. In the left corner-flo, one open-channel drain and one return line. Well I was only 50% successful. The right side drain was completely silent with very little to no bubbles to the sump when dialed in just right with the gate valve. The left side, however, behaves just like a factory installed overflow. Water was coming down to the sump mixed with air so there was gurgling noise.

The Bean Animal system works if both the primary and open-channel drains are draining water from the same pool of water. What I didn't realize was the two corner-flos are independent pools of water. They each receives the same volume of water so draining one has no effect on the other. I cannot modify the right side corner-flo because 1) the drain pipes are glued into the bulkheads which are glued to the pipes below, and 2) both drain pipes won't fit into the overflow. I think I will just leave it at that.

Right corner-flo - full siphon, no air
008-12.jpg


Complete silent with very little bubbles
010-5.jpg


Left corner-flo - water and air mixed in. Notice the higher water level.
009-10.jpg


Because the left corner-flo behaves normally so half of the water flows into my fuge which I think is too much. Here is a slight modification to send some of that water to the protein skimmer compartment.

011-7.jpg


014-9.jpg


013-9.jpg


To be continued...
 
Doing the plumbing work was quite challenging and I was really worrying that I might have missed cementing some connections:worried:. The water and pump test kind of removing that worry. After tweaking the left side drain a little bit, I was able to achieve an almost silent system.:beer: I am still waiting for the replacement pump to come. The current pump is running really quiet after I rotated it 90 degree from the original position but I was only able to select two speeds.

Today I started to do a little electrical work which to me is almost as challenging as plumbing. Trying to organize the power cords and wiring of various equipment in a neat and organized manner is not easy.:crazy1:

009.jpg


My original plan was to use 3 dosing pumps to dose alk, Ca, and Magnesium but decided to use a calcium reactor instead. The one that I will be using will be a GEO 612 and controlled by a Pinpoint PH controller.

010.jpg


Most of my electrical components will be controlled by a Digital Aquatics RKE Elite Net system.

I also started to do a little rockscaping. I ordered about 50 lbs of dry Fiji live rocks from BRS. My plan is to have rocks at each end of the tank and leave the middle mostly clear.

003.jpg


001.jpg


005.jpg


With 50 lbs of rocks I was only able to achieve a height of about 12 inches. I would like the height to be another 4 inches higher so I will be needing more rocks. The BRS Pukani dry rocks look pretty good and I probably will get 25 lbs of them.

Please feel free to comment or offer any suggestion as my plan can be flexible.

To be continued.
 
Back
Top