My Radion Mount

DP Reef

New member
I thought I would share how I ended up mounting my 2 Radion Pro's. I got the idea from another thread to use 80/20 extrusions. Overall, I think it looks great, professional, and doesn't take much DIY knowledge other than needing to cut some aluminum rails.

I used the 1 inch, black anodized.
 

Attachments

  • IMAG0413.jpg
    IMAG0413.jpg
    30.5 KB · Views: 6
  • IMAG0414.jpg
    IMAG0414.jpg
    35.3 KB · Views: 3
Reef Octopus T90. Here is a better shot with proper coloring of the tank. My previous pictures are not color accurate.

The overflow is a tube that comes from the bottom of the tank. In that tube is a ~ 1-2" drain and a 3/4" return pipe. You may want to check on those sizes yourself, those were off the top of my head.

I've yet to decide if this was the best choice in overflow, but the overall tank setup from Reef Octopus was "inexpensive" and looks nice to me.
 
Thanks. Your colors with the Radions are quite nice.

Those (T90s) are nice looking tanks. I was looking at them when I got a new tank last month but ended up going with a Deep Blue 60g cube.
 
For the Radion Pro Setting, this is via the Apex (White, blue, Royal Blue, Green, Red, UV, Start-Stop Intensity:

If Time 09:00 to 10:59 Then RadMorn 20, 100, 100, 20, 20, 100, 0-5
If Time 11:00 to 12:59 Then RadMorn2 45, 100, 100, 20, 20, 100, 5-25
If Time 13:00 to 15:59 Then RadMorn3 50, 100, 100, 25, 25, 100, 25-48
If Time 16:00 to 17:59 Then RadMid 50, 100, 100, 25, 25, 100, 48-48
If Time 18:00 to 20:59 Then RadDown 50, 100, 100, 20, 20, 100, 48-5
If Time 21:00 to 21:59 Then RadDown2 20, 100, 100, 20, 20, 100, 5-0
If Time 22:00 to 08:59 Then OFF

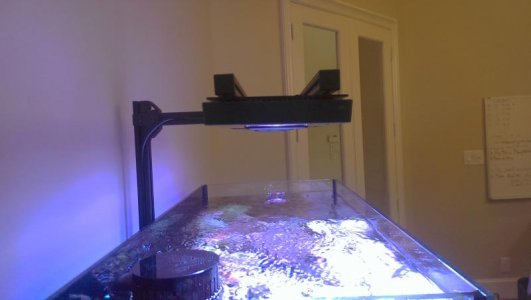
Probably a better way to optimize it, but I got lazy. Been at this setting for 1 month. I spent 1 month before that ramping up to 45%. Previously I had a maxspect Razor and all my colors were fantastic. They have been slowly improving since I did the light change.

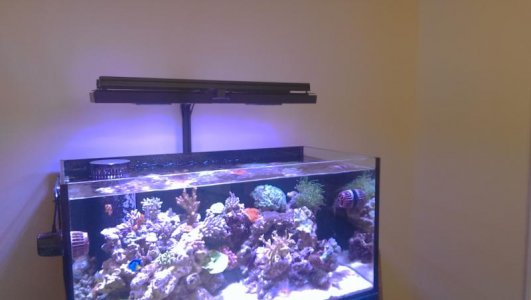
That digitata that is brownish (used to be pink) in the back and the brownish birdsnext was my first SPS so don't blame its color on the Radion. They both went through alot of trial and error on water parameters. Both are slowly getting their original color..
 
Last edited:
I had 2 people ask me about the part list and setup so I thought I would type it up quickly. I had it all drawn out on paper with part list but threw it away so sorry. This is quickly from memory..

I bought all my stuff online on ebay for a discount. They have an online store A lot of it was precut extra material but it came looking brand new to me.

1. 1 x 72" 80/20 extrustion 1" 10 Series black (Goes Up the tank)
2. 1 x 18" 80/20 extrustion 1" 10 Series black (Goes from back to front..you may want 24" if tank has more depth)
3. 2 x 24" 80/20 extrustion 1" 10 Series black...you might want a longer one like 36" since you tank is longer... These go lengthwise down your tank which you can adjust to either make the radions go lengthwise or short side on the front of the tank.
4. ~6 Guessets for support and make angles or cross brackets (Get some extra)
-2 used on bottom to create a "T"
-2 used at the 90 degree angle
-2 used, 1 for each cross bracket to keep keep it fixed to the 18" one
5. 10 x M5x.80 screws 8mm, 10mm, 12mm. These are different sizes to screw into the radion and let it hang. You will have to disable the buttons depending on how you mount the radion. I have mine angle towards back of tank so I used 12mm in the front and 8mm in the back.
6. ~25 pack of Econ T Nut and Bolt kit
7. 2 T-slot aluminum 2 hole joining strip (Probably not needed but I was paranoid).
8. 6 x end cap (I did not get the threaded kind, just the push in)

Since everything is adjustable I left the bottom/top, front/back and left/right extrusions at full length and played around with the light setup until I had it just right. Then I took it apart and cut if off to size to make it "clean" looking. Use a dremel, miter saw, or something with a blade to cute it clean at 90 degrees.

My tank is exactly 1 inch from the wall so I cut the 72" shorter and then took the cut-offs and made the bottom of a "T" shape which wedged between the wall and stand. This is all the support I need along with some velcro halfway up the tank. to keep it in place. My tank was already setup so I could not go to the back and drill in any support bracket. another option is to drill from the inside to the back and ad a T nut where the top/bottom extrusion slides into it and is secured from inside the tank. Good luck guys
 
5. 10 x M5x.80 screws 8mm, 10mm, 12mm. These are different sizes to screw into the radion and let it hang. You will have to disable the buttons depending on how you mount the radion. I have mine angle towards back of tank so I used 12mm in the front and 8mm in the back.
6. ~25 pack of Econ T Nut and Bolt kit


So how exactly did these screws connect the cross bar to the Radion? Thanks!!
 
If it's set up the same as mine, the screws screw into the top of the radion and the heads of the screws slide into the tracks of the 80/20.

Here's a pic of mine...

20120731_DSC8661_200gReef.jpg
 
Dennis - That's great. Now I get it. Just put the screws into the radions, slide them on. Do they tighten somehow or friction keeps everything in place?
 
Where would you expect them to go? :lol: ;)

They fit tight enough. But loose enough that you can slide them back and forth if needed. Or remove completely for doing something like installing wide angle lenses. :thumbsup:
 
Yes, they slide onto the T slot in the rail.

I don't have any angle of the Radions inplane with the crossbar so sliding of the unit is not concern. The only angle I have is front and back which causes no movement. With that said, I've had a few instances where I've angled the entire thing and the radions move slightly, but the friction has held it in place. If you are worried about it, you can also try to tap a thread onto the ends and then screw the end caps on. Otherwise, the push on endcaps do provide some resistance in the event things start moving.

Do a few tests where you remove the radion on one side and see if there is enough moment to drive the whole setup to tilt. For me, I could not secure it to the tank but my T on the bottom was long enough to keep the system stable. If you can secure it to the back of the tank or the wall, that would be optimal.

BTW, the screw lengths shown by d2mini are much longer than what I used. His allows for use of the buttons. I never press the buttons anways, so they are disabled allowing the unit to be as flush to the rail as desired.
 
Last edited:
Thanks Dennis, Thanks d2mini.

Right now I have my lfs trying to get two of EcoTech's display arms for me, but since there's been no action for a week my guess is that is not happening. I knew about the 80.20 already as I'd considered using it (the 1.5x1.5) to frame a stand and then attach birds eye maple panel doors to it - would have matched my stereo speakers - but then opted for a traditional cabinet that I am having finished to match the wood trim in the living room. Which will look very nice.

The thing I'm a bit stuck on is which way to orient the Radions. Tank is 48 x 24 x 27. Overflow is back right corner and aquascape is going to be set up for viewing from the front and left side. So I'm thinking that having the lights "crosswise" will give me a better chance to have GSP on the back wall plus some other corals on what would most often be the back side of the rockscape. Your thoughts would be most appreciated.
 
I had the same dilema as you on a 36 x 18 x 18.

I tried both having the Radion's facing long and short side facing front of the tank. At 9" mounting, I felt having the short side facing forward caused too much shadowing on the sides of the tank. If I made the gap between the radions too big, there would then be an odd darker area of the tank between them.

In the end, I decided to have them face length wise to the front of the tank which gave my 36" best coverage from left to right. I agree though, that left me with darker areas in the back top of the tank. That is why I tried angling it a bit to the back (didn't help too much). My trouble could have been fixed if I raised the Radion, but any higher and the light would hit me in the eye as I walked around.
 
I used T-Slot too!!! i used it in the past before college when I worked in the die cast industry. We used it to keep up with OSHA standards on protection for people and we even built cages for protection of the robotics. Its pretty good stuff....

I ordered mine on Amazon because the shipping prices were cheaper then Ebay. But, it is way better to go through one of those channels on this stuff. And it is super important you get your design locked down and then buy only what you need because waste = $$$$
 
Back
Top