Is anybody interested in a step-by-step in how to make an LED fixture? If nobody is interested, I'm not going to waste my time documenting every little step. If someone is interested, I'd be more than happy to take the time and write up a guide in how I did it though.
Well, my old LED fixture was limited in use. The fixture had the LEDs bolted on. Some of the bolts started to rust and cause short circuits. (I'll be epoxying them on this time.) The U-Channel that I was using didn't cool the LEDs enough either, so I couldn't turn them up as high as I wanted. (I'll be using "real" heatsink this time.) So, why not build a new fixture?
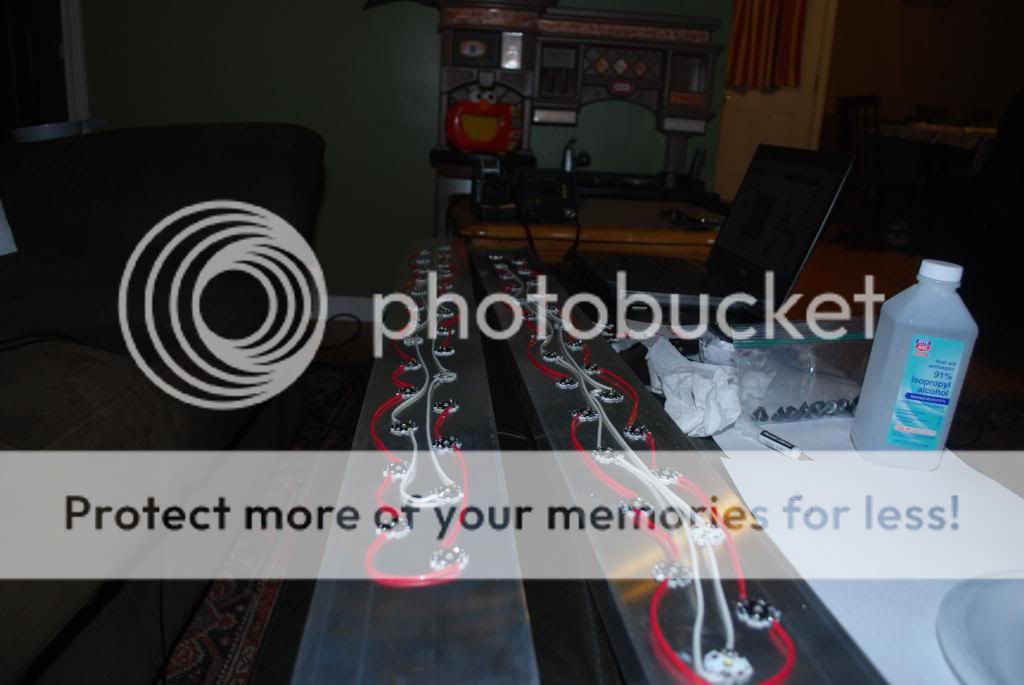
The new fixture isn't completed yet, but it's well on its way.
Total: 54 3w CREE LEDs
Blue: 36 LEDs, mix of XP-E and XT-E
White: 18 LEDs (all XP-G I think), 4 warm white, 4 neutral white, 8 cool white
Drivers: 5 MeanWell 60-48P dimmable (3 for blue, 2 for white)
The last step I have to do is wire up the strings to the drivers.
Obligatory teaser picture:
Well, my old LED fixture was limited in use. The fixture had the LEDs bolted on. Some of the bolts started to rust and cause short circuits. (I'll be epoxying them on this time.) The U-Channel that I was using didn't cool the LEDs enough either, so I couldn't turn them up as high as I wanted. (I'll be using "real" heatsink this time.) So, why not build a new fixture?
The new fixture isn't completed yet, but it's well on its way.
Total: 54 3w CREE LEDs
Blue: 36 LEDs, mix of XP-E and XT-E
White: 18 LEDs (all XP-G I think), 4 warm white, 4 neutral white, 8 cool white
Drivers: 5 MeanWell 60-48P dimmable (3 for blue, 2 for white)
The last step I have to do is wire up the strings to the drivers.
Obligatory teaser picture:


