Scandinavian / Japanese Style Reef Tank

And today was thee big day - The fish tank we were waiting patiently for over a month has arrived. I got the same feeling i did when i was young and it was Xmas :bounce1:

I was very satisfied with the way it was made and it exceeded my expectations.

Enjoy the pictures :beer:
 

Attachments

  • photo-1.jpg
    photo-1.jpg
    49.9 KB · Views: 3
  • photo-2.jpg
    photo-2.jpg
    44.7 KB · Views: 2
  • photo-4.jpg
    photo-4.jpg
    32.3 KB · Views: 1
  • photo-9.jpg
    photo-9.jpg
    44.3 KB · Views: 2
I love the look!
I am in the process of using the same style. I am in the process of building acrylic base and rod to support the drilled rocks. Basically using the base and rod to stabilize the rock work. Something like this.
http://www.reef-eden-international.com/reef_rods.htm


And here I am again. We finished the first draft of the Aquascaping but knowing us well then probably we will change it several times before we settle on how we would like to have it.

First Illustration - The column which protrudes slightly out of the aquarium is the concealed overflow box.

Second Illustration - A quick "bird eye view" of the location of the stones (they dots behind the overflow box belong to the circulation system)

Third Illustration - This is to show where the inspiration comes from. And yes, it is ok to think that we have a loose screw :wildone: We truly believe that having a story behind a decision makes the decision special - but again we might be wrong:artist:

Fourth Illustration - An attempt to add some corals to the stones and get a feeling of how it will look.

Looking forward hearing your views and suggestions.

Best regards,

Dino
 
Sounds like a fun and sweet build. If your going with the bonsai look make sure you add plenty if tabling corals. Can't wait to see the finished product!
 
That's a cool tank, I like the dimensions!... Where did you get your tank from?

Thanks Greg,

The tank was manufactured in Czech Republic and was dispatched to Denmark. They have paid alot of attention on how they have glued the glasses and applied the silicon. The hey also used optical glass on top so the light from Radion will display the best possible colour on the reef.
 
I love the look!
I am in the process of using the same style. I am in the process of building acrylic base and rod to support the drilled rocks. Basically using the base and rod to stabilize the rock work. Something like this.
http://www.reef-eden-international.com/reef_rods.htm

You are a star! You gave me a very good solution which i did not think about it earlier. With these acrylic stands i can create the look of "upside-down-rock" allowing space for SPS corals on the highest point. I will do some more research on these stands and will take your suggestion to the store to discuss it further. THANK YOU SO SO MUCH!

Best regards from Copenhagen
 
Very nice tank, i like the overflow design.

It will be a bit of a challenge to cover it smartly and hide the tubing behind it since one of our requirements is no visual pumps and rubbings. Stay tuned and see what i will come up with in cascading it

:beer:
 
Sounds like a fun and sweet build. If your going with the bonsai look make sure you add plenty if tabling corals. Can't wait to see the finished product!

That is a very good suggestion! I got totally mesmerised last May when I travelled to Philippines and whilst diving i saw the biggest tabling coral ever which was several meters. Ever since that I have a "thing" with this type of corals.

Stay tuned and i will be updating the thread each step. Thanks for your kind words and support.


Best regards,
Dino
 
Update - Aquascaping

Update - Aquascaping

So here is an update of the setting up of the new tank.

Yesterday we went to the place we bought the tank from to do the aquascaping based on what I presented earlier.

I have to admit that is was not as easy as initially anticipated. Actually it was much harder and frustrating at times. We spent a total of 7 nonstop hours trying to assemble live rock and ceramics in order to accomplish the desired look. I found that the diversity of materials we used (live rock, ceramic, glue) didn't give me a clear view of how the tank will look like when all surfaces will be covered in algae


KEY LEARNING POINTS FROM TODAY :reading:
should be mentioned that it is key learning points for us and maybe others not necessarily agree:

IT MUST BE UGLY BEFORE IT IS NICE
What we have done today is not pretty! It will become once the tank will be circulated and corals will be placed in it.

TAKE INTO ACCOUNT THE SIZE OF THE CORALS & SURFACE LEVELS
We found ourselves adding rocks in places where with a more critical eye we should add a coral. The illustration was helpful since it gave us a guideline to walk along. Without it I feel that we would have totally changed our initial intentions adopted to the kind of rocks we had available. We wanted to achieve the "œplate look" and for this reason we started using alot of nice flat stones and flat ceramics. Wait a second.. if we would do that where would the live plate looking corals be placed? Bingo.. there would be little space for them and the main thing would be that our vision (i.e. minimalistic, Japanese & Scandinavia fusion) would go down the drain.

LESS IS MORE
Better with a light stone structure than a crowded one. In our current tank I was too eager to have it look full right from the beginning and once I added new corals it looked blown out of proportion. Taking this into consideration we removed nearly 40% of the rock initially placed-

MIX
For us it has worked really well to mix the live rock with reef ceramic. It provides an interesting look which doesn't come with the cost of the full rock weight.

GLUEING
Getting the rocks and ceramics glued was proven to be a real challenge. We just hope now that during the transportation the rocks will not break. As one of the members in this forum suggested, we wanted to use the acrylic base but it ended up taking weeks before it would be delivered so we decided to skip it

OVERFLOW
We decided to cover the overflow sides with a flat ceramic. Once the algae and coralline would cover it, it would look natural, plus we could play with the depth by placing scattered rocks here and there (picture will follow on next update).

Attached you can see a sample of what we managed to get together in those 7hrs. I know that it looks little work but we were very critical in sticking to what the plan was.

On 9th of October the tank will arrive in our place and we will be 4 hand carrying it on the 4th floor (most of the downtown apartments in Copenhagen are missing an elevator since they are old buildings from late 1700-early 1800.

Will keep you all posted.
:beer:
Dino
 

Attachments

  • IMG_4638.jpg
    IMG_4638.jpg
    53.2 KB · Views: 2
  • IMG_4648.jpg
    IMG_4648.jpg
    54.4 KB · Views: 2
  • IMG_4674.jpg
    IMG_4674.jpg
    36.2 KB · Views: 2
  • IMG_4677.jpg
    IMG_4677.jpg
    49.3 KB · Views: 1
Last edited:
Its been some time since the last update. That was due to very busy work schedule and constant travelling.. But today I have an update of what happened the past 2 weeks.

So the room is prepared for the aquarium! Have posted a few pictures so you can get a feel for the living room, where it should be. The aquarium should be standing by the empty wall - right across from the couch.
There will be TV located where now you can see our 250L Red Sea Max

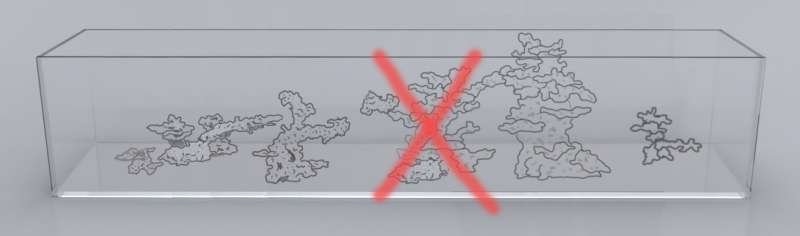
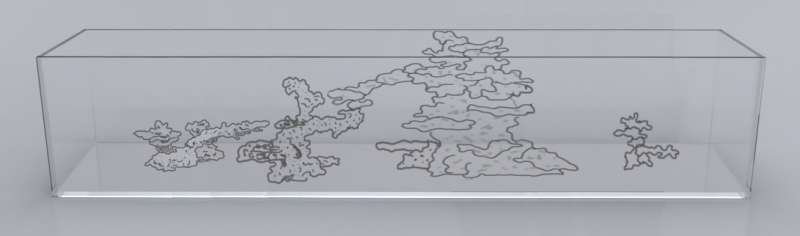
As you can see the way we like out place is absolutely minimalistic and we hope to achieve the same with the aquarium.

We have nothing on the walls and the aim is the new aquarium to be " the center of attention".

For our American friends this is a very small living room which is actually pretty standard sized for Danish standards :lmao:

apartment3.jpg


Apartment2.jpg


Apartment4.jpg


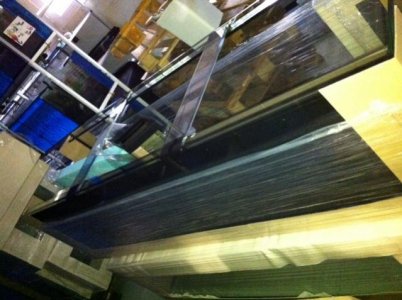
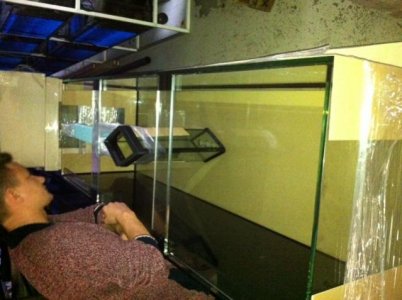
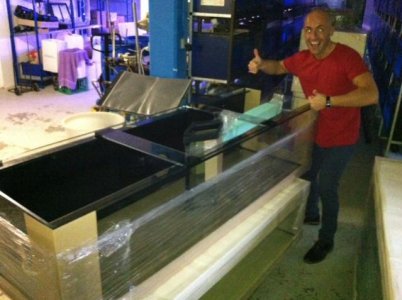
And the day after .....the aquarium arrived home :thumbsup:

4 floors without elevator was a bit of a struggle but thanks to good friends we made it without any victims :rollface:

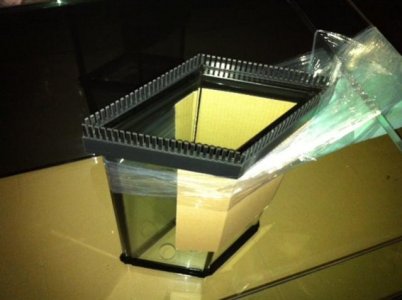
As the plates were not ready we placed towels between the stand and the aquarium. Here are some pictures of the aquarium and some details of the circulation system.

Aq1.jpg


Ag4.jpg


Aq3.jpg


Tomorrow arrives the sump, the skimmer and the semi automatic water change. As soon as we are done with the work I will upload more material.

Thats all for now - Thank you for reading the progress and wishing you all a wonderful evening from Scandinavia

:wavehand:
Dino
 
Will be following along. what type of software are you using for the designs? I hope to incorporate some of your ideas into my next tank!
 
Great thread with challenging ideas. I'm starting a new build as well and am looking for ideas that leave the tank with plenty of open sand. Following along
 
Tagging along! I'm planning a tank myself, and you're giving me some fantastic ideas. Thanks for sharing :)

Will be following along. what type of software are you using for the designs? I hope to incorporate some of your ideas into my next tank!

Great thread with challenging ideas. I'm starting a new build as well and am looking for ideas that leave the tank with plenty of open sand. Following along

Thank you so much for your feedback. I want to be totally transparent throughout the process and hopefully some can be helped by my ideas or mistakes :)

I am using Photoshop for the illustrations. Although it gives a very good feeling of the way I would like to head to the actual result is not 100% simulated. I definitely though suggest to use something similar so that you will have a guideline to refer to when you are dealing with the aquascaping.
 
...Today it was a BIG day. We received the skimmer, the semi-automated water change tank, the sump and the wooden plates to be placed between the floor and the stand and between the stand and the aquarium.

IMG_0726.jpg


IMG_0724.jpg


IMG_0725.jpg


IMG_0730.jpg


We also received the heart of the circulation system - the ocean motion. With no visible pumps, the ocean motion will be pumping water on 8 different tubes at frequent intervals. This will create an uneven circulation similar to that in the open ocean.

IMG_4969-1.jpg


IMG_4994-1.jpg


carsten-1.jpg


IMG_5006-1.jpg


And this is all from todays progress. Result?

IMG_5002-1.jpg


Tomorrow will work with the aquascaping around the overflow valve. The aim will be to disturb the even look of the overflow wall and add more dimension, shape and character into it.

Thanks for reading the update and wishing you all a wonderful evening wherever you are around the world.

:thumbsup:

Warm regards,

Dino
 
Could you please describe the frame you are using for the base? It appears from the pictures to be a type of light aluminum with plastic connectors. I am concerned that this would not have the strength or lateral stability to hold up a filled tank.

Dave.M
 
Back
Top