Started from a nano, now I'm here

Fuel Doodle

New member
Hey there reef central! I've been planning this build for years now. yes, years... I'm going to talk very little on this thread, and post pics non-stop. I think pictures tell the story better than I can in words :)

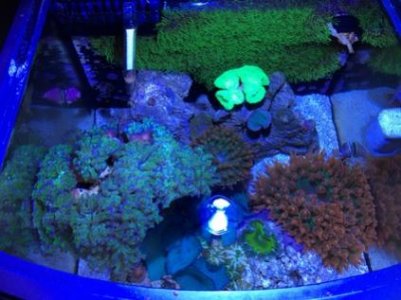
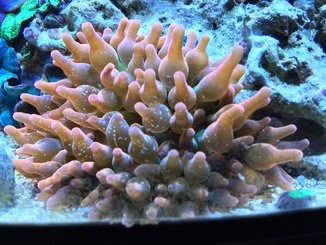
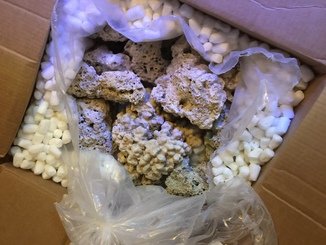
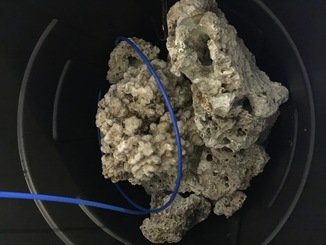
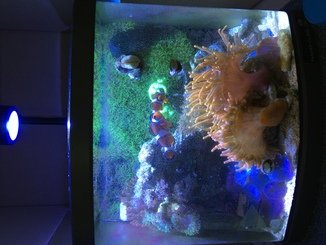
Brief history: Bought a nano reef with some rock and clowns. They lived through my learning curve, and must be some real tough fish. I've had many types of corals and have found that anemones are among my favorite of all the critters in the sea. This tank started back in February, 2016. I've been saving each month and buying a few things to get me where I am today. I'll post some pics along the way of what I bought each month and my 1 year plan I had for this tank.
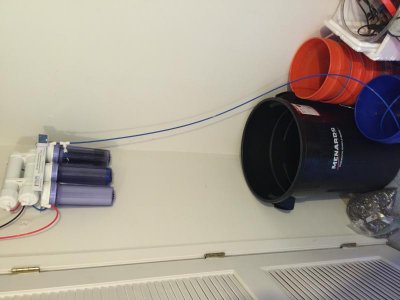
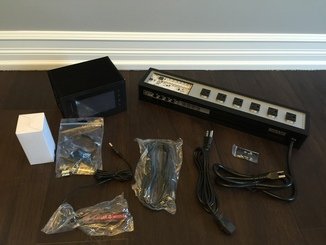
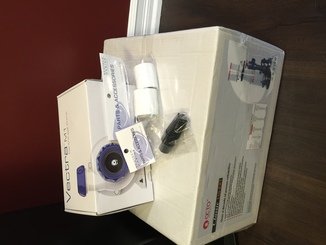
February purchase: Trash can and RODI system.
 

Attachments

  • IMG_8417.jpg
    IMG_8417.jpg
    40.9 KB · Views: 5
May: Bought some basic things for the nano to keep it going until the big move. A couple of bags of salt, phosphate pad, and Purigen. Just thought I'd show a couple photos of the nano tank in May :)
 

Attachments

  • IMG_7789_13.jpg
    IMG_7789_13.jpg
    27.6 KB · Views: 4
  • IMG_7792_13.jpg
    IMG_7792_13.jpg
    70.3 KB · Views: 4
June: Didn't buy anything worth mentioning that I can think of. Had to save my money to take my wife on vacation :) On the bright side, my anemone split! Now I have 3 of them:
 

Attachments

  • IMG_8022_10.jpg
    IMG_8022_10.jpg
    67.6 KB · Views: 6
  • IMG_8894_10.jpg
    IMG_8894_10.jpg
    74.8 KB · Views: 4
July: Started my first purchases towards my tank upgrade on the 4th of July weekend: 74 lbs of Fiji dry live rock! Threw the live rock into the trash can and started a dark cycle until the upgrade tank is ready.
 

Attachments

  • IMG_8418_10.jpg
    IMG_8418_10.jpg
    44.4 KB · Views: 3
  • IMG_8415_10.jpg
    IMG_8415_10.jpg
    50 KB · Views: 5
  • IMG_8419_10.jpg
    IMG_8419_10.jpg
    58.8 KB · Views: 6
  • IMG_8420_10.jpg
    IMG_8420_10.jpg
    37.2 KB · Views: 5
August: Got my cerebra! First time controller owner. Excited to test it out.
Also bought the 16 inch synergy reef overflow along with the fittings, valves, and piping for my overflow system :)

Also, went to a frag swap and picked up an orange anemone. Hope you enjoy!
 

Attachments

  • IMG_8668_10.jpg
    IMG_8668_10.jpg
    30.2 KB · Views: 5
  • IMG_8935_10.jpg
    IMG_8935_10.jpg
    29.9 KB · Views: 5
  • IMG_8937_10.jpg
    IMG_8937_10.jpg
    41.1 KB · Views: 4
  • IMG_8735_10.jpg
    IMG_8735_10.jpg
    51.1 KB · Views: 6
  • IMG_8535_10.jpg
    IMG_8535_10.jpg
    32.3 KB · Views: 5
Look forward to seeing it come together. I've been in the planning and slow purchase phase while enjoying a small tank, too.
 
August's end: Went out and bought recirculating external reef octopus and M1 ecotech return pump with M1 schedule 40 fitting converter and M1 Mesh screen. After purchase, it was clear I would not need the converter.
 

Attachments

  • IMG_8983_10.jpg
    IMG_8983_10.jpg
    29.5 KB · Views: 5
  • IMG_8988_10.jpg
    IMG_8988_10.jpg
    38 KB · Views: 5
Thanks! Good luck and you will have to share some pictures for me :)


Sent from my iPhone using Tapatalk

Definitely will do.
I have the aquarium, a 300g 6' x 3' x 2', a plumbing plan, the 55g refugium, some live rock in a separate curing tank (fully cured since it's been in there a long while with some food, snails, and hermits) as well as pumps, protein skimmer...
You get the idea. :)

I have to get the flooring in the room it's slated for redone before I can set it up.

Stand construction is underway - only the frame, no pretty parts yet.

Sounds like you have quiet the set up there. Looking forward to what you have going once that floor is in and stand is completed.
 
September: Bought the return fittings, tubes, pipes, heater, mesh nets, and some glue.
e6818d875e2618e6b8621d36f8e1685d.jpg
1417b8f383ba480d76e1e898d8852130.jpg


Also saw a thread with some ideas I already had in my head that I wanted to give a try for aquascaping.
21ced4bbe1ebab13c948db7a690bc3ef.jpg


Went to local big box store and bough 2 cans of spray paint enamel. Then bough another.... Then gave up and bought some "true black" in a can of nautica and brushed the entire stand.
a063689d8dc73fa667972a852da2ea84.jpg
3f40860d9148c1bdc2ed28bde5d2ea87.jpg


Enjoy!


Sent from my iPhone using Tapatalk
 
September mid: finally worked up the courage to drill my first tank. I grabbed my parents 55 gallon that was 20+ years old to practice on.
d78b59eef8e07f895a57fccb3f4cd545.jpg


Guess it was tempered. Very loud boom when the tank broke. Sat around for 30 minutes trying to think of my next steps, then went to drilling the real thing. Directions say to draw holes using the template on the inside of the tank. That doesn't exactly work when the tank has been painted already...
547a86b398d30020ab9cc1be9969e222.jpg
d123b4d2648442d89279d14064400794.jpg
e9b8a6130ebf1b887f736adacf0e8792.jpg


nano update
436e6ddb566625b6550bf1655bb8578c.jpg


Sent from my iPhone using Tapatalk
 
So my holes turned out better and better. The learning curve is a real thing. My last hole, the return, is basically perfect. First hole was rather rough... Still worked out great!
be9f73001ab47649792d04cf200a6abe.jpg
09b5c3ea4a8c20716a65cd3a31f17e11.jpg


Sept 18: cut the pipes during the week and dry fit into place. For those of you whom have never done this like me, please be aware that once you use the prep and glue, the pipe will slip snug to the inside of the fitting. Because of this on glue day, I had to stop and go back and cut many more of the smaller pipes because only a nub would have been left.
7f3d6f68df0355b3feba16c5b507afa2.jpg

Finished dry fit prior to having to go back and cut again.
4b350458a9e9c6d690efd2e741008b4f.jpg

Make sure you chamfer for ease of install and for no leak ever. This was how I chamfered for ease and speed.
df2fcc339b282802d4978149d5c8e82e.jpg


Sent from my iPhone using Tapatalk
 
Sept 18th week cont: this is what the chamfer will look like up close
93b76fa24eba16a2605943f938ff166f.jpg


Here is my piping taken down and ready for glue. Currently, about 1/3 has been glued and plan on finishing that up today or tomorrow.
01955228fd3bd159cd094196c263a6f3.jpg


Also, I plan on having a nemish tank. I was liked this great chart for nem compatibility.
eae92dddd3e79203e85fb0fb1f071c91.jpg
spent some time with far away friends who have the same dog we do and beautiful sightseeing
fb3b6dd35e90cf720ab7424e99cd943f.jpg
that isn't us/me in the photo, just some people who didn't move for me.
149e9c96f213c20b30c167e004e2b2ca.jpg


Sent from my iPhone using Tapatalk
 
So I'm trying to figure out what type of lighting and how much I should get. I am torn between 2 kessil ap700s, 3 radion 4Gs, or 4 kessil 360s. What do you all think? I'm going to house mostly anemones and stuff that goes with them. My main concern is I want low cost/month electricity, and one solid color of light without that cone look.


Sent from my iPhone using Tapatalk
 
If it's just anemones you don't really need much. You could get away with two Kessil's 360 and a few T5 retrofits would be my suggestion.
 
Back
Top