Stockman Standpipe--New, Easier Design

kstockman

New member
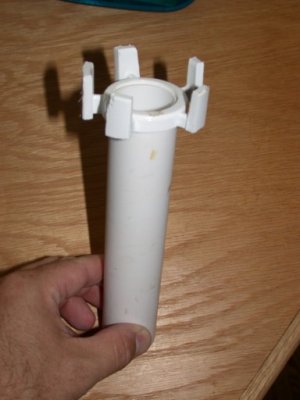
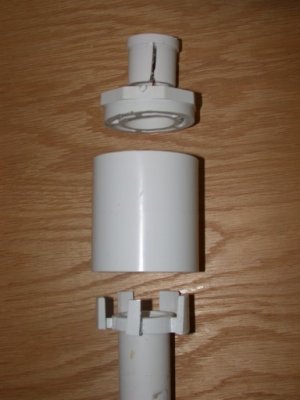
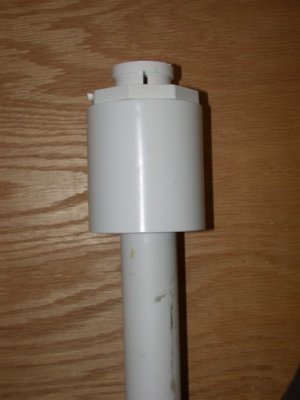
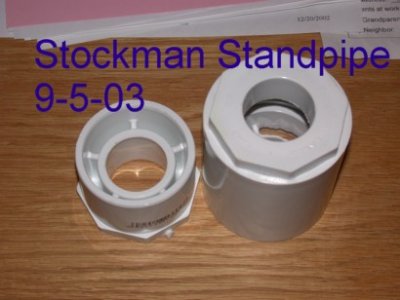
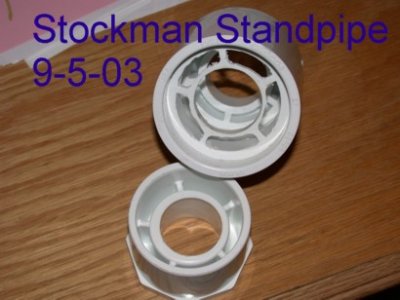
Here is the my "new" design for the Stockman Standpipe. This design would just slide onto the end of any 1" pipe. At this point this design will only work for a 1" pipe and a 2" coupling fitting.

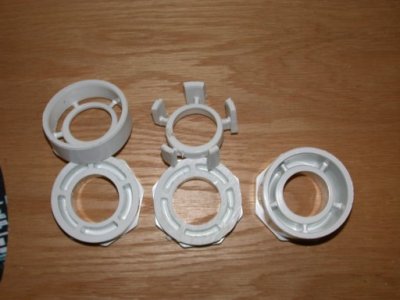
The first picture is the top view picture of the fitting and a 2" to 1" reduction fitting. Notice that the reduction fitting has the fluted desing on the inside. This is key. You will see why in the seocnd picture.
 

Attachments

  • standpipe-mod-1.jpg
    standpipe-mod-1.jpg
    32 KB · Views: 0
Here is the second picture. A bottom view of the pipe. What I did was cut the reduction fitting in half such that the bottom half got about 1/4" of the fluted section. The top half was put into the top--go fiugre-- and the lower half was slid into the bottom about 1/2". I then dremeled out the ridge that would stop the 1" pipe from sliding into the fluted section. I also dremeled out a little of the fluted section to make the water intake suare area a little larger. I was thinking that I could cut out two sections of the edge that connects to the inside of the pipe.

Now all the fitting needs is an endcap and sliding it into place.

The whole concept avoids the need to cut into the side of a pipe and the fluted holes and the size of the holes acts like a strainer.

The next step is to have a slide in endcap with 1/8" slots cut into either side, so that depending on how far you slide the cap into the end it will vary the air intake.

Let me know what you think.
 

Attachments

  • standpipe-mod-2.jpg
    standpipe-mod-2.jpg
    34.9 KB · Views: 0
Ken,

How about a picture assembled with the standpipe? It is probably my lack of sleep, but I am having trouble orienting myself as far as top and bottom..


NF
 
i do understand about the flute but it seems that you still need to drill holes into the 1" pipe..is this correct? do u have a picture to share?
 
Ken,

I think I understand your new design, after reading the description about a dozen times. It looks like it should work well.

If my understanding is correct, there is no need to drill holes in the 1" pipe. The pipe just slips into the standpipe on the right in the pictures. The fitting on the left is just to show what the reduction fitting looks like before it has been hacked up.

I had a similar idea. Take a 2"x1" reduction fitting and dremel out the curved sections between the flutes. Slip a 2" cap onto it. Drill a hole in the top of the cap and install an air valve. The result is very simple and compact. Although I have already done this, I don't have my new tank running yet so I can't comment on its effectiveness.

Jon
 
I will post more pictures later, but I can't get the fittings apart right now.

There is no need to cut the pipe the pipe just slides over the end with the fluted area.

I really have to up date my site and get rid of the drilled holes idea. That is a real bad method that I have not done for years. I cut a square hole in the side with a miter saw. The drilled holes can get clogged and cause an overflow. I also have to send new pictures to Durso's site.

More later
 
Ken,

I've been using your standpipe design with great success for almost a year now on my 150g. I find that the algae and gunk that would clog the holes usually builds up on the overflow grate instead of the holes in the standpipe. I do periodically check and clean the standpipe's holes though to make sure they're clear of debris. I wish I had a miter saw to create the single square hole that you presently use.
 
Ok here are some more pictures:

Modification of the reduction fitting

1. On the left, you can see that I cut the fitting in half so that I have the bottom half that is the water intake section and the top half that will go into the top of the 2" coupling fitting.

2. The middle is the picture of how I cut out portions of the rim of the lower half of the reduction fitting so that the water intake is as unrestricted as possible.

3. Right side is the pict of the 2" to 1" reduction fitting as received from Lowes or HD.

I tried to get some perspective in the pictures. Hopefully the point will get through.
 

Attachments

  • reduction fitting.jpg
    reduction fitting.jpg
    41 KB · Views: 0
Here is a picture of how the water intake portion of the reduction fitting is fitted to a 1" pipe. In this picture, I did not dremel out the inner lip of the reduction fitting, so the pipe will not slide down around the fitting. I had enough of the inner piece to not worry about it.
 

Attachments

  • partially assembled.jpg
    partially assembled.jpg
    37.6 KB · Views: 0
Here is a picutre of all the pieces lined up but not assembled. Notice what I have done to the plug. I sliced a slot with a saw. Depending on how far in the hole you push the plug will dictate how much air will enter the pipe.
 

Attachments

  • unassembled.jpg
    unassembled.jpg
    37.5 KB · Views: 0
here is the last picture of the thing assembled.

Let me know if the pictures make sense.

Maybe not easier, but definitely higher up on the coolness factor.
 

Attachments

  • assembled.jpg
    assembled.jpg
    32.8 KB · Views: 0
thanks, I am about to drill two tanks, and I like the coolness factor of those puppys, I will have the dremel whining
 
Just wanted to say how grateful I am for sharing of your idea. Best 4 bucks I've spent on this hobby.. Got rid of that infernal noise with 1 trip to the hardware store and 5 minutes work. Thanks Ken.


Steve
 
kstockman (for us clueless people) would you mind listing the different parts I would need to purchase?

I don't think I will understand anything until I'm actually doing it myself.

I would really appreciate it.
 
Looks great. Almost makes me want to upgrade the current stockman (old stlye) in my tank which works great. But, "If it aint broke, don't fix it."

NF29
 
For the 1" pipe all you need is:

one 2" coupling fitting (maybe $0.60)

one 2" to 1" reduction fitting (maybe $1.00)

one 1" plug ($0.23)

Total is around $2.00, but I always buy double waht I need incase I screw something up, especially the reduction fitting and the plug.
 
Ken,
Does the 1-inch "plug" fit INSIDE the 1" standpipe? Is that different from a "cap" which would slide over the end of the standpipe? I just started purchasing the parts for your original design last night, and got a 1" cap. I want to try the newer design but I'm wondering if something changed there.
JB
 
Back
Top