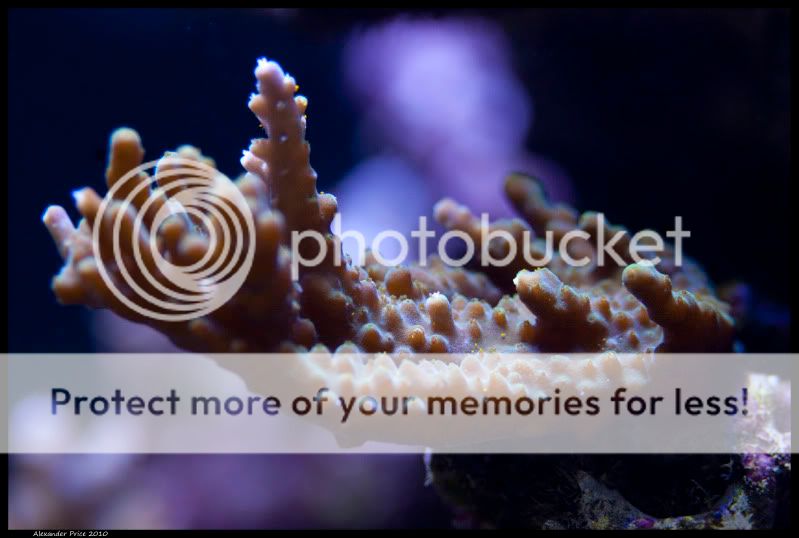
Taqpol's 220 gallon custom Miracles tank!

Not an expert here but maybe I can clarify. :) The output of the bio pellet reactor is positioned as close to the skimmer input as possible as to skim out dead bacteria and to limit bacteria entering the water column and making it back to the display. So, in my experience the bacteria itself is only used for reducing NO3 and PO4 but it does't directly "feed" the corals etc... This is different from a Zeovit system where the "mulm" created inside the Zeovit reactor directly feeds the corals. Any excess bacteria that sloughs off inside a bio pellet reactor is to be skimmed out.

Bio Balls are not a carbon source. These are two separate systems entirely. Bio pellets are a "consumable" carbon based material that beneficial bacteria eat and then intern multiply within. They are essentially a home for good bacteria to populate and multiply. This bacteria is very efficient at reducing NO3 and PO4. As the bacteria consumes the bio pellets the pellets will need to be replenished overtime. This is dependent on their efficiency, bio load of the system, and other unknown factors...

The use of bio pellets reduces unwanted nutrients such as NO3 and PO4 quite effectively in my experience. When elevated nutrients are present, the symbiotic zooxanthellae algae present inside the corals will be essentially "fertilized" by the available nitrogen. When this happens it can make SPS corals look brown as this is the natural color of the zooxanthellae algae. When these nutrients are reduced, i.e. through the use of bio pellets (solid carbon dosing), zooxanthellae is reduced and a more colorful presentation of the coral comes through.

Once the bio pellets have been established and a ULNS environment has been created, subsequent feeding imo are necessary for corals to thrive. The available nutrients that were present in the water column are now unavailable. There are many known beneficial methods to feed corals but you'll have to decide if you go this route, what the most suitable method would be for the corals you are keeping would be, whether it be SPS or LPS, or both. I don't believe a ULNS environment is a suitable one for softies in general but I don't have much experience with that. Hope this helps. ;)

As far as LED's in relation to bio pellets ULNS, Alex would have to chime in. :D

Thats exactly as I see it.
 
Very nice tank! Gonna be awesome when it grows out! Was woundering if the light stand on the cube is DIY or did you purchase it? I've seen DIY light stands with conduit but havent seen it done with square tubes.
 
Should not you post some updates ?
Considering the bottom part of the stand has been done since Thanksgiving and the top part has been done since the beginning of February, I think it is time for me to finally post a picture update.
 
Ta da!

030111Stand.jpg


Everything you see is handmade by me, including the doors:
030111Stand2.jpg


030111Stand3.jpg


030111Stand4.jpg


I liked it so much I had to go with the exact opposite of Prop Frags' stand and put a white granite lip around the top. I really like it as it almost blends in to the sand.
030111StandGranite2.jpg


Close up of the granite:
030111StandGranite.jpg
 
Now on to the canopy. I owe the front panel design to my father in law and the doors themselves to my wife, so I'm lucky I married into this family.

All the doors flip up and hold themselves in place just due to friction/gravity on the hinges. This makes it very easy for accessing the tank for simple day to day things like feeding, dosing, and moving frags/snails.
030111StandTop2.jpg


For more complex manipulations where I have to get my entire body above the tank I can lift the entire front panel off by myself.
030111StandTop3.jpg


030111StandTop4.jpg


This is accomplished by four wooden "hooks" that fit very snugly onto the 1x2 boards that span the length of the canopy and maintain even spacing. If you lift perfectly vertical and then pull out the front comes right off, even with the corner molding pieces.
030111StandTop6.jpg


Corner molding:
030111StandTop.jpg


030111StandTop5.jpg


Flush fit with everything seated in its place again:
030111StandTop7.jpg
 
Looks great, you have done a nice job start to finish. I have been following your process since your first post, in fact your tank inspired me to order mine.

Maik1
 
Looks great, you have done a nice job start to finish. I have been following your process since your first post, in fact your tank inspired me to order mine.

Maik1
 
Looks great, you have done a nice job start to finish. I have been following your process since your first post, in fact your tank inspired me to order mine.

Maik1
 
Alex you made my day seeing the pics for the most amazing tank in reefcentral and the most skillful hands.
 
Last edited:
Although you have not stained much of the interior of the stand I hope you have at least sealed it from all that humidity.

Dave.M
 
Looks great, you have done a nice job start to finish. I have been following your process since your first post, in fact your tank inspired me to order mine.

Maik1
It must be nice being local to such an amazing tank builder. Good luck!

Alex you made my day seeing the pics for the most amazing tank in reefcentral and the most skillful hands.
I really don't think this is the best tank on RC, but thank you anyways!

Awesome job on the stand and canopy Alex. It really came out great!! :thumbsup:

That stand is great man!
Thank you!

Although you have not stained much of the interior of the stand I hope you have at least sealed it from all that humidity.

Dave.M
The bottom part of the stand should hopefully never see humidity, but I put polyurethane on the inside anyways. The inside of the canopy is also covered in polyurethane, but I feel that is more to protect against splashes. Since the top of the canopy is completely open and I have a ceiling fan right above the tank I don't think the canopy is going to be trapping a lot of humidity. By the way, I love your signature!
 
Not too many coral pictures this time around. Many of the corals are dead, still don't look too good, or are too small to get a good angle at for pictures. That being said, some corals are recovering literally before my very eyes since I started feeding heavier and dosing Lugol's plus Amino Acids. Here are some examples:

ORA Tricolor before (October 27th):
102710RedBug.jpg


After (Notice all the new growth and the blue tips):
030111CoralTricolor.jpg


Orange Monti Cap Before (December 9th):
120910BadMonti.jpg


After (I saved a tiny frag, but it still turned all white before it started getting its color back):
030111CoralCap.jpg


Of course, this Sunset Monti has been doing great the entire time and is even encrusting off of its plug! The white spot is where some nuisance algae grew before I removed it.
030111CoralSunset.jpg


Toadstool in my anemone tank. I kept a frag of this guy all the way from my previous 120 and never new what to do with it because I didn't want it in the main tank:
030111CoralToadstool.jpg


Top down shot of my porcelain crab inside its anemone:
030111Anemone.jpg
 
Taqpol said:
The inside of the canopy is also covered in polyurethane
I was more concerned about mold and mildew eventually spreading to exposed wood.

Taqpol said:
By the way, I love your signature!
Thx. It came to me as I drooled over the really excellent images folks are providing of their tanks here on RC - a case of chippendipidy.

djm
 
Back
Top