TOM Aquarium RP3 Plus, Unpacking/First Impressions Review

kottok.motors

New member
Hey guys!

After much debate, I have decided to pick up the RP3 Plus filtration system by TOM Aquarium / Koller Craft. I have only seen a few thorough reviews on this system (one of them on here) so I wanted to add my $0.02. Due to space restraints under my stand, this seemed like my best option for adding a sump, and I wanted to inform others who may be in a situation like mine, of their options.

Lets go!

THE PLAY-BY-PLAY

Arrived VIA FedEx from Amazon this afternoon, just about an hour and half ago- to give you a timetable of setup and installation.

ixGvoma3PoWqbx7xTLEMU6tb3Yg2HR_zTl_JH1Df4sw=w334-h187-p-no


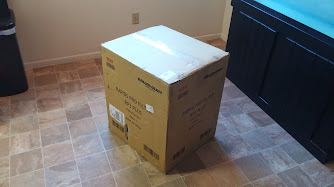
Big box. There were a few dings in it from shipping, which concerned me, but when I opened it up I was please with how it was packaged. Double boxed for shipping, with the system in one box and ATO in another.

MkQa7UKb2XRCOxTAbJYM6JJ9RTvceGFJhiMijq3JvIk=w334-h187-p-no


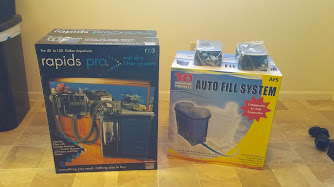
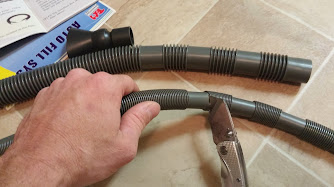
The two small packages on the ATO must be a new addition from them. Reading the reviews, everyone said that the manufacture recommends elevating the ATO for it to function properly. These are feet for the ATO. Well done!

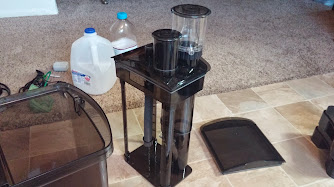
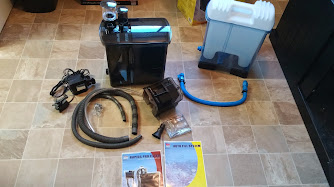
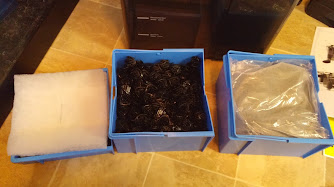
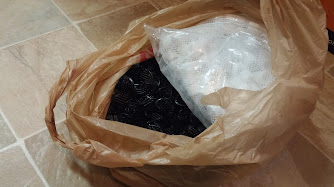
Unpackaged everything, once again pleased with the packaging. Heavy corrugated cardboard support, individual pieces bagged.

Mc3GWSd_aZv5gvGg2Bv-k25LAhSm0eooAWCve9Bs08Q=w334-h187-p-no


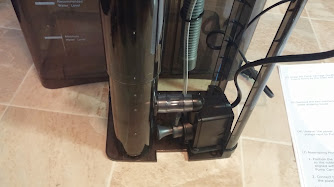
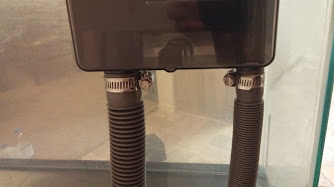
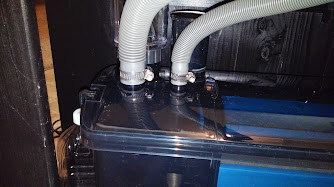
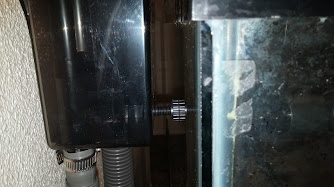
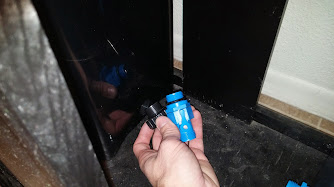
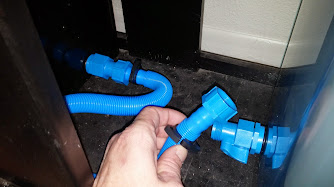
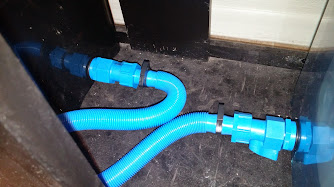
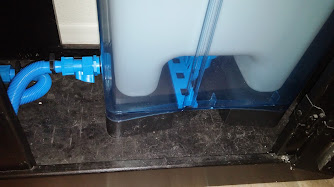
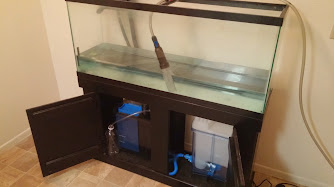
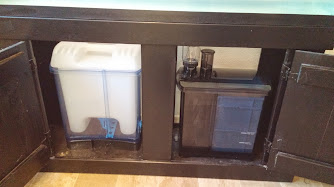
Test fitting in cabinet, it's a squeeze, had to tilt them a tad to fit.

h76lbAxNAivjtZA3p6Fi49ScMhO21p_U7KgC-BvrGkU=w334-h187-p-no


Time to follow the instructions, see how confused I get, and hope it all works!
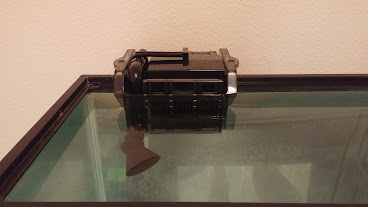
Step one- Unpack the media basket side of the 'canister'.

cGDwquLTAnJlLaC2NSwFXPd9BBct1k2mNKsqX78B6EY=w334-h187-p-no

U-pGXEkcg9uOJ1gQGU2oX0jglAgUOelnz1-yeKBrUeo=w334-h187-p-no

d4Kx-9DLs7ZCq_hXbpv7975Cph0ATPi9qsPNChQmMoU=w368-h207-p-no


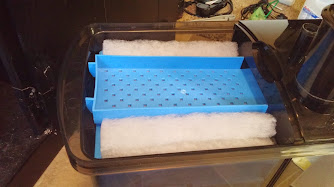
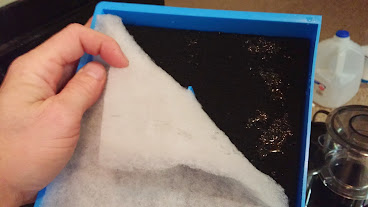
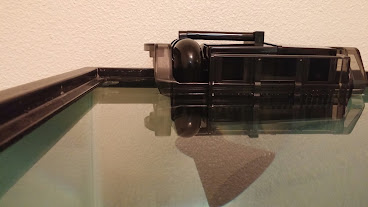
Top basket has a 'carbon pad' and filter floss, 2nd basket bio-balls, 3rd basket carbon 'pillow' and sintered glass media.

I think we all know which ones are going into cold storage :)
8hd-sPJU3eZ28gW4GS4svG9QgkyW5VRvx8SpOacVnW8=w334-h187-p-no
 
Next step is to install the pumps. Remove the pump/skimmer assembly from the other half of the canister.

vqAHkwacI-bEOhVTHzcA7KGmfZliEWH1Z-tvtH3isGs=w334-h187-p-no


Install the skimmer pump, then return pump. Theres indents on the bottom plate that the rubber feet of the pumps set in so you know they're in there right. Was a bit cumbersome getting the skimmer pump in, but not a big deal.

-rGRk0HwYMd2-B7y0wSHljGufow2Wt2P3Xp7Qh_8FO8=w334-h187-p-no

mFYYhDLO-5uVzGvGgINhp98GPYOr351l2pGCvt_onGQ=w334-h187-p-no


Reinstall the assembly, filter basket, and drip tray, and place in the stand. Now we move onto the overflow.

Just wanted to point out the venturi tube here, this is how the return flow sucks the air out of the overflow starting the siphon. There is also a hole on the backside of the return tube that was too difficult to get a picture of, that breaks the siphon when the pump is powered down. In a salt environment, both of these will need to be maintained to ensure proper function.

7vg7-KKSnvVpPPROttw4n7D7kd_xPEfR8SVlZqpu8nw=w368-h207-p-no


Place the overflow box on the tank where you want it, with the straightest shot to the canister. Measure and cut the hoses. No turning back on this one!

lquPz6Duon8EmUFjUDX9kTJyfv97mFzL-4O1yI6Roro=w334-h187-p-no


Install the hoses on the overflow, then on the canister. Be sure to slip on the hose clamps first. One thing I've noticed throughout this, is these hoses are a really tight fit, I feel like I'm going to break something trying to get them installed. Nothing broke, and a tight fit means no water leaks.

UqRp0jUkaIIHaCRzXrjYdzdchjuQcjKRpt7011Ah0TI=w334-h187-p-no

E_II3VuJjnRvUdTpRqpOIfQtz_fH_CxQIOwJHw_tlxQ=w334-h187-p-no


So far so good!

Install the adjustable overflow guard, and the return nozzle. Adjust the screw on the back of the overflow to make it set nice and level on the tank. Easy-peasy.

1Ju7xeIRSOPTs_zAlvL-SqIR-Sh0wAFo4QKWxGwWE0s=w334-h187-p-no

6UR96t5JrmYUyN2WLtMlN4UKf-0d6aO3mOSrvVXEpII=w334-h187-p-no
 
Install the skimmer drain tube, into a container of your choice.

yifx5Bf-WOzTwSjRlF58js1qcose1G7l70jxyzrnlwo=w334-h187-p-no


ATO time! Remove the drain plug from the canister, and install one of the ball-valves attached to the connection hose.

J3saW2Un6k51TRY5yZN8zOEWMIWjtUAOkHTGASW166o=w334-h187-p-no


Attach one end of the hose to said ball valve, remove the other ball valve and attach to ATO. Undo the hose clamp on that side so you can twist it together while maintaining the desired routing of the hose. Hose should not go higher than the bulkhead on the ATO.

OZLRKmW1hsSiPxOy2vg5jYiqNIVQBSyWCmuL7z2xI1E=w334-h187-p-no

-0Fgw6RqZ5GuyMbMyrKxaE8s3VasVKnp3sVMtZs_N-Y=w334-h187-p-no


Tighten it all up and install the included stands.

9HYkpV8bwv1qvkQnqXmu8FovXkJNmsQqVyTob81HcDU=w334-h187-p-no


All done! Now to test it out. Fill the tank to your waterline, and the canister to the 'max' waterline.
EOJdAhhUrX1exlv0MDRknFTZX5jIAU_ttkS__MvJ8nU=w334-h187-p-no

ZMl_vc69zLo-tdLeuO2LHtp2SM4s0W8votPGQI3mb3Y=w368-h207-p-no


Plug it in and see what happens! But don't forget to prime the overflow by filling it with water first... I forgot, whooops... tank got a wee bit full.

TyOSCp-gCCE-VDOMMCHiOfNaZuh1xHqTIisvEjtM79Q=w368-h207-p-no


THE REVIEW

OK So here's my initial thoughts, super impressed with the packaging and ease of installation. While the plastics do feel a little bit sketchy, they're not flimsy or anything, just light and thin. So far I have found only one leak, a dime size puddle by the return outlet on the canister. Easily remedied it with another 1/8 turn on the clamp. It does make noise, but with that flex tube it is to be expected and I would not say it's an abnormal amount. I don't have to turn my TV up to drown it out. The return pump is nice and quiet, just a standard hum. Seems to be flowing a good amount of water. I cannot voice my opinion on the functionality of the skimmer yet, as I was testing the unit with freshwater. Would prefer to leak fresh than have salt get everywhere if catastrophe occurred.

Return pump is rated 700GPH at 0 head. I have about 4' of head on it, so I would guesstimate closer to the 400-450 range output. Not quite 10x turnover for this 55g, but I'm sure with all the sand and rocks my water column will be closer to 45g to narrow that down.

Overall, I give it a B+ as an initial review. I will keep this updated as things go along.

L8ers
:wave:
 
Back
Top