tyler91913
New member
Disclaimer: Most of my posts in this thread will not come close to approaching the following one in length.
I know two things about you already. First, you're asking yourself, "Does the world really need another aquarium build thread? Will it be better than the hundreds of other sporadically-updated threads that clog this section of reef central? Will this one at least have good pictures?" Second, you're curious about why I've titled this thread/tank a "consolation station." Well, the answer to the first line of questioning is a qualified "no." That is to say that No, this thread probably won't change your life and there are plenty of other threads that will be better-maintained and show-case sexier tanks, but Yes, I hope it gives folks with existing and planned nano tanks some occasional inspiration. To answer the second question, I've been jokingly referring to this project as my "consolation aquarium" since I had to break down my 90 gallon system last October (the short version: stand started rotting, I parted things out, was left with a bunch of aquarium stuff and about 30 lbs. of live rock, I bought a 30 gallon tank/stand in a moment of weakness, and started imagining my new tank). If you were to ask my wife, you'd learn that I wasn't supposed to replace the 90 so quickly, but with the leftover equipment and the itch to keep a good thing going, it was probably inevitable. All of that by way of background to my current project. I could have titled this build thread "Tyler's consolation aquarium," but that doesn't rhyme, and it would give the impression that I received this tank as a "thanks for playing, better luck next time" consolation prize at some reef society raffle. Anyways, whatever you call it, this tank has been a major source of consolation since having to part with the 90. So, with all that by way of introduction, let's turn to the actual system.
One thing I decided the moment I decided to reintroduce 35 gallons of moving salt water to my living room is that I wanted to use nice equipment. I had bought my 90 as a package deal from a guy who used low-end equipment purchased mostly in the 1990s. Here's a link the build thread for the system I jokingly called my Old School 90. It was a great tank, and in that thread you can see what a great learning experience it was. One of the nice things about a nano is that you can use things like Vortech pumps, since it costs $250 for an MP10, rather than $900 for a pair of MP40s. An MP10, in fact, was one of my first "big" purchases for the consolation station.
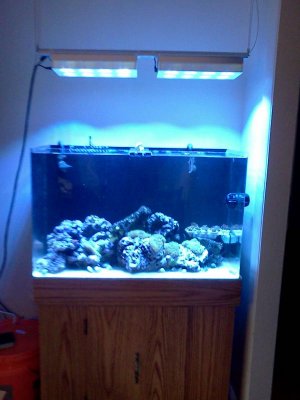
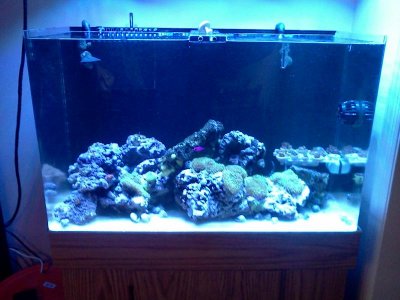
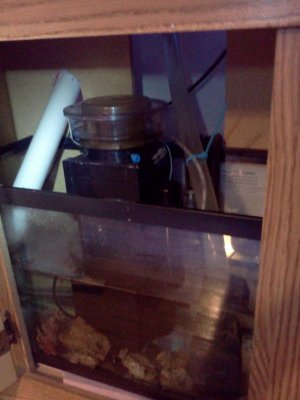
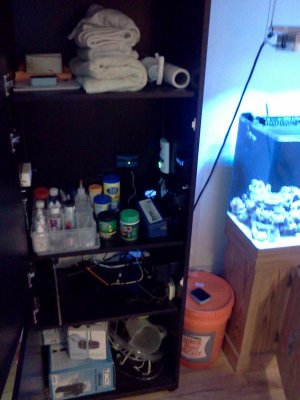
Rather than a simple bullet point list of specs, I'll take you on a ride through the system. Imagine you're a bit of Cyclopeeze. After being introduced to the rimless acrylic 30 gallon acrylic tank, you are pushed around some 25 lbs. of zoa and mushroom covered live rock by an MP10 pump, narrowly escaping the grasping clutches of the tanks three resident peppermint shrimp, dozen hermit crabs, dozen Astreas, a Turbo, a Black Margarita snail, and a brilliantly colored Orchid Dottyback. You zoom right past the teeth of a Glass-Holes overflow but are not sucked in--that's because the Tunze 1073.02 return pump with SCWD returns has been toggled off with the brand new ReefKeeper Lite's feed mode. It's been set for an hour, so your odds of being eaten by somebody or something are not great. You can see (okay, so you're a very unusual piece of cyclopeeze in that you have eyes and a neural system capable of sensory processing) by the light of a pair of AI Sol Super Blues, mounted from the ceiling on a custom sized rod. You take refuge somewhere--maybe in one of the empty shells left for the amusement of the hermits, maybe in a crevice in the rocks where the monstrous and ageless brittle star (a relic from the 30 gallon sump in my 90, now living in the display) didn't notice you. A flood of microbubbles from the two returns announces the end of your hour of terror and water begins flowing again through the teeth on the overflow. You are swept along by the current and ride a fast-flowing ripple of water down the 1.5 inch drain line into a 10 gallon sump (a standard 10 gal tank that used to be my ATO reservoir). In the sump are another 5 lbs. of rock and a sadistic snail-murdering scarlet hermit crab (the SSS). The electric eye of a Tunze Osmolator signals, and you hear a faint whirring from beyond your dark enclosure. The whirring is followed by a stream of fresh water delivered via 1/4" airline tubing. Before you take a last, bubbly ride to the collection cup of a Tunze DOC 9006 skimmer, you have just enough time to notice the array of heater, iTemp probe, and pH probe, with wires leading back to the RKL in the cabinet next door. You'll never see the cabinet, but if you could, you'd see a shelf for towels and a log book, a shelf for food and test kits, with controllers for the Vortech, the Osmolator, the AI Sols, the RKL and its SL2 module. On the shelf below, tucked safely out of sight and out of danger of spills, are a regular powerbar, the PC4 for the RKL, and the electrical cords for the tank's various components. As you're rinsed down the bathroom sink, you're consoled by the thought of Tyler's love for organization and efficiency. It's been a good ride.
Subscribe to the thread, if that's your thing, and talk to me about the tank. I'm open to ideas, questions, warnings, praise....
Here are some bluer-than-life cell-phone pics. Better pics will follow.


