AcroporAddict
There is no substitute.
You should use an ATO reservoir that only holds a specific amount for evaporative makeup. That way in case of a leak, you don't kill everything in the tank with an endless supply of RODI going into the tank. Worst case scenario assuming it is not a tank failure, you burn out your return pump, but your livestock lives.
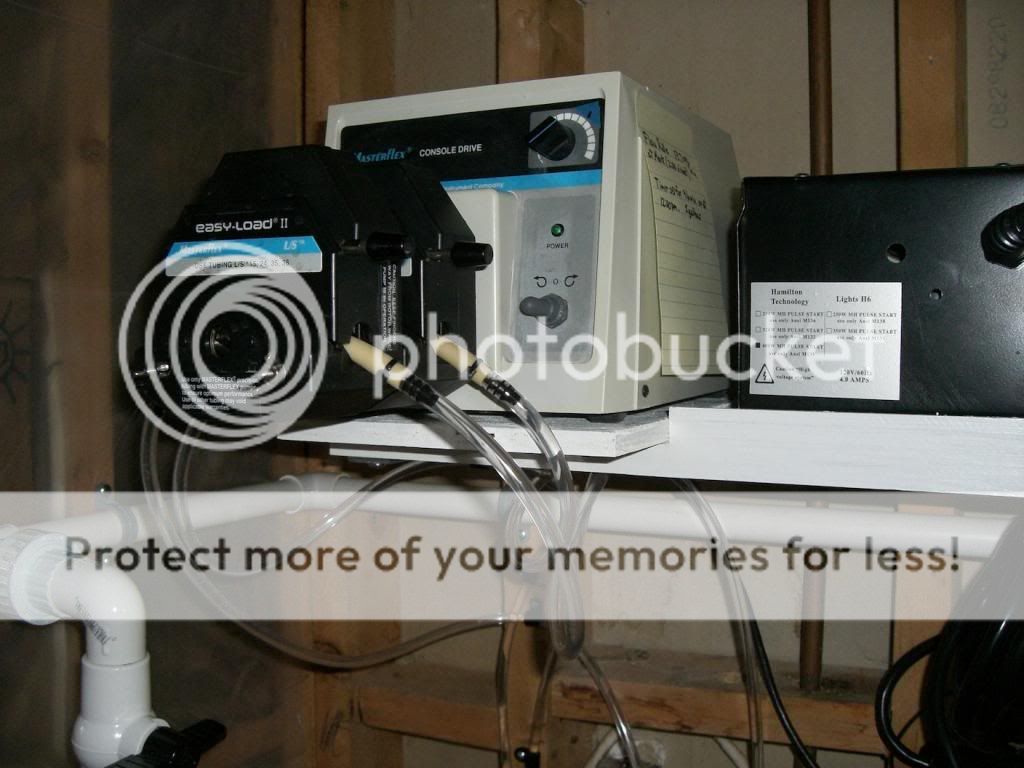
Here is my AWC setup, probably one of the simplest and most trouble free you could get. A dual head Masterflex peristaltic pump on a timer. One moving part. You have a line from one head going from a new saltwater reservoir (Brute) into the return section of your sump. The other head has a line going into the skimmer section of the sump to pull old saltwater out and feed it to a drain. Mine does a 1% daily WC on my 465 gallon tank. Simple and 99% foolproof. No solenoids, no other equipment involved. I just change the dripsets out every 6 months or so.
Here is my AWC setup, probably one of the simplest and most trouble free you could get. A dual head Masterflex peristaltic pump on a timer. One moving part. You have a line from one head going from a new saltwater reservoir (Brute) into the return section of your sump. The other head has a line going into the skimmer section of the sump to pull old saltwater out and feed it to a drain. Mine does a 1% daily WC on my 465 gallon tank. Simple and 99% foolproof. No solenoids, no other equipment involved. I just change the dripsets out every 6 months or so.
Last edited: