Walling in the Fish Room

d2mini

Premium Member
Going to be completely redoing my garage-based fish room.
Utilizing basically the same space, just walling it in.
What i have now was a quick and dirty way to get a lot of extra water volume and it evolved since I set it up exactly two years ago.
So after two years of use, I know what works well, and I know what needs work.
And the best thing is that I'll be able to add an AC duct, which will be a massive help since I've gone back to MH/T5 lighting, and the garage temps get up to at least 95 degrees all summer.
The mixing station will have to stay out in the garage but that's ok since I rarely do any large water changes.
Mostly I do tiny daily auto water changes.

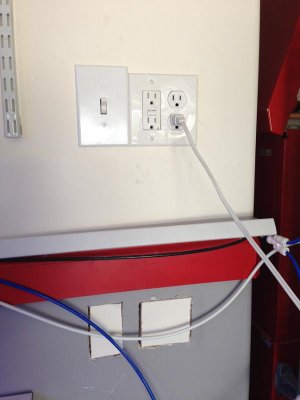
Here is the current space...

i-jNM5D5z.jpg


Here is the plan (work in progress) of what is to come.
And I'll still end up with basically the same water volume I have now.
I'll custom build 2x4 stands along 3 walls to hold the tanks and give me a work surface.
The bean animal plumbing will also improve with a more direct route to the sump.

i-NKvP5P6.jpg


So one question I have right off the bat... After sheet rocking the exterior of the walls and insulating, what would you cover the interior with?
Worried about humidity. I do have an exhaust fan already, and I do have a dehumidifier, but was thinking regular sheetrock may not be the best idea.

And of course if you see anything else jumping out at you that I should change or think about, let me know!
Work probably won't start till September but I want to start gathering supplies and have a solid plan. I'll post progress pics as I go. Thanks!
 
If you are worried about moisture use greenboard instead of regular drywall and then just paint with a nice exterior semigloss paint..
 
Treat it like building a bathroom. The exhaust and dehumidifier should work fine. Paint with some mildew resistant paint. IMO Greenboard would be overkill but certainly wouldn't hurt. You mentioned adding duct work for AC, talk to an HVAC guy to see if you should also include a return so that you are correctly pulling out the humidity.

I see you are going away from the Rubbermaid and installing (what I assume ) is custom made LifeReef. Is the Rubbermaid not working as projected?
 
I see you are going away from the Rubbermaid and installing (what I assume ) is custom made LifeReef. Is the Rubbermaid not working as projected?

Well, it has worked "ok" but there are a few issues in my case.
I have it raised up because we had a toddler at the time and knew another would eventually arrive so my wife was worried about having an open tub of water at ground level. Since its raised up, and also positioned away from the wall, I had a hard time getting the bean animal plumbing to it and creating a siphon. Too many elbows and not enough vertical drop. Second, it really collects a lot of gunk at the bottom. I empty it once a year to clean it out which is a real undertaking. Third, dealing with some kind of skimmer box was a pain. Started with a roughneck tote but that ended up bowing too much, then had a custom one made, but that cost money. And the thing is just big/cumbersome. I think I had a large basement where i had a lot more vertical drop from the display and a lot more room I'd be more apt to use them again. But this time I'd just rather go with a regular berlin sump since the rubbermaid isn't gaining me anything. Overall, the new setup will make much better use of space.


Now for the wall covering.... i think i've seen people use those sheets of thin white plastic... maybe has a texture to it... anyone know what I'm talking about?
And how does the green board compare to the regular gypsum board? Is it heavier? a lot more costly? harder to work with? I've sheetrocked plenty but never used that.
 
I just completed a project close to this. I used regular drywall primed twice and two coats of bathroom paint. In areas where I thought splashing would occur I used the sheet goods you refered to. Fiberglass reinforced panels (FRP) bout $35 for a 4x8 sheet. Check out my build thread, I decided to use a glass tank for the refugium, but my lifereef stuff looks great.
 
Given the dimensions of the refugium and the sump I personally would combine the two into a standard 180g. A baffle to divide off the refugium and a bubble trap between the skimmer and center return section. Easy enough to DIY. I would make the stand for the frag/mangrove tank high enough to get the skimmer cup out with out arguing with it.

One other change I would make would be to rotate the quarantine tank against the wall opposite the sump and place my work surface between the quarantine tank and the sump/mangrove setup. That way if you are working on frags you only have to turn 90 degrees instead of all the way around. Same for working in the quarantine tank.

Just my opinions.
 
I just completed a project close to this. I used regular drywall primed twice and two coats of bathroom paint. In areas where I thought splashing would occur I used the sheet goods you refered to. Fiberglass reinforced panels (FRP) bout $35 for a 4x8 sheet. Check out my build thread, I decided to use a glass tank for the refugium, but my lifereef stuff looks great.
Cool, I'll check it out!

Given the dimensions of the refugium and the sump I personally would combine the two into a standard 180g. A baffle to divide off the refugium and a bubble trap between the skimmer and center return section. Easy enough to DIY. I would make the stand for the frag/mangrove tank high enough to get the skimmer cup out with out arguing with it.

One other change I would make would be to rotate the quarantine tank against the wall opposite the sump and place my work surface between the quarantine tank and the sump/mangrove setup. That way if you are working on frags you only have to turn 90 degrees instead of all the way around. Same for working in the quarantine tank.

Just my opinions.
I just really like his sump designs and the sump and refugium will be integrated.
Will cost a little more but that's ok.

Right now i have the top of the stand at about 42" which is already going to cover about an inch of my electrical wall plates. This will leave me with about 4 inches between the top of the skimmer and the bottom of the horizontal 2x4. This should be enough as the skimmer only needs an inch or so and I only remove the cup about once a month to clean it. The rest of the time i just drain the cup to another container. So I *think* i'm ok. :)

And great idea about moving the QT. Making that change right now!

Thanks!
 
You could always move the electrical boxes :). I agree that 4" should be enough to remove the skimmer.

If you redraw the layout could you include where the return pump is? I think I see it in the side view of the sump but its missing in the top view.

Have you looked at the fact that the skimmer will be jammed into the corner? It may be a PITA to get it out. If your work shelf were just a counter top with nothing under it or even a removable counter it may give you better access.
 
Yeah, I may have to move the electrical boxes up a couple inches. Don't you hate it when you are THAT close? lol

Placement is kinda up in the air but the return pump is there in the bottom right illustration... the black box that says pump. If looking at the top-down view it would be in that empty space between the current position of the QT and the sump. Against the wall that shares the display tank. I'm not quite sure yet where the return is going to exit the sump. I think from the center section. So it would elbow 90 towards the house wall, enter the pump than go straight up and back into the display through the wall.
 
Well, it has worked "ok" but there are a few issues in my case.
I have it raised up because we had a toddler at the time and knew another would eventually arrive so my wife was worried about having an open tub of water at ground level. Since its raised up, and also positioned away from the wall, I had a hard time getting the bean animal plumbing to it and creating a siphon. Too many elbows and not enough vertical drop. Second, it really collects a lot of gunk at the bottom. I empty it once a year to clean it out which is a real undertaking. Third, dealing with some kind of skimmer box was a pain. Started with a roughneck tote but that ended up bowing too much, then had a custom one made, but that cost money. And the thing is just big/cumbersome. I think I had a large basement where i had a lot more vertical drop from the display and a lot more room I'd be more apt to use them again. But this time I'd just rather go with a regular berlin sump since the rubbermaid isn't gaining me anything. Overall, the new setup will make much better use of space.


Now for the wall covering.... i think i've seen people use those sheets of thin white plastic... maybe has a texture to it... anyone know what I'm talking about?
And how does the green board compare to the regular gypsum board? Is it heavier? a lot more costly? harder to work with? I've sheetrocked plenty but never used that.


Greenboard is pretty much the exact same thing as regular sheetrock...just a little more.


Just bought some of this to panel my sump room walls...seems perfect:
http://www.homedepot.com/p/COROSPLA...-in-Twinwall-Plastic-Sheet-COR-3672/202771364

7e8a1533-2f16-46fd-84e8-846df41fd102_400.jpg
 
I have another question.
If you look at the diagram above, the new wall at the bottom with the doorway is the wall that faces the garage door. The floor of the garage has a slight slope in that direction. So if there are ever any major spills, water drains in that direction and out into my driveway. This has come in handy in the past. ;)
So is there a way to design the footing of that wall to allow some drainage out of that room, but minimize heat/cool transfer between that room and the rest of the garage? I am also thinking about moving the door to the other right wall as well, so that would completely close off that other wall and all water would pool up agains the base of it in the event of a flood.
Thoughts?
And a drain in the floor is not an option.
 
A piece of pipe cut in half and run "under" the wall should work. Then you can seal the baseboard to the floor, the pipe to the concrete and the baseboard to the pipe. Any water runs along the wall and through the pipe into the garage proper.

Oh and moving the door means you have more work space......
 
Cool idea. You think one pipe would be enough? What size should I use?

And yes, that was my thought on the door. Plus the door would open into empty space where a third car would go, rather than opening towards our two cars. Not that the door would hit either car but would probably make it easier navigating around. The problem though is my mixing station is on the other side of that right hand wall so I'm not sure if I have enough room for that and a door. I guess if I leave the door where it is now, I could forgo a threshold, and just put a rubber sweep at the base of the door that just barely misses the ground, and then seal up everything else like you said.
 
If you are worried about the door and space, have you considered a pocket door?

I have, but the space outside the room is not enough of a concern and the walls will be fully insulated, as well as the door having a weather seal all the way around it (except for the bottom if I forgo the threshold). So i think a regular door is the way to go in this case.
 
Back
Top