Yerboy's Rimless 190 w/ 3 sided starfire

yerboy

Member
Well i have this title thread on a few different forums already but i figured i would let you guys play along too.

Hey everyone i would like to share with you the build of my new setup.


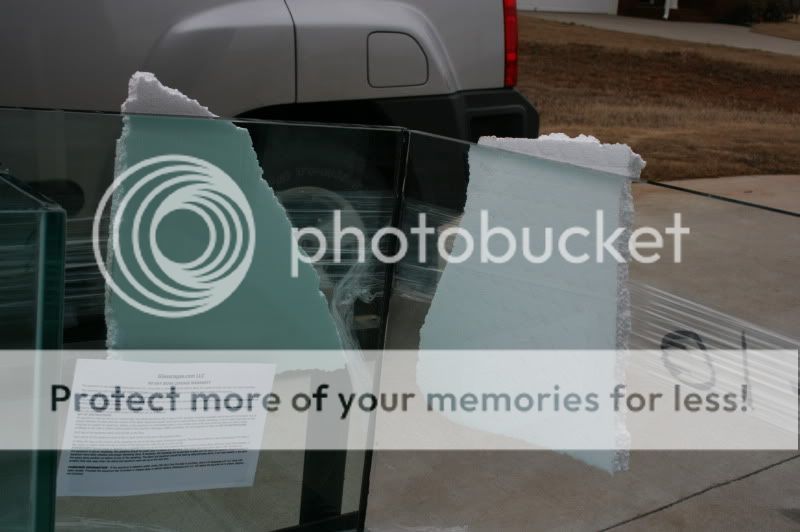
190 - 4 Wide (Rimless) 48 x 36 x 24 3 sided starfire i pick up the tank in about a week.

This is the wall where the tank will go.
IMG_5527.jpg

and this is directly behind that wall and will be used as my sump/equipment room.
IMG_5525.jpg


i will be using the ATI 48" 10x54W Powermodule fixture. This gives me a good option for bulb choices for the exact color i want.

Some of the equipment i will be using, 100gpd RO/DI from BRS with 5 micron sediment filter 1 micron sediment filter 1 micron carbon block and duel DI, PM Kalkreactor, SWC Mini cone skimmer, 100 rubbermaid sump, and a reefkeeper 2. Return will be feed with a ReeFlo Dart, while main circulation with 2-4 Vortech MP-40s. Im also planning on dosing BRS 2part with mag via the bubble magnus doser once someone has it back in stock and i can get my hands on it. I also have the BRS GFO/Carbon reactor that i will be using.

I have considered a zeo style system but truthfully i cant wrap my head around all those different additives. So i will likely stick with what im used to and continue vodka dosing.


here is my swc mini cone. in the process of curing/cycling some old LR thats been sitting dry for about a year. I spiked it with about 12oz of nog so its running harder then it should.
IMG_5646.jpg

IMG_5648.jpg

IMG_5647.jpg

I have since purchased another 100lbs of BRS reefsaver rock and im in lock with it. I will try and get more pics up later.
more to follow.
 
Ok so yesterday i drove up to Glasscages to pick up my tank.

I was somewhat surprised when i pulled into the driveway of a farm with cows, ducks, and a very friendly peacock.
Picture026.jpg

Picture028.jpg

The warehouse where the tanks are built.

Everyone was very friendly and contrary to what i have read about glasscages all the mexicans whom i spoke with that work there all spoke very good English.

Picture027.jpg


My stand
Picture029.jpg

all loaded up
Picture030.jpg

Picture033.jpg
 
Once i made it back home i snapped a few more photos
Picture038.jpg

Picture037.jpg

Picture036.jpg

Here you can see the diffrence between standard glass and starfire. Remember this is all 3/4" glass.
Picture039.jpg


You can see the build quality is no Elos and some trimming of silicon is called for to clean it up. Some of the glass could have used some cleaner cuts but overall for what it cost me im quite happy. Given i cant add water for 3 weeks of manufacture date 3-11-10 so i cant comment on if its even water tight as of today.
Picture035.jpg

Picture034.jpg

Picture031.jpg

Picture032.jpg

And with the help of a few friends Mike whom took in all my fish and coral when i moved and Jack over at TritonsGarden.com we got the tank in the garages where it will undergo a little maintenance and the stand will be stained.
Picture040.jpg

and i got my RO/DI bolted up to the wall.
Picture011.jpg
 
Here are a few more photos.
This is 100lbs of BRS reefsaver rock, i have 75lbs more that should arrive today and another 100lbs of LR at a friends house that i may end up not even using.
I must say it looks much better in person.
I was thinking of doing a half moon shape on the left side and a bonsai type tower on the right. Not sure yet but ill play around with it till im happy.

20100317_417.jpg

20100317_420.jpg

20100317_419.jpg

And here is my light. Its the ATI Powermodule 10x54
20100317_422.jpg

20100317_423.jpg
 
Got allot done this weekend, my back and arms are killing me. Anyone know of a calculator to determine glass weight?

Anyways saturday we got the stand in and the light up.
20100329_2.jpg

Sunday we moved the tank in. Took 3 of us and it was everything we could do to lift this baby onto the stand.
20100329_4.jpg

20100329_5.jpg

20100329_7.jpg

20100329_9.jpg

175lbs of BRS Reef Saver rock. Gave it a quick hose down outside because its pretty dusty then loaded it all inside. for size reference that cardboard is 3'x4'
20100329_11.jpg

Loaded it all in and started aquascapping i have since changed it around a little and some sure i will play with it for a while before im happy.


Picture taken with 2 Blue+
20100329_17.jpg

Here with all 10 bulbs "6 Blue+ 4 Fiji Purple"
20100329_12.jpg

20100329_37.jpg
 
Beautiful tank and build quality. It's a strange thing with builders like Elos etc, but the standards in the US are so much higher :) Here in Europe this tank would be considered perfect and very well finished (and I think it is)
Good luck with the further build.

Leonardo
 
Great looking tank and very nice stain job.

Our systems are very similar.

I also have a starfire rimless GC tank with a power module, twin Vortech's, two part dosers and a SRO XP3000 cone skimmer.

I also ran my plumbing through a wall into a seperate room (garage for me) and I LOVE not hearing a sound from my tank and the unlimited equipment room. Makes it really easy to set up a small seperate frag tank plumbed into the main tank with a small T5 fixture over top.

Good luck with the rest of your build. Waiting the final few days before you can put water in are the longest days in history.
 
Looks great so far, what do u plan on stocking it with?

I haven't even gotten as far as a stocklist, but i have a pair of b&w clowns that will move into thie tank once its ready. Im a fan of anthias and would like a male and a few females. I really want an angler and maybe a filefish but i haven't made my mind up. My wife digs tangs but with only a 4ft tank im a bit hesitant.
 
Why the 3 week wait time? All the rimless tanks I have had made here, 3 days is all the wait necessary (that was a 36X18X20 tank) and smaller ones the same. Is it beause it is using thicker glass? Mine were all built with only 10mm glass
 
i think its because GC only gives you a 90 warranty and they want to stretch out any chance of failure to as close to the deadline as possible... honestly i dont know every date i have seen for solid cure time has been 5-7 days not 21 so who knows.
 
Ok so i have got some work done. The water is in and plumbed. 2 part dosers are in place and calibrated.
Picture002.jpg

Picture001.jpg

Picture003.jpg

Picture005.jpg

Here you can see the water level in my overflow runs almost silent, the center pipe is an emergency drain. I will also be installing a float censor in the overflow to turn off my return pump should the water level rise to high.
Picture004.jpg


Simple plumbing
Picture010-1.jpg

Picture009.jpg

This is the gate valve that controls the overflow's water level
and dosing pumps
Picture008.jpg

Picture007.jpg


Sump
Picture006.jpg
 
Ok time for a much needed update.
things are coming along smoothly, i never seen an ammonia spike but there were a few weeks here and there that i was out of town and unable to test so i may have missed it. Yesterday i finally got the remainder of my livestock back "a local friend had been holding everything since jan 29th".
first off is a photo of my almost 3 month old daughter Madison
Picture006-1.jpg

and my first daughter pic taken a few years ago
IMG_3779.jpg


anyways on to the tank.
Picture026-1.jpg

Picture008-2.jpg

Picture037-1.jpg

Picture010-2.jpg

Picture011-1.jpg

Picture023.jpg

Picture022.jpg

Picture021.jpg
 
Back
Top