150 gallon build thread...avoid my mistakes

nanoguy

Premium Member
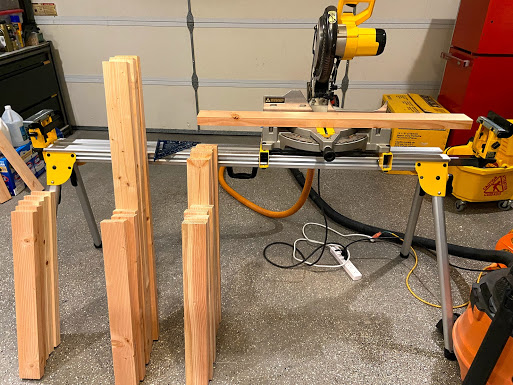
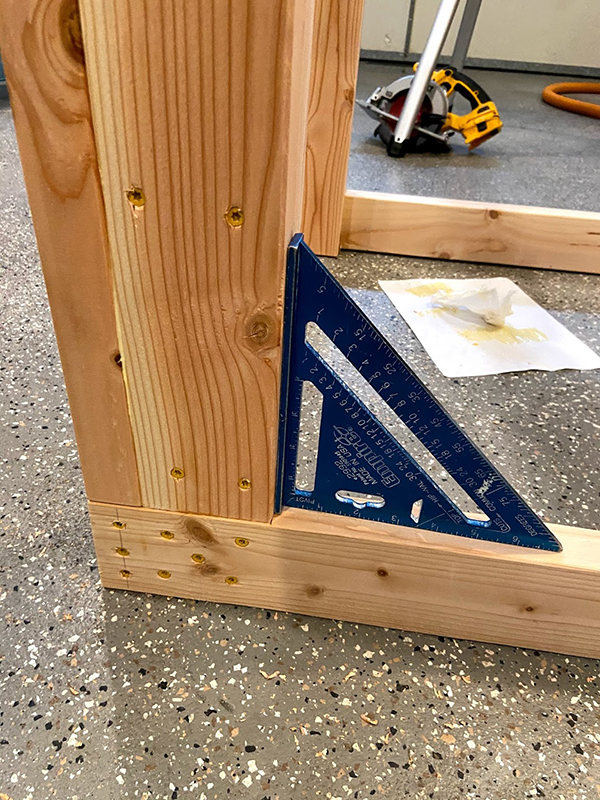
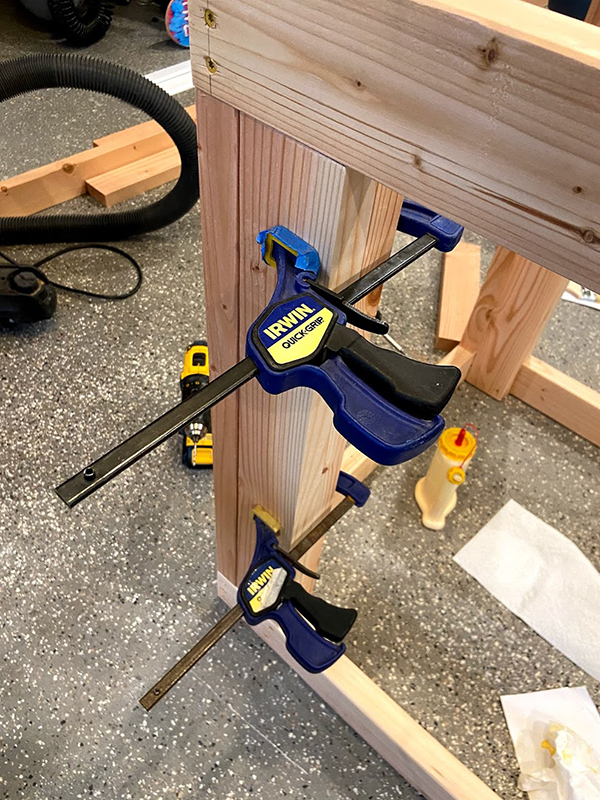
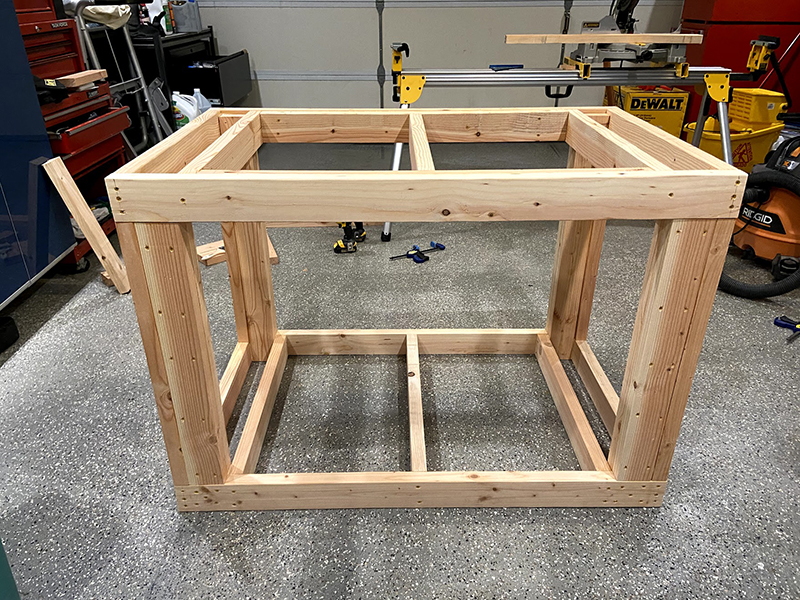
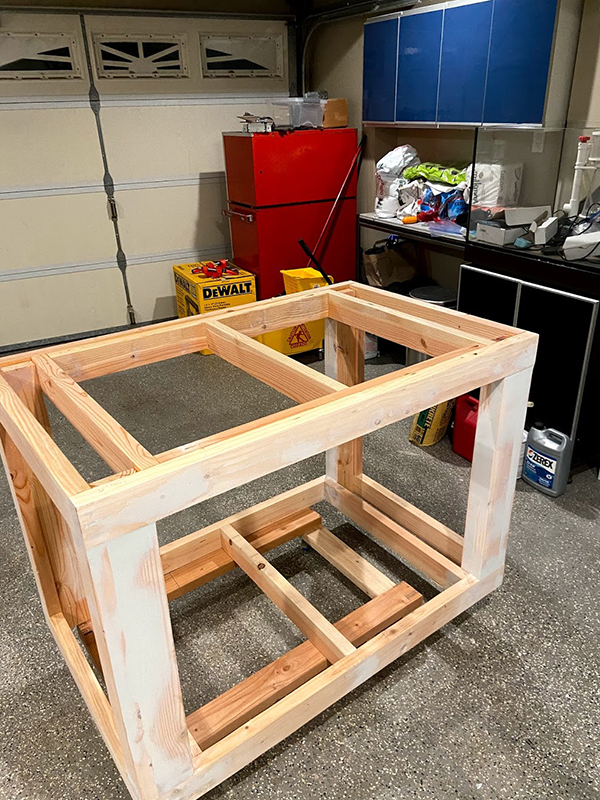
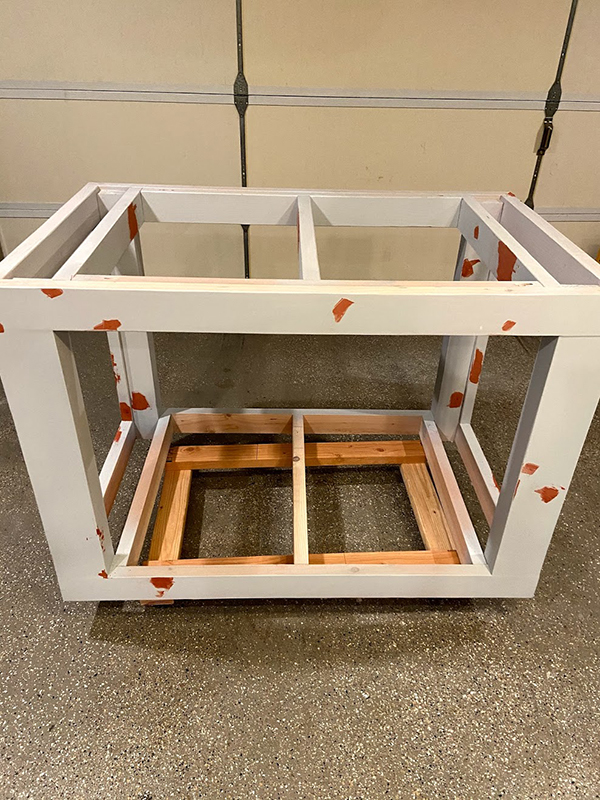
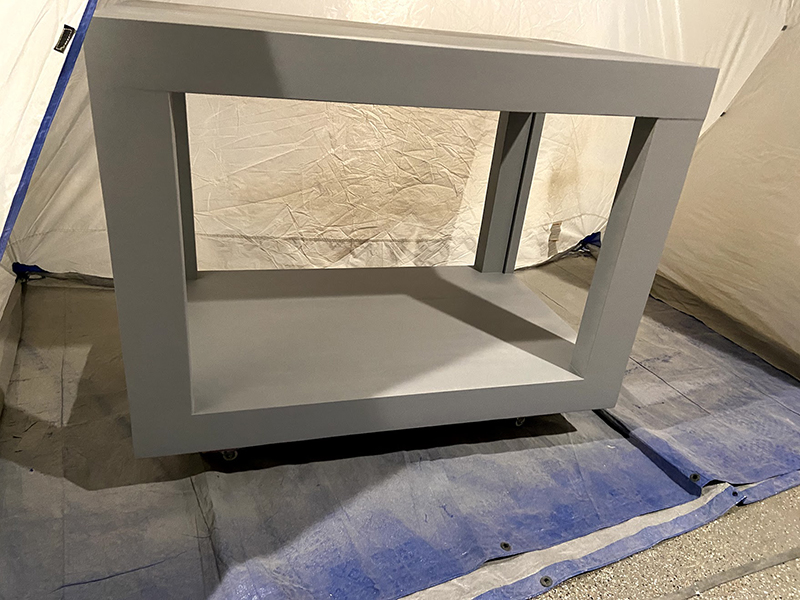
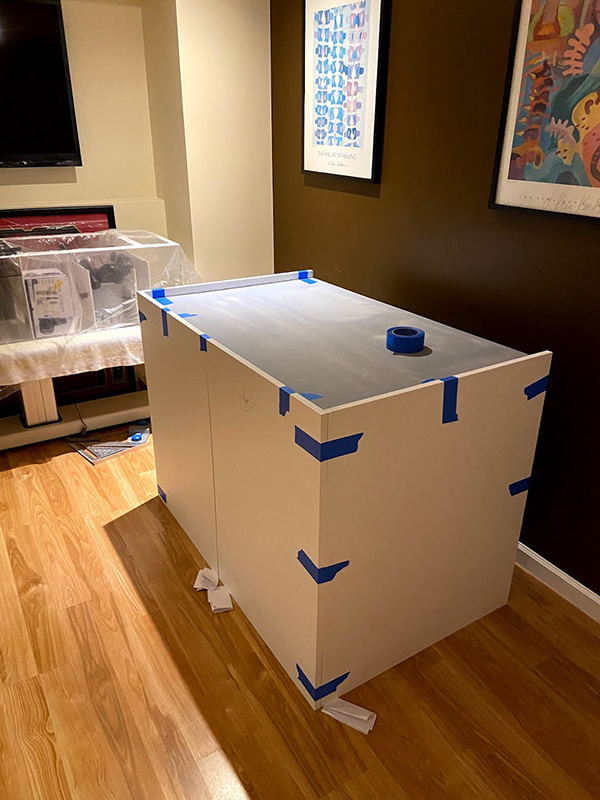
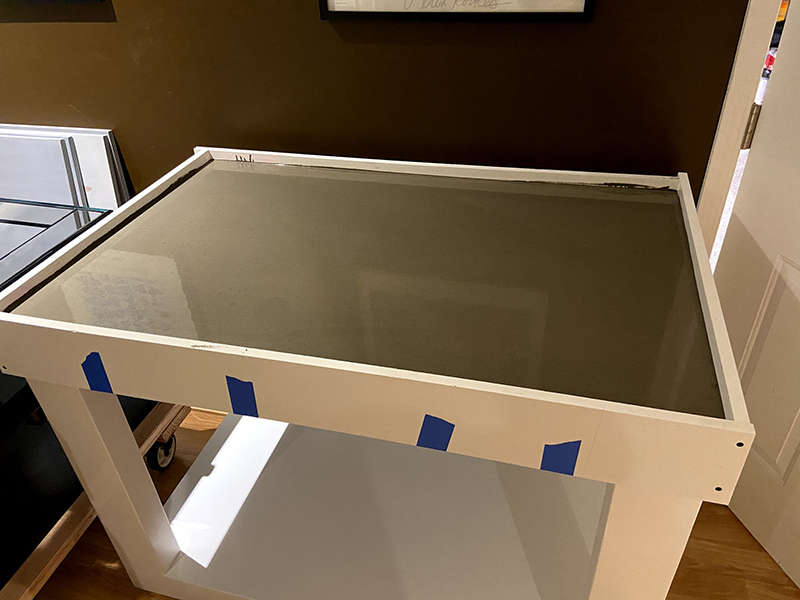
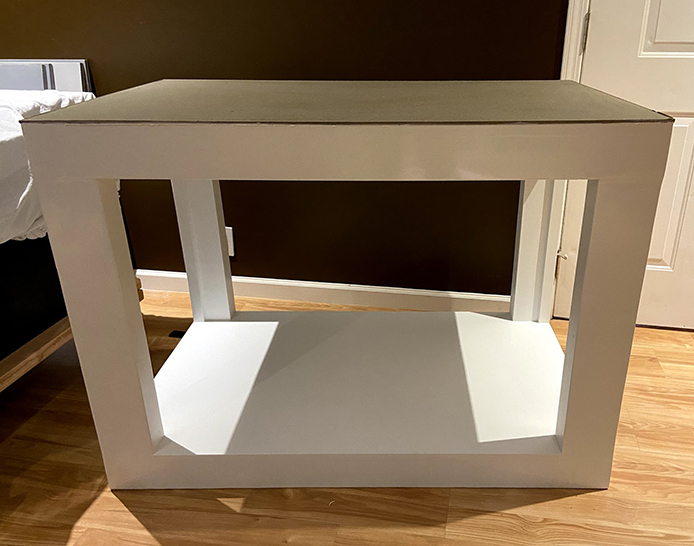
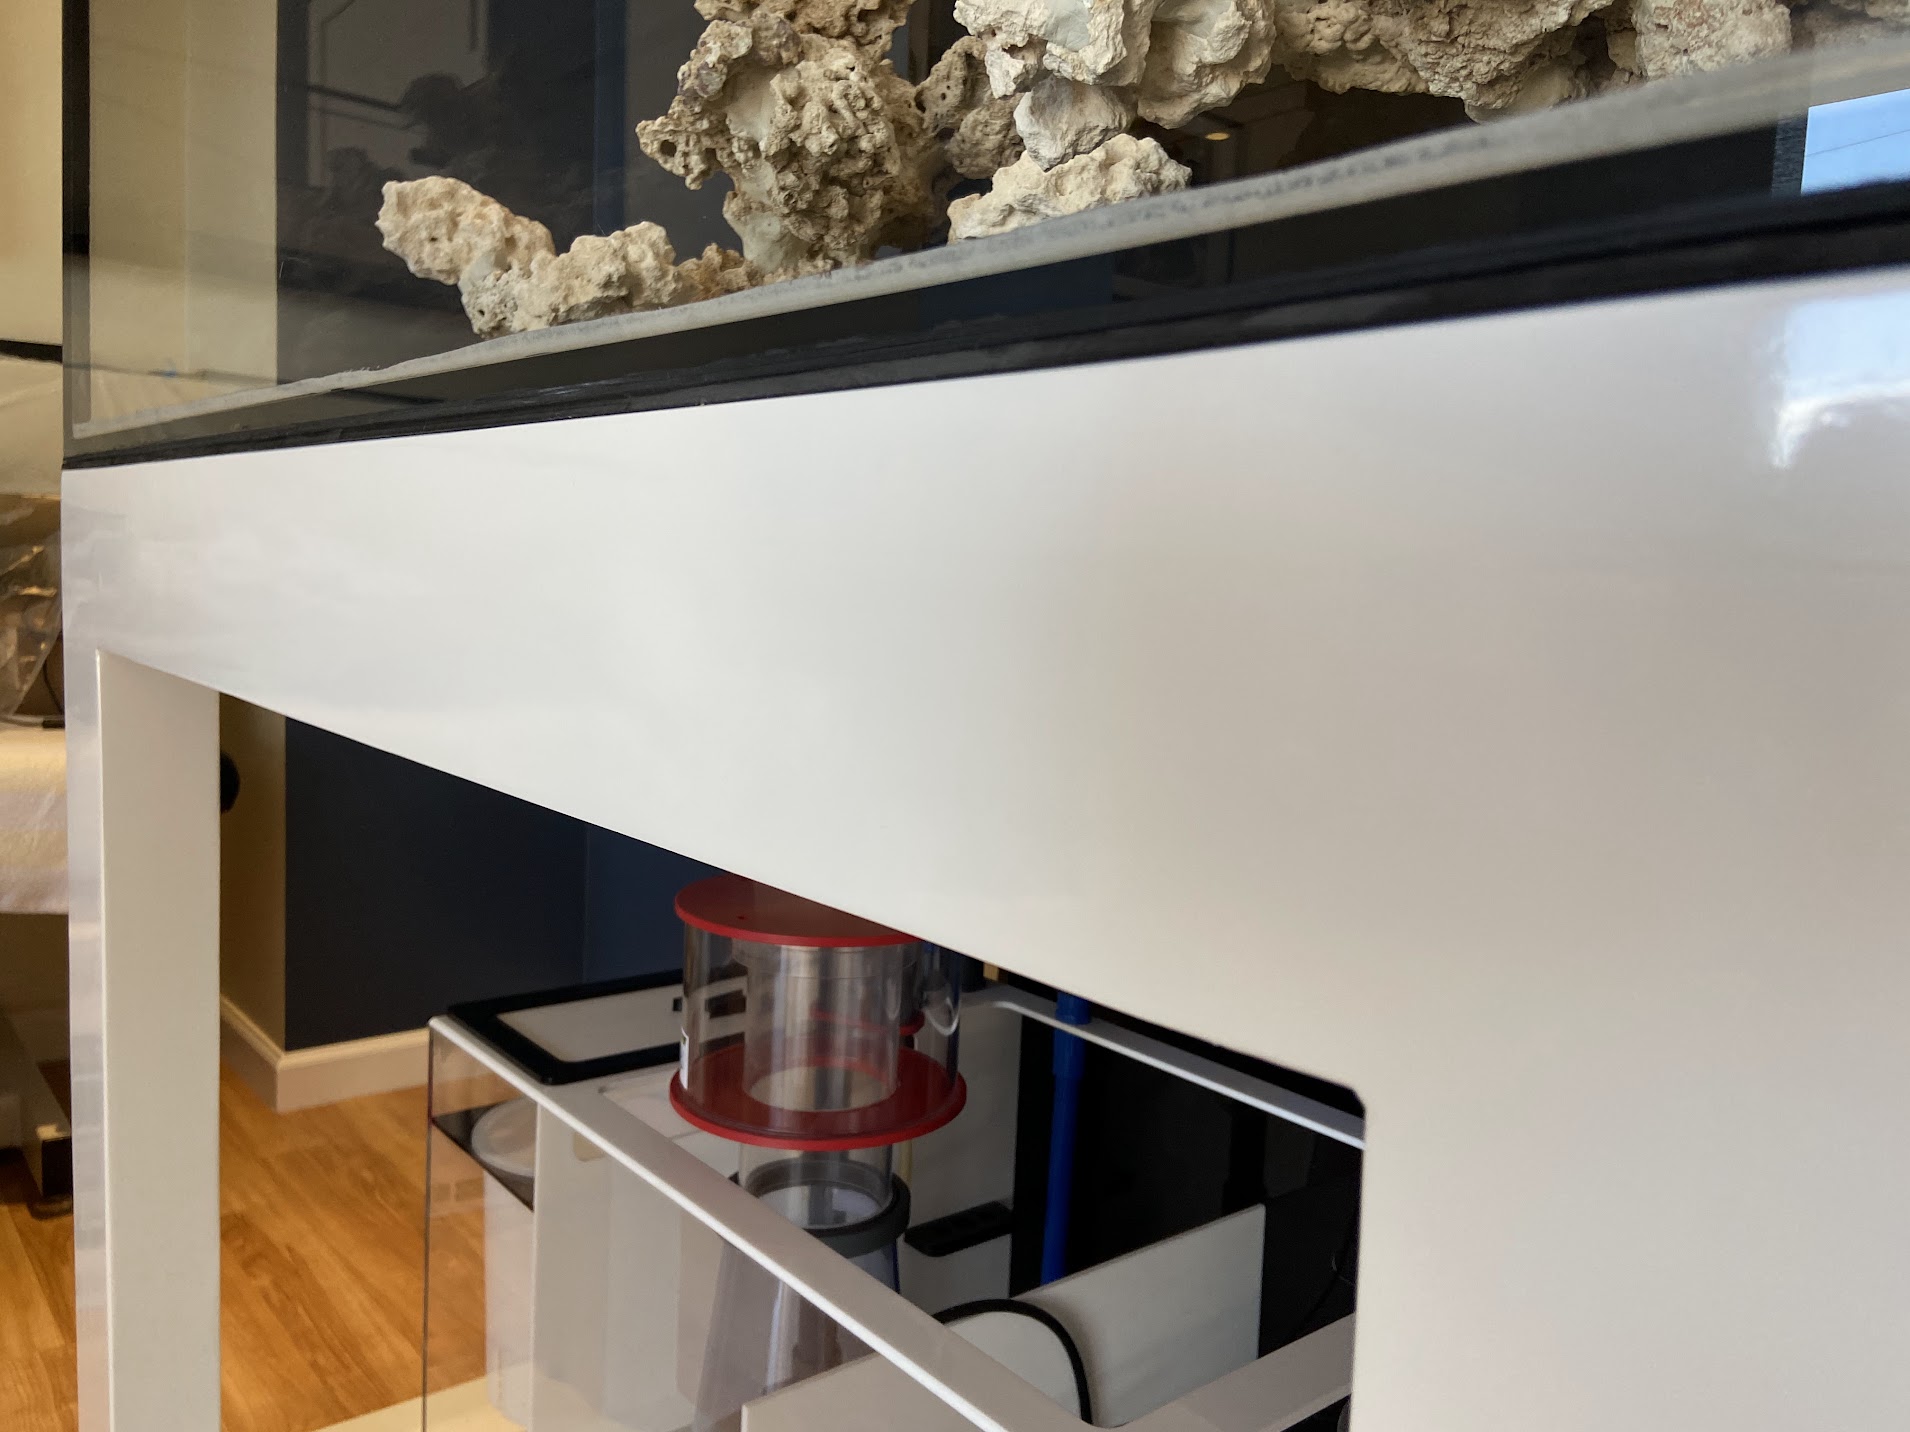
Just getting back into the mix after taking a long break from the hobby. I figured this would be a good time to document my build here for the local guys even though this place have pretty much become a market place...I'm old school like that ;). Just a bit of background info on the setup. The tank is a 150 gallon Crystal Dynamics tank (48x30x24) that I picked up used from a local reefer. I also purchased the stand but end up giving it away as I wasn't so found of it and decided to build my own. I went with a 2x4 stand since it was cheap and I had all the tools to put one together. I got the basic build plans on YT...tons of videos on it so I'm not going to get too deep into the details but focus more on the mistakes I made along the way and hopefully provide some useful tips I discovered during the build. Time for dinner...I will start uploading the pics with descriptions tonight! Stay tuned...
 
I mean the only way you can get this section to not be Craigslist is by posting non sales threads. But I admit BAR is the place to go for local build threads and such. Either way look forward to seeing the build, sounds pretty sweet
 
I mean the only way you can get this section to not be Craigslist is by posting non sales threads. But I admit BAR is the place to go for local build threads and such. Either way look forward to seeing the build, sounds pretty sweet
I agree with you 100% on that. I'll just copy and paste my post here for all that is interested.
 
Hello all! I'm just getting back into the hobby after a very long break and wanted to share my build journey with all my fellow local reefer nuts! The decision was made to get back into the hobby a few months back when I came across a used 150 gallon Crystal Dynamics Tank on CL and decided to move on it. The tank measures 48x30x24, euro-braced with low iron glass, and equipped with a 16" Synergy shadow overflow. I purchased the stand along with the tank but decided to go a different route so I gave it away and decided to build my own. I did some research and came across some aquarium stand build videos on YT and decided to go with a 2x4 stand because it provides an undeniably sturdy structure for the tank to sit on, 2x4's are super easy to work with, and it's very friendly on the wallet . I'm not going to go into all the details of the stand build (tons of videos on YT on that) but wanted to focus more on the mistakes I made along the way and provide some nifty tips that I came across that some may find useful. I started off by cutting all the pieces that I needed for the stand before assembly. Having a chop saw with a stop makes the job much faster and gives you more precision with your cuts but your standard miter box will also work if you don't have access to the power tools. *****DON'T make the same mistake I made and purchase regular 2x4's! Make sure you purchase "kiln dried" 2x4's. It's usually marked with a "k" on the tag/description and is around a $1 or so more then the regular ones. I had no idea 2x4's came kiln dried until a buddy told me about it. Not using the kiln dried ones caused some issues that I will get into later.

0sVHTxog2xYKmV_O2oP87A3V7tO7QQmsLCsRo5REALHFUO63tvqdcMPZIVWZe9HBI_i2jersWaM0i9FxTY-bwpWHZzWsKPLgQAFLDY_VmPs8WxNJMOixlLR4cHB0sfg5hn10mlZ-kgIhAXaXdG1glB378WDeKmEjJoUM2vou7jWAqcnMsDsHE4Mgc3SAffUw_qIxp2j5no0dGEeUim_Q8gfky3OVICqBb5Mnr68byWc1fiXjMuRklAJGv7S8pcjRvTo7BM5pliU0cMaFDomsOBnYX764_0Mwzvf36QjA139qWXuBLTUYx4wunHIfSUjJONqqtfGXCo5DEV3rQiNOKdl_slmh5AvBbfWdLe9ZWU_PdbtJ2MAIq5IDWqBCyelZxPEgxEibNSETCYItUvHml2I03DJCpKTOz9grRTiqI-SGaWJDufkOiWcBnl2YDNgiJWZ8cvbxXTeWcR9t7qT30ELloOT1Atjvn_gk-eBd_uRNI5SIsU_foGxLpSZffX_Rh2ogxdPyPYgTs5V-G28_KWJZD_TY833pUIfm-ea_xfDtN5vvaMxkGTN1wd1VWpKq5jSWpx4Fq3t69SAqnoW_2mdwjKnL-6FRWIbCgjP7Y7n46LVUoB8CKaeLMTwrc0pvOezY02F88j0DGc7eXgAAzS9-PXa67TzF-NSoTyna-IC-R74R3B0ZS9g=w513-h385-no


Assembly was pretty straight forward...screw, check square, rinse and repeat. The total assembly time with cutting took me around 1.5 hours. Along with the screws, I also applied wood glue to the surfaces that made contact with one another. You don't need the glue but I had it on hand so why not.
gHV_yz97uoO-o5oLo9tRmHIh0RD3g1mHL-rGlkH2LMnjWWMOdqcrzfLt0UGx_DCz62w6OvsMuSluN-QkFh9OTJEXK47cqJQnrqSk-2EaSU9vNbdgjPFg2e9B-i7njql-qsw2uVAjKJW7FgCqsmDUDFabqRwNV7L5qdEJ5Nc95TcslWeQiQ8j4_iFc83nUYrG7TiI_H6QKLoEsza5l9MRX8cMnVeL8fth-xqXm_AHJg7wPuWQ7tVO89JTKYmQWbZX76i5YHSROSo_AEwE1CZfVBetDcr7RJeIwSiQe-L0IWXzxo3tVnWxC6cKQ88pXdCFKzHiT3RUxgYjbxo6ePY-3_-su7HN7KSfI76GgbYctejm6D7oolRXUaS5JZ4X_lINJhcx-4EHiQ_Xy015gBcg6hDlrqu3YwQGmYuNDVxe_808FMEcMscLJBIQFDb1XPcJYpjC1IYumah2CWIU6NWUTw_ayjdw8RrKD3hilFKfCuEVjppQEFhYjnjA2zdAwEM3874IiIsYRHiDfs35oattiJwn45jxiwd_F76O8_2Ac7exgusiJoCJlZQjju-LW9Hh86X2a2Y64_BWRpE8K0Td3Xbhaa8Zn_f6WUoOcQ3pTb2uF0ql7JoDezk2dpIykkneOo3-LCHLph7X2NSZDHqBYnzoIEFhE_71j-yI4o1gQBKmt2YxbLBEvi4=w600-h800-no

IwdJTAxu_vA-zOk_9TVtecbyA5cfinfKTp58IpxZmMz5Lyy96j_my8RBQIDZos0O0ipG_nqq3wLCrD1RLqsi0ryeP9W5PNSQL1BmcMk0xk-7FrcG9vGu1osT-yfcO1upsxBehhSDgSCfxwDVz1DRTBV0mlzSlP2UKGmZ3UpS1jGSPek1Y9id_m1QMCldtYiY6whiGwVwh8-vMw8nLvsvrB_NuLfqs0k1Ytabh6rwdfEsqxyjLATUbRely2gzGtB2ZmcrsOLb1T8Vkrh1FrYCqlTtBZcL81o4zKjp7Dviq6D2H_cbAF1QihOUdGrhtRfz0GYx0Dh6Pg6B1nmX-PE5DeFH3j31a-KHSHZeSkQdvJawU4hsw-AvRSIanpNe5sk9Qqf5yqajEIiTCqPDbQGxS_1bfbUArDRvzNrkMER0-9Ra6ObYV35fUCYjzYOWoPVAYJZmQ2oWsnPbhZ5qTtsVCfi9Y5Xuojy4P5QL3djTgKZmI_WdGYw1IeHCt09D52YmljtLw2LJrgScvCiI5MsyOrIKfT5kFlA5rf2X1JwZs0uPOi1UBeu15N5sagtXANm7Jg9RpW2FPQqnqlRbaZhd9-S-7XmJ34N3StUFOOxf3iuyj-dJa0_9uh7w-FnASNOWFkcm-dthl1kWQK7Pe9bDMgdViiuj6A8vyRlSPBUiWaGPqlcxuI1QLu4=w600-h800-no

RXU_ZvrrWhH7E0N7_3qNW_svhyisiCPkw2oPyfUr-FiO-o_haxzwGKeTl2i03ScNvgs6je5eVPsROKMzZ7OxNMI5iIx4ICxmfV4ETcw3e1c10rp1osAhGEjEWg72IZR8GOSb9aMmo-auHELi928D7BmkA8n-lkrSt_x0MAXjShHHZc2F4LOUBSf2sUdoOlGRvATdRD6R19VzQm63oei6KE_vIPbPXVY7QsrqQ94Yw9dm40WmIZ35oycp6Oj0F5K3jmTu3819xtLQze_9lgW9GoDnMBOItQQJA7qRuEhWsyCeLjh8PrVtd5ZvuQCW-cmCg0dYYHluzbk6vZdlWNDe8rdp8ku7xXp_4gJL8iJZ1Cf4Sa6Nd_RxV88rtY9MMHc03dqcMa5xlodI3xyvh8kqqvceN6lpi5hT2v_4nrK57KZZjx3vH7Qw0X58QYqO3RN-OFpsxc36pDJb1l2Tg4vdQtiS7Bmq3fbdLEU4cI2aMWgp-Kx-CBAhSJ4t7r4X5bYMnRwCGtj7sCfBdmd0snICzHq7kQ2eODosuyu4a_kTlMHWLAHj4XgysxtYFLLuf4wwmJv4MpZ1NYgljhguXm4OZn3Z-bMb96MNniEcbtSw3K78tgbUp1_r863Vxf5EU_XCEBGxU-PkKJHLA40Qi_yJ41-PB7vbd05N6JnNkS2z5cruOQL1xWsrCZI=w600-h800-no


The wood glue between the pieces tend to make the pieces glide on one another while trying to screw them together so the use of a clamp keeps it from moving
mIUPQcGsjI2yf_wJXS_y3JrU_BMi8ELfjyOJtutfUEg0nrq2mx2SQzudpBmBTn359_yJ-lM5UoQctH-Yg4EnIUyt-Qlc3XJhDfTZNRh-0eTk9xsHImyVbf3fULCs8AliLY_TBxK_WN_HphWi4XIWpdfDPsIgtrHsmObO_sQaYm0_ZNDLQ4Kev7IRRtTbJLCt0FqObNhZZaOPD9n5vwUPToitsYk1-eYbON0ia2F-zoiwfU44pieRqGjHSq7tWV14yPKC8MH21iQ1JfAu2ZdgM1bmUpAASYJNnPlCZsfU6A0hFuW918srqTyh_XFG4VuU83QpLXrKrQOvALoJrTq5jmhpkqAJ7QTMvg74lsy2-gGhMYUqGku9e4KQFIGorWbR8RYYNbaeXGR9pYeuet0gx7DQMp3Tvx4-r5dx6kbftdJ87sfm8pl9winL2benGz9P6y6fMV7l9efOQMlJ92BFhU00DJRzhmUh8nUzPbG6mglSA395b9P_5Epd9Vohm6I3C3M9BHJQ4K35HG3LV0DtKmJ_9oTb7hiRaTOtdOHdDcRT4hWQ2hSsv43AxJbG42mJ9WWg5eae0EUye-fV7livmxScYpkAuHpwRqlhmDSeMG2j_JTV3zzh_99BkrA1KLp8IRg5vC7-qox5EDGAflvrZD5SQpcRMPTFKFrRuCgJOVnFpNFGPFH7tao=w600-h800-no


Here is the stand all assembled
y1sXgtLnx4iYhybxlOxdGnx6Rv83t81zv2Zxm_vrzucbhBTB5Aru1Hl4BK2xbmiMP3U84wMb662h6Pg6weHSVRL6jKRKG1jY-og9fc0oH1--QR69Nvbr9yVsgPuesY-vceVGkByW2jzv_WpBOiqA-uD8hyZpdpSe62erzyesRtDIebkagaZ-9V51y16_EBIBI4ZRB-oQ07oslAkIGAi0lEd1rjYy6HSeLyepzczWfpTruPmnAYvshlkVHjuh398ZV86GBEJajD36v3L18I2wDcyJhuwVW3t18VzNvZJCw0J3-SrdwHTcHl2hv8W7cuHLNn0WyzocisZjjVx_qJxgOOFujVY_vAvJLGo7UM0MCqKXYG3NatAQAcgTPnQGChbWx1xUecT9auK-4mtUD5sdDbEvurO7l2u8pvgwRzrRVgBMndKXptoXzNjGMygcvi7v_vuOcNIsIbpSFQAG_wpWD9xfTPXEjEsvkY4L-G44yNZmgSz8p-N74HKsNph_-Noc3mNCfUatEsb6Lu-3v8lGdzuebcX3DQyYHQvLfZkeQx3lVOddB48Q6pyoNL1vi-BhPtC7pgvyUIDQxTHf5Rcjk09cRg1XCVU9cPiwPQH1zCT2uz6ikRAFQBJU0edccCnnwZURpn8Z0IhthKCUpgtnqqx0H9-YRuvGB1bCYNukhePtxRK72OSWp3k=w800-h600-no


I used a light weight body filler I picked up at O'reilly auto parts (U-POL Fantastic) to fill in the screws and any imperfections I noticed in the 2x4's. I think it was around $20 for a almost a gallon of it. It's easy to work with and sands easily with a electric palm sander. I don't recommend using general purpose BONDO. That stuff is hard to sand!
jxM18lPIRC2JZVuVTrulqQpfk4LyUvcTWGX8GmBP5tdI5w2PrRJbzhguoaK8YcmdhCMtISzO_3F0UbNpW1XrbWcXFAlOM4UbGFk76xAUXzJrp1Klz8tTYnB1n4FFXrbcY6bqpvJu3UMufFauExcjCveWdR0PXi62PLn9LE-max2VKk78xyj5gvZyzE6Xje00ZiGvt6q0KTLjHcUVZpJ0jULiofKNqWvO35RBQQ25I20SX_fweysK-jXQCG0yT1GdZ1dA6FTXYl0dKRr9-VxNE0hXrkWcEzV6rtGaesYimd4OhNDiV9CGu23LlOGVnEQztYGy5jmRBe5DgYHNe25kUGj_4eJzsAHtRlJagzeyFbUSLIlEhVxk_HMGJnla9amS1xDJHL178UcY6MN502YFrZfWXvpti4pttAlgREUWU0ZntFvXfCbrVtgYs2klBOebb2KqNvEGHzWZigwtZiUJTHlsfxo07drP1iMiXRm7qnCh4HcgsMcC0C-36cUoY0ADkB9EG3vq077oOLWmxnpRixoDw8DAHxGymoXeHbIHrJdkUEzSnaTgQErjoXsfqlL3l5owiRzJgy2JR02kkL5wgPHC-_Nor9LWM6o6B3da4W8oR3pZ8qYZqBAMpYxKwBYSR0VFFcNWggettg45LJzavCTEhNui-Wdri2JJoDfui6EcMCMJMv7BN1c=w600-h800-no


I used Dupli-Color automotive paints in a can for the finish. Years ago, I built a stand and a buddy of mine that owns a body shop painted it for me. The finish was super durable so I decided to go the same route here but went the rattle can route. Here is the stand primed with it. After the primer, I filled in any missed spots with 3m Glazing Putty...those are the red patches you see in the pic.
p91Sxbk8jrafm_-U21mAKAVGLf4mww1tE4I6HqDHRay4gjKsiSo8wBDJDusF1qe3R9CAvun_ZgePJ44vOAJkpEiTocbiYNaiPAF1QdjbCK9hsteMFLWldMgef8HwYYCyHiP281kpnpG1_V5KpaBbMk6-Yopn3G-SiDgjsjy7yXJxa5rKSwZuREUr6HbSUlMKRVe4MI9h39cadBDroUaUVRBoMWhwjiaV0m_WwXITtUex7JuaQKY13f-8kWBpgk8FD-YYbi5JtBkR0w9zJkNEUY1jAQR_ZEfnUqL-TQlTq8SP0wRUM72xbyqn71VzBvYmLCTjLDmLZRDcY78JDU6iPQFrkkp53AQQy_FATcePh9Nsp0Zl_Q2KqK2vMjvkYHmbefEUynTFO5zOYzWi_BehvgNzbI5tXMWLdvRUjCL1EhC2GMNSn35sN-RY2MvrU4VSw9uCi4w51y4xZ_lUbXfhQMSYUh7BF-xRWxx0f-36-XnRypi6B81XpBVgjlJ2llC-mUfJhrLHMxr4PlLylI9PofDpef_72YEBriFPzV7YLw8l45Ocb2cEO4QjUHiRLI41rNhpqm9UOGnOnmVOo4iqqUDtp1Lz-LS0ZaGwnhVbfHpW7bRkL8x6TRJ2_qWCdo5bcrtGNuWR7YA3dUvDhq6kD6IBESoQTu5qwK9ZizivlTf-lrmlDpbr490=w600-h800-no


The first coat of primer was white. I recommend using gray instead as it shows the imperfections better. Here is a pic of the final primer coat
2umuMIBTcvX4gwwh16UFCI15KPjs1U_N6c1T0M_AhZs1cMHaLL6VGZ2A_gDysUpcClJcsyuRu6bW8yuUPLdLnFjtLm6sME5LY0InXuvPQRDBZeAB0Ln4g1g5QuMAqVttN_HF-O0fDOlyYF_bIZFw2wZ5GWeaXdHzOk4HgLxJ_yacAQhwa-1XJ_lYRsTcYDqTuHkHpTxnr9ZM-f8ybePwCPH9e0XTK54taro3hRq2q3muOBJIFXOL3zWavbkuRE0J-a83LjP1gn2lB30yb-dhTEjspfmfoXthNvcsZrDKaCGkuyWWnzm1Z7QHCPInOWFsguEeLPG-LYW6_PTec-jDvGr4YM2P25-fLojqLLj98fq8gxZOckgp8Muy09y0h33Vzo4F0JzxvPWMH6TVLYUlAvicvoLEHmwGPxkOP0WqfrFtLtpF6lN6RBMPPxDjYcuOQGiNVrTatXrokUvE1xYn6zbVFesGu3W5WD2xvYB7xWghwZ88nzBvyK_lF7InTlJRlZsfQXfREweT41YFBlHISO2yUyXiBuoj-fNeufY5ScfHJaImB9FV9A8GYwQC5D31-1nfb0xuQKeMp5m6TtjPsCgWG5_tuy1uSxSf0_FOXDpZ9hFeYpBHwswPRB6r2Ky9H5pwqG_8PvjK4rV3tNIL8qFs0SkkHwYyEkVVGOJxDCSDVdo3h6_rsbc=w800-h600-no

pFIfY6MG1p7LAr29HiluYcYgNvCYBvZQDYhNtBFHyQJ05YfBI8HRJWSlwRqVcPE2Qpw6lS_y8bV0Aaqx930yjsRBJbDvFfYcFg2Kb_wD914EAFqJCTiKQFqCrNlWBTGOyZ6yI1zyGbCyJ8iMWo-jDkn1swhxW9nVVtDLPs4thrj8jY3KbYt8YuHMqNim2sWeLU-aQIdjdTvp3yxd-OAkGZ0JD9kGKaq7ZBqGCfm6gvWJqQZ8qWJmcQdOFKb5bM-h47STpvkvl0jsqTi_r1sDxqWTGPGy0olNtLAZyT6e74U2Hvj36pGse0s9_q-K2Re1wfDtvCqB1rAc6dniKsugENa2Ch4GagcjQpP9YMaovow0O74pVKzljpn-vxVdST6PQCtAjpeiHbGGf6O5-6WAhSd8NaBjp5fqri5xEE7qcTihO8y-CflPDDGc_zKnkL5JSQ1QYfMEx7_DT-I0AxV3tZzr_kHw7RwYl_Guq0r3TUfOo2PoYK1PkW68us7PD4G18Tr5S8NyZahGKXzOhCAjPBx9WsKcQaRMc5uxRTtyX0RXFDp61YuOjGafjJoFrR597sdW3bRlBVHQJYUrLTHrWTg6cRuv73OvRIKRL5RpuebNyFjsf06UYY3ND6kHhWbUzCUxFNgOEo8VDBqXBtya70M1g0AINz_Vv0nO_T7VS2Puh_pqYsYqjjI=w600-h800-no
 
I wanted removable panels for easy access and installed magnets I purchased on amazon to hold the doors in place. Here I'm test fitting my panels on the stand and trying to figure out the placement of the magnets. One thing to note, the placement of the magnets have to be directly aligned with one another on the door and the stand. They will center themselves every time with barely any wiggle room. If the magnets are not aligned, your doors will not align properly so prefect alignment of the magnets is a must! I achieved this by taking a small drill bit and drilled through my door and into the stand to mark its location. This left a small on hole on both where I later used a forstner bit to drill out the hole for the magnet placement. I then filled in the small hole on the face of the panel with body filler...not a big deal for me since I was going to paint it anyway. Make sure to label your panels (front left door, left side, etc) so they match the magnet placement on the stand. I applied Gorilla Glue two part epoxy to the underside of the magnets to hold them in place along with the screws it came with for attachment. The screws are pretty small and the magnets are strong! I wanted to make sure they don't come off when removing the panels. ***NOTE*** The magnets I purchased (4 boxes total) all had different polarities! I found out the hard way and ended up pulling more then half of them off and reinstalling new ones since most of them broke when trying to remove them.

9gJFcclJqobYx1j-jfuXhWJXqLuhHtSET3cf1qpH4oCyjsHHnZym7tW4HVGJpvXJglwbPC6_i2UiSfwtyjA2sqEpPfSNSTh4T0DvUkOJNBK4r22_Ib-T0z-pyEdauSTcNHOVeFdSPGtTYJSb75f46TEh_M7B7MlagxtHlhipDgnCBCaqJqNw0eRjxFZK9PJg0Duv_50WPvOMgpktQB03Ts_lIRvCFmrxJ1uLNdKS35R8txbO6vwsb_W8SL8uYwTVtwR5TO2BlvsylSEyAQFVHrfAkNlrgG2eFzX9zdZRhAF6tKsSrHMfi1aH8UQ4_G4mx6QWe6gL-NmDZIDt08yQqo-PH-xjynx0AaXbA77qrRAgLNcEfeFAzQ8Bg7ub2P1d60zoBAiWoHdxzv7L8XnTzLxdJ2mpM6YOpOrdFm-aoS-V2D3O3LdrMBP0gmhGFTGsUxCv_KRrnXIUCIoHE7iMxdAEBqKNsEAP38mdL5uVRtQgjgO3d7IACmTFMzM33Tu8fQLPlUyV6zceaWBKfBzd24im3zaUQBashp2zVulrwQ5ULC5qPLhgjSl5qZ3yAmJ7IWupPDH_4T5vRh92AtxlZLq5_Oj2Z0jGGggfWzv4KOupzj5VFp3gwQj2Z0_9PG7-6mGZZXMFaJss6IEzzcMC36xmfxANQrGMtP406CHYMaAIiXAKe3Dl3WE=w600-h800-no

ZsICUKLymP4chmKHyhT2chyJODpY9PfjFFaD2i6-96GT_3Tg8zOgsOp-Nv8z7i_usvsfK6FNdBIt1Az3l2dW6M1kbl2xNn1PdVMST5Aa6TwROLjVWzQw_aoR8CGOmu3T6Sk6-gL7ThI3iu_1REPohQ6vEhDrWg23svnUJQ_nMurlfxT_ZbZGUdhVwkqECOm_7Syql440FFkwOZArdM48jEaA3c4dD3idTicq5vQzio9aAB6R7IxRvZf6bMj7xBx32C3ScIk6N-WZmp5Hn8JeLYWzPGqvNSGQgJy-EBR50fx4G7_utunWjj40YIUnvtWeYW7vLtOqb0IrX_qwVMvGLX8IwmpH8xDFKn9CHco5LnOqITFo_OYro7ROmlpcIWo6dxm5O5lhlStioLCaORsS8rhcVhvz6rw1Rk1JVnWiLzbOPwm3epnO7zenAz4wUHOqVC6Px-DFF7m27xWeTZi4-mygidepeLB1BqI80ghUH_JtWjTZaczvqb8tp7kSoJ54k_zSlPYkSP3zJyM-inUwtESjkehZ-GnzugB320LNjVA1gNnnFxuJ-rhWt_s9cTbYdEYtkCCxGnKingZYcAt0KtHpHz5MZ6DdkGNrKlXe3iJGyNE3COfb_h5meUd0Gznh5z7nS8FF_2bPHBaCMHaIB0yaR6lQ5tZNQ9HHKTbbqoMuv-_fYdyZ81s=w600-h800-no

SDB3yPXm4Q3eDu6XnvvAy3vWPykmkLyKw67TkHgpnnQaW6CkxwTyeJFLPnI93NU2KrS6rHqTF6XOzMP1IVI-VL56v6K3t5Dq7pTiDFUP2ATiwirLiYIrhXnsz0VlxaJNLHIVhL2KlXM1HgSAowAUsESOyl1KbBSbMuSO69_EyqXFvi9ZIFZo6Sz3WyLX7gGLWNRE19a1eFvOHtJsk0BW96py2yVKMtvWaS5OoSswrl5BtMw-WHGOOS8cSU7N9P0ikmQkeh0s2znFQn1k20xEpq8MwYPeIolw16jBFBatTsh1G_KRAponf2fr5OE0tNpZSS4jfcl7FJkGzct9AOYz2oNOhRf9K1eU1sQJ83QRga8fZdpAtRhc5WQjRfFJYo5NRxFpixhtKELIF44noDWuJGJSwoed96BxwG7bhRY6kqvakYL4Sz6RvSJvmQyvIUnzxN8z6DDwYwB99UYZfVCWh2_pPJ3Z_kT_MSxv6jwxskrwrng1hR1b6_eJYrYdSFUfC4MS4htwgUlueDMakcpq6Vd9PpsMZDiITXEPtqI9AG5C2YA_d9nPKEXJB7cTR88g3i4HFrsSibu4dnJnwHAs318FHbZm0RuzCCS9ZwMP5jDP7clay-boaEbcxQ3n-6lTj7DJus6SwQWKe-EHdnd6i7BAzqtw-s5ndEmCv6rYRZW_Ou4n0-Wvn2MZq4z0=w600-h800-no

b56mGGs9QE9q7bFgKHuUJa59J3QQyUb0yEEE_sHUoAz-d0yeQezq0W5U5L2EM58RPTm-j8_GaanSlTFLwnL2BSvOsmnyYTcqUod4MiHQ9OFw3YIQNj4ab4EGffGm0jzuWgLIofzv-uExn_k_46a9EETv7gmZCTFTzuHi7EdOQX3mS8ItbRARaaUVuY3pyp8ZgwjTDtBYz56lnBIR6uEyIIxVM90UoqUpe59Ipv89llWk1xXpR0oCi0QMvSt7QAxyVMDiygnxS9v5t2mD0gF6qVUep-EC64ffDvmL-N2EQI3i_i7v6ah7WJqpQrf3faeGd1CYiG-KFpxF84GK_m98dWWf4gtZJCPN_facZy4z5_TwdiOACtp71X0iRxWOmP3N2ZksKZ5Bl44ZCnefzVRvsNPQByI27c40e-Czl2Ynn3_MMmn8gI8eq6WJiBOjLqFoYaTPWmeQhhhiMUauVYXPx73ZcxR2DH7XGwwxt7SYTe1-6dKIMEynFBbqFbaRYUiHOscYVfv98pRasTkvTMH-vaX5Mmu2vN0eoCRlbd3ufTaD3v-zpHyVRV9RlpurSaUBRh0I9kOGIjuNZWHyoQgNBVMNqUEHMZwM2qgLVJe3H5proS2RkXoU1KXnU6qNh7ZelgD-Fvygik5Uj9s6eBXlcwdjlDzs-iq1LDCzNURMeVXgRtrMIWPrn5c=w600-h800-no


I wasn't planning on covering up the magnets with filler but had to since removing the magnets with the wrong polarity really did a number on the stand. It ultimately gave me a cleaner look, but I would've installed the magnets right after stand assembly if I was planning on covering them up. I had to use the body filler, sand and primer again...what a pain that was. Here are the results with the final coat of paint and leds installed.
fRu2ZiUFzuQBKx6Mcbdm4ReOkAAV3xYbr3n9gmYeGWdjeBU5QmLfeCs-y7ojbAjDQ43AGZPLAWV_nGUo93vXPyu_s5UDkYihycLqk765J1dvLTdikmfbdA9NwPftFqYRFk3zAX8dF0BmTp3f5B5VagCdObz9RCwYihZ2TJYQ1C0DEZfVCb0LFvI2-1kEqFmb7cFsdTmHW9mo3Lmm9tCLY8H5_cEVM7b-Zp2SMYwe0FeHC9dhEak26cuP6ZG5YQaM7qTUrEOJtL02OSaMv34_0wWiziDj0-zGo4cUHO34CIRx49tF369GEzgQqRslmggWuxH0t5-2m3Zu81lU5KIdQHaQ5d2OvwN4AhzkA0nOqMTxIcwduKKtY7DJRCDCslrgEWDF3_oMfAhjYQJbNwsGkD_DXGibNqgXNcMYj03HJ6qheCnk3SFeOZdg81sCskKoNjDN_Heuq8f8YsmYkBbIIDVI8oD8AZVO9JSEOdtCg-5rxQMRijn6Gbrja30eqO52alqjmfVreDJ4YwzT1NBvLf-J1shOwWwBRaFmTP8rizT-vcPyqf9k0Sf_X8CS4gMTS0Q8uG-jWtGA3h8lmfnaogpBfZxAh013s3pNfcmrxMlBv_H-iFw-JHfrcftY_GEDobGCL8xXwsnFpByVZegWoy-wWDsyzwHlm62Lvt4dUz4t_3oVEUwPC0Y=w600-h800-no
 
I anxiously waited 3 days for my buddy to come over to help me lift this tank onto the stand. The day finally came...I was giddy with joy...haha.
aAPTTFY4vD6HBxZyrnSUHBYf1P-C-WGa5DTVquH1tyVIkK6QBS4giUGUuBvNaISijl70PdV_0NyXvkuBWJa4tg-Z7XLvzsz0Wg7PKq4e1L9qk-JOAfthEJn4kg8yo9l9HXTIVlemKuadJ18tyyXG_2z3Oh6aODgBpSodesUICSEJVS6UOLshhOc3Z9-w_JaK9qxCVwTLs3LqaFXVzpYSrJ1y-jqLI6UJBHaRqq7XCtjpVAWZ2AGrukYA5GPdcrR645m_81LklNVyKlCig1vNGv3ZczGxugzHpyzFC1u_x9kPG5Yhjy1_gTk-TrggrVCn5fsoUSOduoHlX7Fq88c8Qc66o4skQHg2Ug3VCmupDRmhIJkCnAbozNwY84lYr0Xs-4O9USGJggQmZcIQVtqCEp9cd_UmxNe4KLURTe8fjTvPjzzqgFxmmsgJFoZ4z7dBphdKu3wTa08n4ZK7pi5pXR_al0ZGc3pYRlLlbprq9Tm-K6Ktal70Hst6fTOdye_aIxGvh_dVZ5nRhDj5Pwa8wd9j8Q5udl-Wy_moc4_RxQkK81E-T8qILA4db0xHAf07L-speofPG7ThfTFYFNNi_fM3MUmc3rWetTFYQoXSRqYBJl1ki17_HThy_UjZuL5VSjKcvNt1XgL4a6_JmG7DkdVp4u-j_GsrCXCDTsXbIOhS-V3l1bS5I1k=w600-h800-no


The next morning I noticed something was terribly wrong! ***! It's getting late...time for bed...I'll post more later today.
 
Great documentary, with sharp photos.
Patiently waiting commentary on kiln and what actually went wrong.
Hope the placement of 30 wide tank doesn't block the view of TV.
 
I know not everybody is in SF, but for SF and the nearby areas, Beronio Lumber has a great selection of high quality kiln dried dimensional lumber. A higher grade than anything you'll find in the average big box store. But all wood moves, whether kiln dried or not (though kiln dried should move less). So you still need to try to pick out good straight pieces, buy a little extra just in case one piece decides to warp like crazy on you and try to get your stand assembled as soon as possible once you start cutting.
 
I know not everybody is in SF, but for SF and the nearby areas, Beronio Lumber has a great selection of high quality kiln dried dimensional lumber. A higher grade than anything you'll find in the average big box store. But all wood moves, whether kiln dried or not (though kiln dried should move less). So you still need to try to pick out good straight pieces, buy a little extra just in case one piece decides to warp like crazy on you and try to get your stand assembled as soon as possible once you start cutting.
Good info dan...wish I knew this before I started this darn project!
 
Ok...on with the build documentary. So the next day after a bit of gawking at the setup, I noticed that the front left corner and the rear right corner of the tank was not touching the top of the stand! Called up my buddy again to help move the tank off the stand...not fun...it's heavy. After some investigating, I found that there was a slight twist in the stand! This probably occurred when I was assembling it in the garage. I checked the garage floor with a 6 ft level and found the area where I was doing the assembling was not flat...UGH! Long story short, make sure you do your assembly on a verified flat surface! Doesn't have to be leveled, but should be flat. I came up with several fixes for this issue and decided on just using leveling cement...more work...more hassle...sigh. I used some scrap material I had laying around, built a form around the stand, siliconed the inside edges, mixed and poured in approximately a 1/4" worth.

ACtC-3ehrP_0S5pZIYO8qKi0g_uFhdqOi-5IwlKNp7_KnYvDY1AbpU_wJyxADcMW8lMzaHdubYf9YCplbKAGTzlbpsZKK_60RPbyw8h0Mye_6knpzDFTQjGirm7odUeZnLaNZQJMYuOBhMocTCqft7AiDnVZ=w800-h600-no


I removed the form the next day not knowing how it would turn out. I was pleased with the results

ACtC-3d7uWPnFPsqD5y2Ak8dN152Jwh6zUORRdC8qMDqaS4S5ODyEK780LT3w5HSnpl6MqG2SdoyqnnHA4mqEJeyXBXa2jlcA05IY6dB_EHw4GYjuFRgm8HyRuk0wNbszJsKkIISiBGrdNIPklpjaHm8iIg4=w694-h546-no


I scraped out the caulking between the concrete and top of the stand. I did some light sanding to flatten out the top of the cement and to soften up the edges. There will be a slight "lip curl" on the top of the concrete where it meets the form. A palm sander with 80 grit sand paper took care of this with ease since the cement was not fully cured. I wasn't happy with seeing the layer of concrete...so more filler, more sanding, more primer, and more paint...sigh. I originally used dupli-color automotive paint but decided to just go with some Krylon Fusion for this last repair. I was very happy with the Krylon paint results. The paint sprayed well , can easily produce a nice wet coat unlike the dupli-color, and was much cheaper! I sprayed a total of 4 coats for the final repair. I wet sanded the 3rd coat with 600 grit wet/dry automotive sand paper (let the coat cure for 24 hours prior to sanding). I waited about a week before sanding my last coat. I wet sanded the final coat with 2000 grit to even out the sheen. The over spray from the rattle can will make some areas look more flat then others...just lightly sand the entire project until the "sheen" looks the same across all the surfaces. I finished it off by buffing with an automotive "heavy cut" polishing compound (Meguiar's Polishing compound). Sanding will flatten out the paint but the polish will bring the sheen right back. (TIP) Soak your rattle cans in some hot tap water for around 10-15minutes to warm it up. This will decrease the viscosity of the paint allowing it to flow better out of the can and the increase in air pressure = better atomiziing of the paint = smoother finish. I just took this picture of the setup as it sits today. The stand is perfectly flat and the tank is resting on the entire bottom. As you can see, no visible concrete layer. I purchased the Innovative Marine leveling mat for safety measures...probably not needed...but hell, I did build the stand lol. The tank has a starboard bottom...that's what you see above the mat.

ACtC-3cuSL_igV8X4sscdNnP_bR2D12EDkIGhUdEYyy2Bdp8W5IGfvod8zsYEkZPzLVYZJjZsf9_GbaVZBVx_ue5tUSyy0a9nCUr30xHXlzO1gyAIVN5EMUM9zlDdDc7oqHTbJJ2Wyrwz2l_WVnRPPiU7gs0=w1910-h1432-no
 
Back
Top