150g Family Saltwater Adventure Build from DasCamel.

DasCamel

New member
I'm starting this thread a little late, started the idea of my build back in September and documented with pictures along the way. If you want to cheat a little and look ahead you can, but I'm going to start from day 1. I was a total beginner, but deciding to post here instead because my problems have advanced to a higher level. Over next few days, maybe weeks, should be caught up to the present. :)

The whole idea started back during Labor day in September, when my wife wanted hardwood floors. At first I was against the idea due to the expense, but after looking at our carpet it was probably a good idea. So after some fierce negotiations with my better half, we traded hard wood floors for a saltwater aquarium. If she only knew what was just started....

My saltwater experience was limited to a brief stint back in 1985 with a limited budget. Let's just say it didn't end well and this time I waited patiently until it could properly be done. We talked a great deal about the location, had some crazy family ideas and we finally settled on a spot. During the time we had the floors installed, I spent far too much time on the internet reading and researching the plethora of information available. During this time, I found myself cruising these forums far more than the rest and picked a saltwater home. Thank you everyone, without Reef Central's help this would have been an epic fail and I would be divorced by now. :fun2: Without further delay, let's get to the build details.

Sincerely,

-Das
 
The Build.

The Build.

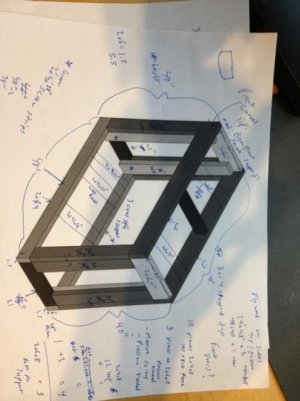
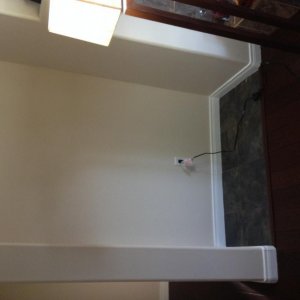
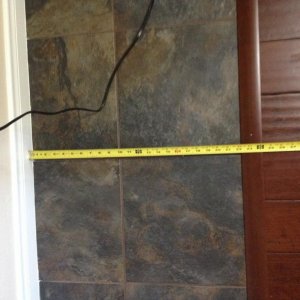
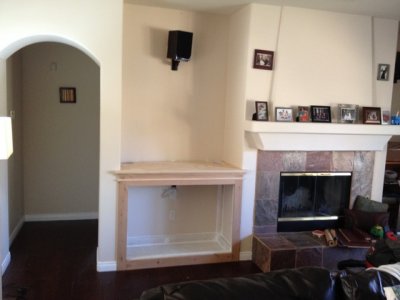
So around late Sept to early October we had the location settled upon and I trusted a local fish store with a deposit to order a 48" x 24" x 30" tall acrylic tank to fit into this space which was around 50"x 24. Attached pics of the location and early stand design. Tiled the area underneath the tank, which was probably a complete waste and created that ledge for the transition. Oops.

We were limited in length, I would have sold a kidney(maybe not) to get to 6 ft but didn't want to tear down walls or do any major construction. I understood that water volume is your friend especially as a beginner and wanted as large as possible buffer for my early potential errors. So taller it was. Plus, everyone had long, tall provided a bit more presence in the room while being a bit different. Yes, shallower would have been easier, going tall has worked out well.

So fast forward a bit, 3 weeks had passed and I contacted them of the status of the tank. I really wanted to support a local business so I had given them the tank order. Mistake. I had found out, three weeks after giving them the order, by contacting them, that they had effectively done nothing with it. My best guess is he completely forgot the order until I had called at the finish date 3 weeks date. At which point he said it couldn't be done.

He had promised a bow front tank, which he could not do and was trying to negotiate a far higher price for rectangular than I had been quoted previously by non-local vendors. LFS owners, WE WANT TO HELP YOU SURVIVE, a little good service goes a long way. Keeping promises/contracts helps. So 3 weeks wasted, didn't want to deal him anymore, canceled the deposit with the credit card company and moved on. Zero business for a store that is only few minutes away. Supporting another store in the area now much farther away. Also discovered, most things these days are just a keystroke away for less.

Frustrated,

-Das
 

Attachments

  • IMG_1069.jpg
    IMG_1069.jpg
    36 KB · Views: 3
  • IMG_1132.jpg
    IMG_1132.jpg
    34.9 KB · Views: 3
  • IMG_1134.jpg
    IMG_1134.jpg
    72.7 KB · Views: 3
Getting to the tank.

Getting to the tank.

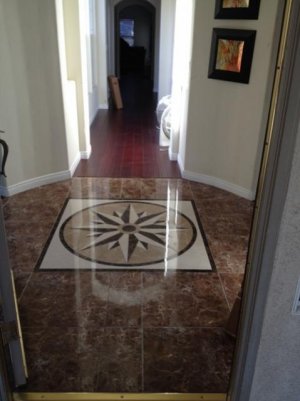
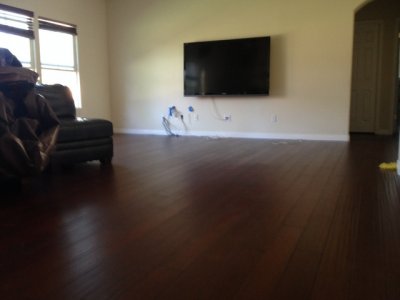
Moving to the positive, the floors and tile entryway came out great, with only a few small shenanigans. Quick side track pic, because with the floors, happy wife = happy life. Pic attached.

After the fact, we realized its the same symbol as a particular government agency, "Welcome to CIA."

So, shortly after the LFS incident, doing a little research online I went with a TRU VU rectangular tank after discussing the options with Scott. He's a little hard to get a hold of on the phone, but overall did a great job going over all the options and talking me out of a few potentially bad design decisions. Took a little bit longer than expected, but nothing crazy.

Also, worked with Scott to design the sump. Which was a 50 gallon acrylic, that is 36 x 18 x 18 with three sections and multiple black baffles to keep the algae low and bubbles to a minimum. Came with a ring to hold a large 200 micron sock, large section for the refugium ad skimmer. Well designed, enough capacity to keep from flooding if the power goes out. Again volume is key, the price including shipping was very reasonable for a custom sump and tank, everything made from scratch to order.

The final tank size was 48 x 24 x 30 tall acrylic with dual rear corner overflows. Lids and two opening on the top along with overflow access and well designed teeth keep fish out of the overflow area. Pictures coming soon regarding the tank along with stand info. The stand is were it gets fun.

-Das
 

Attachments

  • IMG_1086.jpg
    IMG_1086.jpg
    34.7 KB · Views: 3
  • IMG_1109.JPG
    IMG_1109.JPG
    78.3 KB · Views: 4
More to come tomorrow.

More to come tomorrow.

waiting to hear this story :-)
I always wondered why aquarium builds were always accompanied with home remodels until recently. Now I want to move to a bigger house for a 300-400g aquarium. Someday.

Fun fact, regardless of your tank size, you will always covet one bigger than yours.
 
I always wondered why aquarium builds were always accompanied with home remodels until recently. Now I want to move to a bigger house for a 300-400g aquarium. Someday.

Fun fact, regardless of your tank size, you will always covet one bigger than yours.

that is so true............ I recently got to convincing the wife I need that bigger tank..... 84X30X30.....lol
Not a reef though.....
 
The Stand.

The Stand.

At first a buddy and I were going to use the rocket engineer design:
http://reefcentral.com/forums/showthread.php?t=1169964

Using 2x6 for the top frame would allow the stand not have a permanent center brace. Which is huge for maintenance and access. Anyone planning a stand build, space, every last square inch underneath is valuable. Full access is priceless. With the brace getting the 50g sump in and out would be impossible.

The conditions from my family were, it needs to fit the decor of the room and look professional. :eek1: Wake up call, neither of us had any real construction or wood working skills. We were complete rookies, noobs, beginners, in over our heads but didn't really know it yet. So I ordered a few tools, miter saw, jigsaw, baldes, screws, glue, clamps and other random tools for the job.

"In life, sometimes it's better to be lucky than good." says Lamar Gillett, the only P-35 pilot in. World War II to shoot down a Japanese Zero fighter.

My friends friend, a contractor, specializing in carpentry happened to need my services. Such perfect timing, saved the project from myself and brought just a little more skill to the table. So, we exchanged services, to everyone's benefit. Looking back, I could have built something functional, just not elegant by any means.

I showed him the rough design posted above using the DIY template. We spent some time tinkering with the design, figuring out the details and had a date set for construction. We're now in late October, starting the stand build, with the tank arriving just a few days past due, but enough that we don't have it before construction. But, we had the layout planned out so construction was started. Details and pics coming in bit.


-Das
 
Quarantine Tank.

Quarantine Tank.

So right before the stand construction was started, while waiting for everything. We decided to work in parallel a bit and start the QT. Figuring I could get past the 4-8 weeks of quarantine in about the time we had everything else setup and cycled.

So QT design and getting the family involved. At first, was a little hesitant, but decided to have the QT in my daughters, and place her in charge of it. She's ten.

1. GFCI outlet was installed in her room for the QT and also in the living room for the DT.

2. Setup the full version of the Apex on the QT to tinker with, using a simple wireless adapter.

3. Discovered how finicky wireless connections can be and hard wired a Cat 6 cable into the living right behind sump area. HARD WIRED Apex from Neptune is very nice, it can't update over a wireless and it avoids major networking issues. If you can, hard wire.

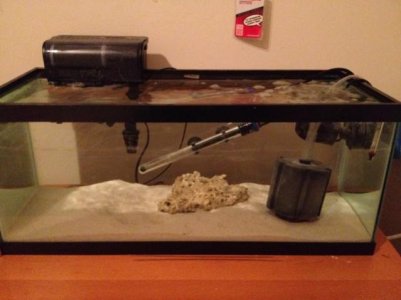
4. 20L from Petco, not on sale. :( But it is a good size for a QT, setup with some extra "live sand" that was damaged during shipping. Foster's and Smith kindly sent me more twice but they kept popping the bags in shipping. Sigh. I just gave up and used it.

5. A large sponge filter for filtration and couple pieces of dry fiji live rock from BRS. (Great stuff btw.) Eheim Jager 200w heater, Hydor Koralia power head, glass cover, and a cheap led light for refugiums off of Amazon. Cheap glass thermometer to backup APEX temp probe.

6. Instant Ocean salt, refractometer(they are awesome!) with 35 ppt calibration fluid, DON"T USE RODI water, some don't calibrate at high ranges w/o fluid close to test range. Mine didn't. Caught the problem before anything got hurt.

7. Getting my daughter involved and teaching her about the chemistry/biology. Never too early to start, but she's a little chemistry nazi now regarding the cycle and checking all the parameters. She even gets on my case when I didn't "properly quarantine" a recent fish purchase. Not bad for 10. Don't underestimate your kids, get them involved. In the end, without both of them helping, all the tasks would be much tougher than going at it alone. Plus, the skills they learn can be applied in so many places in the future. Priceless. (They help far more than my wife, shhhhhhhhhh.)

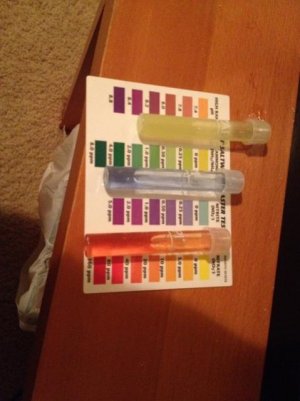
8. The cycle, had my daughter setup a little notebook like a pro researcher and document the steps and cycle reading each time we tested. Fairly simple, dosed ammonia from a bottle to establish a 2 ppm(kept it at least 1-1.5 during the process and wait. As we tested, got both of them started on some early chemistry lessons. In about 14 days, cycle complete. Some pics attached. Great memories. Huge water change and we're good.

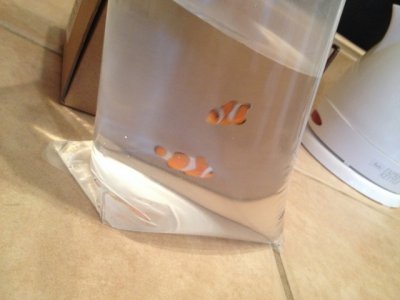
9. Going to a new LFS farther from home to test, found out they had just gotten some tank bred Ocelleris clowns, juvenile. Perfect! Yes, the entire family loves finding Nemo, other clowns were not an option. I would have lost testicles, completely out voted. So picked one bigger than other to avoid serious dominance fights. Thanks again Reef Central for prepping for all this. Also to, https://www.facebook.com/pages/Bakersfield-Aquatic-Pets/104071879626016 for providing the fish and all the help. Wish I had known about them sooner, journey would have been easier.

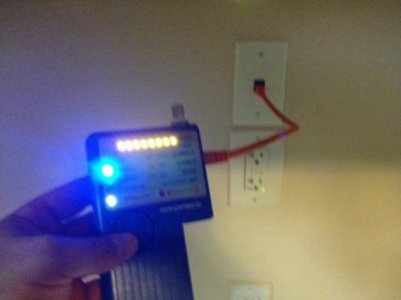
10. Pics of the first additions to the quarantine tank. Network wire tester, priceless.

11. Stabbing a hole in my hand with a cable punch tool for the Ethernet jack. OMFG, OOOOOOUUUUCCCCHHHHH! Down to the bone, fun times. Care with instruments in the future, check. Working when tired in the evening wasn't a great idea.

12. Frozen mysis, pellets and flakes used sparingly to get the clowns used to all the foods. They ate like little champs. You could say, at this point the family was hooked, addicted and eventually headed for saltwater aquaria rehab.
 

Attachments

  • IMG_1223.JPG
    IMG_1223.JPG
    95.8 KB · Views: 1
  • IMG_1204-001.jpg
    IMG_1204-001.jpg
    35.2 KB · Views: 3
  • IMG_1185-001.jpg
    IMG_1185-001.jpg
    32.8 KB · Views: 3
  • IMG_1201.jpg
    IMG_1201.jpg
    25.5 KB · Views: 3
Custom stand dimensions.

Custom stand dimensions.

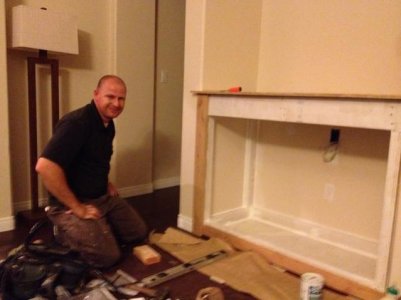
We went with 40 high, to give the tank more sump space and working area. Also, with being 30" it magnifies the tanks presence in the room. To kids it looks massive being tall and for adults, don't need to bend down for viewing pleasure. We built the stand into the wall studs with I believe lag bolts and placed cross supports to support the middle of the plywood. So in the end about 51" in length, 26" deep, 40" tall for the stand. After the fact, I discovered the extra sump space height on the stand is VERY helpful. Before the fact, hard to understand how much time we spend down there. Already dreaming about a fish room....

We cut out 6x6 corners for the overflows and kept the back open on top to help with ventilation from the sump and passing cables behind the tank. The back of the tank will be black to hide all the cables.

So, we get to work building the stand into the wall. Always fun to watch an expert in their trade operate. Learned so much, not even funny. Reefing is such an educational hobby, from so many aspects.

So, here are some pics of the stand progression.

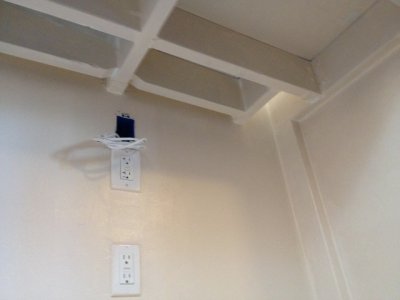
I had an electrician come the same to day to install a second outlet, GFCI, with a dedicated 20 Amp to the stand area. Reliable power on its on circuit I felt was critical. All I needed was someone to plug a vacuum on the same line that had other items on it and trip the breaker. Little bit more costly, but dedicated power for stability and peace of mind. 20 amp was probably overkill.

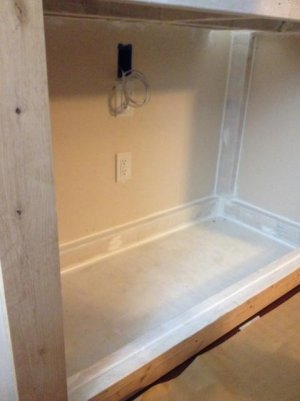
We used knotty alder for the wood, ordered custom cabinet doors, and I went to work staining and sealing the top getting ready for tank and sump. Used outdoor graded white paint and silicon sealed the sump area which as a wood frame basin to catch some spills before overflowing onto the hardwood. Worked well so far.

Biggest design flaw after the fact, accessing the bulkheads with tools is very tough. In hindsight would have provided more space to be able to tighten bulkheads easier. Overall, not bad for a first attempt.

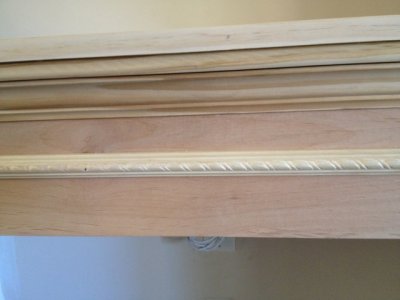
The professional touches with the layered trim, worked out nicely. Wasn't sure how it would all work out.

Went with a glossy finish to be able to clean the wood easier. More pics coming. Need to find them. :)

Timeline, this is happening around the QT was setup and cycling late October, 2013.
 

Attachments

  • IMG_1164.jpg
    IMG_1164.jpg
    31.2 KB · Views: 2
  • IMG_1187.JPG
    IMG_1187.JPG
    84.3 KB · Views: 3
  • IMG_1167.jpg
    IMG_1167.jpg
    26.3 KB · Views: 3
  • IMG_1180-001.JPG
    IMG_1180-001.JPG
    94 KB · Views: 2
  • IMG_1182-001.JPG
    IMG_1182-001.JPG
    95.4 KB · Views: 3
Staining. Phase one.

Staining. Phase one.

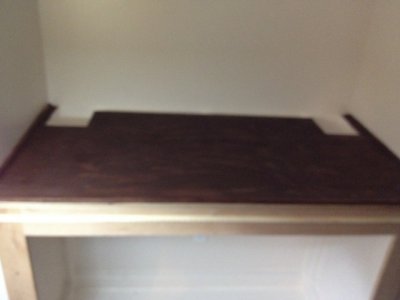
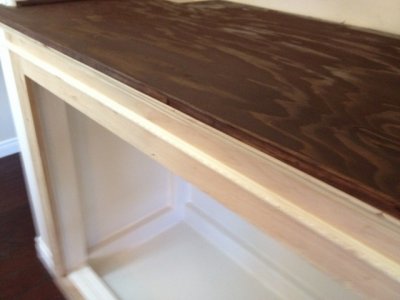
I needed to stain the top surface and finish all of the painting of the interior. The tank was arriving soon. Pic attached, the top was just regular plywood. Was thinking about going fancier(granite/knotty alder), but why it'll be covered by the tank.

Pic attached. My first ever attempt at staining wood. Surprisingly, relatively disaster free. In fact, out of everything found out that staining step was really fun. Interesting how different woods, textures absorb a stain differently. The stains picked really does differ when used on different surfaces. Sanding and a smooth surface are very critical. My contractor friend did a good job prepping me for the task at hand.

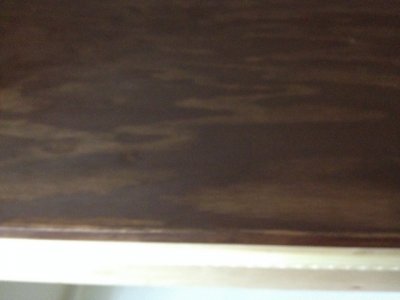
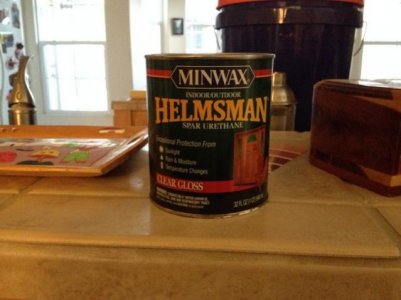
Also, regarding the sealant, pic attached, I applied 3 layers according to the instructions. Unless its scraped off somehow it does a great job repelling the water and protecting the wood. Since all this is becoming fixed to the house, wanted it to last. Later on, when dealing with the plumbing got water under the tank, it was trapped between the acrylic and the sealant. Wood protected, check.(I did eventually dry it though.)

So surface prepped, was then waiting for the freight company to deliver the tank and custom sump from Tru Vu Aquariums!! They say patience is key in the hobby, I have none. :lmao:

Pics attached.

-Das
 

Attachments

  • IMG_1192.JPG
    IMG_1192.JPG
    85.1 KB · Views: 3
  • IMG_1193.JPG
    IMG_1193.JPG
    94.1 KB · Views: 3
  • IMG_1191.JPG
    IMG_1191.JPG
    99.1 KB · Views: 3
  • IMG_1200.jpg
    IMG_1200.jpg
    35.2 KB · Views: 3
The big day, tank arrives!

The big day, tank arrives!

After tracking the delivery and contacting the freight company, managed to arrange delivery at a time I was wasn't working. Translation, skip lunch and rush home to accept it and inspect everything for damage before signing off.

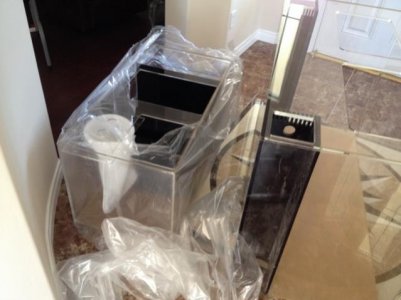
So everything was nicely packaged on pallets, wrapped and tied down. Opening everything absolutely zero scratches. Everything was pristine for both the tank and sump. Woo hoo! Never know what happens during shipping, would hate to wait a few weeks for another one to be built. All good, back to work for the day.

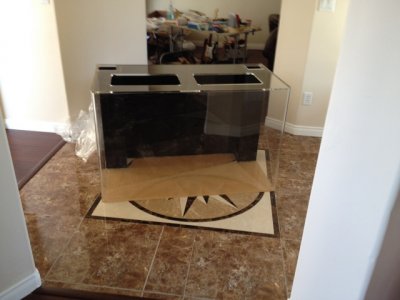
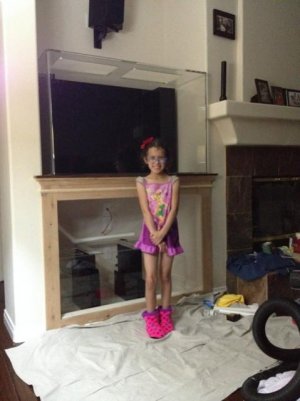
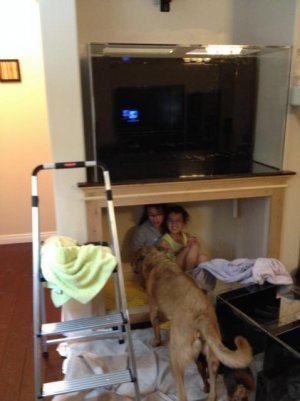
First look pics attached. The first few weeks, hard to judge the size. On the stand with my 7 year old next to it, better perspective. The girls and dogs were having fun with the process.

Good look at the top access holes, tank also came with acrylic lids. Cool, but won't use b/c of restricted gas/air exchange. Overflows also came with covers, which I could use to cut down noise a little, but again slight trickle sound better than restricted gas exchange. Yes, it does make a difference beginner reefers, charting with Apex pH makes it easy to show the difference.

Overall, very pleased with the build quality and the arrival condition.

Next post, first hiccup in the build and planning.

-Das
 

Attachments

  • IMG_1194-001.JPG
    IMG_1194-001.JPG
    101.9 KB · Views: 3
  • IMG_1196-002.jpg
    IMG_1196-002.jpg
    34.9 KB · Views: 2
  • IMG_1211-001.jpg
    IMG_1211-001.jpg
    33.7 KB · Views: 2
  • IMG_1214-002.jpg
    IMG_1214-002.jpg
    31.5 KB · Views: 3
Really enjoying your journey. I am in a very similar situation. Floors inn, wife and I have agreed to a 180 gallon tank. I have been reading these past few months in preparation. Fascinated with the detail of your build. Thanks!
 
Let the plumbing begin!

Let the plumbing begin!

So the tank arrived with two 1 3/4" holes for a 1" bulkhead and another hole for a 3/4" bulkhead return line on the left side. I originally had asked for the return line to be on the right, but they had drilled it on the left. Scott had contacted regarding this, but I figured not a big issue, correcting it would have required delaying the process. Crossing the return back to the left isn't that big a deal.

But I was planning on a 1" return line to maximize the return flow rate. Using the handy calculator at reef central, I had it all planned out, parts ordered. Not sure if the flow really improves that much with a 6ft head, and crossing 2-3 feet to the left with a Sicce 5.0 pump, but I didn't want to unnecessary restrict the flow. Max flow with pump is 1321, after all is said and done I'm getting over 600, probably around 700-800 gallons of flow being returned and thus draining back down and flowing into the sump. Lot's of debate on how much flow you need, unless doing some fancy plumbing and a very large return to create circulation in the DT, really only want 4-6 x DT vloume = total flow.
So in my case 600-800 gph is perfect. Powerheads will keep the DT volume circulating, much more on that later.

http://sicceus.com/aquarium.html

http://www.reefcentral.com/index.php/head-loss-calculator
 
More coming!

More coming!

Really enjoying your journey. I am in a very similar situation. Floors inn, wife and I have agreed to a 180 gallon tank. I have been reading these past few months in preparation. Fascinated with the detail of your build. Thanks!

Definitely digging the details!

Very clean build so far! +1

Thanks guys, more coming! Any particular details or questions just ask, I remember being fairly overwhelmed trying to figure out why things were done a particular way.
 
So want a larger hole for the return.

So want a larger hole for the return.

At first wasn't sure how to safely increase the hole size of the return, wanted 1" bulkhead and had space for a 3/4" on the left. Zero experience working with acrylic on this scale, didn't want to damage the new tank so wasn't quite sure what to do. Here's were it gets funny, my wife gave me specific instructions not to try myself and get help to get the hole drilled bigger.

So, the next day I completely ignore her advice and during my lunch break (had two hours) attempt to correct the problem. I went and asked my neighbor for help to move the tank into the driveway, and with the help of YouTube, a router + water hose to keep the acrylic cool, we slowly expanded the hole. Trying in the 1" bulkhead as we went.

I know, you're expecting disaster to strike. It didn't, everything went fine. :dance: My marriage was still intact.

For the sump, my skimmer didn't fit with holder for the micron filter blocking the insertion path. So, we just cut the area with a jigsaw and also the router. This I wasn't as worried about, will never really see the area again after everything's placed. So trimmed a few inches and acrylic to get everything to fit .(Yes, measure all the equipment, look at specs, etc, and even then be prepared for a few modifications.)

Regardless of how much prep or planning goes into it, just be ready adjust and improve as you go. The journey itself is all the fun.

So we placed the bulkheads, filled with water to test on the stand and realized we over didn't tighten them properly. Water leaking from the bulkheads under the stand. Because of the design for the support beams underneath, we didn't provide enough access to reach the bulkheads with a tool/wrench underneath.

Also learned, when threading in the standpipe from above, you can loosen the bulkhead below.

So pro tip, hand tightening a bulkhead probably won't be enough, but over tightening can cause stress fractures in the bulkhead or push the rubber gasket past the edges of the bulkhead, which will also create a leak. So, if you watch the gasket, can hand tighten then give it an extra 1/4 to half turn to further secure it!! But, make sure the gasket doesn't get over compressed.

So in short after playing with the plumbing, my neighbor helped lift the tank and move it so we can adjust and get it dropped into place. Acrylic being lighter and stronger than glass, priceless. Just need care for scratches.
 
Back
Top