400G Plywood Build

anflyer

Member
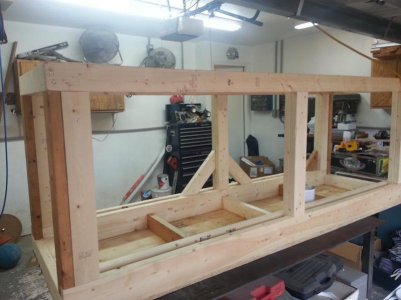
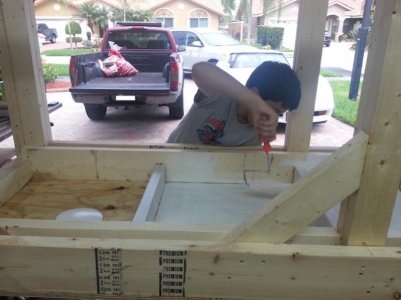
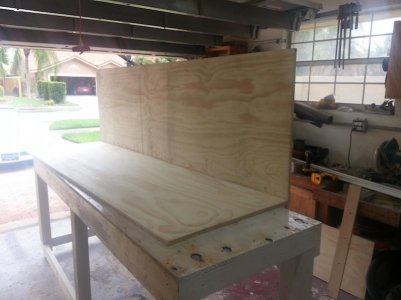
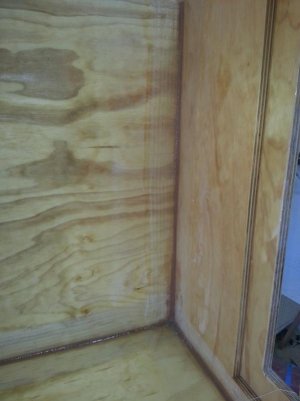
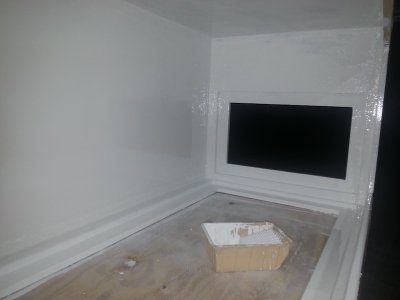
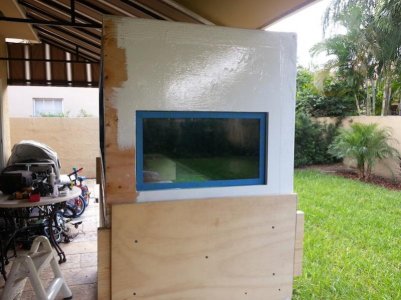
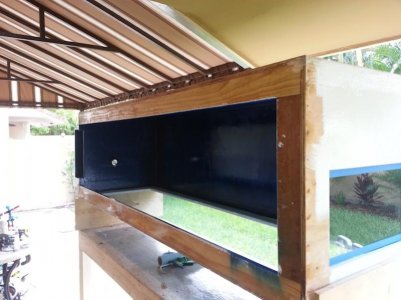
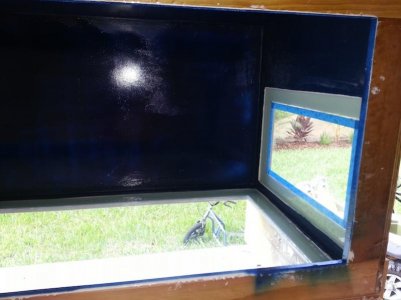
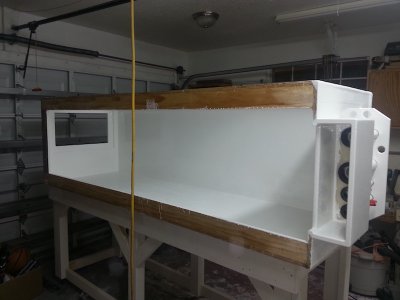
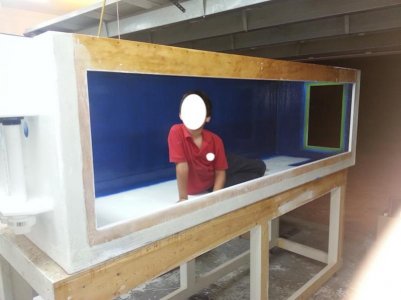
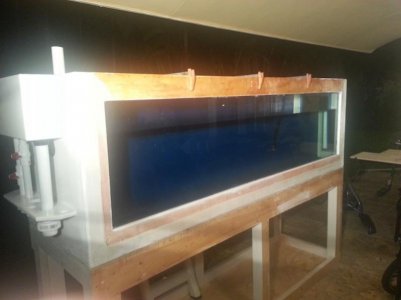
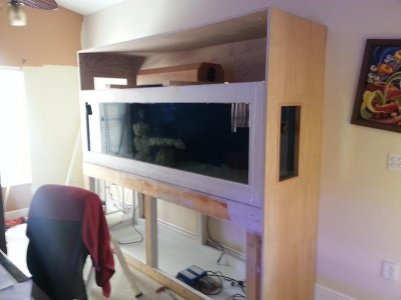
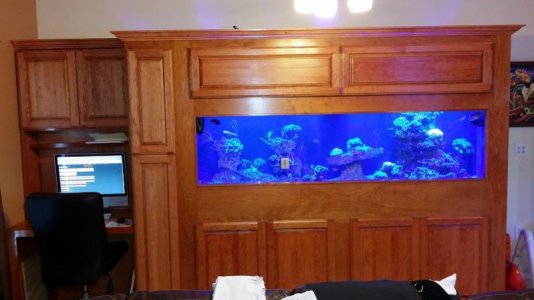
Here is a sneak peak at the "almost finished" tank. As the title implies it was a plywood build / fiberglass / epoxy build. I will be posting a complete build thread soon with equipment / livestock.

Right now I need to upgrade my skimmer (SWC 180) that I had on my previous tank (140 gallon).

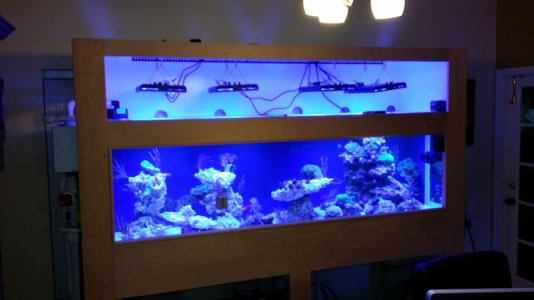
It will be a mixed reef with a medium/heavy bioload.

Right now I have narrowed down my decision to the Reef Octopus SRO 5000sss, but recommendations are always welcome.

I am looking to stay in the $600 - $700 range.

Please help me decide.

Anflyer
 

Attachments

  • Tank Pic.jpg
    Tank Pic.jpg
    46.4 KB · Views: 5
Thanks Cyclist MT,

The tank is 96" x 30" x 33" high and is viewable on the front and right side. I am also currently building a plywood sump with the leftover materials (60 x 22 x 20).

Anflyer
 
Sweet! I ended up doing the same (building the sump out of left over materials) and then went on to build my fuge and surge tank out of plywood too. Guess I just liked to watch epoxy dry. :)
 
After many years in the H2O hobby (Discus tanks, FOWLR, Reef tanks) I made the decision to join the Large Reef Tanks Forum by building a 400 Gallon mixed reef tank out of Plywood. First I have to give a big shout out to my better half for allowing me to "cover-up" a window in our family room with the tank. In my opinion the tank looks much better than the curtains that were there... :jester:

My previous tank was a 150 Gallon mixed reef cube (34x34x30 high) and I still have a 55 gallon (30x18x24 high) tank which is home to a Sabae Anemone and a pair of Spoticintus Clowns with some coral.

Here is some of the info on the new tank:

Tank:
96" x 30" x 32" high
Plywood encapsulated with fiberglass and 2-part epoxy. It also has several coats of Sweetwater Epoxy Paint. It has glass on the front and right side of the tank. The stand is made out of 2x4 and 2x6 wood.

Lighting:
6 x Ocean Revive Arctic - S026 LED's

Water Movement:
2 x WP60 Jebao pumps controlled by APEX
1 x MP40 Vortech
1 x Sea-swirl powered by Little Giant 3MDQ (this will be replaced with a DC Pump Soon)

Sump:
Currently building a 60" x 22" x 20" sump with the leftover materials
The sump will have a chamber for the protein skimmer and a fuge

Protein Skimmer:
I currently have a SWC 180 that was on my previous tank
I am in the process of upgrading, thinking about a SRO 5000 / 6000. Total water volume should be about 450 Gallons.

Help, Help, Help with any recommendations.

Controller:
- Apex
- Using 2-part with dosing pumps

Water Changing:
Have 2 x 55 gallon drums (1 - RO , 1 - Salt) plumbed directly to the tank so water changes take 10 minutes.

Anflyer
 
Stand

Stand

Here are some pics of the stand and my helper painting. The Stand has 4 - 2x6's going accross the top. The wheels in the 3 picture is just for transporting.

Anflyer
 

Attachments

  • stand.jpg
    stand.jpg
    54.4 KB · Views: 5
  • stand paint.jpg
    stand paint.jpg
    54.8 KB · Views: 5
  • Human Fish Stand.jpg
    Human Fish Stand.jpg
    66.7 KB · Views: 5
Building Tank

Building Tank

Here are some pics of the beginning stages of the tank construction. The plywood was joined with waterproof glue and 3 inch stainless steel screws. The inside corners have a thickened epoxy filet and a layer of biaxial fiberglass tape. The tank then has 2 layers of fiberglass cloth with multiple coats of 2-part epoxy. It then has 2 coats of Sweetwater 2-part epoxy paint.

I'm hoping that this should last many, many years. :thumbsup::thumbsup::thumbsup::thumbsup:

It took me several months to build, but I enjoy the building process almost as much as the hobby itself. I really enjoy the DIY part of it. I learned how to work with fiberglass, epoxy and plywood when I built a 16' Dory (boat) several years back.

Anflyer
 

Attachments

  • Beginning Tank.jpg
    Beginning Tank.jpg
    48.6 KB · Views: 5
  • Biax Tape.jpg
    Biax Tape.jpg
    40.6 KB · Views: 5
  • Sweetwater paint 3.jpg
    Sweetwater paint 3.jpg
    76.2 KB · Views: 5
  • Sweetwater paint 2.jpg
    Sweetwater paint 2.jpg
    79.4 KB · Views: 5
Building Tank

Building Tank

Here are some shots of the glass install and the overflow.

Anflyer
 

Attachments

  • Installing Glass.jpg
    Installing Glass.jpg
    73.3 KB · Views: 5
  • Installing Glass 4.jpg
    Installing Glass 4.jpg
    60.3 KB · Views: 5
  • Installing Glass 3.jpg
    Installing Glass 3.jpg
    48.6 KB · Views: 5
  • Overflow.jpg
    Overflow.jpg
    38.7 KB · Views: 5
Building Tank - Plumbing

Building Tank - Plumbing

Some more pics of the tank and the overflow plumbing.

The last pic is the plumbing that goes to the outside of the house.

1- Drain to empty tank
2- Fill Line which comes from the saltwater mixing tank
3- Emergency drain (overflow from sump)
4- The black line comes from the RO tank outside for ATO (I have since
added 2 more lines for the 2-part 5 gallon tanks that are outside)


Anflyer
 

Attachments

  • Plumbing 3.jpg
    Plumbing 3.jpg
    49.8 KB · Views: 5
  • Plumbing 2.jpg
    Plumbing 2.jpg
    36.6 KB · Views: 5
  • Top View.jpg
    Top View.jpg
    100.5 KB · Views: 5
  • plumbing.jpg
    plumbing.jpg
    97.9 KB · Views: 5
Building Tank - Water Test

Building Tank - Water Test

Here is the mandatory "child inside of tank pic" and the moment of truth water test........

Anflyer
 

Attachments

  • Human Fish.jpg
    Human Fish.jpg
    44.5 KB · Views: 5
  • Water Test.jpg
    Water Test.jpg
    37.4 KB · Views: 5
Lights

Lights

Here are the lights and the tank when it was moved into the house......

Anflyer
 

Attachments

  • Lights.jpg
    Lights.jpg
    93.5 KB · Views: 5
  • Full Tank lights.jpg
    Full Tank lights.jpg
    94.5 KB · Views: 4
  • Tank Facade.jpg
    Tank Facade.jpg
    40.2 KB · Views: 5
Just curious - why didn't you use the full possible height of 48" of the plywood? Was it just a personal preference for maintenance sake? I am asking as I am curious about how tall a plywood and fiberglass tank can go, i.e. are there any structural constraints, but I have not found anyone who has built a really tall tank with plywood yet.

Thx,

Dave.M
 
Dave, maintenance was the main reason but you also have to take into account the glass thickness as you go taller. As it is it already becomes difficult at the 32" height.

I was able to take advantage of all of the plywood in the stand and making the cabinets so it all worked out in terms of not having a lot of wasted wood.

Anflyer
 
I have had 36" tall tanks with 1/2" glass (euro-braced) so I'm not too worried about glass thickness, but I'm curious about what might possibly be achieved with plywood tanks. So far I haven't found any examples or anywhere that tells of the construction limitations of this medium. Thx anyways.

Dave.M
 
Plywood (good quality) is pretty strong and with enough bracing and fiberglass there should not be an issue with going tall. On some of the other fresh
water forums I've seen some pretty tall tanks.

Anflyer
 
Hi anflyer, nice work! A few questions if you don't mind:

Whose 2 part epoxy did you use?

How did you thicken the epoxy for filleting? Anyone know if this is preferential to using mitered wood pieces in the corners?

Any issues with the sweet water over the 2 part?

What silicone did you end up using for the glass?

Anything you would do differently?

I also really like the way you built it in, thanks for sharing.
 
Hi anflyer, nice work! A few questions if you don't mind:

Whose 2 part epoxy did you use?

I used Marinepoxy. Ive used it in the past on building a boat and it is very easy to work with and mix. This is the place that I bought most of my materials from www.bateau.com

How did you thicken the epoxy for filleting? Anyone know if this is preferential to using mitered wood pieces in the corners?

I used "wood flour" which is fine sawdust. I used biaxial fiberglass tape on all of the corners inside and out.

Any issues with the sweet water over the 2 part?

Nope, just a sanding before the application of paint.

What silicone did you end up using for the glass?

I used the GE Silicone (non biocide). The glass is inset to a 2 1/2" frame so the silicone does not really hold the tank together like a regular glass tank. It really is just a gasket since the water is pushing the glass out against the frame.


Anything you would do differently?

Right now everything seems to be working the way I had planned it, but give me some time and i'm sure that things will creep up.


I also really like the way you built it in, thanks for sharing.
 
Stocking List

Stocking List

Here is the current Stocking List:

Fish:

Orange Shoulder Tang
Blue Tang
Sailfin Tang
Vlamingi Tang (baby)
Yellow Tang
Christmas Wrasse
Chiseltooth Wrasse
Melanarus Wrasse
Green Wrasse
Sixline Wrasse
Lyertail Anthias (1-male / 3-females)
Coral Beauty Angel
Blue Throat Trigger
Pink Tail Trigger
Foxface
Azure Damselfish (x2)
Long Nose Hawkfish

Corals:

Pink Birds Nest
Green birds nest
Hydnaphora
Green Stylophora
Spiny Cup Pectinia Coral
Red Montipora
Cactus Coral
Pocillopora
Montipora Digitata
Pink Millepora
Devils Hand Leather
Pipe organ coral
Trumpet Coral
Branching Hammer
Torch Coral
Frogspawn Coral
Plate Coral
Green/red Acan
Pagoda Coral
Wellso Brain Coral
Yellow Cup Coral
Duncan Coral (40-50 heads)
Gorgonian (4 types)
Orange/yellow Ricordea
Green hairy Mushrooms
Blue Mushrooms
7 different types of zoa's and paly's


Anflyer
 
Looks awesome. I want to build a macro tank this summer out f plywood. Can you please tell me about the different coats you put on? I see it's white in some pics, then black and later blue. are these all fiberglass coatings?

What is going on here in these corners?

attachment.php
 
Looks awesome. I want to build a macro tank this summer out f plywood. Can you please tell me about the different coats you put on? I see it's white in some pics, then black and later blue. are these all fiberglass coatings?

What is going on here in these corners?

attachment.php

The main coats on the interior are 2-part epoxy and two layers of fiberglass cloth. On top of the epoxy is two coats of Sweetwater 2-part Epoxy Paint (white). I mistakenly had ordered the white instead of the blue. The blue is just a coat of Krylon Spray paint.


The corners also have a layer of 6" Biaxial Tape inside and out for reinforcement.

Anflyer
 
Back
Top