Acrylic fabrication questions? I can help!

I wipe down all edges with DNA, in fact it's been recommended many times in this thread prior to bonding in order to remove grease and fingerprints. I know that DNA can cause crazing, but I did not consider that a quick wipe across a machined edge would cause any damage. Across a flame-polished edge, yes. James also told me once that if you leave a rag soaked with DNA on a piece of acrylic overnight, it will craze.

It's interesting though. I think that if you follow good edge prep technique, this is not an issue. For many of my builds, my last pass or two takes off a very minimal amount of material, usually barely enough to throw chips (almost a dust instead), the intention being to avoid pitting that results from taking off too much
 
Phixer, your 42 bonding explanation was quite interesting. I do get the point of using DNA on the cut edges. Might have to test this theory out.

Now I'm starting to second guess myself if I want to use 42 or 4 on the side/bottom/top seams. However, I'm probably going to use 4 for two reasons; 1) dont have access to a CNC shop and 2) my material thickness will probably not exceed 3/4" or at most 1". I'm planning going 23.875" high (not including bottom/top thickness). This way I can get two pieces from a standard 4x8 sheet.

I do agree with Floyd, that the edges are usually trimmed down by a very small amount on each pass or at least the last couple of passes. This is what I plan on doing when cutting the sides to 45degree for the bonding. But it is still an interesting read. Thanks for the info.

Look forward to pictures from your build.
 
Phixer,

Question on the 5degree angle you cut for the 42 bonding. Is the 5degree cut on the whole edge or is there a little bit of 90degree left to allow for the sheet to sit flat on the bottom. Like this "|_/" or "|/".
 
Floyd I concur 100%.

Supernemo

3/4 to 1" thickness, I would use what ever method you are most comfortable with. I've seen excellent results produced either way with that thickness. As mentioned, just be sure your machining is good.

The 5 degree bevel is like this |/ (the second one you mentioned) for poly cement. The reason is because the edge never touches the base material it gets bonded to. A full edge provides more surface area for the cement to adhere to in addition to a larger "wedge". But the joint is only as good as the adhesion to the base material which is why I think a little roughness gives the cement something to "bite" into as James had mentioned at one time. The cement it is cast into acts as a socket for the panel. If they touched each other it would create a dry joint.

The opposite is true when solvent cementing because after you pull pins you want the two panels to mesh together or as in capillary cementing you want the solvent to be absorbed into the joint. A wedge joint like this for a solvent job would be disastrous.

The way I glue up the ends is to support each panel with slab lifters, a chain hoist and the gantry crane. The panel is suspended about 1/8 from the bottom panel that it gets bonded to. I use angle clamps and speed squares to ensure they remain at 90 to each other. The same method with aluminum foil tape for the dams is used and then the cement is slowly poured/cast into the joint. The panel stays suspended until dry.

When finished the edge gets milled off or covered with a nice hardwood trim.

The "Acrylic Sheet Fabrication Manual" is a pdf readily available on the internet. Published by Plexiglass. Check out pg 20-26, You may have read this before. I have found it somewhat helpful.

Another helpful resource is the: Handbook of Acrylics for Submersibles, Hyperbaric Chambers, and Aquaria by Jerry D Stachiw. I had to special order this book from the Coronado library when I lived down there. It took several weeks to get in but I learned a lot about acrylic fabrication when I combined this with my Navy experience. The dark arts began to make sense.
 
Last edited:
More photos

More photos

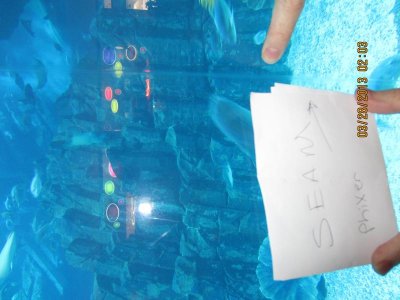
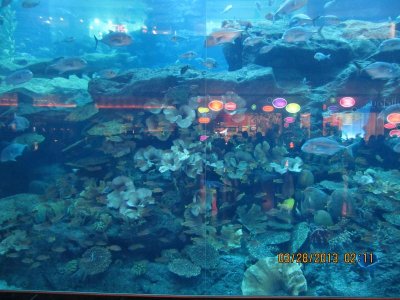
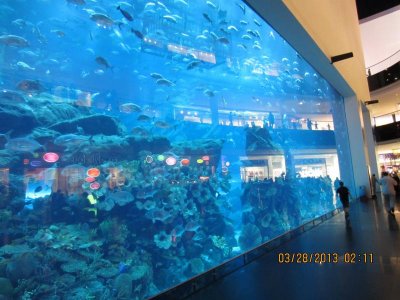
Now that I've figured out how to post photos, here are a few more photos of some seams cast with 40/42. This is the Dubai aquarium. The panels are over a foot thick from what I could surmise. Sorry for not rotating the photos, the seams are all vertical. Check out the minor distortion here, Im thinking these are the 45 degree kerf seams you mentioned.
 

Attachments

  • IMG_0418.jpg
    IMG_0418.jpg
    54.9 KB · Views: 5
  • IMG_0436.jpg
    IMG_0436.jpg
    49.7 KB · Views: 5
  • IMG_0437.jpg
    IMG_0437.jpg
    79.7 KB · Views: 5
  • IMG_0434.jpg
    IMG_0434.jpg
    50.5 KB · Views: 5
More photos

More photos

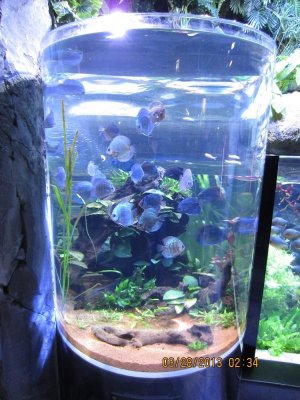
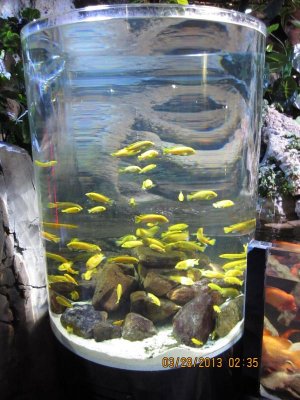
Here is some more photos, although freshwater tanks they illustrate the thickness used for this height. Both tanks were about 4 ft tall and used material about 2" thick.
 

Attachments

  • IMG_0471.jpg
    IMG_0471.jpg
    86.9 KB · Views: 5
  • IMG_0479.JPG
    IMG_0479.JPG
    36.7 KB · Views: 5
  • IMG_0473.jpg
    IMG_0473.jpg
    83.8 KB · Views: 5
  • IMG_0478.jpg
    IMG_0478.jpg
    40.1 KB · Views: 5
Last edited:
12" thick, eh? Wow. I'm kind of surprised that you can see the seams. I thought that one of the reasons for using 40 was that the seams are pretty much invisible.
 
This photo gives some perspective to the size of the front viewing panel and why it had to be so thick. I think the reason the seams are so prevalent Floyd is due to the thickness of the material used. On some of the casino tanks with thinner material you can still see the seams but you really have to look for them. The tanks at the Bass Pro shops I've inspected are the same way. Those windows are bowed and made using material about 3" thick if Im not mistaken, the seam at the local Bass Pro shops tank in my area is nearly invisible.
 

Attachments

  • IMG_0438.jpg
    IMG_0438.jpg
    72.5 KB · Views: 5
Last edited:
Floyd I concur 100%.

Supernemo

3/4 to 1" thickness, I would use what ever method you are most comfortable with. I've seen excellent results produced either way with that thickness. As mentioned, just be sure your machining is good.

The 5 degree bevel is like this |/ (the second one you mentioned) for poly cement. The reason is because the edge never touches the base material it gets bonded to. A full edge provides more surface area for the cement to adhere to in addition to a larger "wedge". But the joint is only as good as the adhesion to the base material which is why I think a little roughness gives the cement something to "bite" into as James had mentioned at one time. The cement it is cast into acts as a socket for the panel. If they touched each other it would create a dry joint.

The opposite is true when solvent cementing because after you pull pins you want the two panels to mesh together or as in capillary cementing you want the solvent to be absorbed into the joint. A wedge joint like this for a solvent job would be disastrous.

The way I glue up the ends is to support each panel with slab lifters, a chain hoist and the gantry crane. The panel is suspended about 1/8 from the bottom panel that it gets bonded to. I use angle clamps and speed squares to ensure they remain at 90 to each other. The same method with aluminum foil tape for the dams is used and then the cement is slowly poured/cast into the joint. The panel stays suspended until dry.

When finished the edge gets milled off or covered with a nice hardwood trim.

The "Acrylic Sheet Fabrication Manual" is a pdf readily available on the internet. Published by Plexiglass. Check out pg 20-26, You may have read this before. I have found it somewhat helpful.

Another helpful resource is the: Handbook of Acrylics for Submersibles, Hyperbaric Chambers, and Aquaria by Jerry D Stachiw. I had to special order this book from the Coronado library when I lived down there. It took several weeks to get in but I learned a lot about acrylic fabrication when I combined this with my Navy experience. The dark arts began to make sense.

Thanks for the references. The Fabrication Manual was an excellent read.

Just ordered me some 40 2 part to test my solvent bonding on some scrap acrylic pieces I have left over from some previous builds. Hopefully it will go smoothly.
 
12" thick, eh? Wow. I'm kind of surprised that you can see the seams. I thought that one of the reasons for using 40 was that the seams are pretty much invisible.

Floyd/Phixer, you guys have any insight on making thicker pieces of acrylic from multiple sheets. I know most aquariums are make from multiple sheets of acrylic to form the 12" thick panels. How do you even bond 2 4x8 sheets together. Would solvent wick all the way across a surface that large?
 
No, I would not try that. It will turn out looking like --- or ---- fill in the blank. I only do that for re-bracing a euro or doing a gusset or something.
 
No, I would not try that. It will turn out looking like --- or ---- fill in the blank. I only do that for re-bracing a euro or doing a gusset or something.

I would not try it either, just curious as to how they are able to get such perfectly bonded pieces.

I'm actually going to be putting in gussets on my future build also. Is there any major difference between a triangle or square gusset besides the appearance. Either way would work for me since the sand will easy cover up the gussets.
 
Here is a link to that guide ... about half way down that page under Fabrication Manuals.

The book "Handbook of Acrylics for Submersibles, Hyperbaric Chambers, and Aquaria" by Jerry D Stachiw is quite expensive!
 
Floyd, can i get your input on adding gussets? Thinking of doing gussets on the bottom and top of the tank, which will be hidden by sand and canopy.
 
Floyd/Phixer, you guys have any insight on making thicker pieces of acrylic from multiple sheets. I know most aquariums are make from multiple sheets of acrylic to form the 12" thick panels. How do you even bond 2 4x8 sheets together. Would solvent wick all the way across a surface that large?

Seaming panels with butt joints is pretty common in order to achieve longer panels. 40 is pretty fun to experiment with. The hard part is keeping the bubbles out. Some will mix it in a baby food jar taped to the end of a dowel or metal rod and spin it with a drill (like a centrifuge) to eliminate bubbles. Others will place it on a vibratory plate or inside a vibrating bowl used to polish brass shell casings for reloading. The vibratory action gets rid of the bubbles also.

I concur with Floyd, the really thick stuff is normally cast to that thickness. Some say that the sheets can be laminated together but this is something I would never attempt myself. Too much margin for error on this considering the surface area.

Glad you liked the reading material, there's more out there but very hard to find and costly. Good information from other countries such as Germany as well. It's good to compare notes from all areas of the globe.

As Dirty Harry would say though..."A mans got know his limitations" .
 
Last edited:
Back
Top